On this page:
SELMA Student Portal
The SELMA student portal is an add-on subscription to normal SELMA plans. The portal allows students to have a login and a view into their records and studies in SELMA. It can serve as a single sign on page to the school and students can “jump” to other applications like LMS or SharePoint storage from the portal. Students may also download course materials and upload submissions of completed work back to the portal.
Curriculum Setup for the Portal
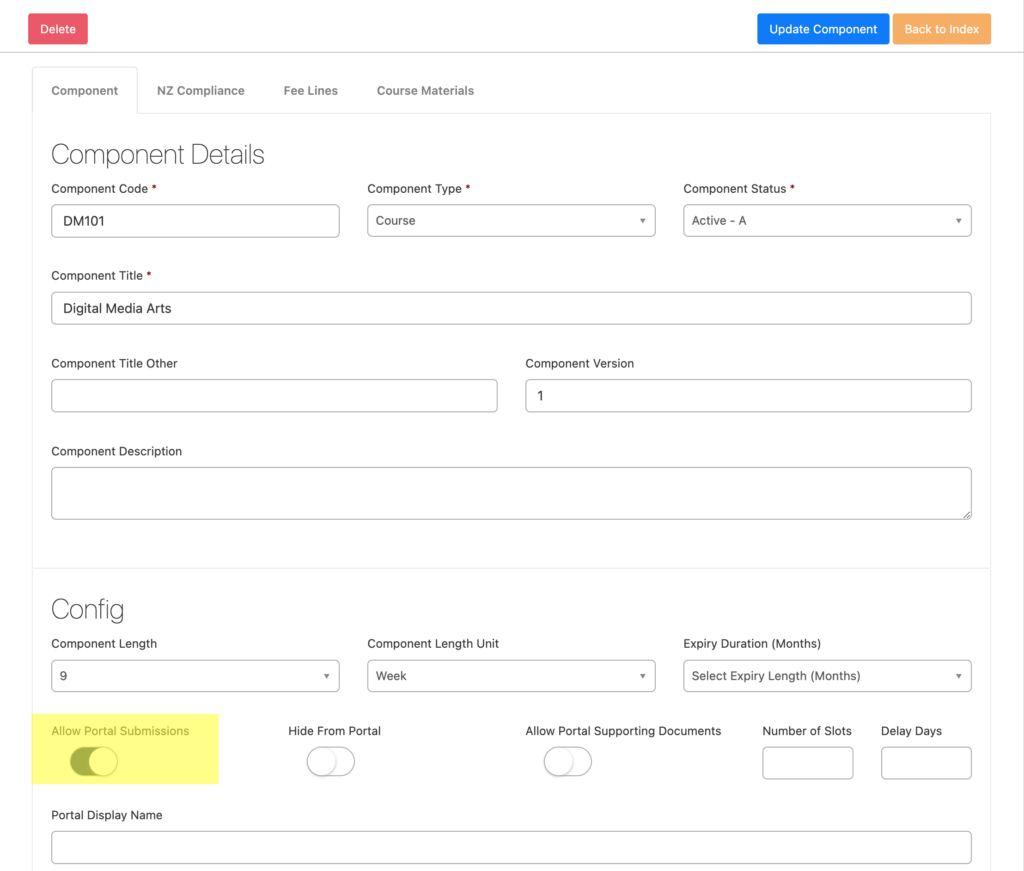
It is possible to allow students to submit work against components in the student portal. To enable the function to submit work, go to the component in the SELMA main module, edit the component and enable “Allow Portal Submissions” on the component tab:
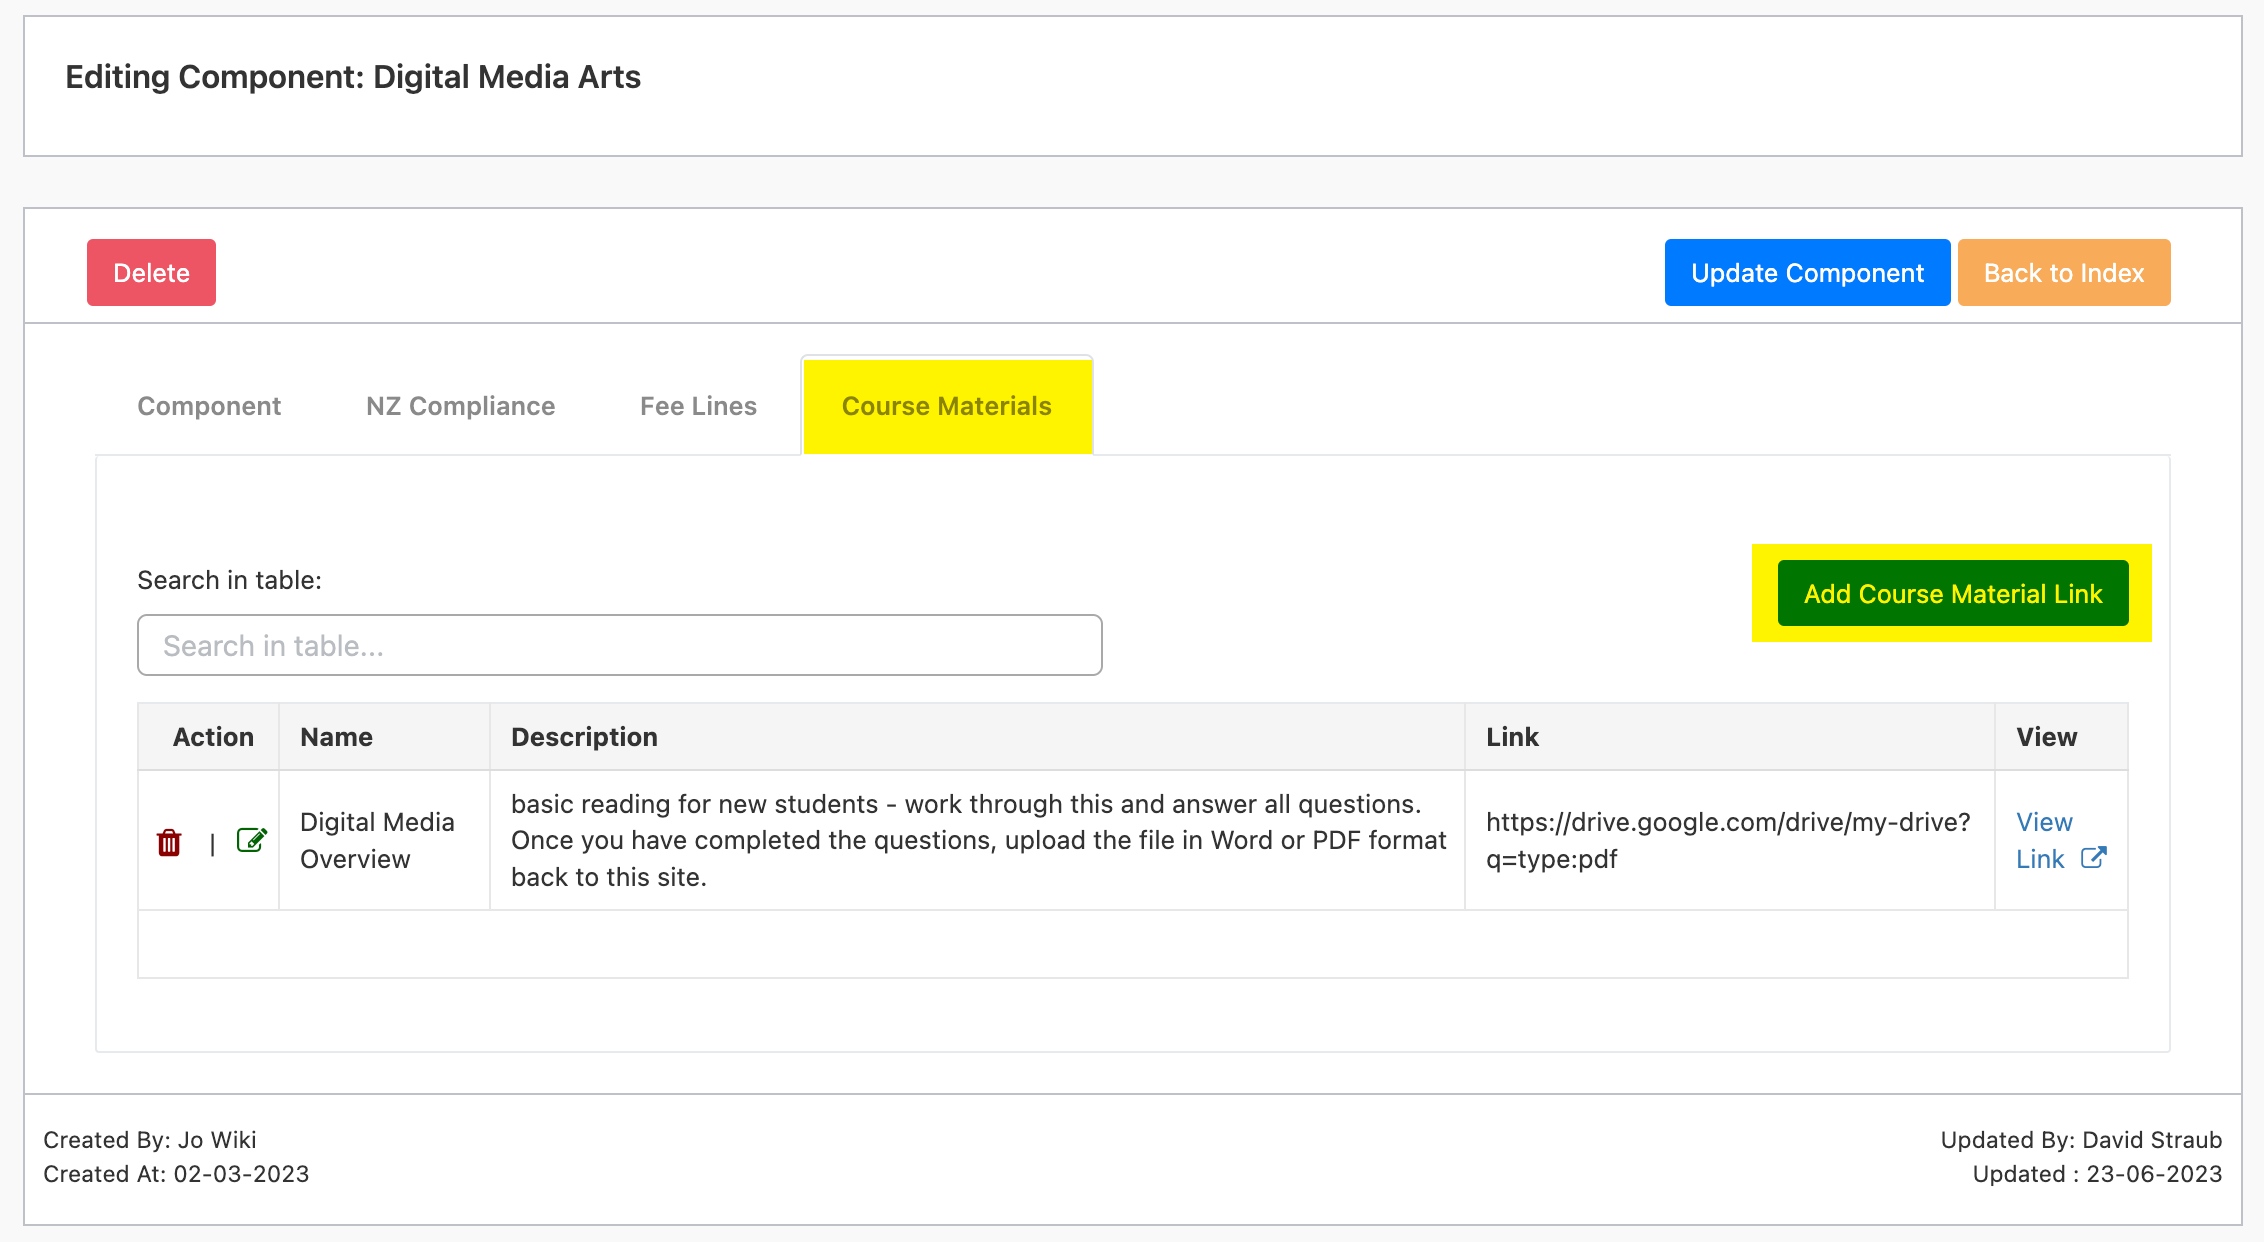
It is also possible to make documents available to download for the students for each component. To do so, go to the Course Material tab and add one or more links to course material(s). Note: This function only works once you are in edit mode of the desired component.
You can only store links to course materials, you cannot upload course materials to SELMA. Use a link to content in your online storage system such as drop box or SharePoint:
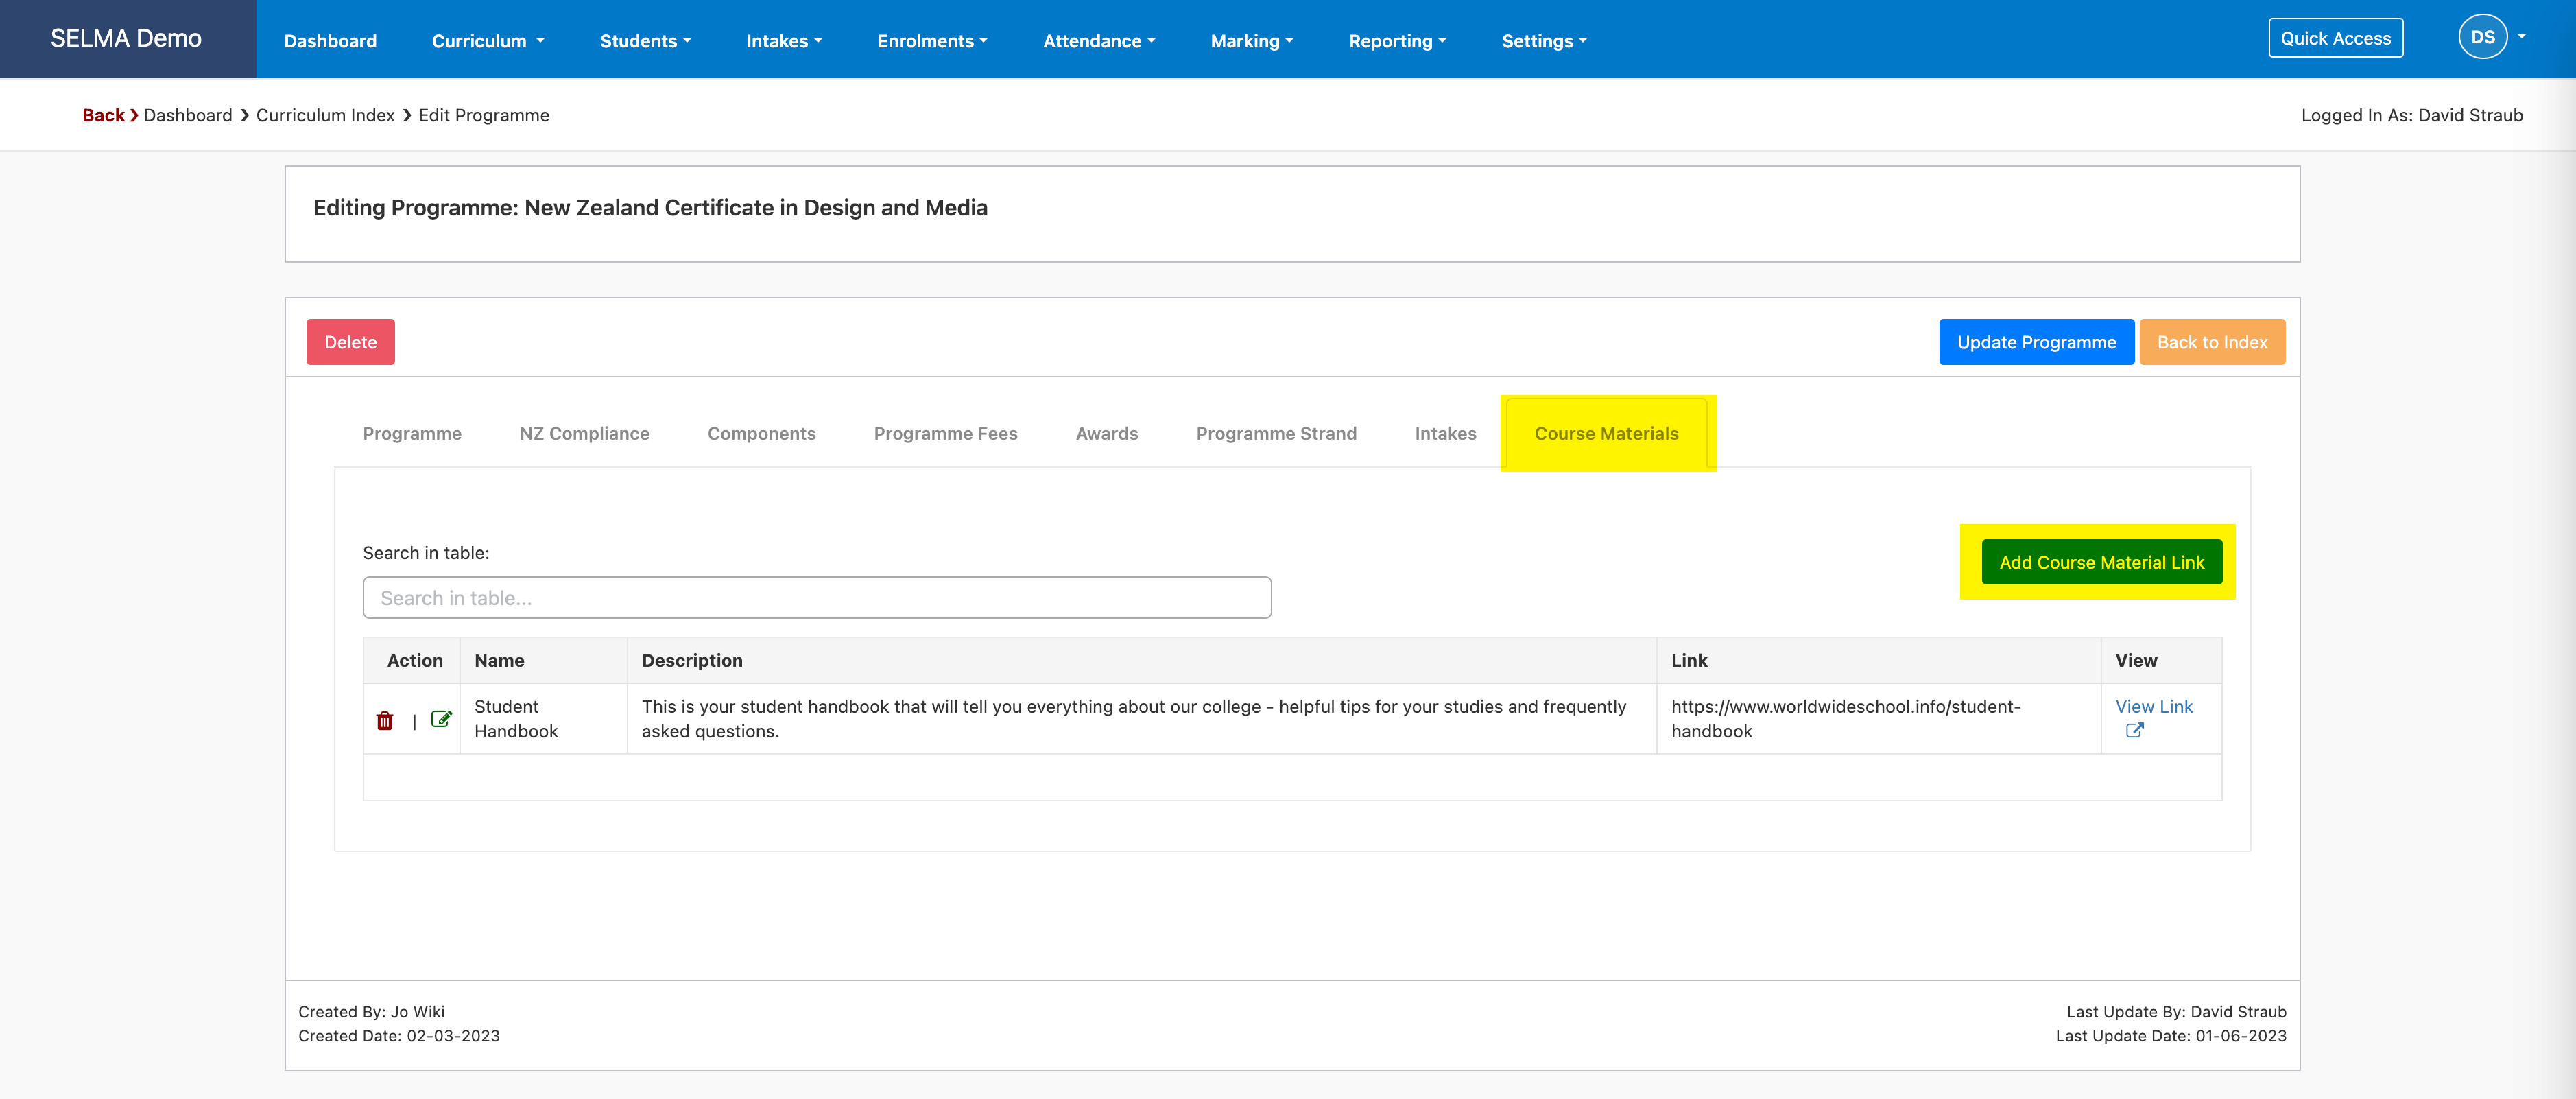
Course Materials can also be added on a higher level to the programme. Later in this article, you will see how students can see and download these materials in the portal:
Organisation Setup for the Portal
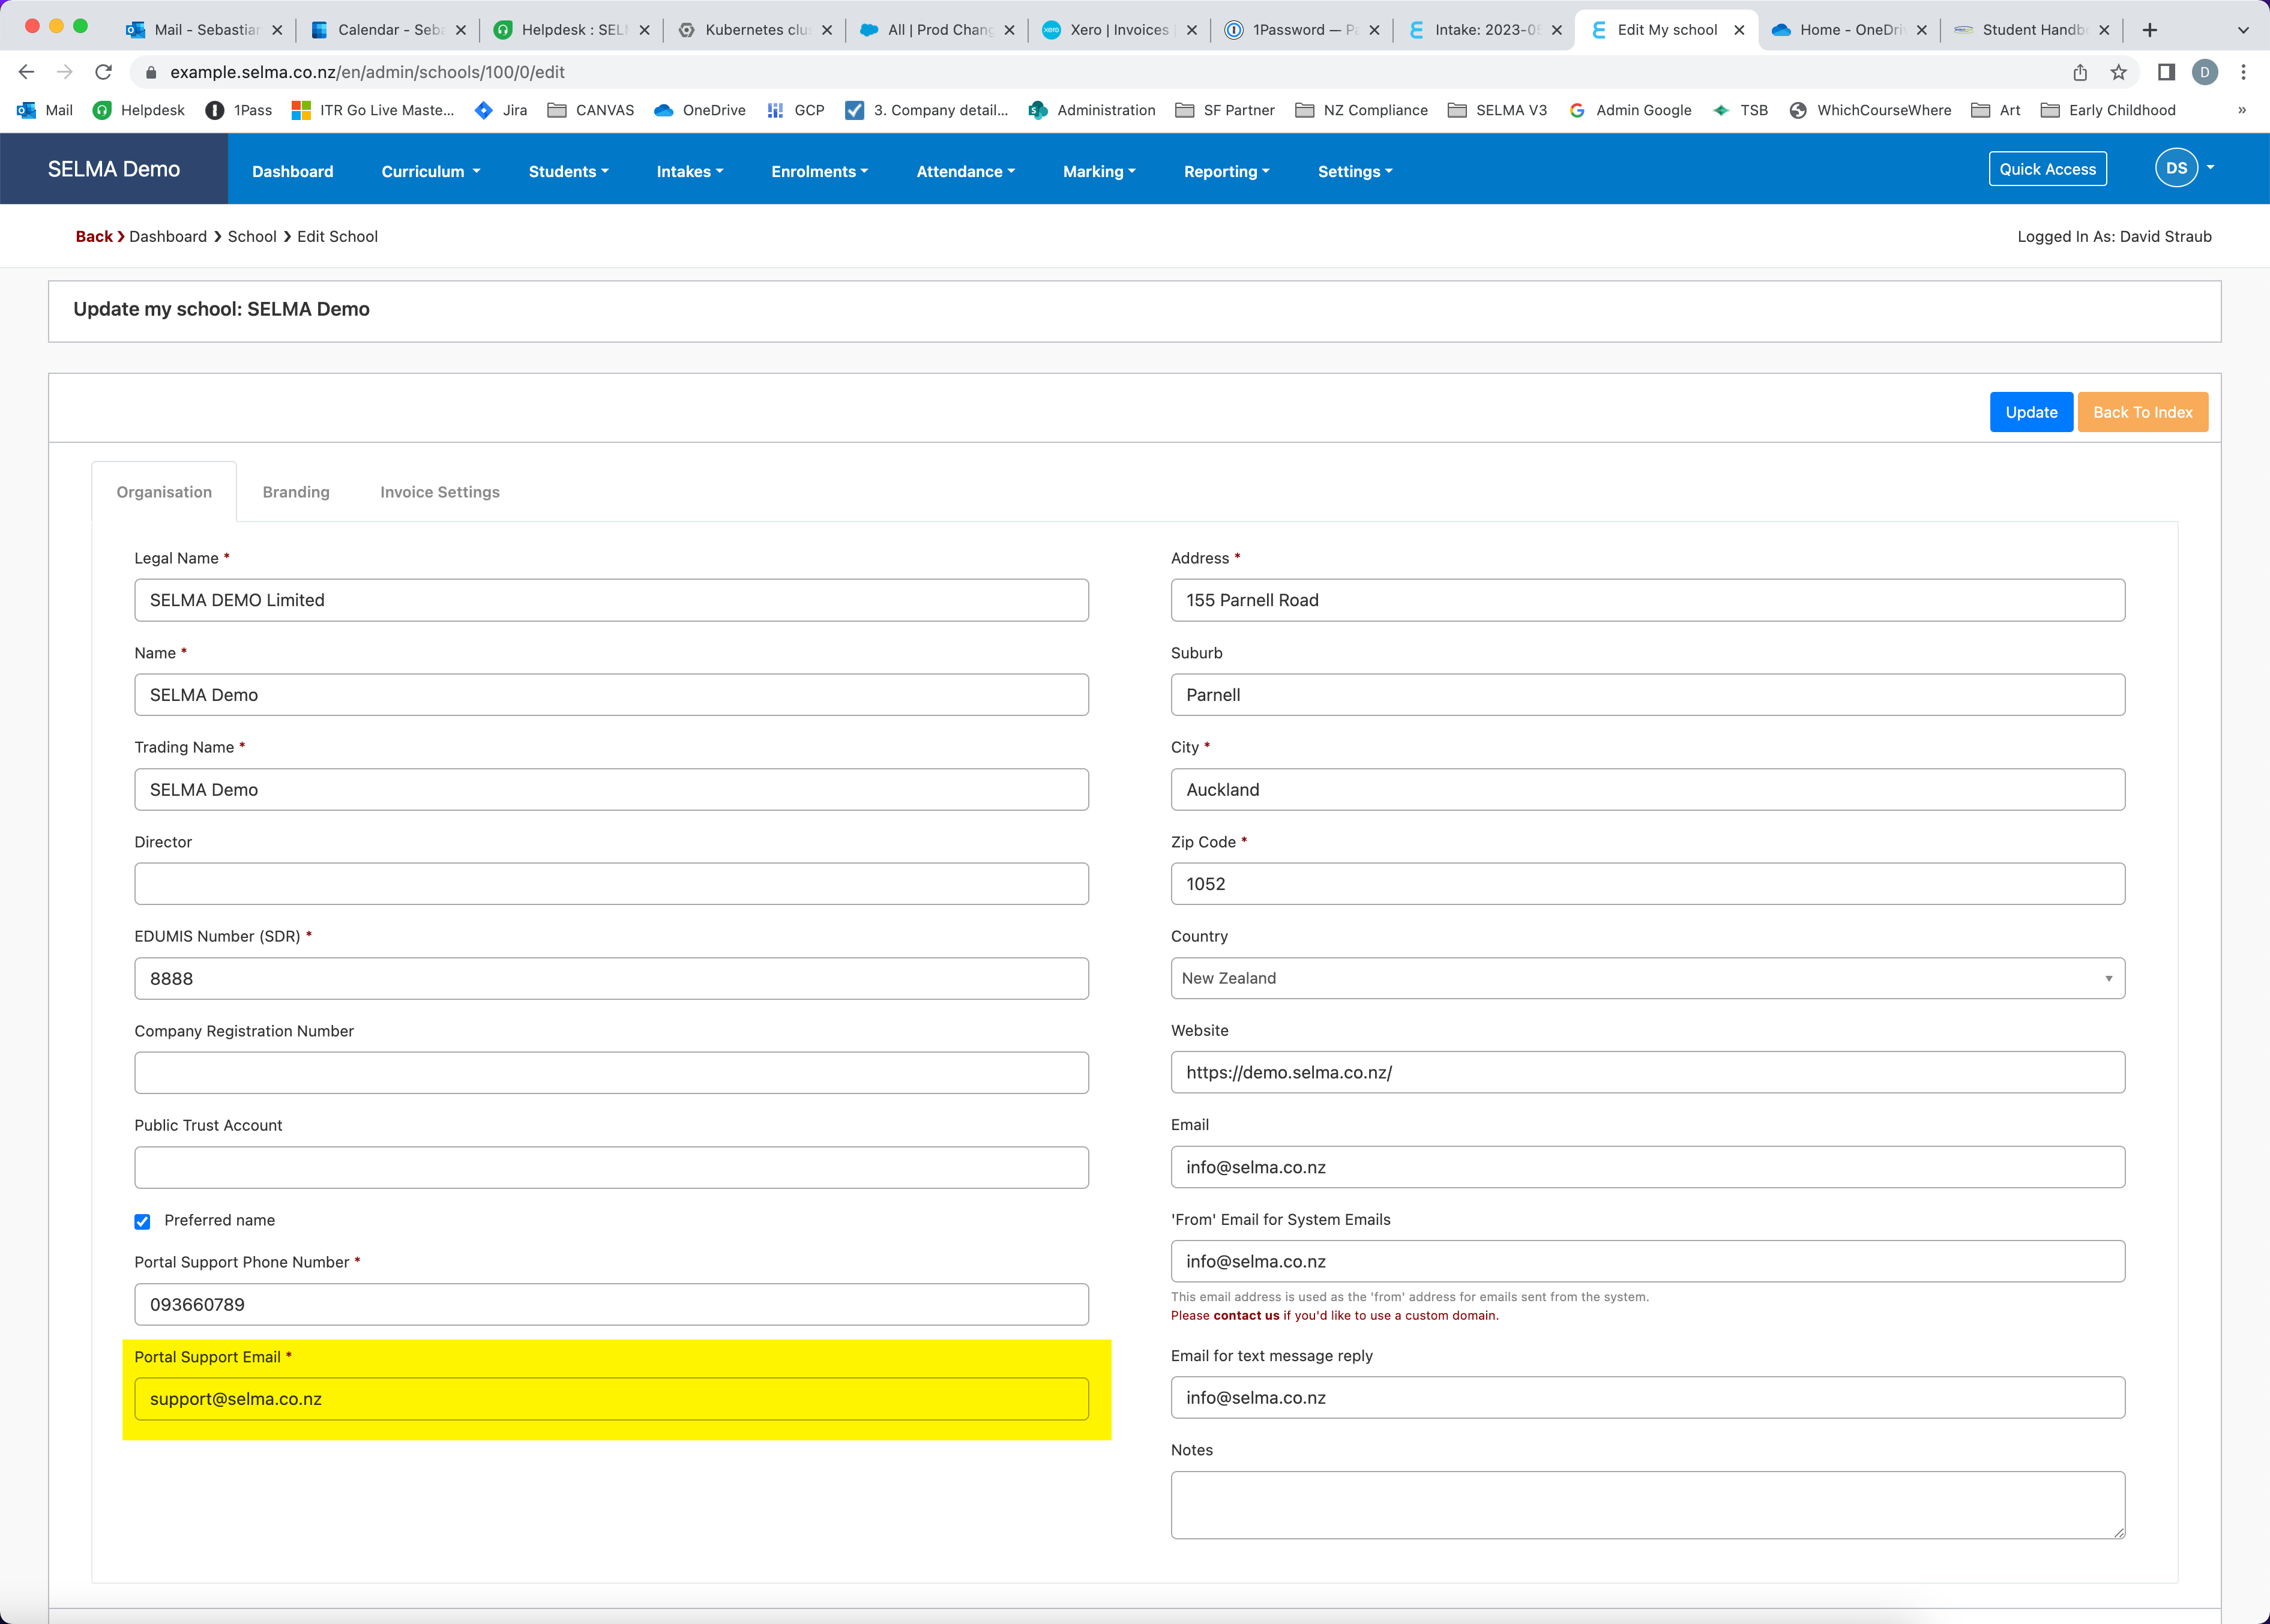
In the SELMA Admin module, under Settings -> My Organisation, click on editing your organization and find the “Portal Support Email” on the main tab of your organisation settings. This email address will be the receiving address when a student uses the contact function in the portal:
Portal Styling
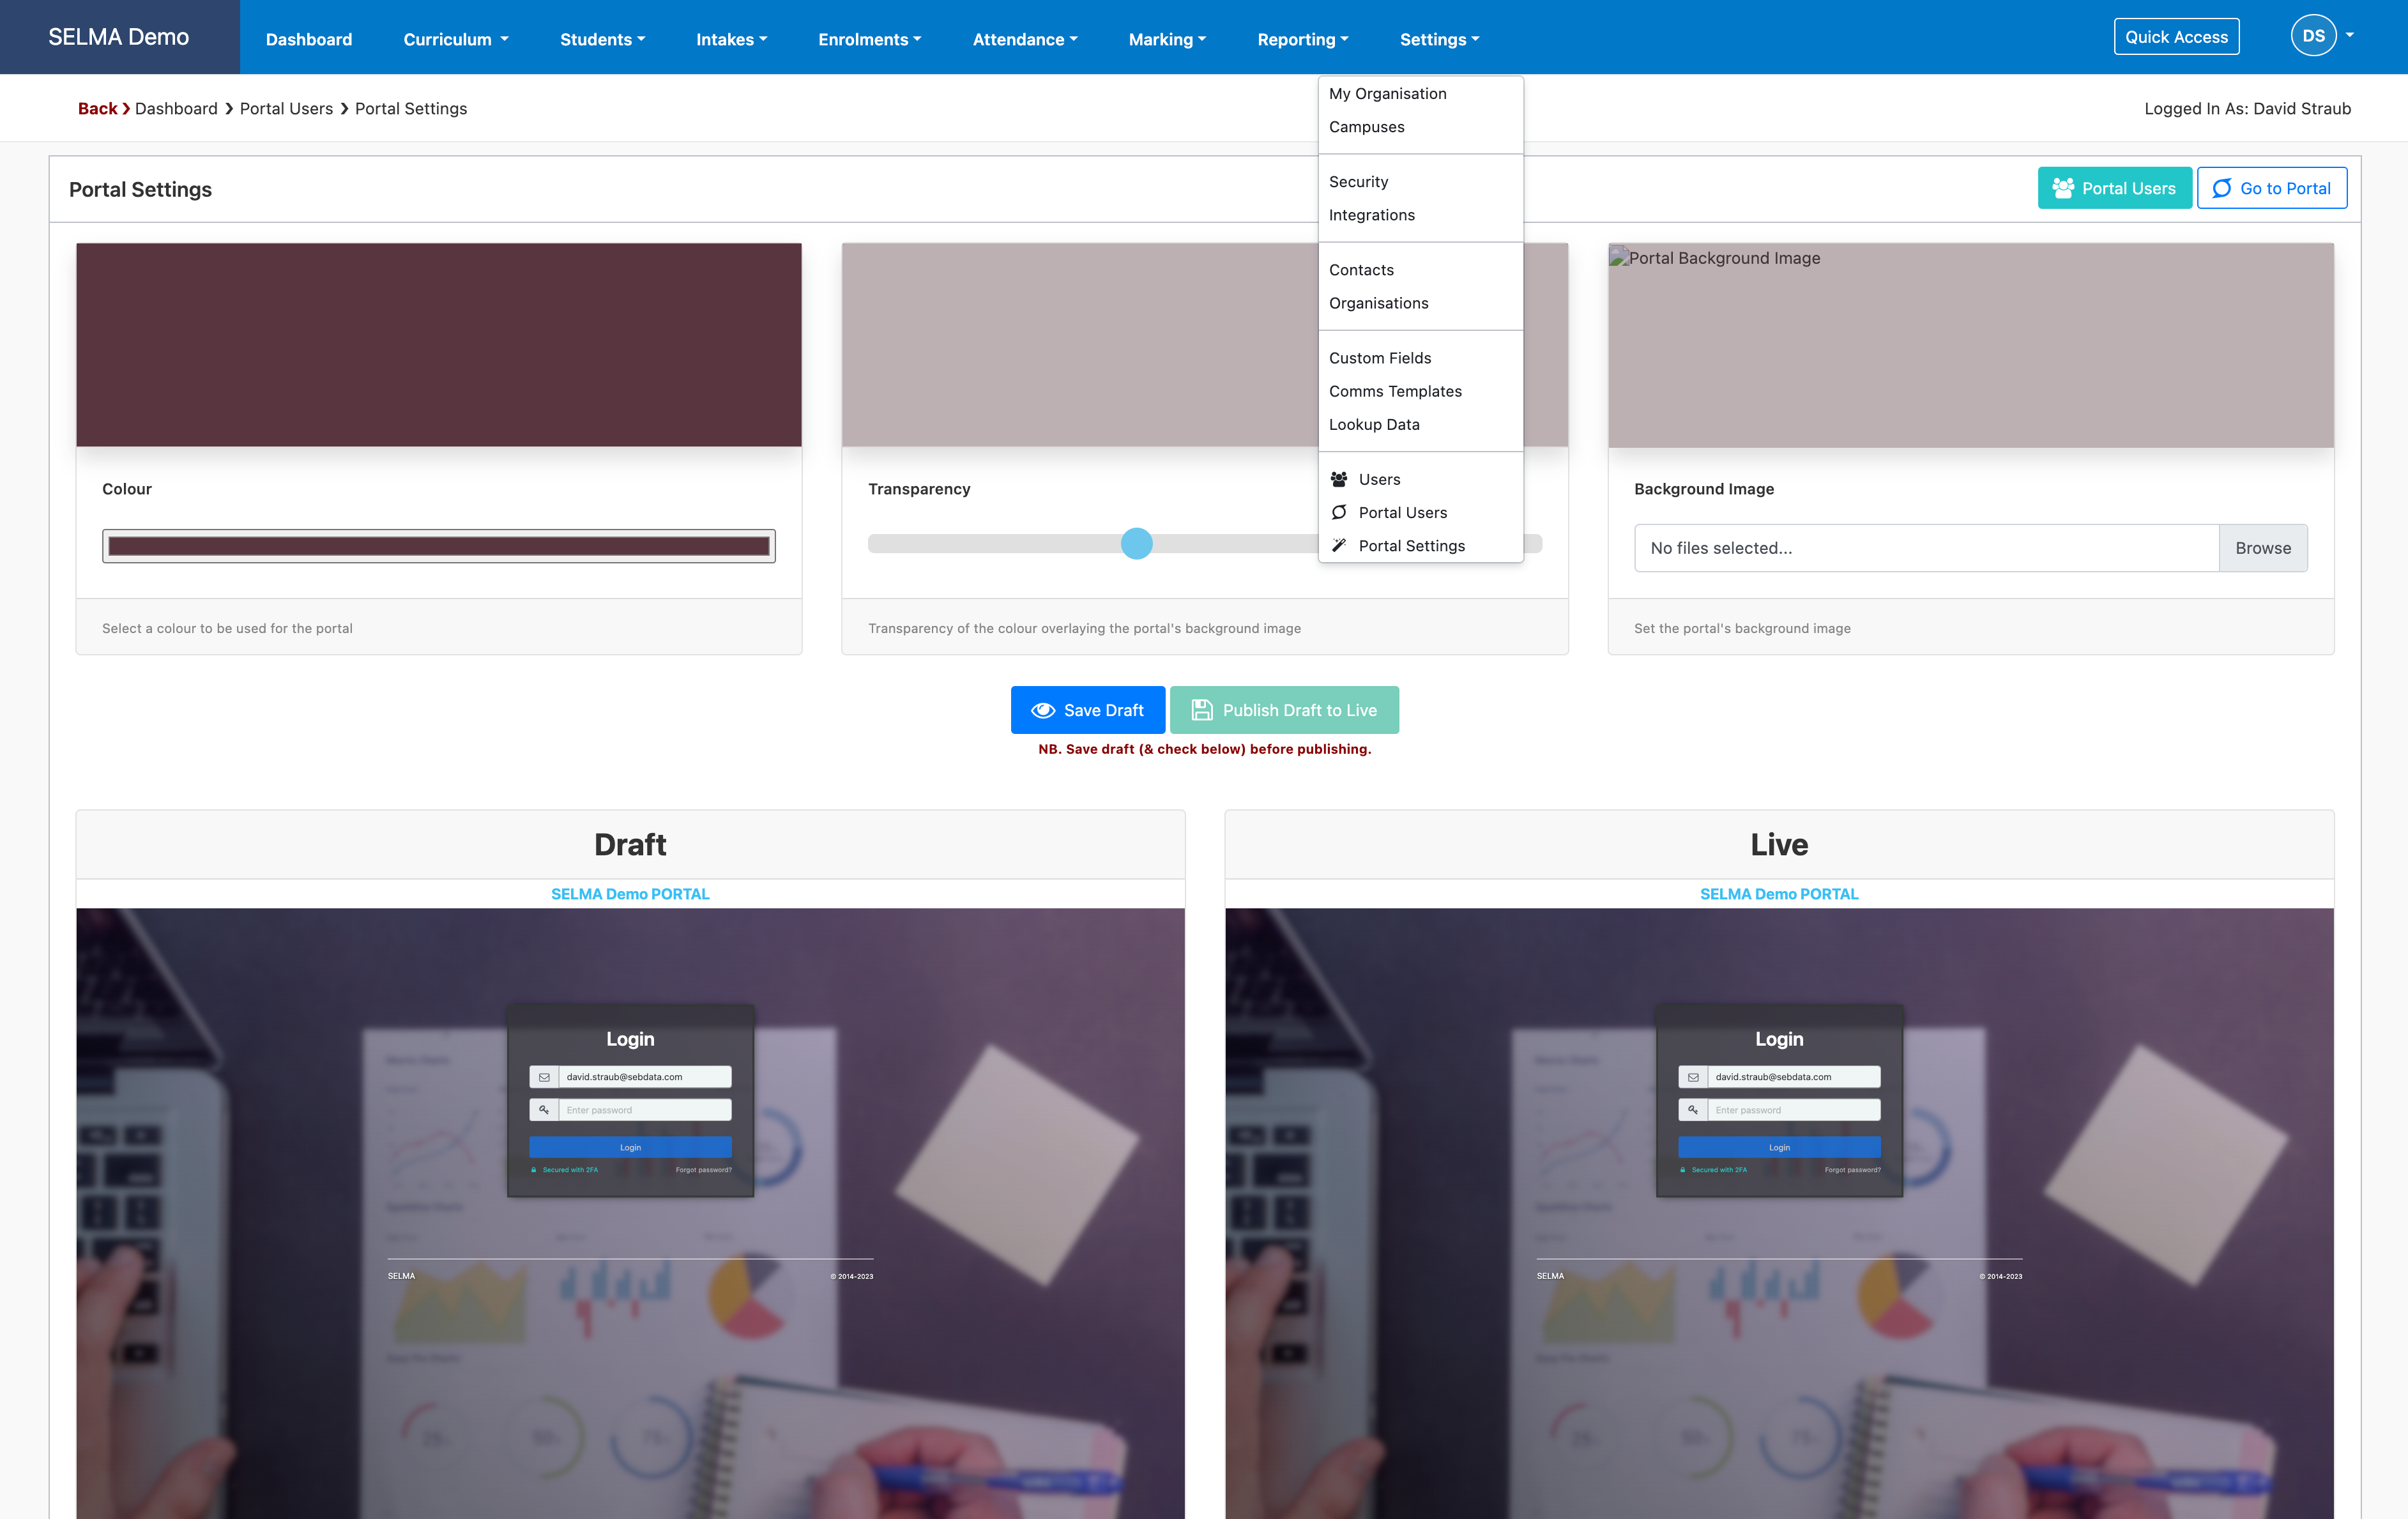
Under Settings -> Portal Setting, the appearance and styling of the portal can be configured. This is mainly to set the login window branding and the backgrounds:
Portal Administration
Once you have configured the above settings for the portal, you may want to invite students to login to their portal. You can invite a student to the SELMA student portal in three different ways:
From the Student Profile
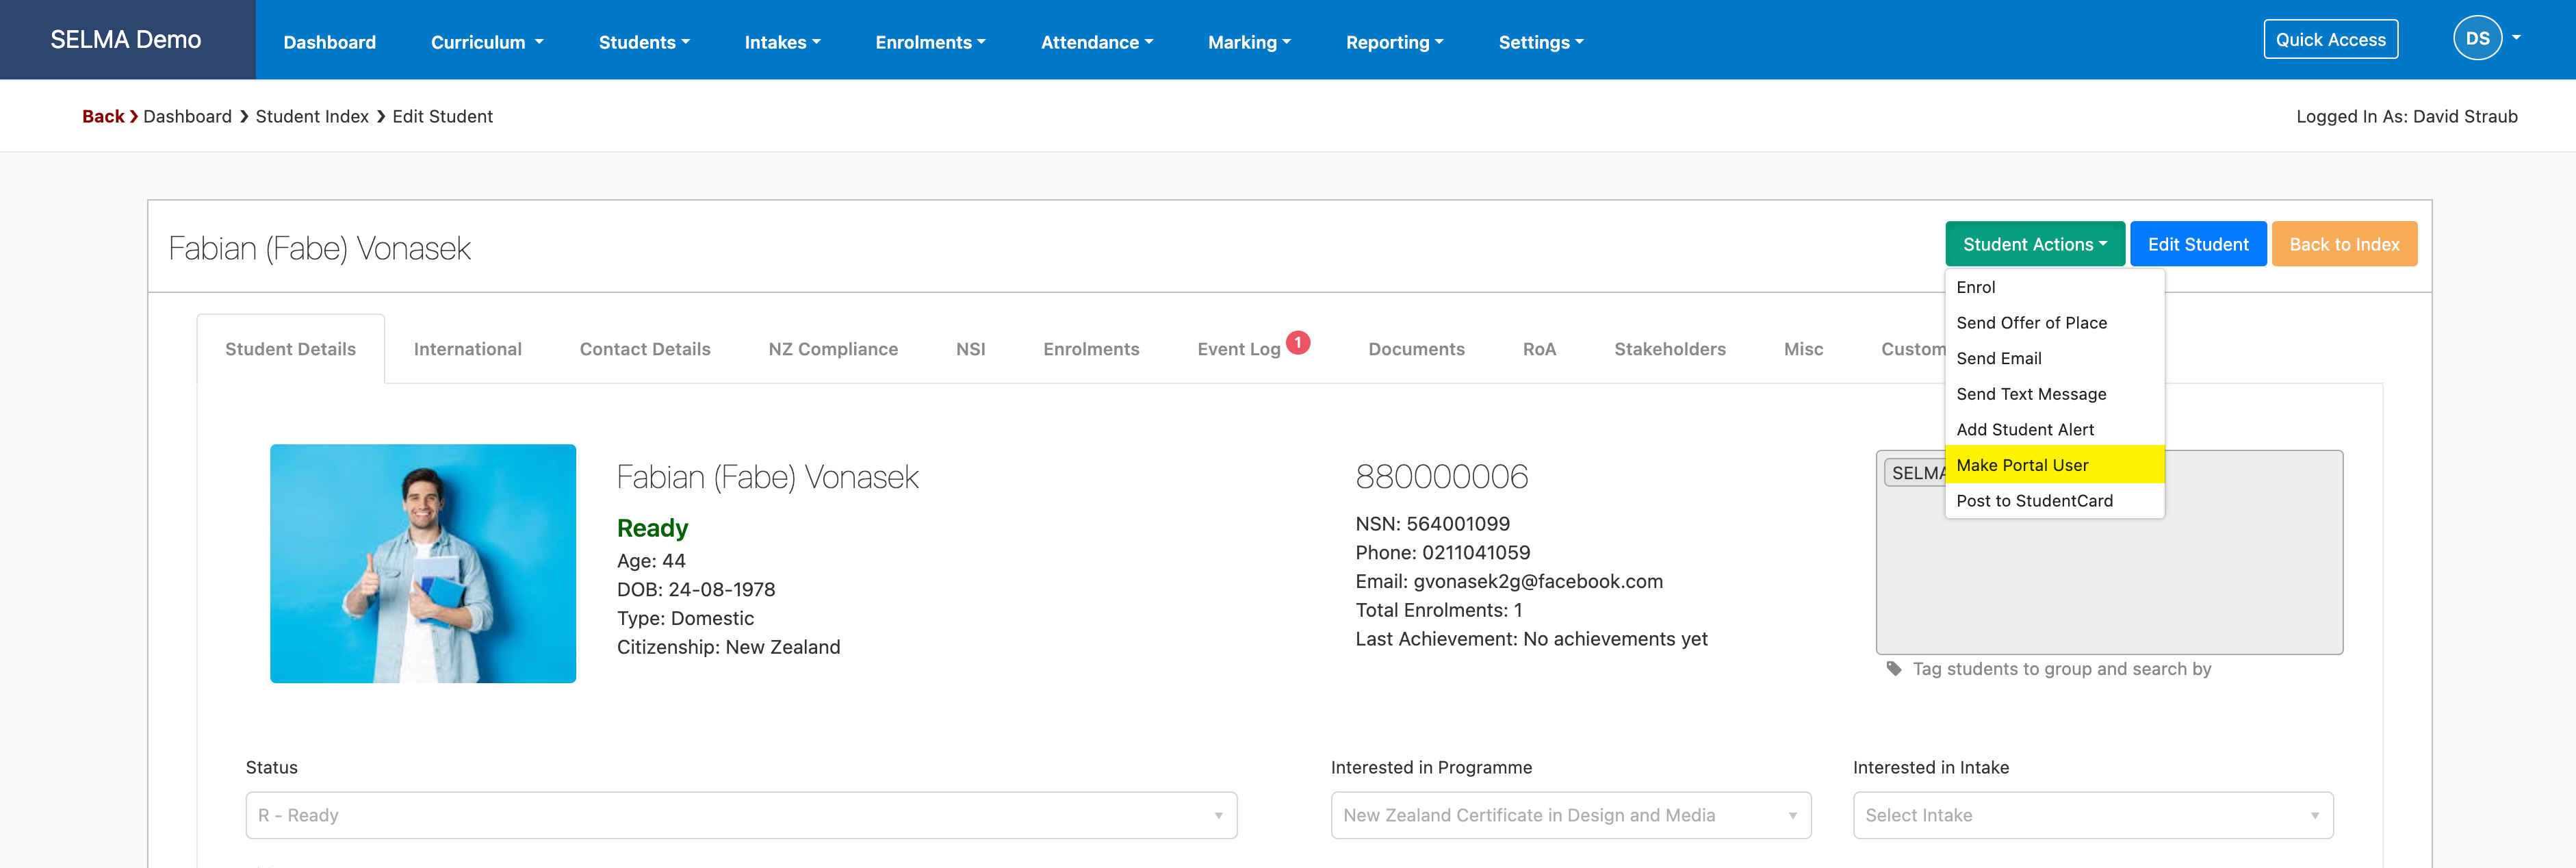
When on a student’s profile and with the correct access rights in SELMA, you can invite a student to the portal by clicking on “Student Actions” and then “Make Portal User”. SELMA will send an email invite to the student to join the portal. This process might fail if the student is already a portal user or if the student does not have a valid email address in the contact details tab.
When enrolling a student
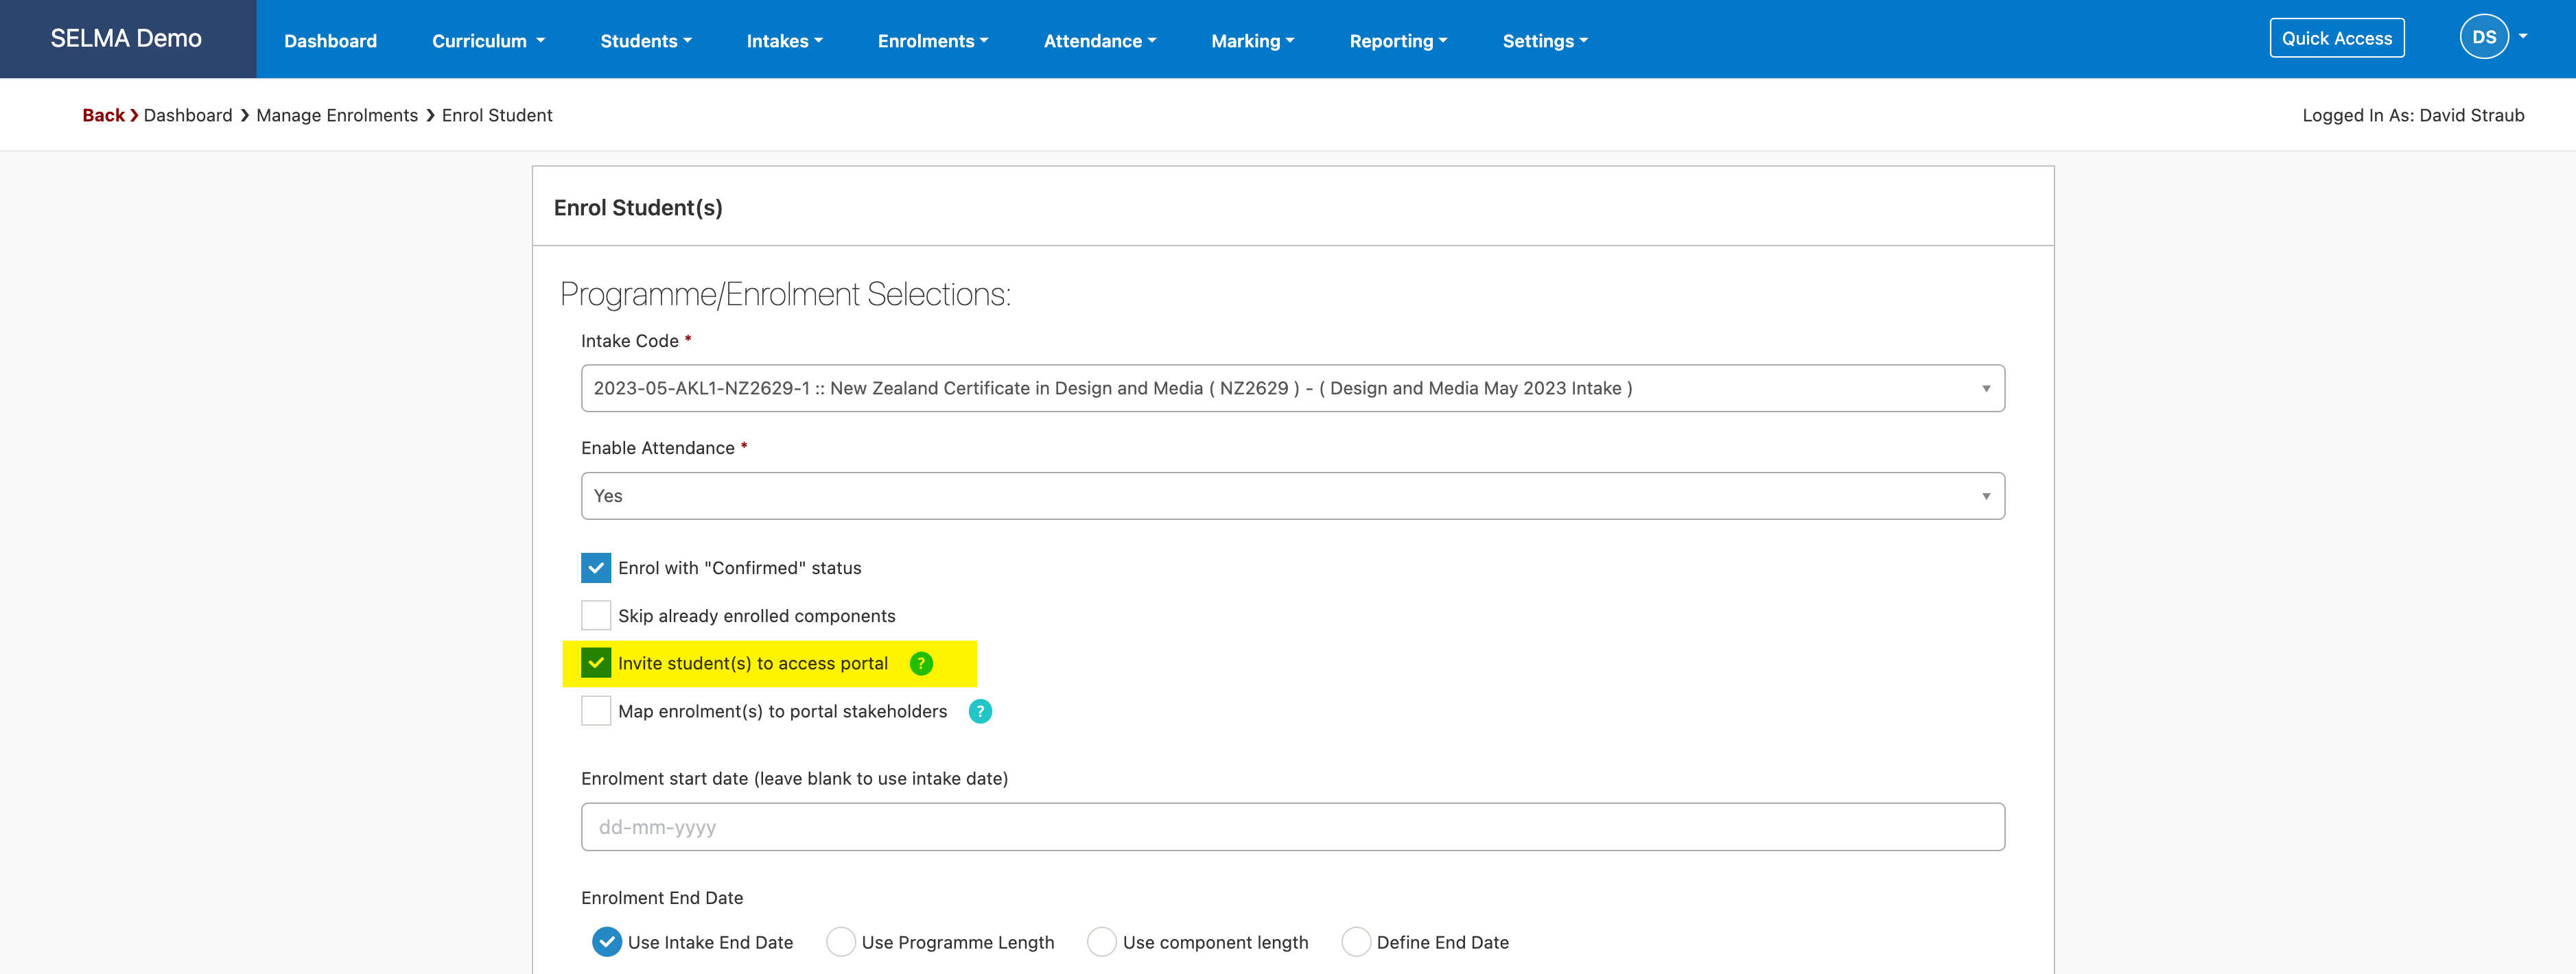
When enrolling a student into a programme in SELMA, there is an option to select “Invite student(s) to access portal”. If this option is selected, the student will receive an invite to join the portal when the enrolment is processed.
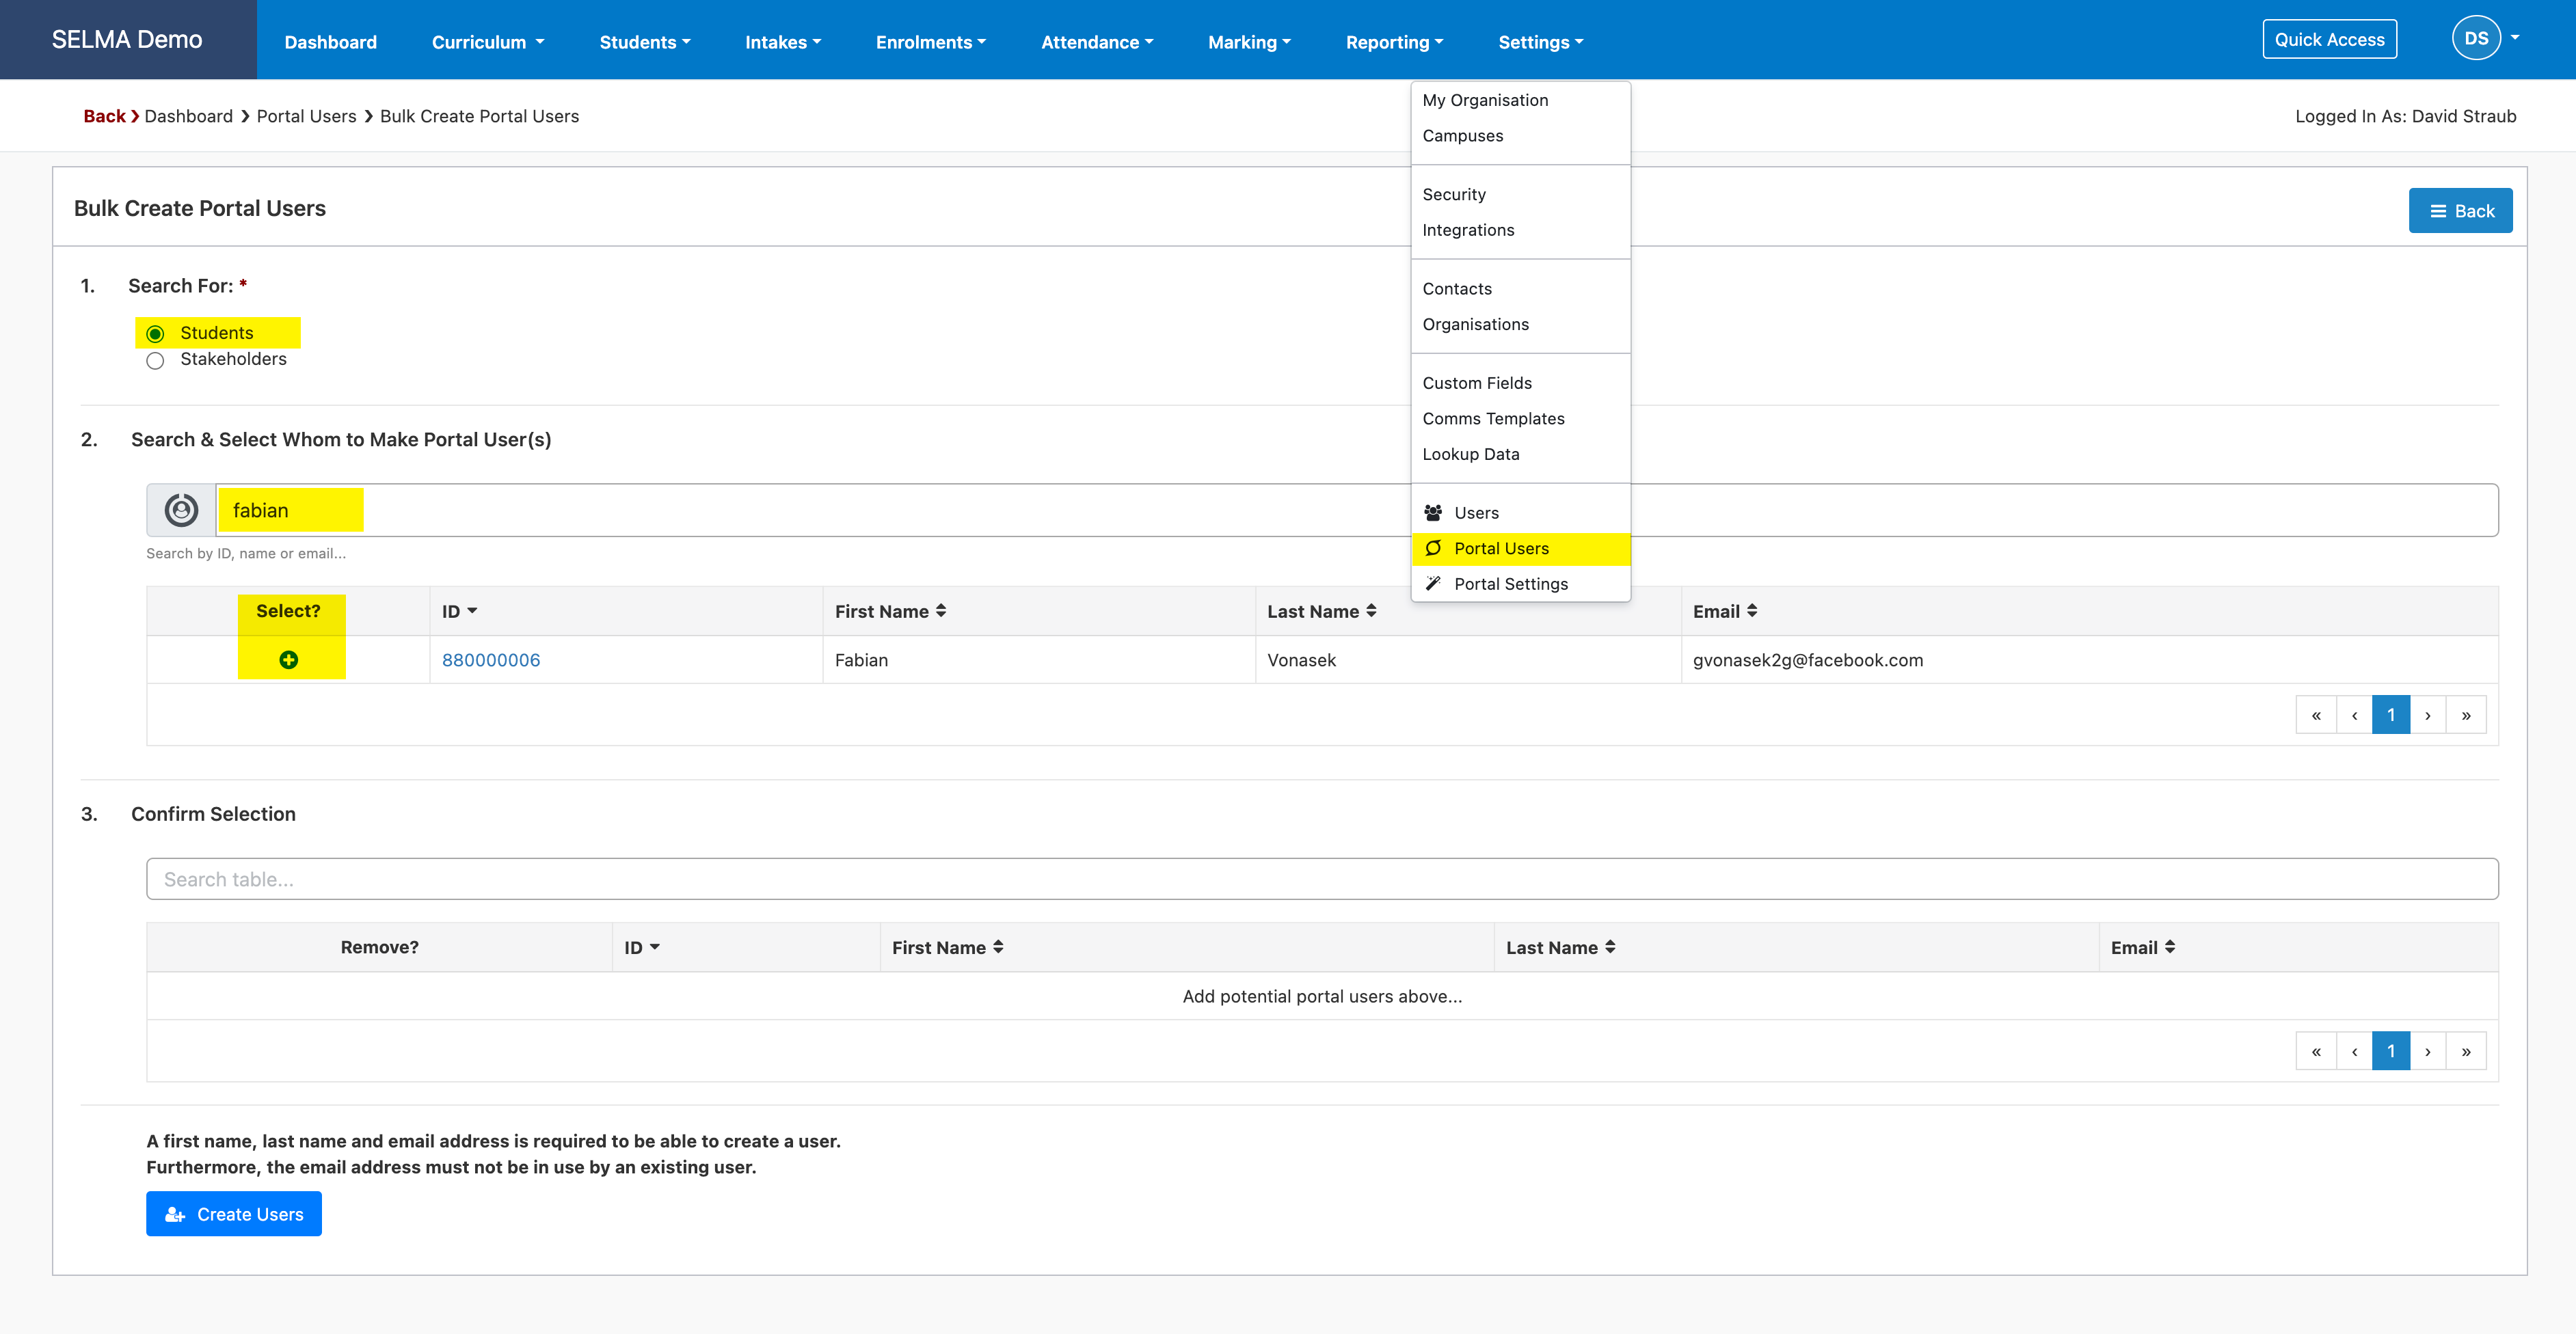
From the Portal User Settings
You can also add students to the portal in bulk. Under Settings -> Portal Users, click on “Bulk Create” and find yourself in the below menu. Here you can search for students and add them to a list with the green + button. Once your list has all students you want to add, simply click the “Create Users” button.
The Invitation Email
Regardless of which method you use to create/invite students to the portal, they will receive an invite email. It is good practice to remind your students that the email might have gone into spam. You may want to use the text message function to remind the students that they just received and important email and that they should check their spam as well.
The email invite looks as below:
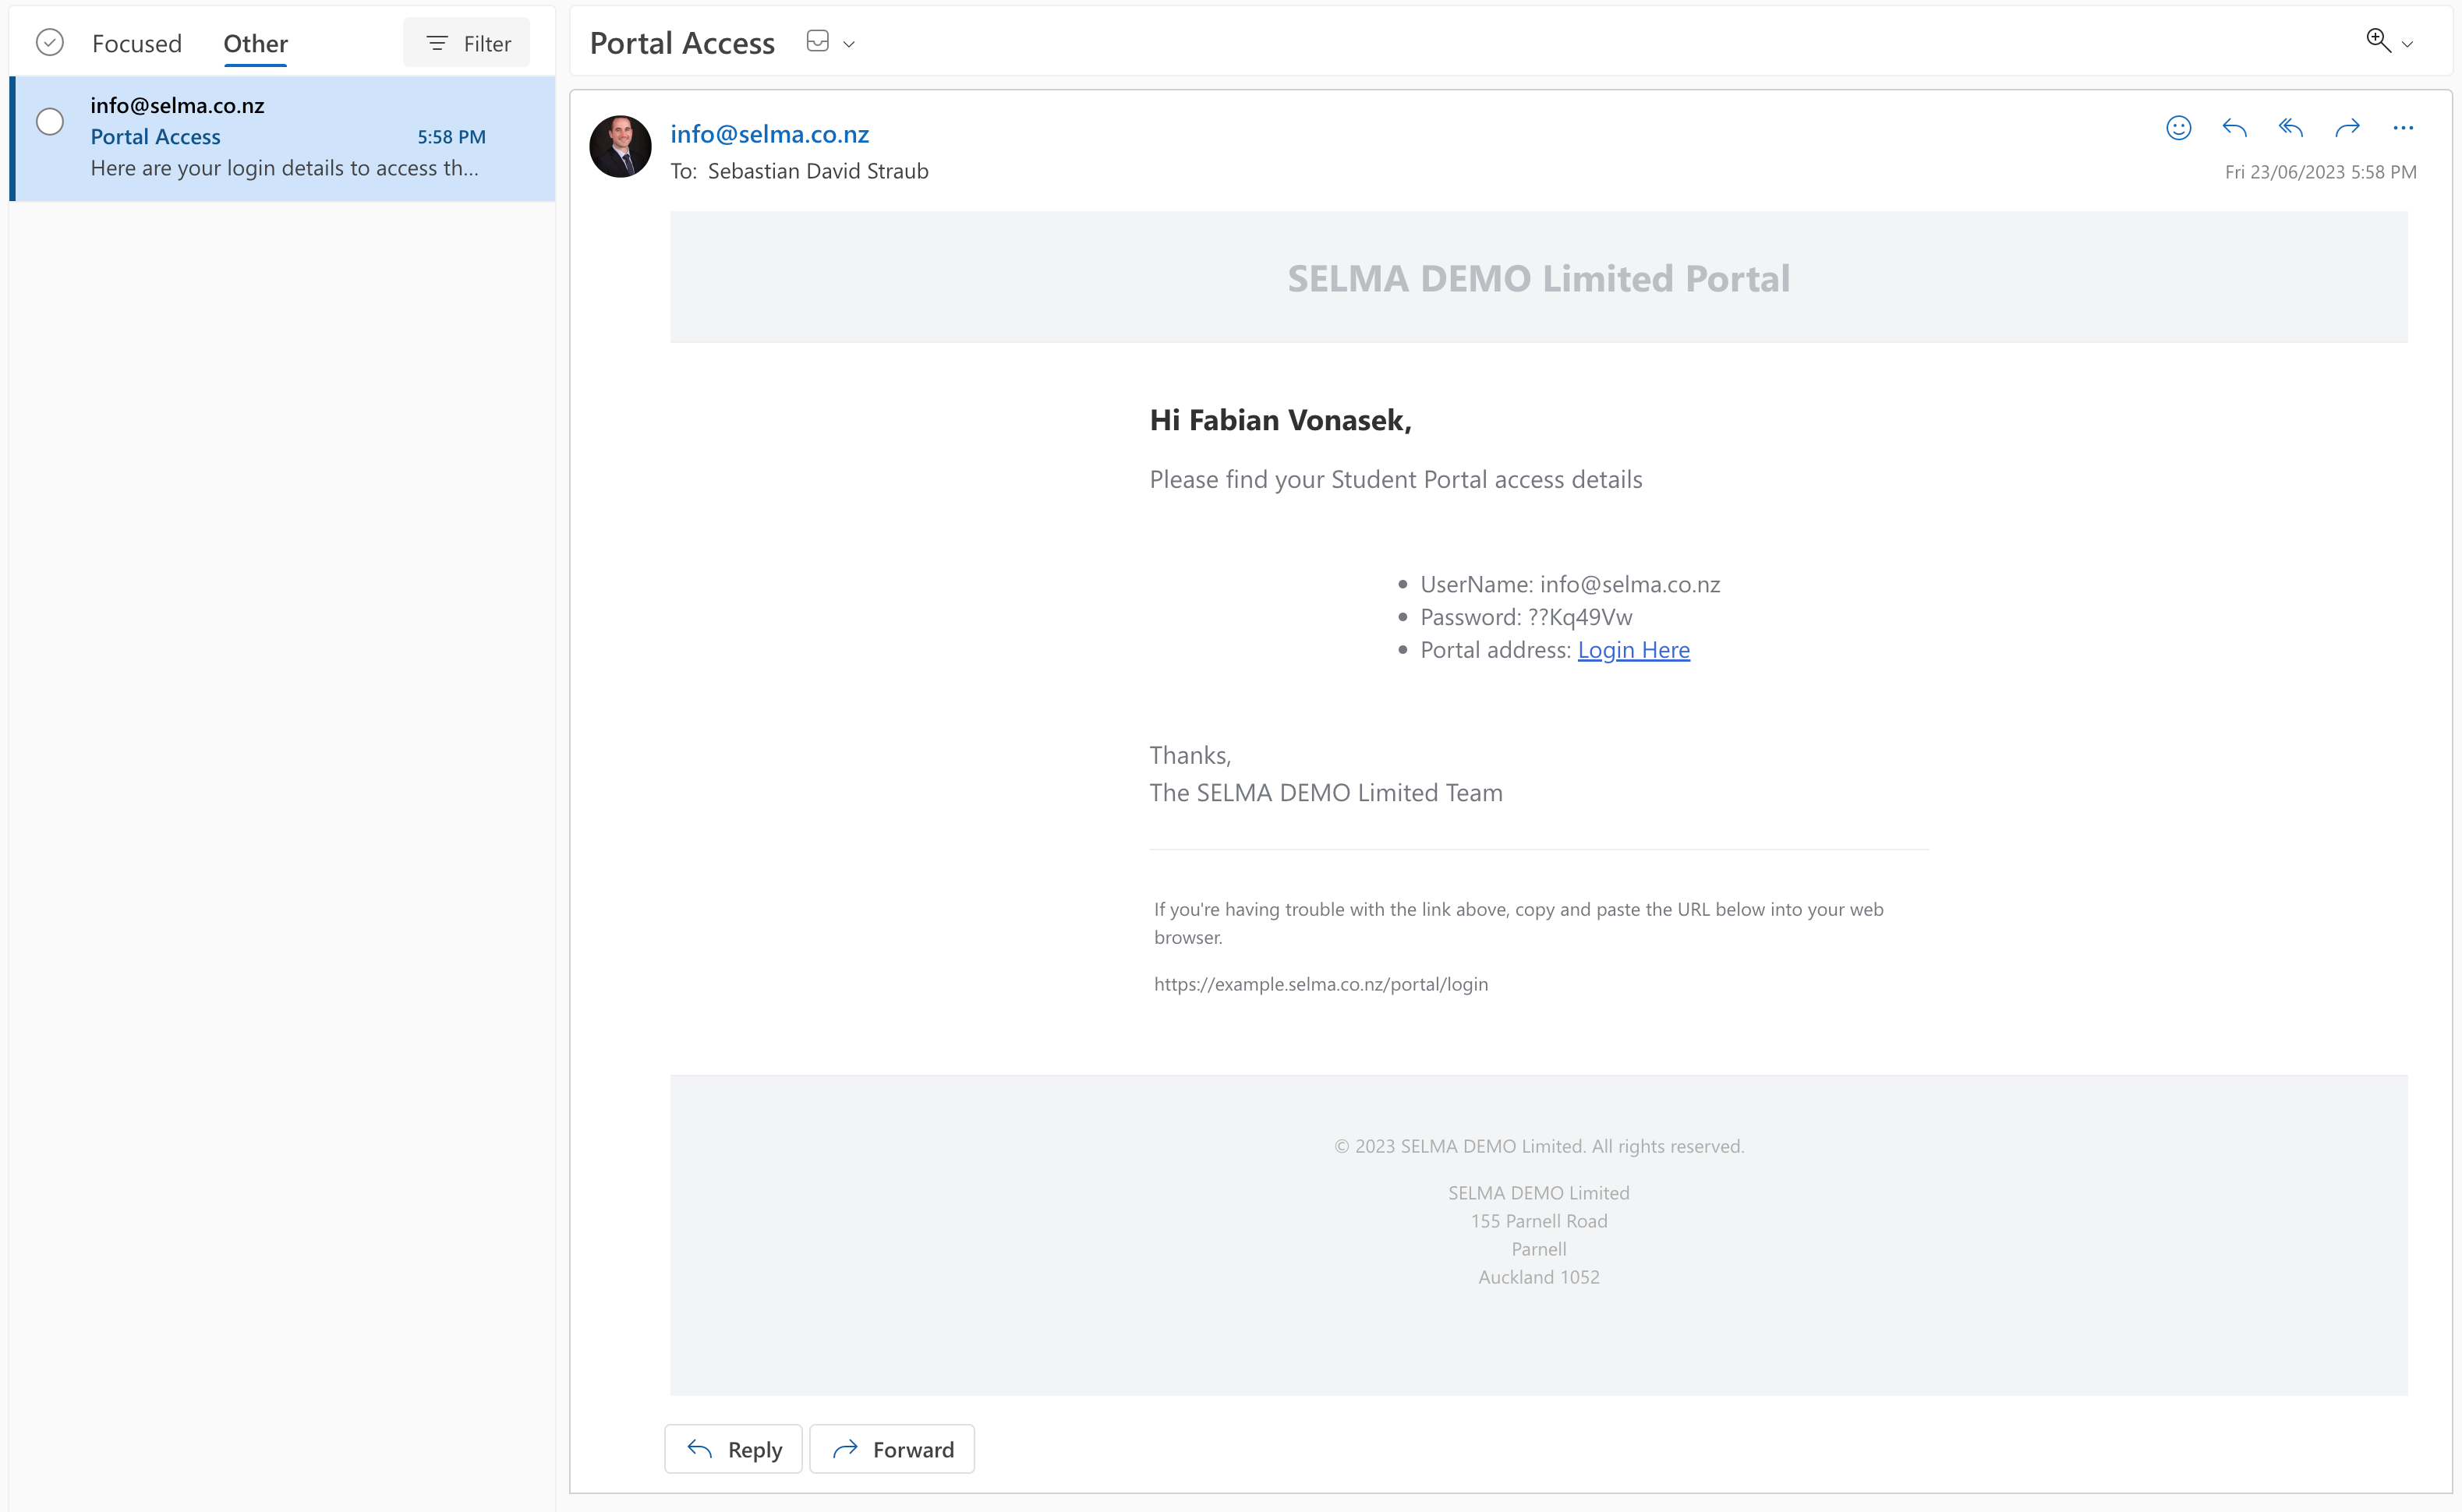
The students will receive the link to the portal as well as a temporary password.
Manage Portal Users
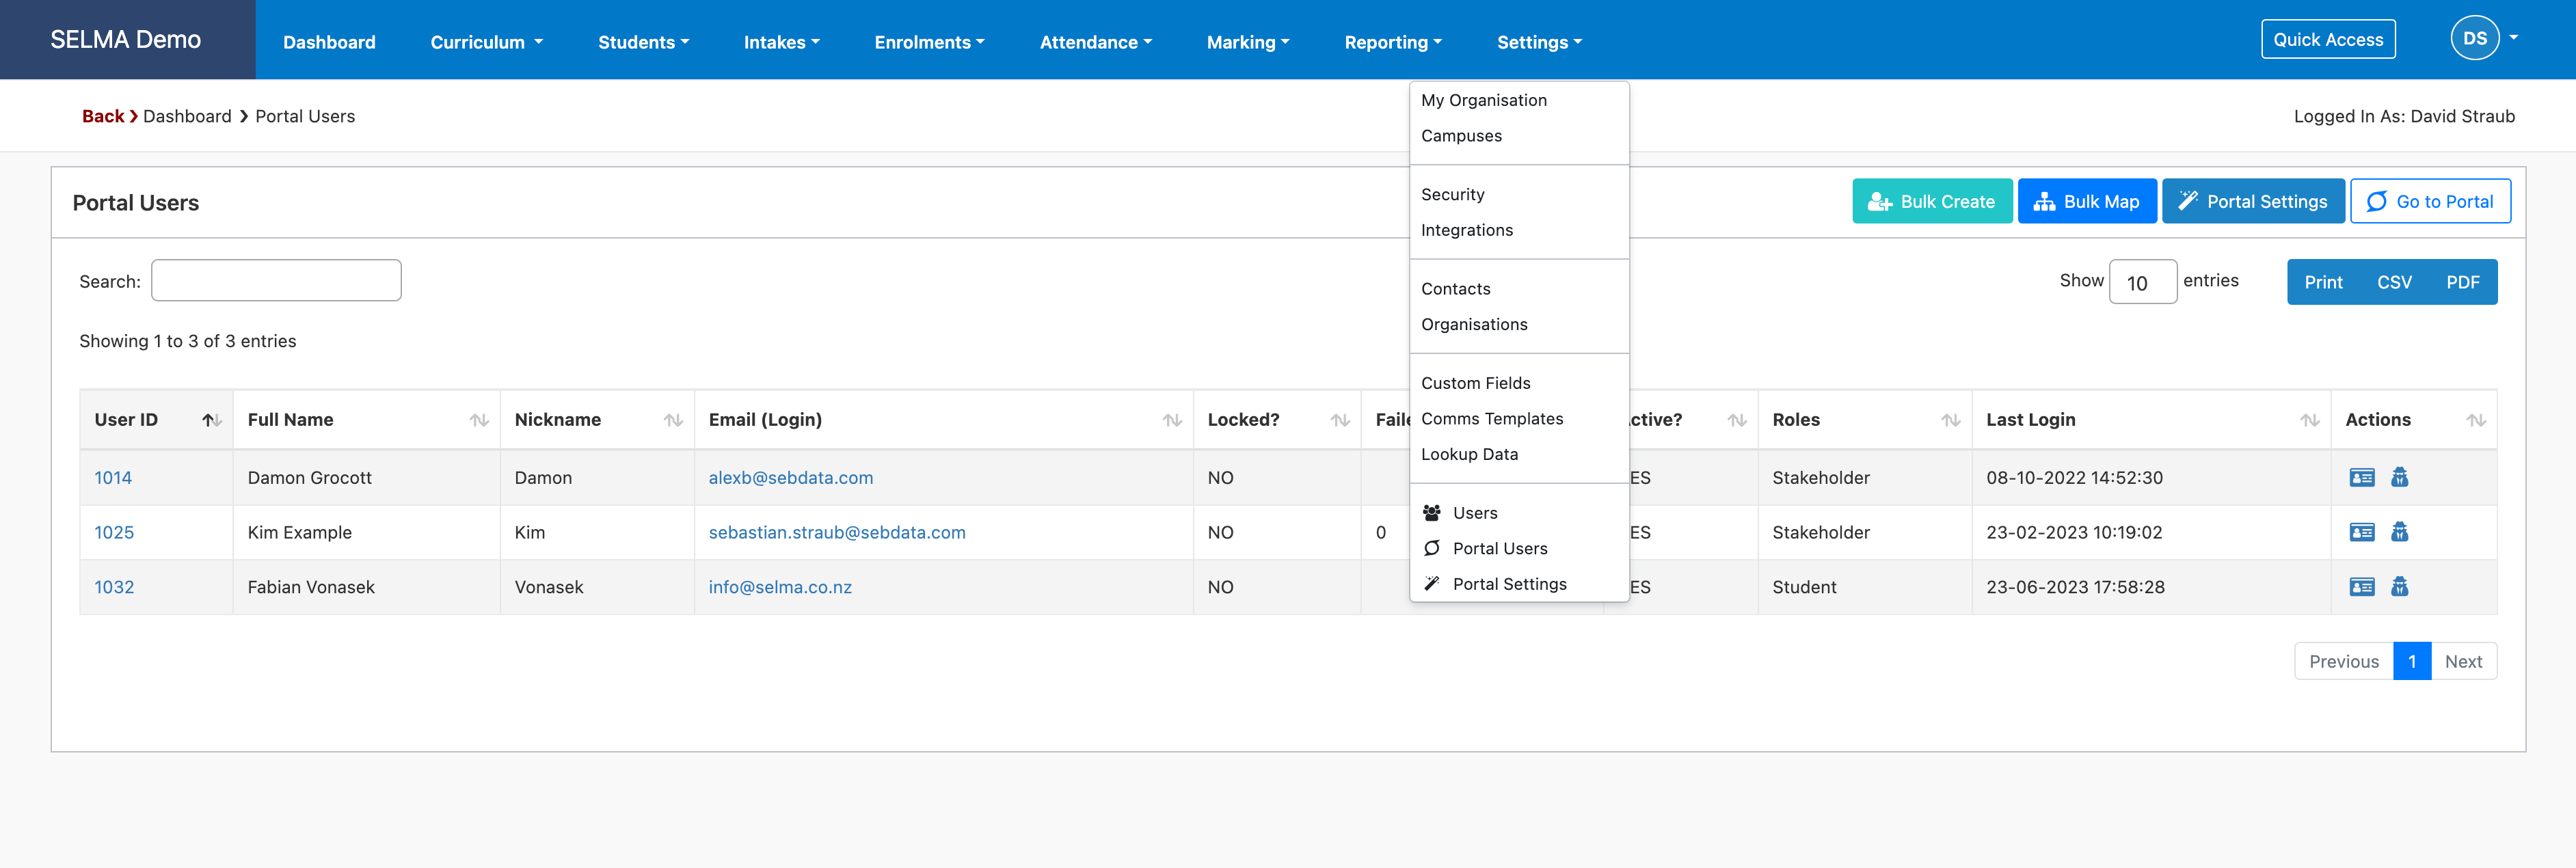
To manage existing users, go to Settings -> Portal Users and search for the user you may want to update. Select the user by clicking on the user ID or the email address.
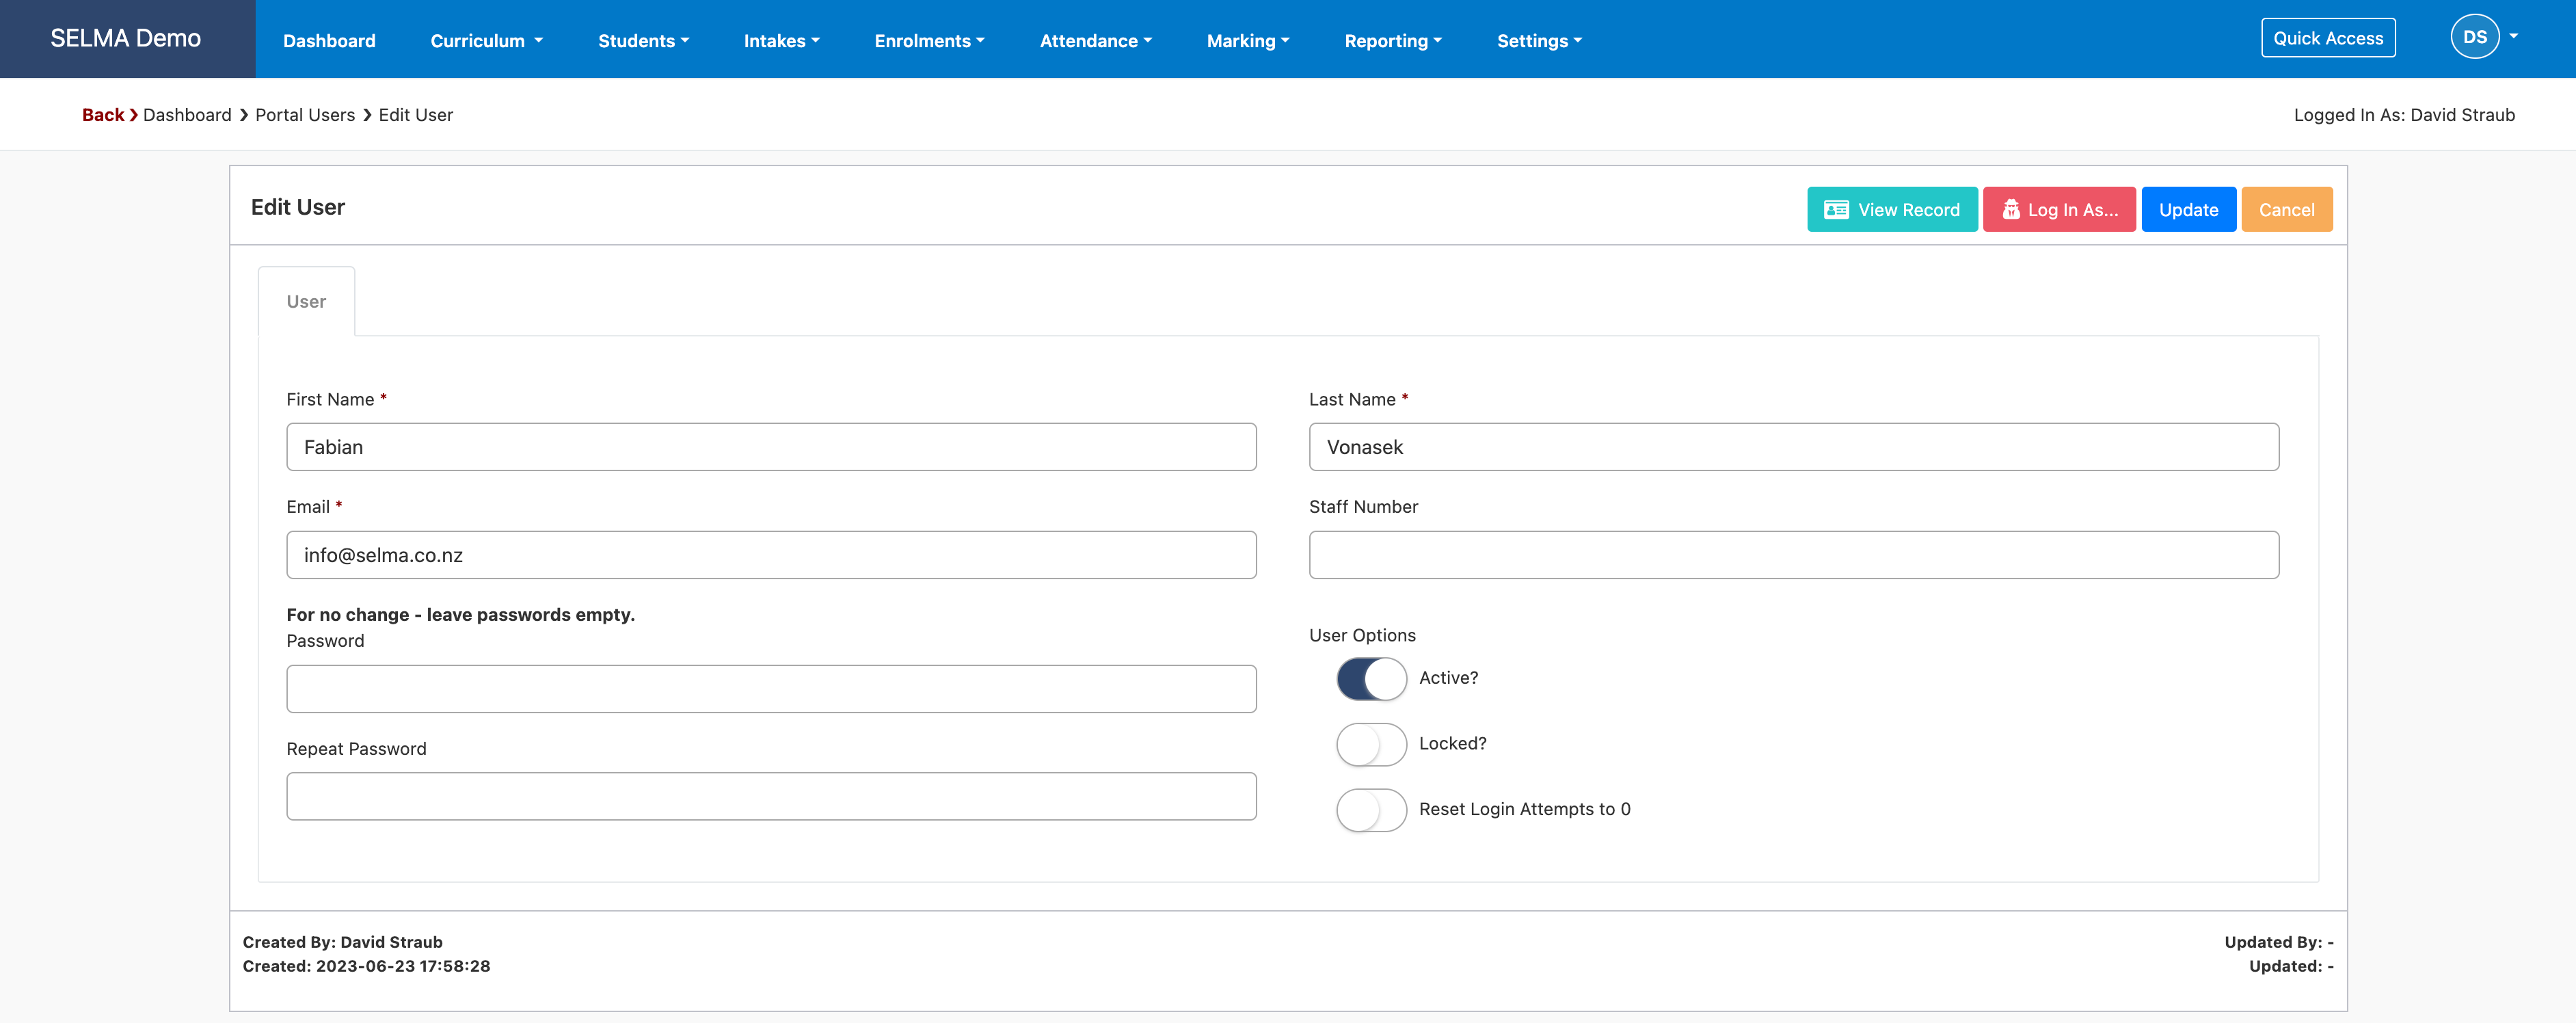
Update a Portal User
From here you will be able to make a portal user inactive, re-set their login or set them a specific password. You may also find that one of your users is locked. This can happen if they tried to login too many times with wrong credentials. You can unlock your student by simply using the toggle button.
Inactive and locked users will not be able to login to the SELMA Student Portal
Student Portal
This section will explain what the students view on the Portal is.
Login
Once the student clicks on the link they received in the email, they will get to the below login page. They will log in with the credentials provided in their invitation email:
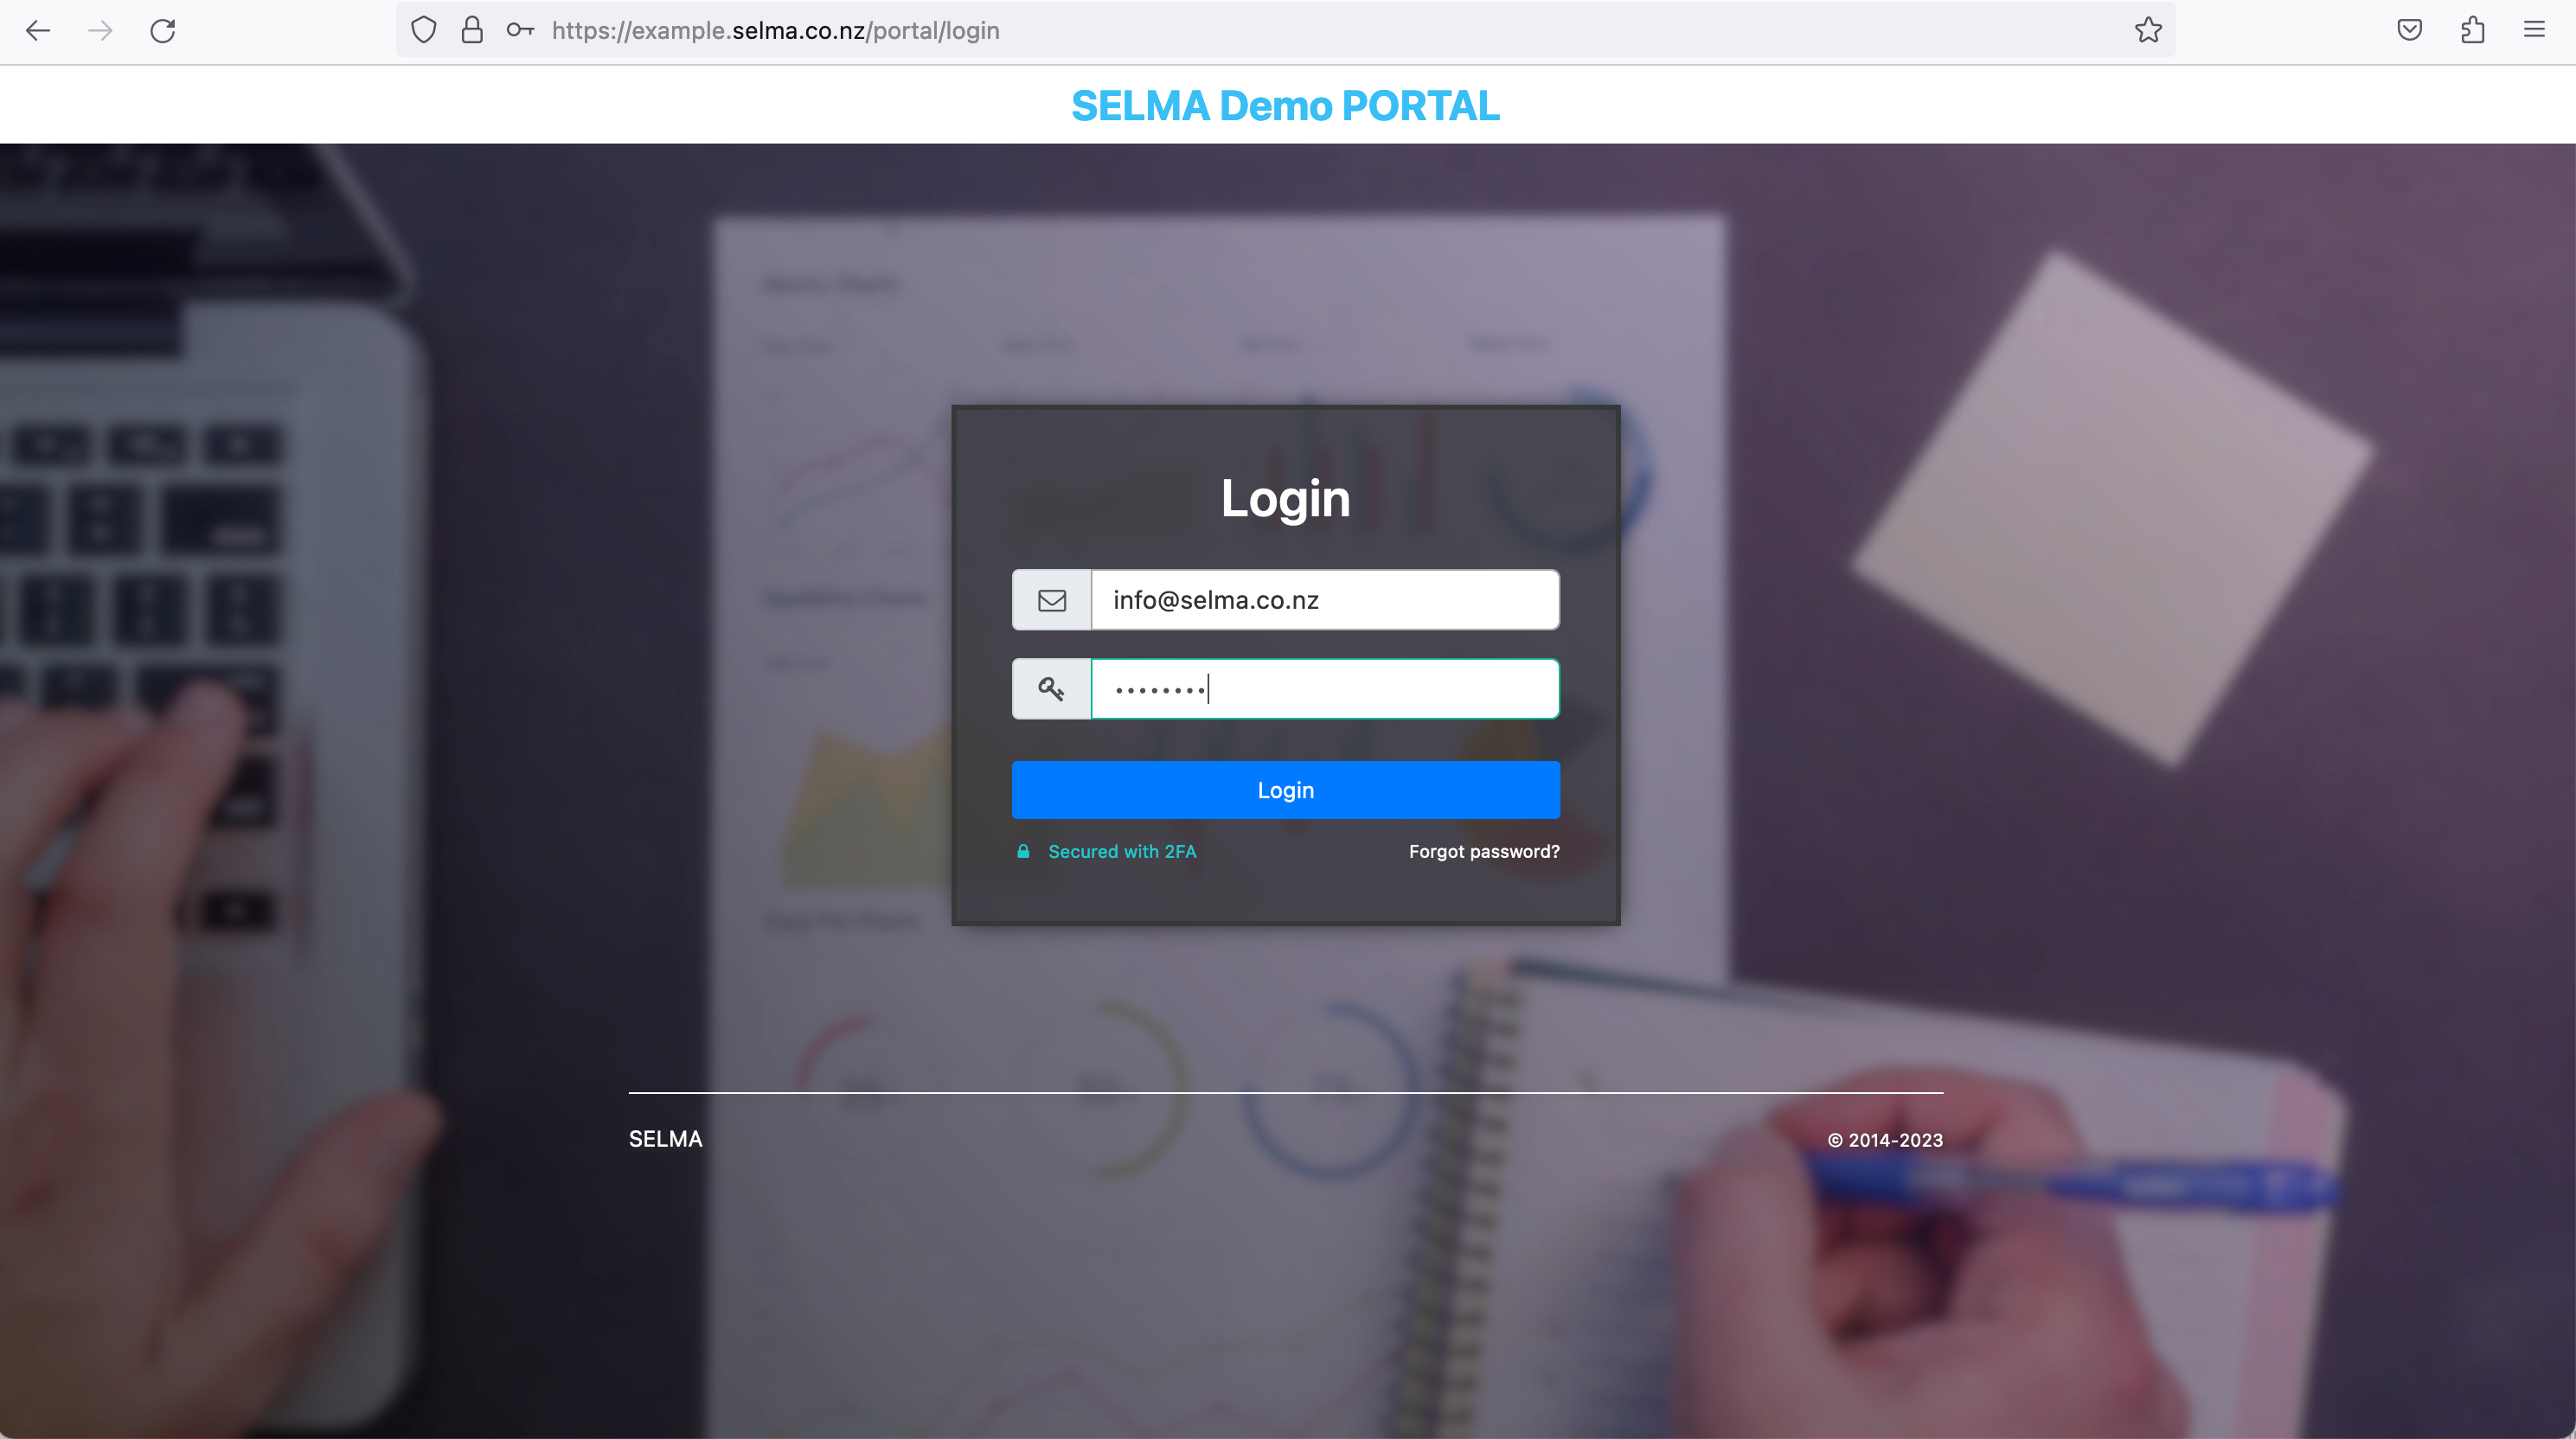
Once they click the login button, they will be asked to confirm their login with a 2FA code that will be sent to the same email they have received the invite in.
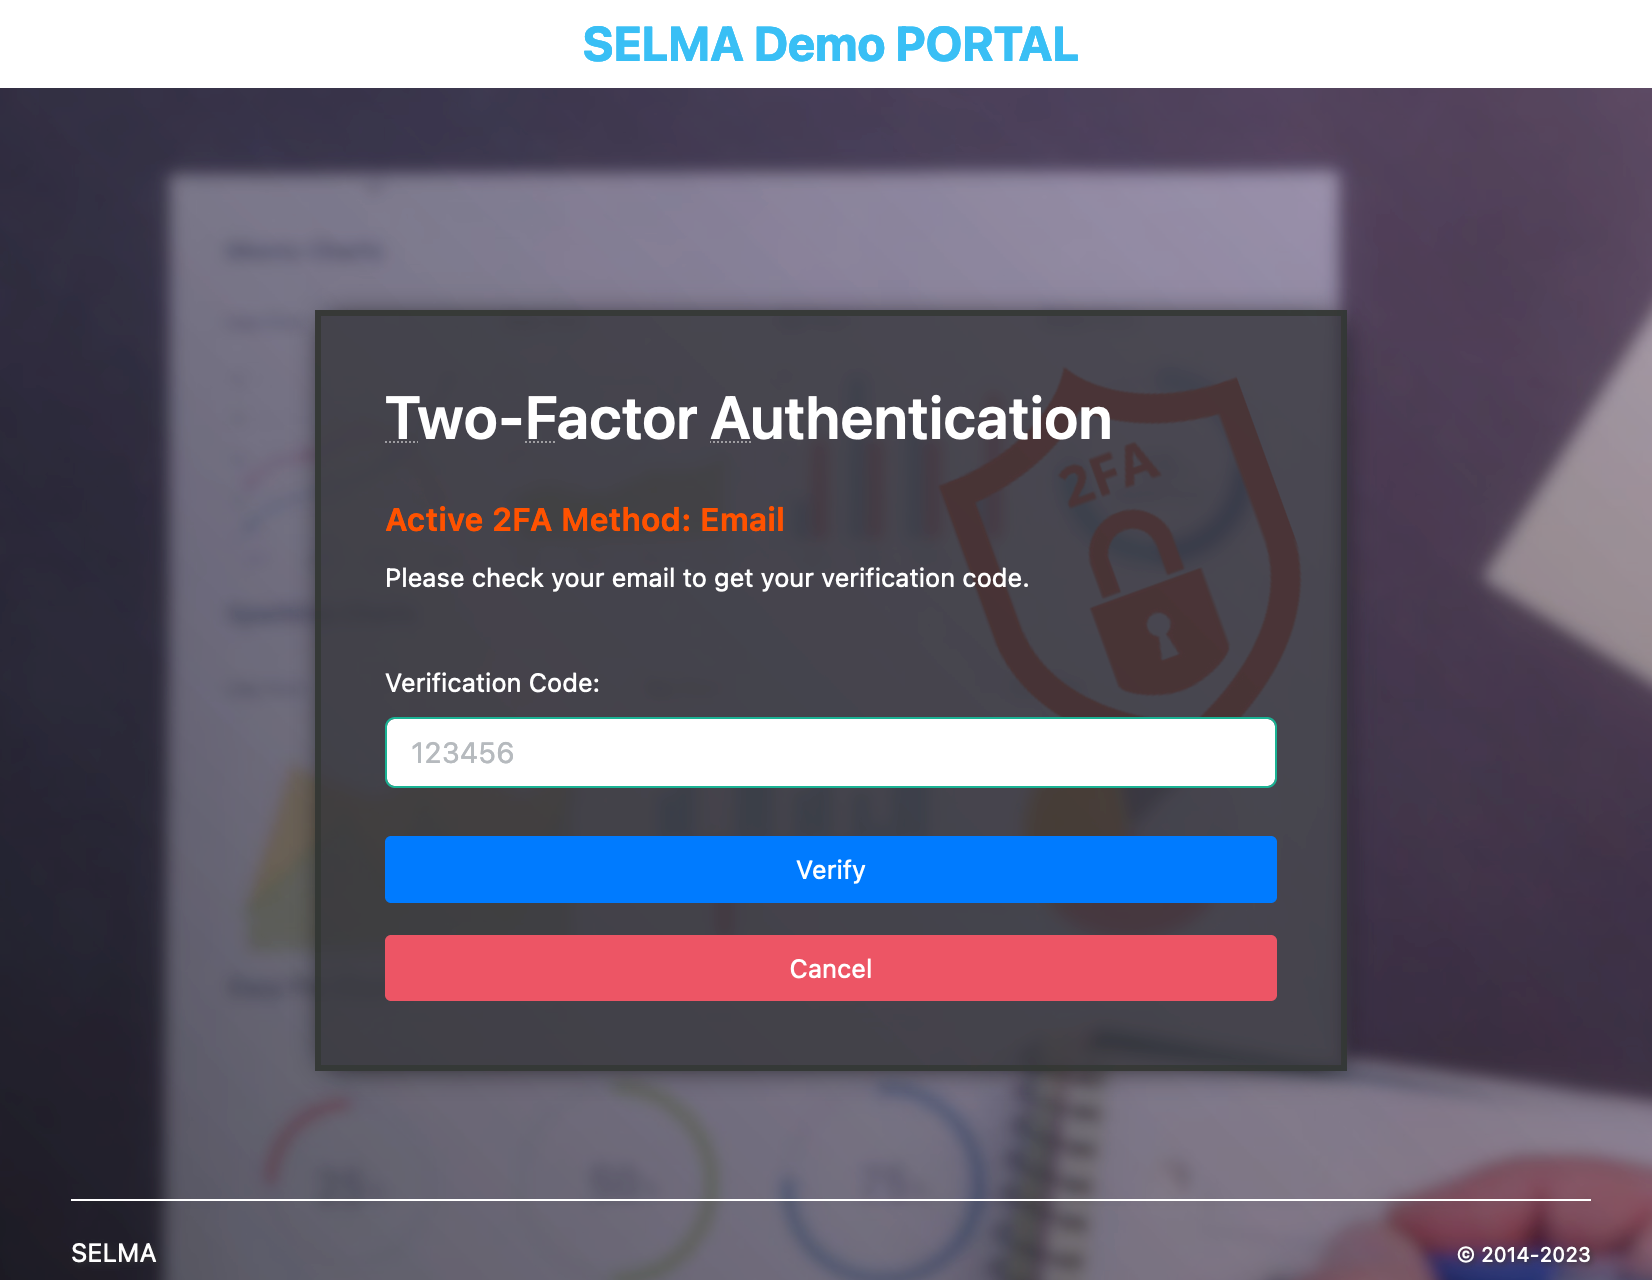
They enter the code and login. Speak to us about alternative login options such as O365 or different 2FA options.
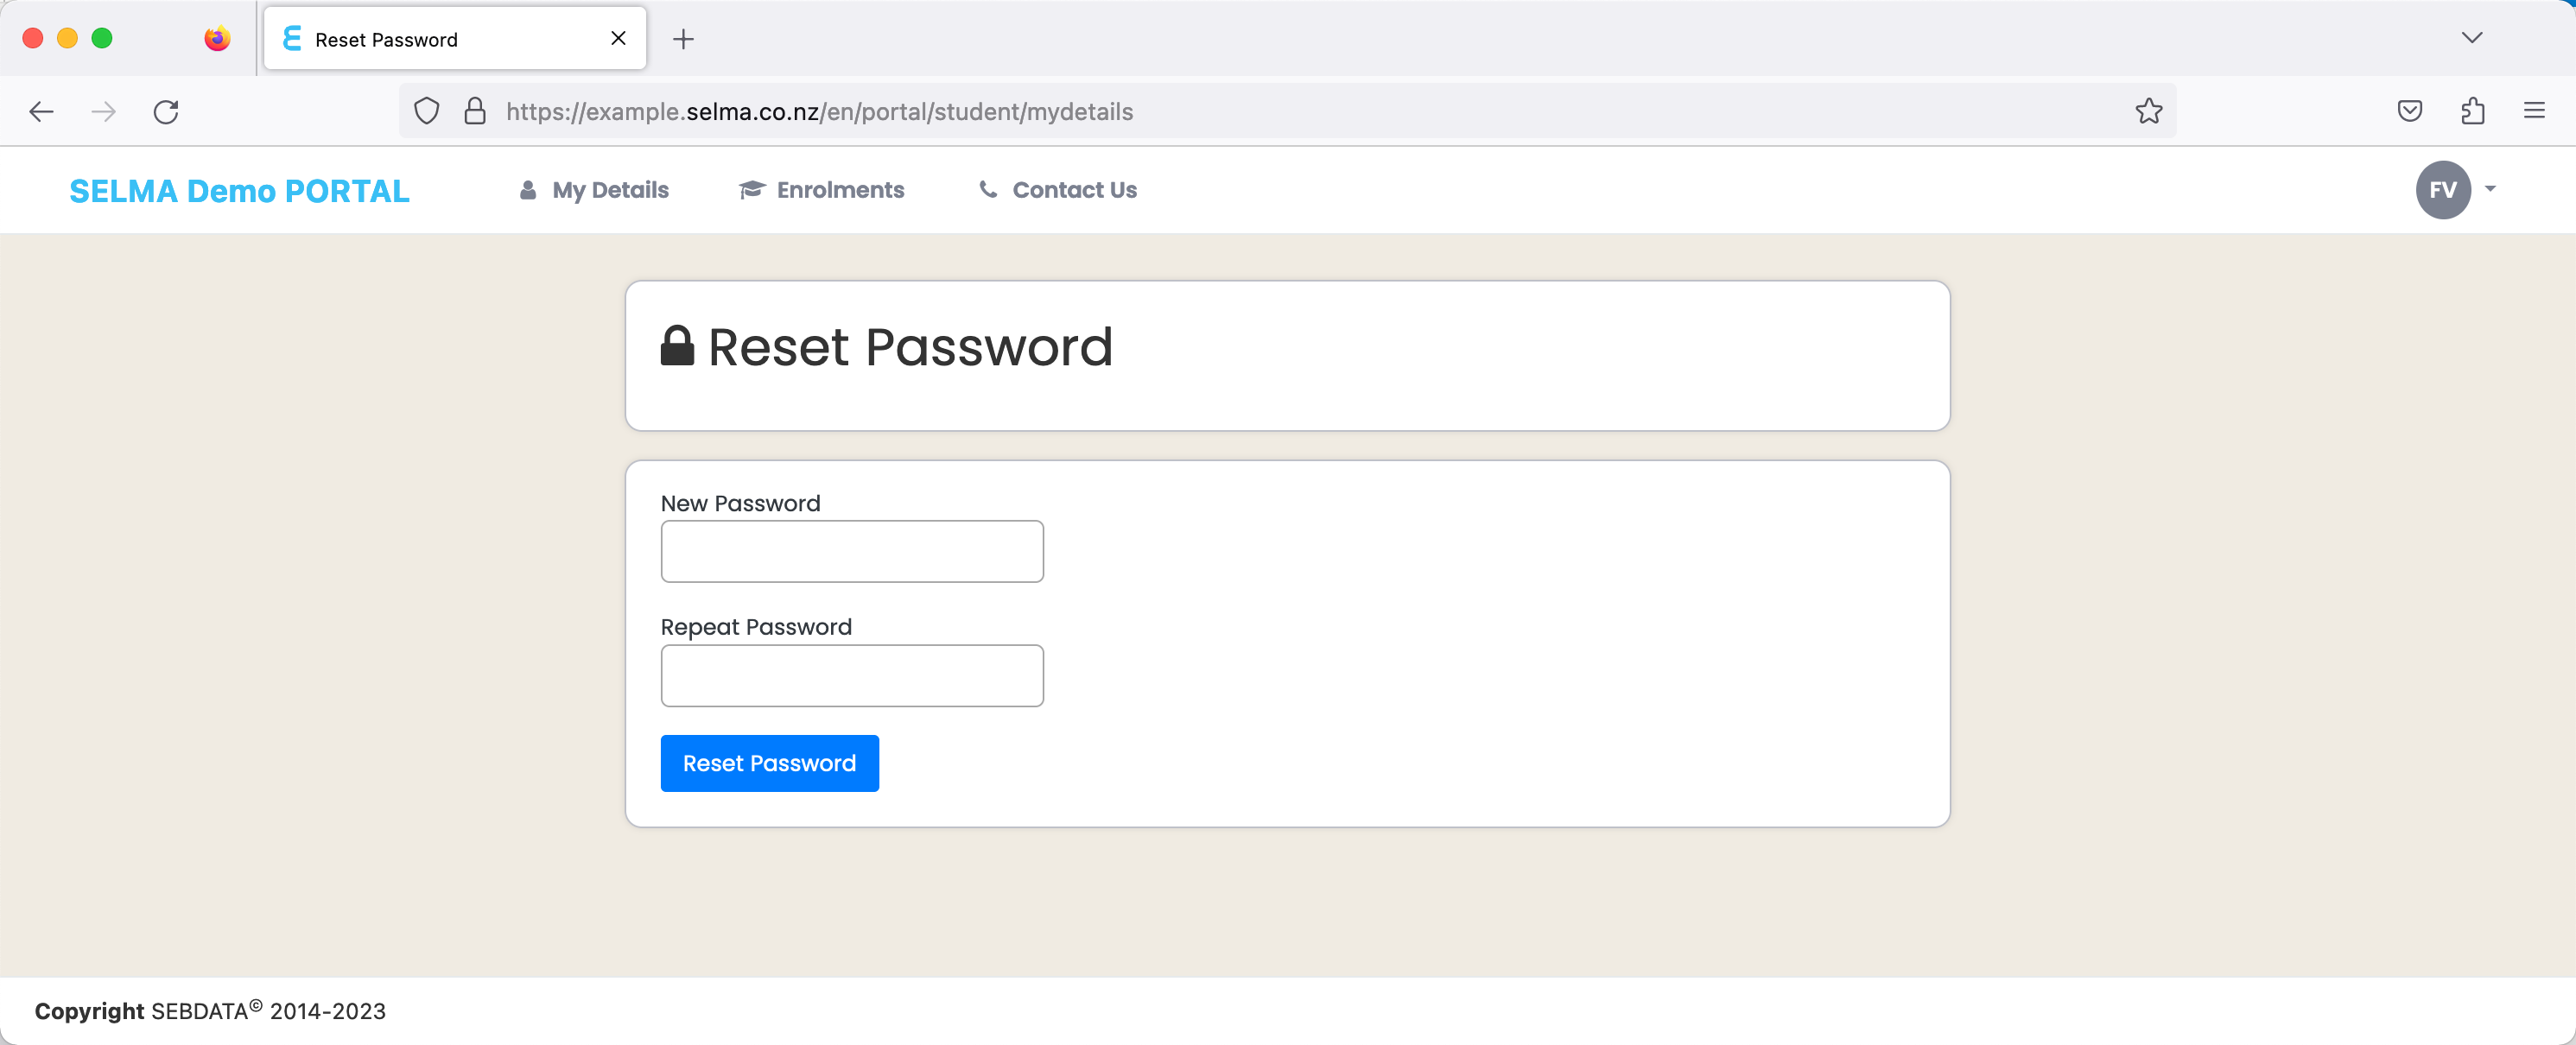
Password reset on first login
On first login, the students will be asked to set themselves a password rather than using the temporary password provided.
The Dashboard
Once a student has successfully logged in, they will get a dashboard view of their Portal. By default, they see four different tiles on their dashboard that will be explained in detail in this manual.
You can add further tiles to this dashboard such as a file storage, SharePoint or an LMS such as canvas or moodle. Please speak to the SELMA support team if you need further Apps on the student’s dashboard.
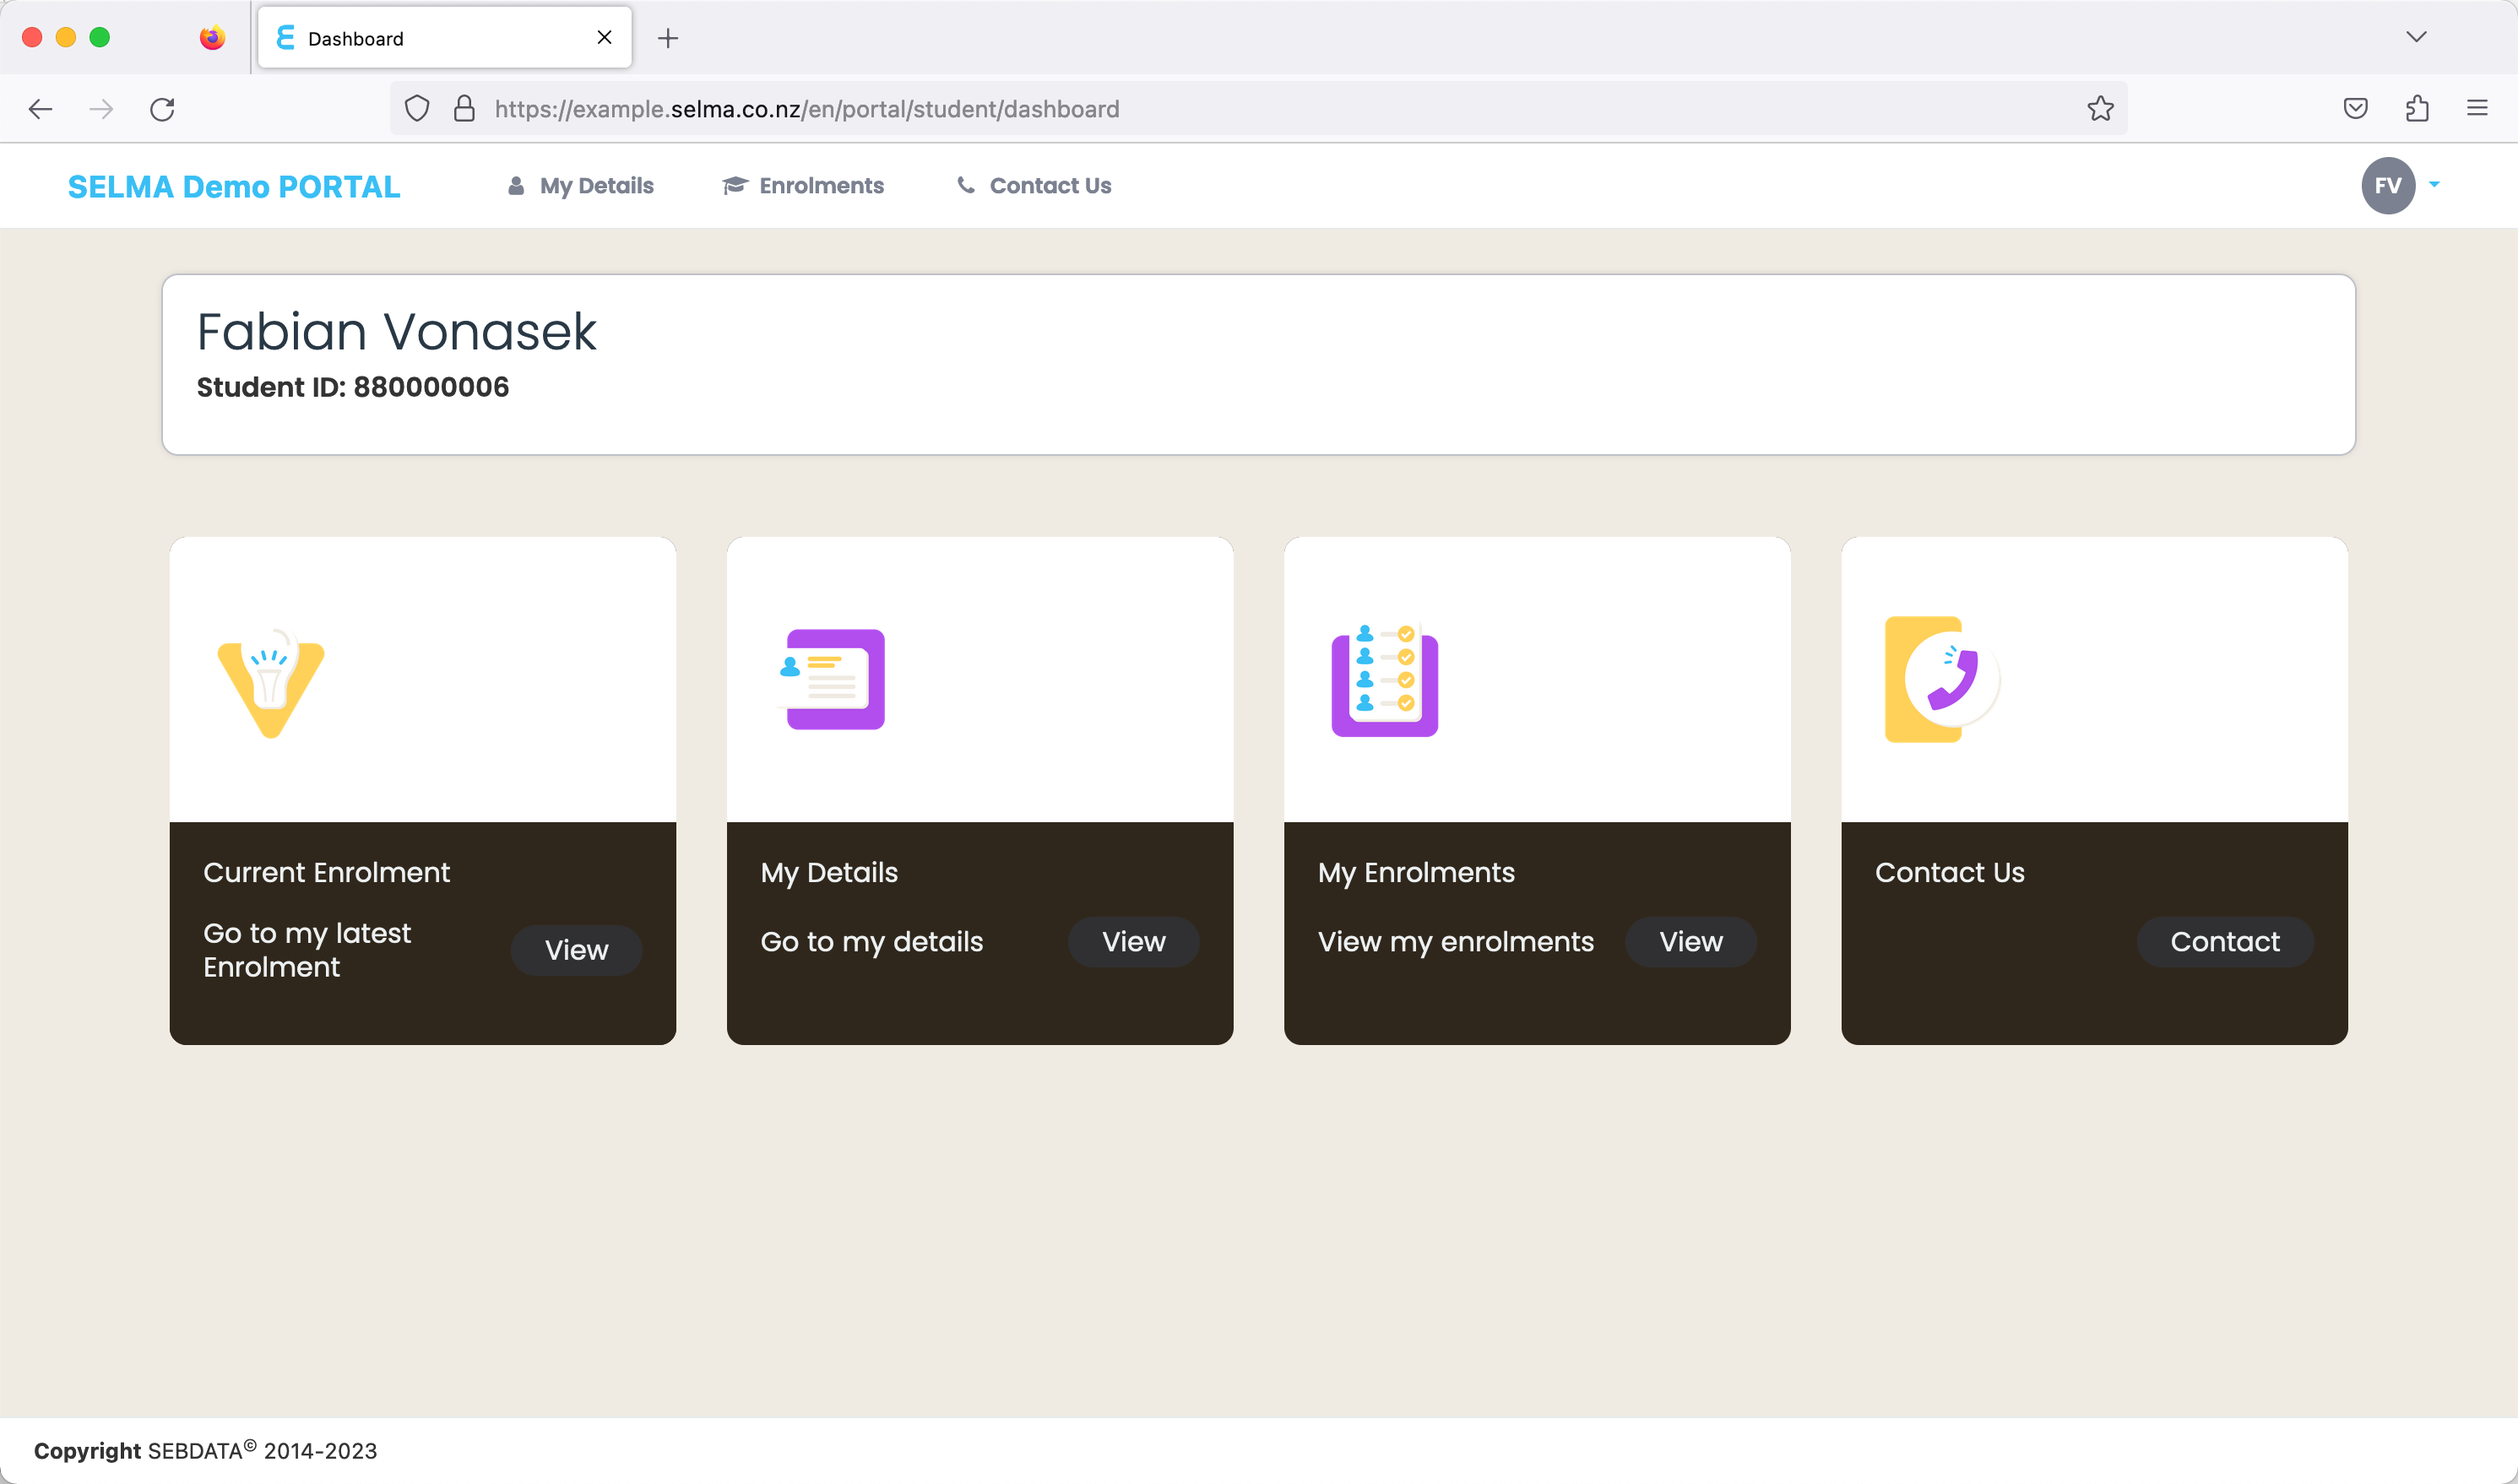
From the main menu, the student can reset their password or log out when clicking on their initials on the top right of the page. They can also jump to their enrolments, contact your school, or check their personal details. The main menu shows the same options as the tiles on the dashboard and will forward the student to the same functions:

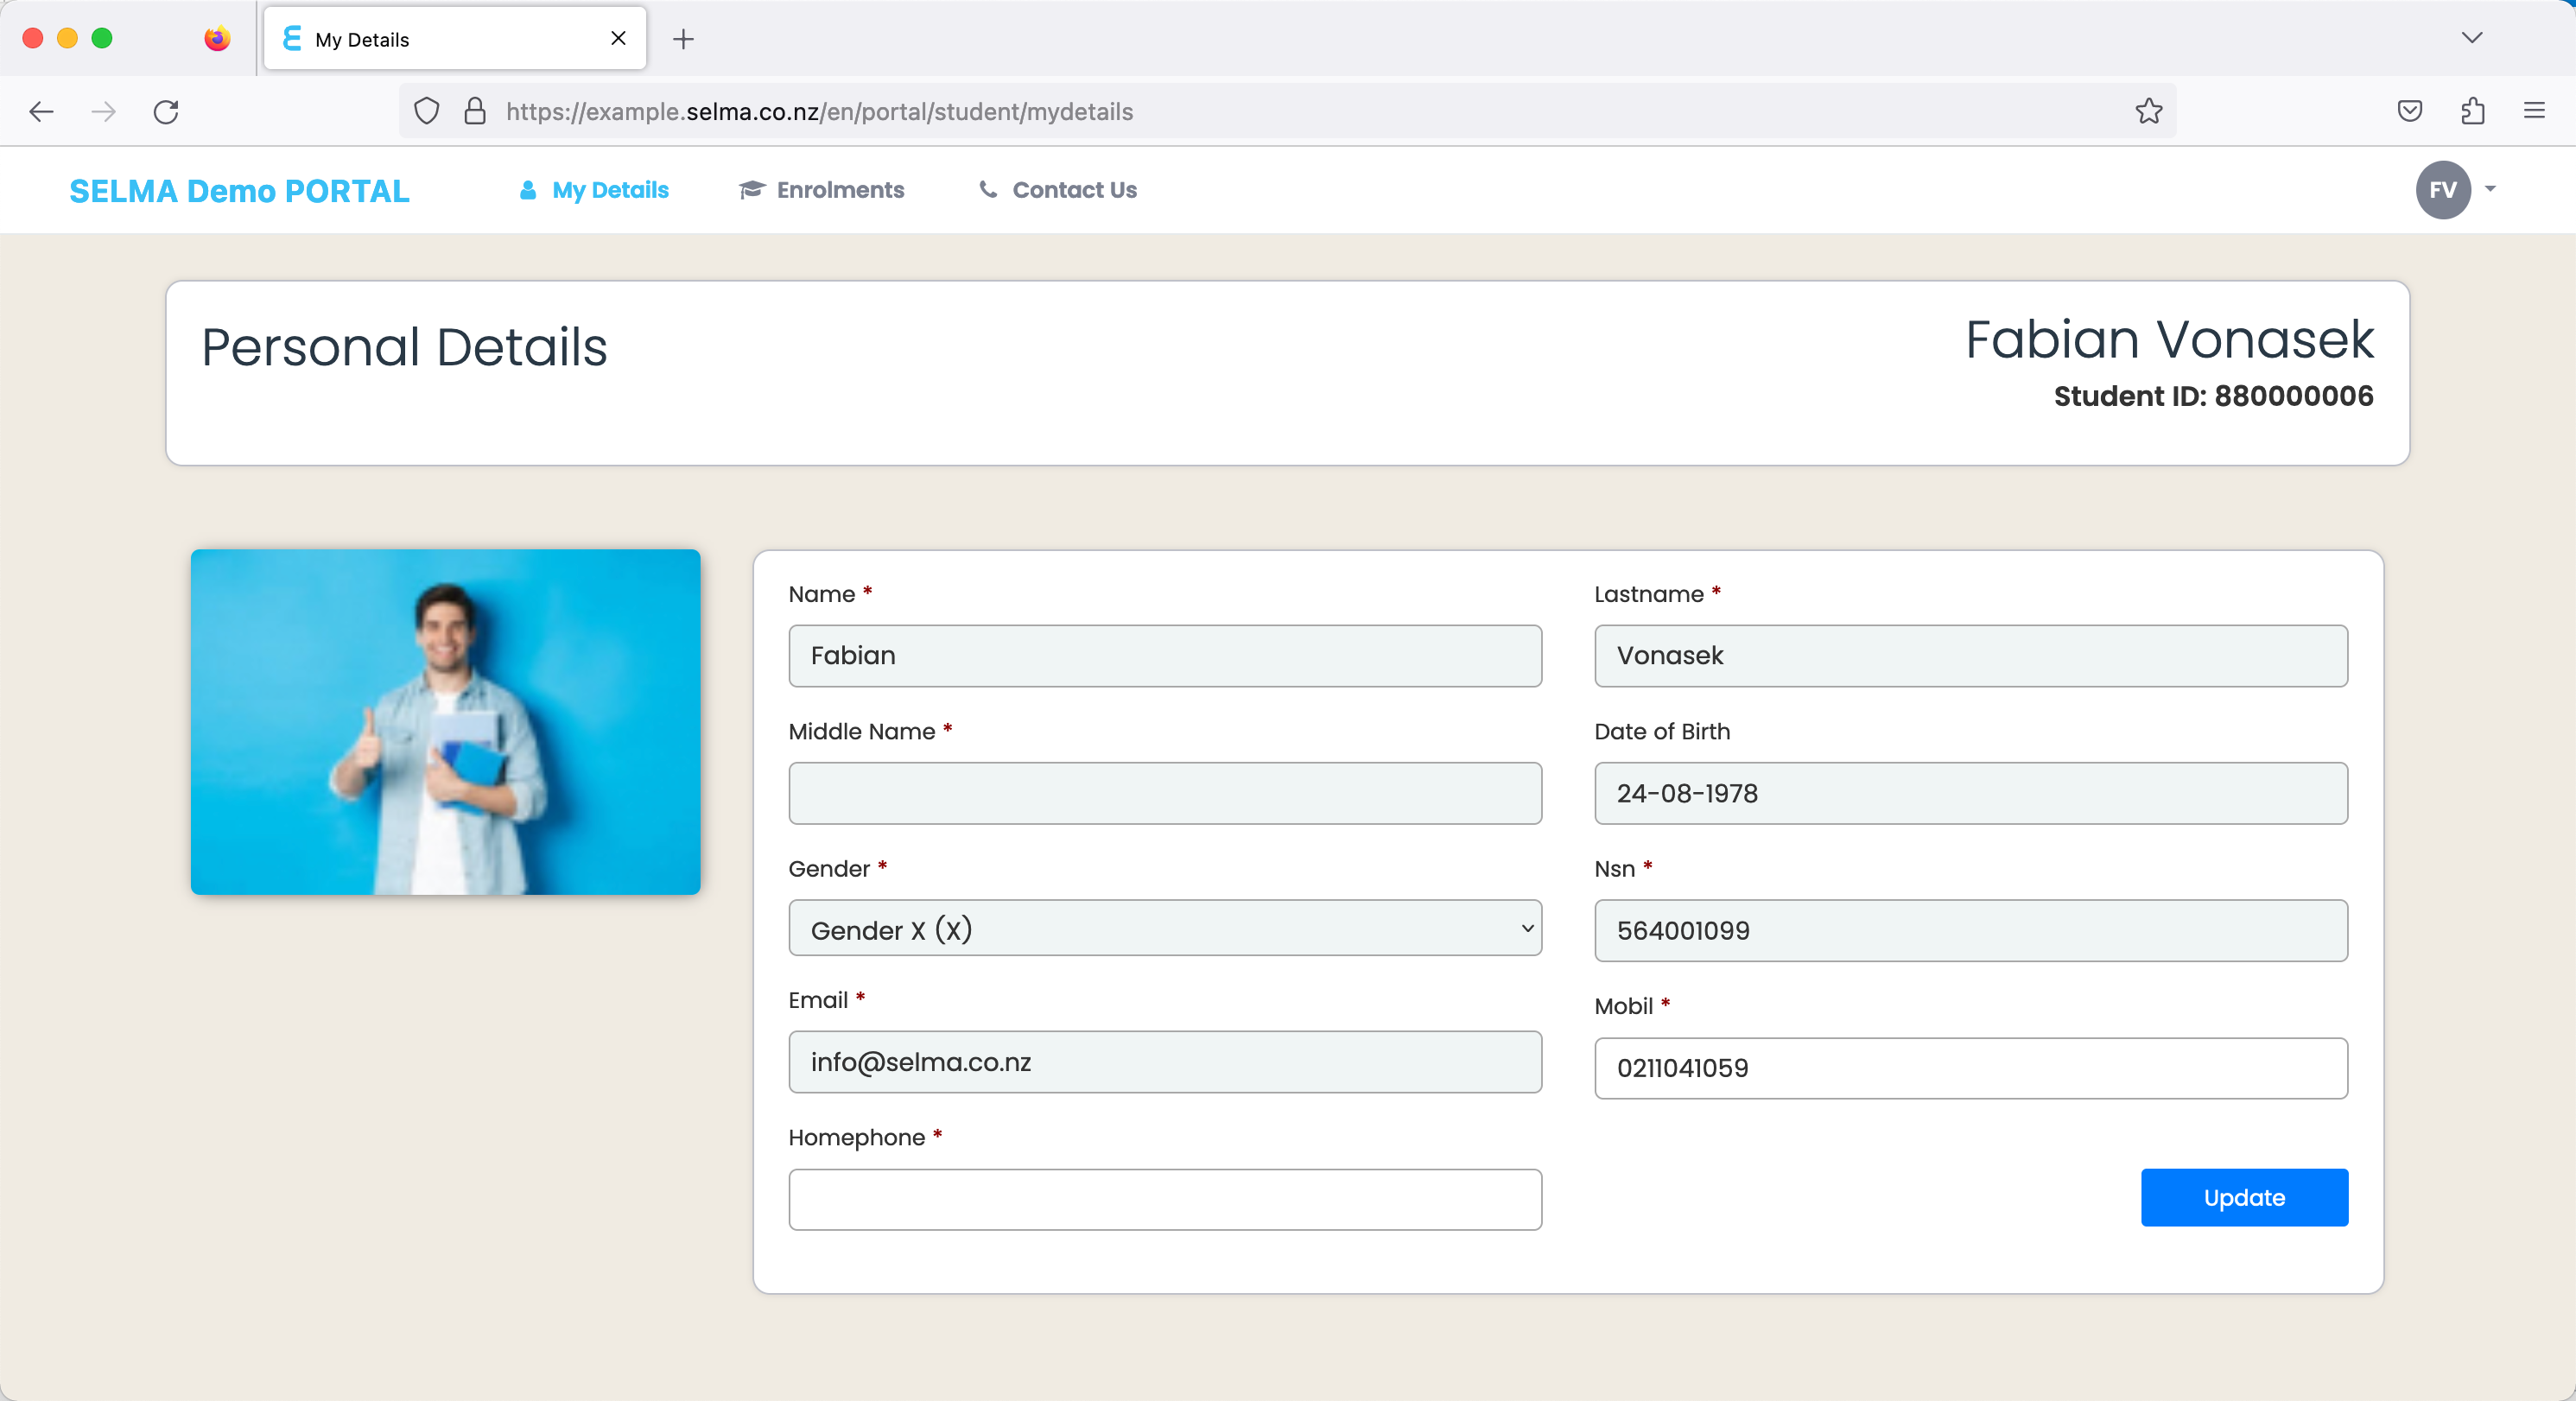
My Details
Clicking in the “My Details” tile or menu will forward the student to their personal data. They can see their current information, contact data and addresses.
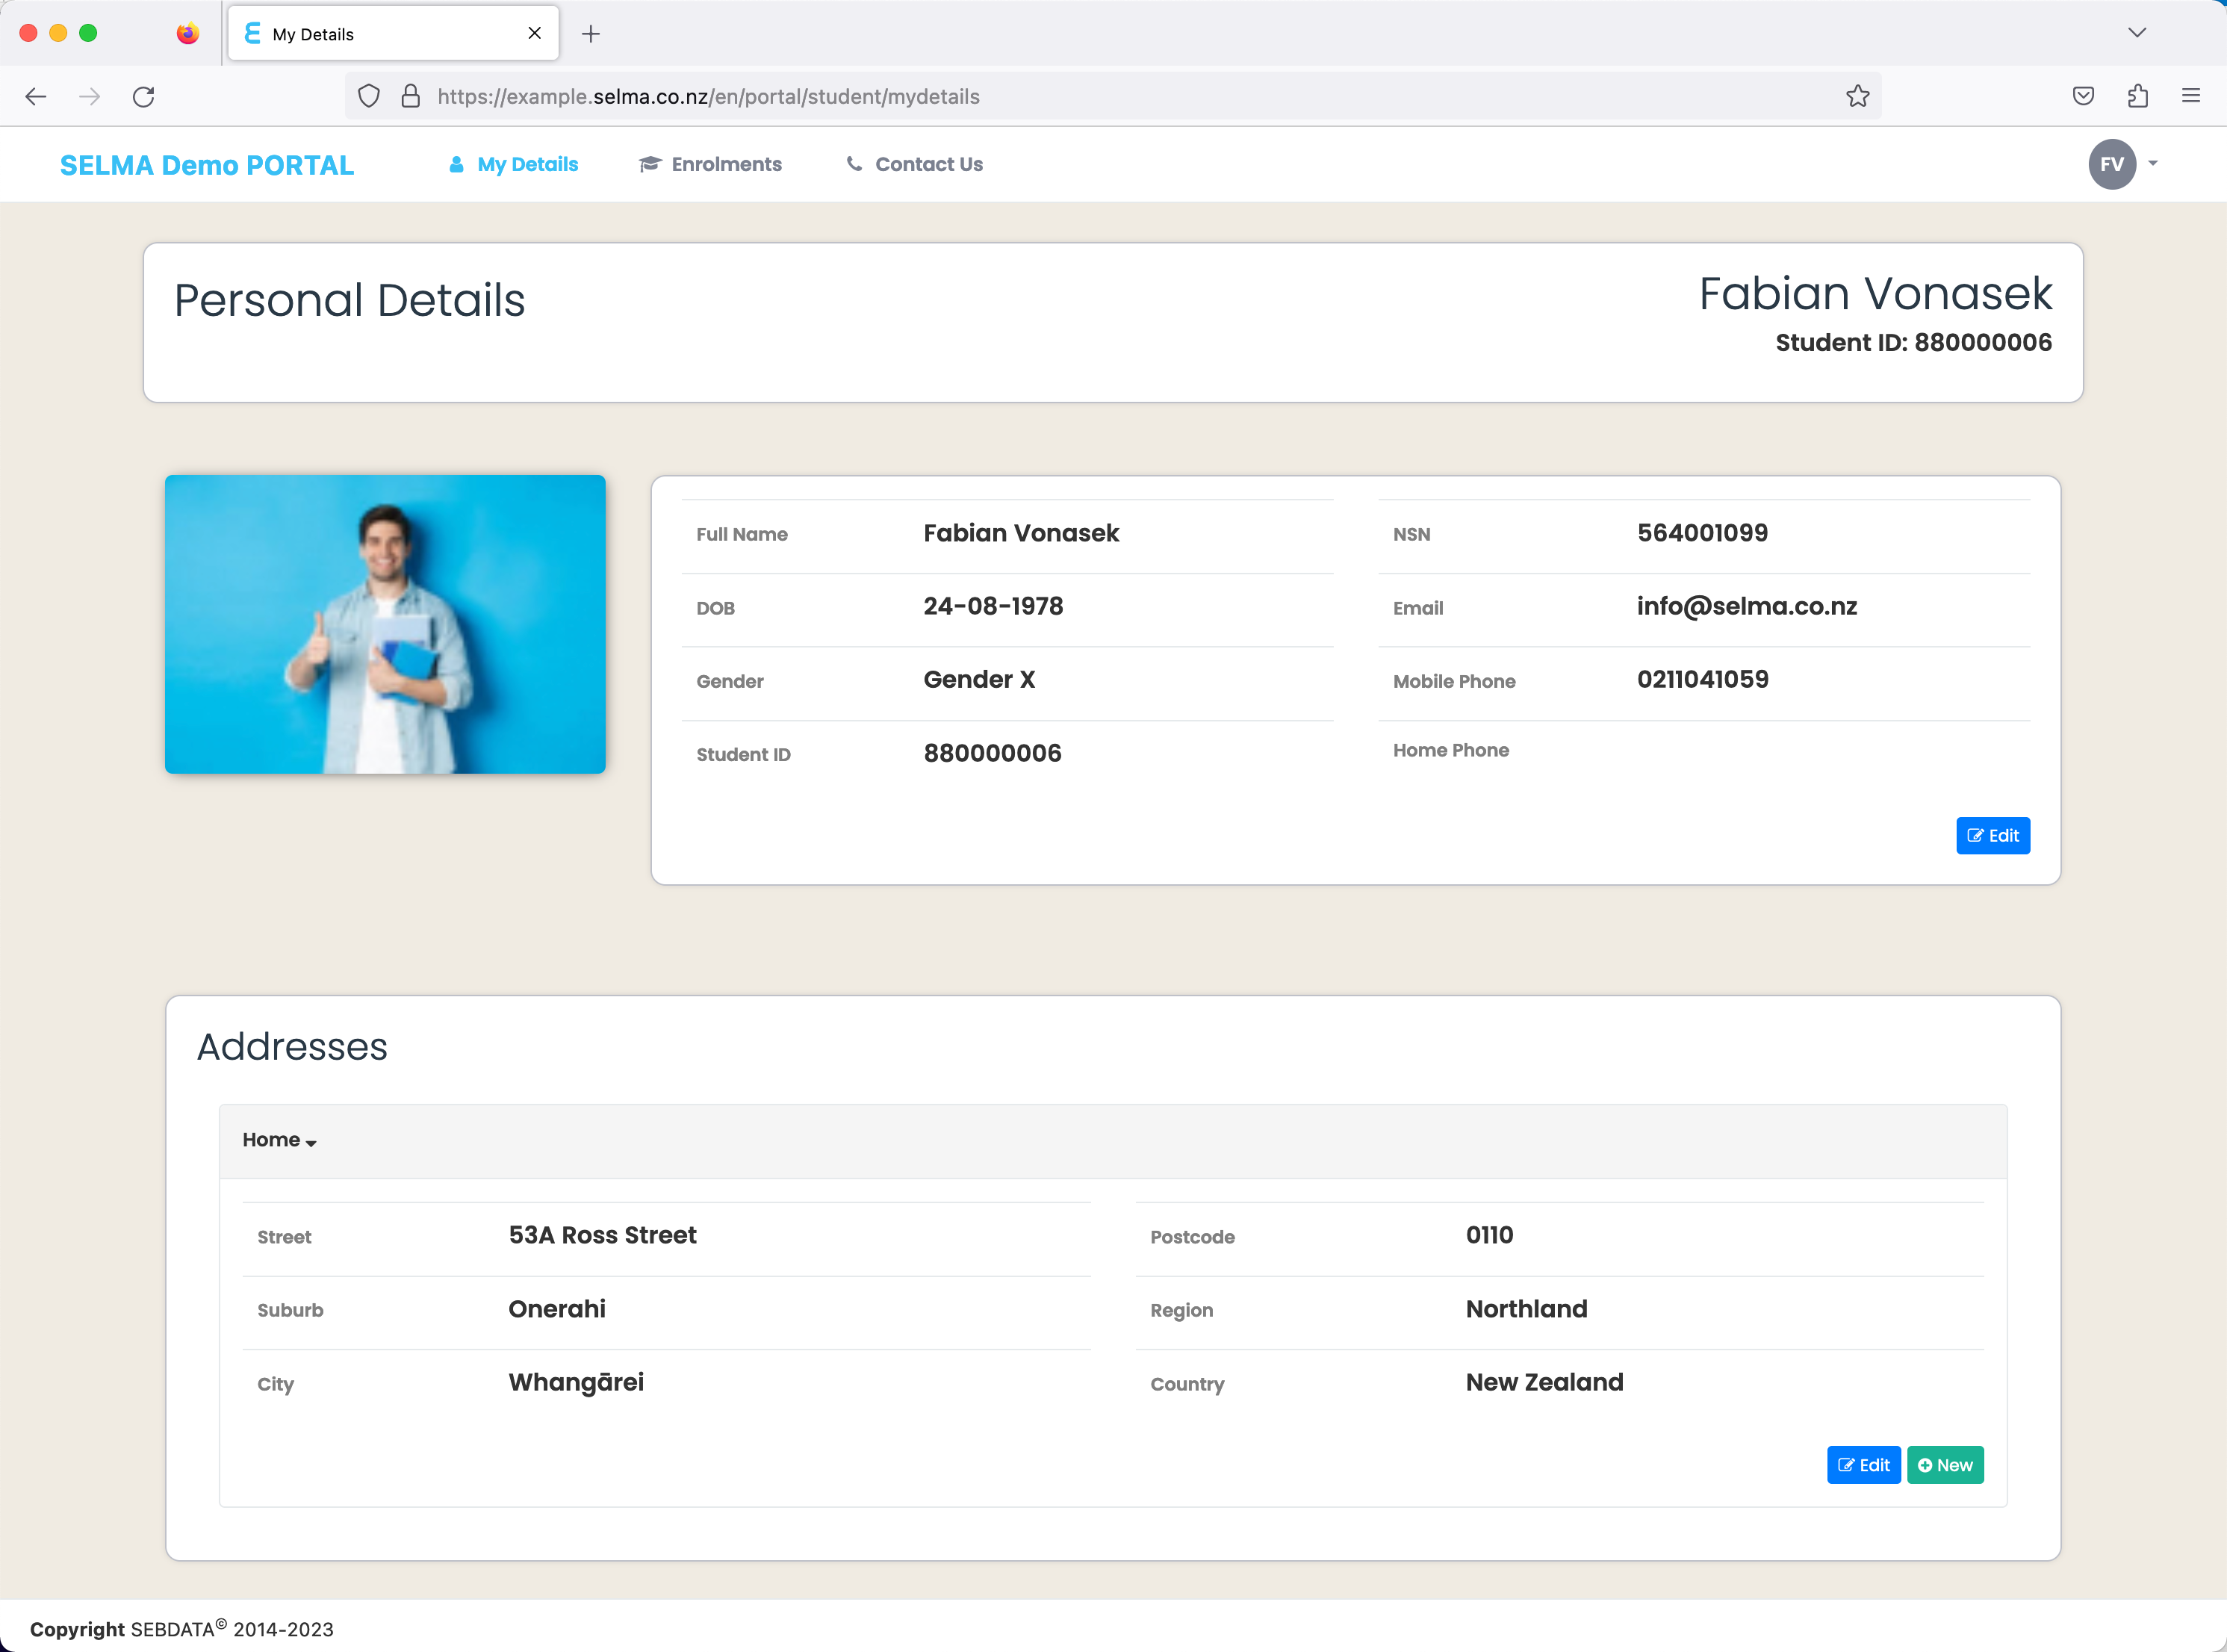
Updating contact information and adding addresses
How much the students can change from this menu can be configured by the SELMA team when we setup your student portal subscription. By default, they can update or add addresses, and change their phone numbers.
Further details could me made editable but changing email addresses can cause issues with login in later and the other information might interfere with compliance data.
My Enrolments
From the “My Enrolments” tile or from the “Enrolments” menu, the student can get to a page where they see all their enrolments. They may only see one or potentially no enrolment if you have invited them to the portal before they were enrolled into a programme in SELMA.

The tiles will show the current statuses of the enrolments and it is possible that a student sees a withdrawn past enrolment here. The “View” option will bring the student to the details of the enrolment (shown later in this manual).
Contact Us
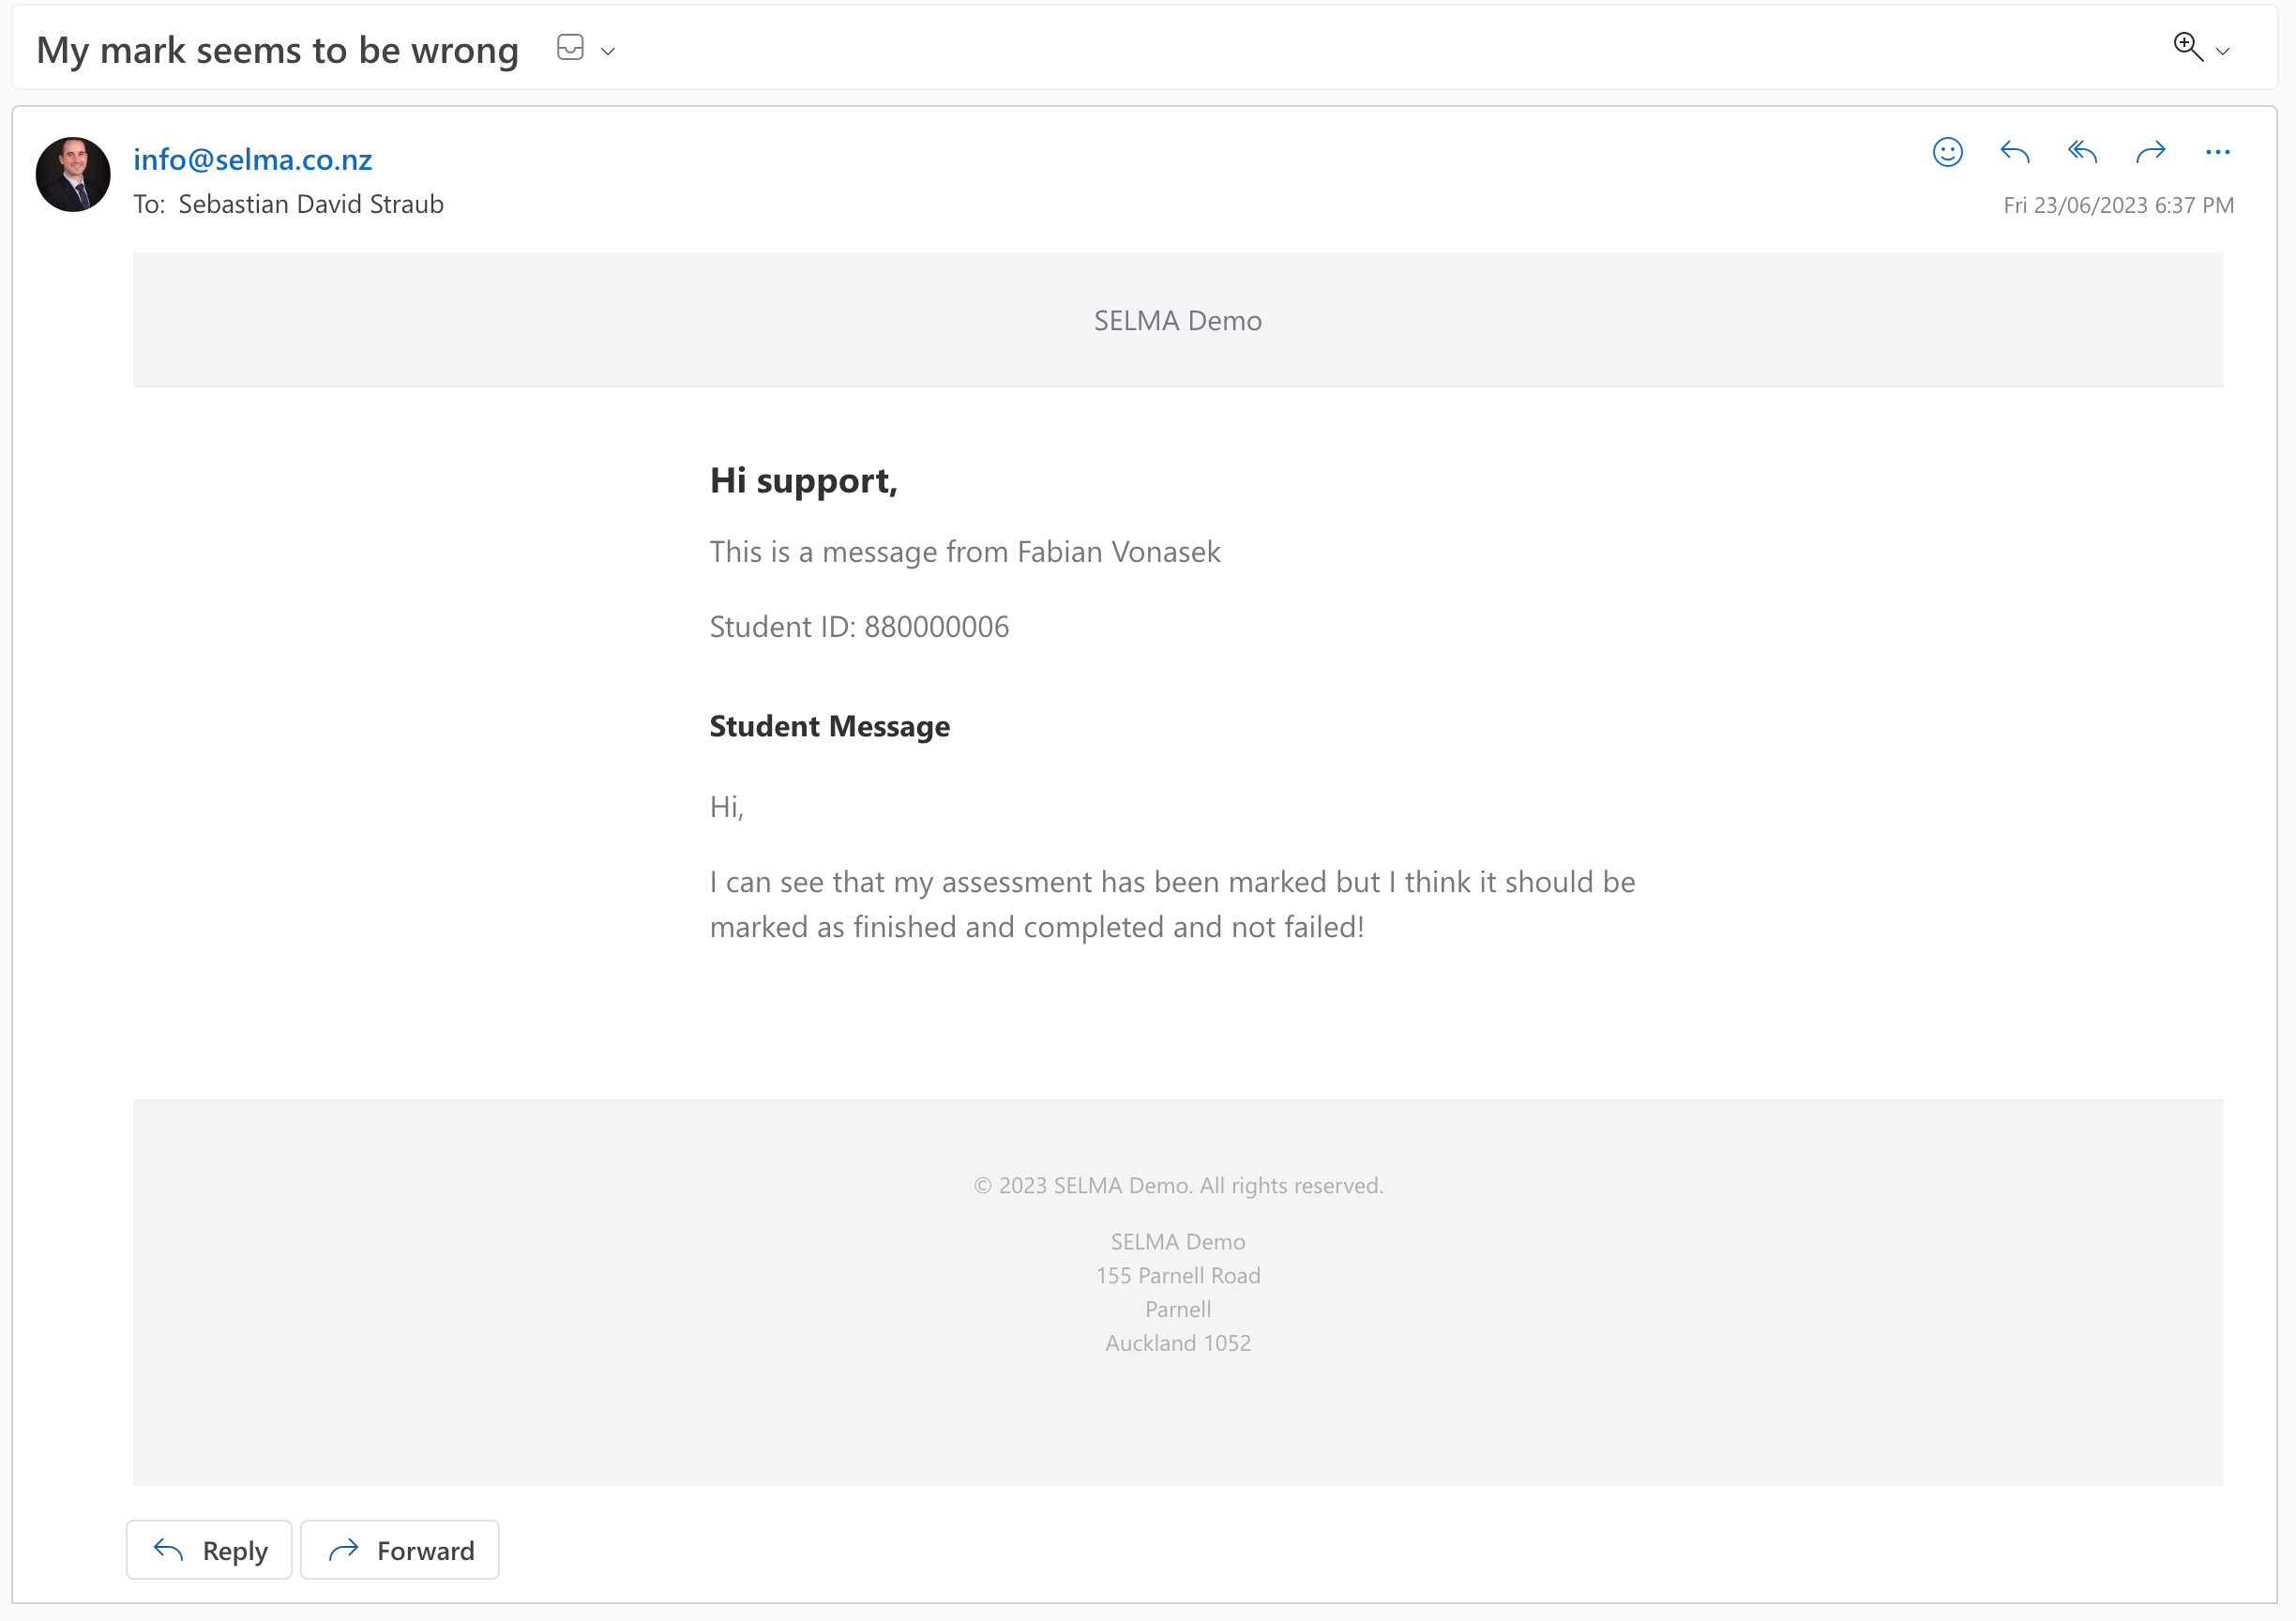
The student can also contact your support team from here. They can see the contact details you have set in the “My Organisation” menu in the SELMA Admin module and they can email the support address you defined there as well.
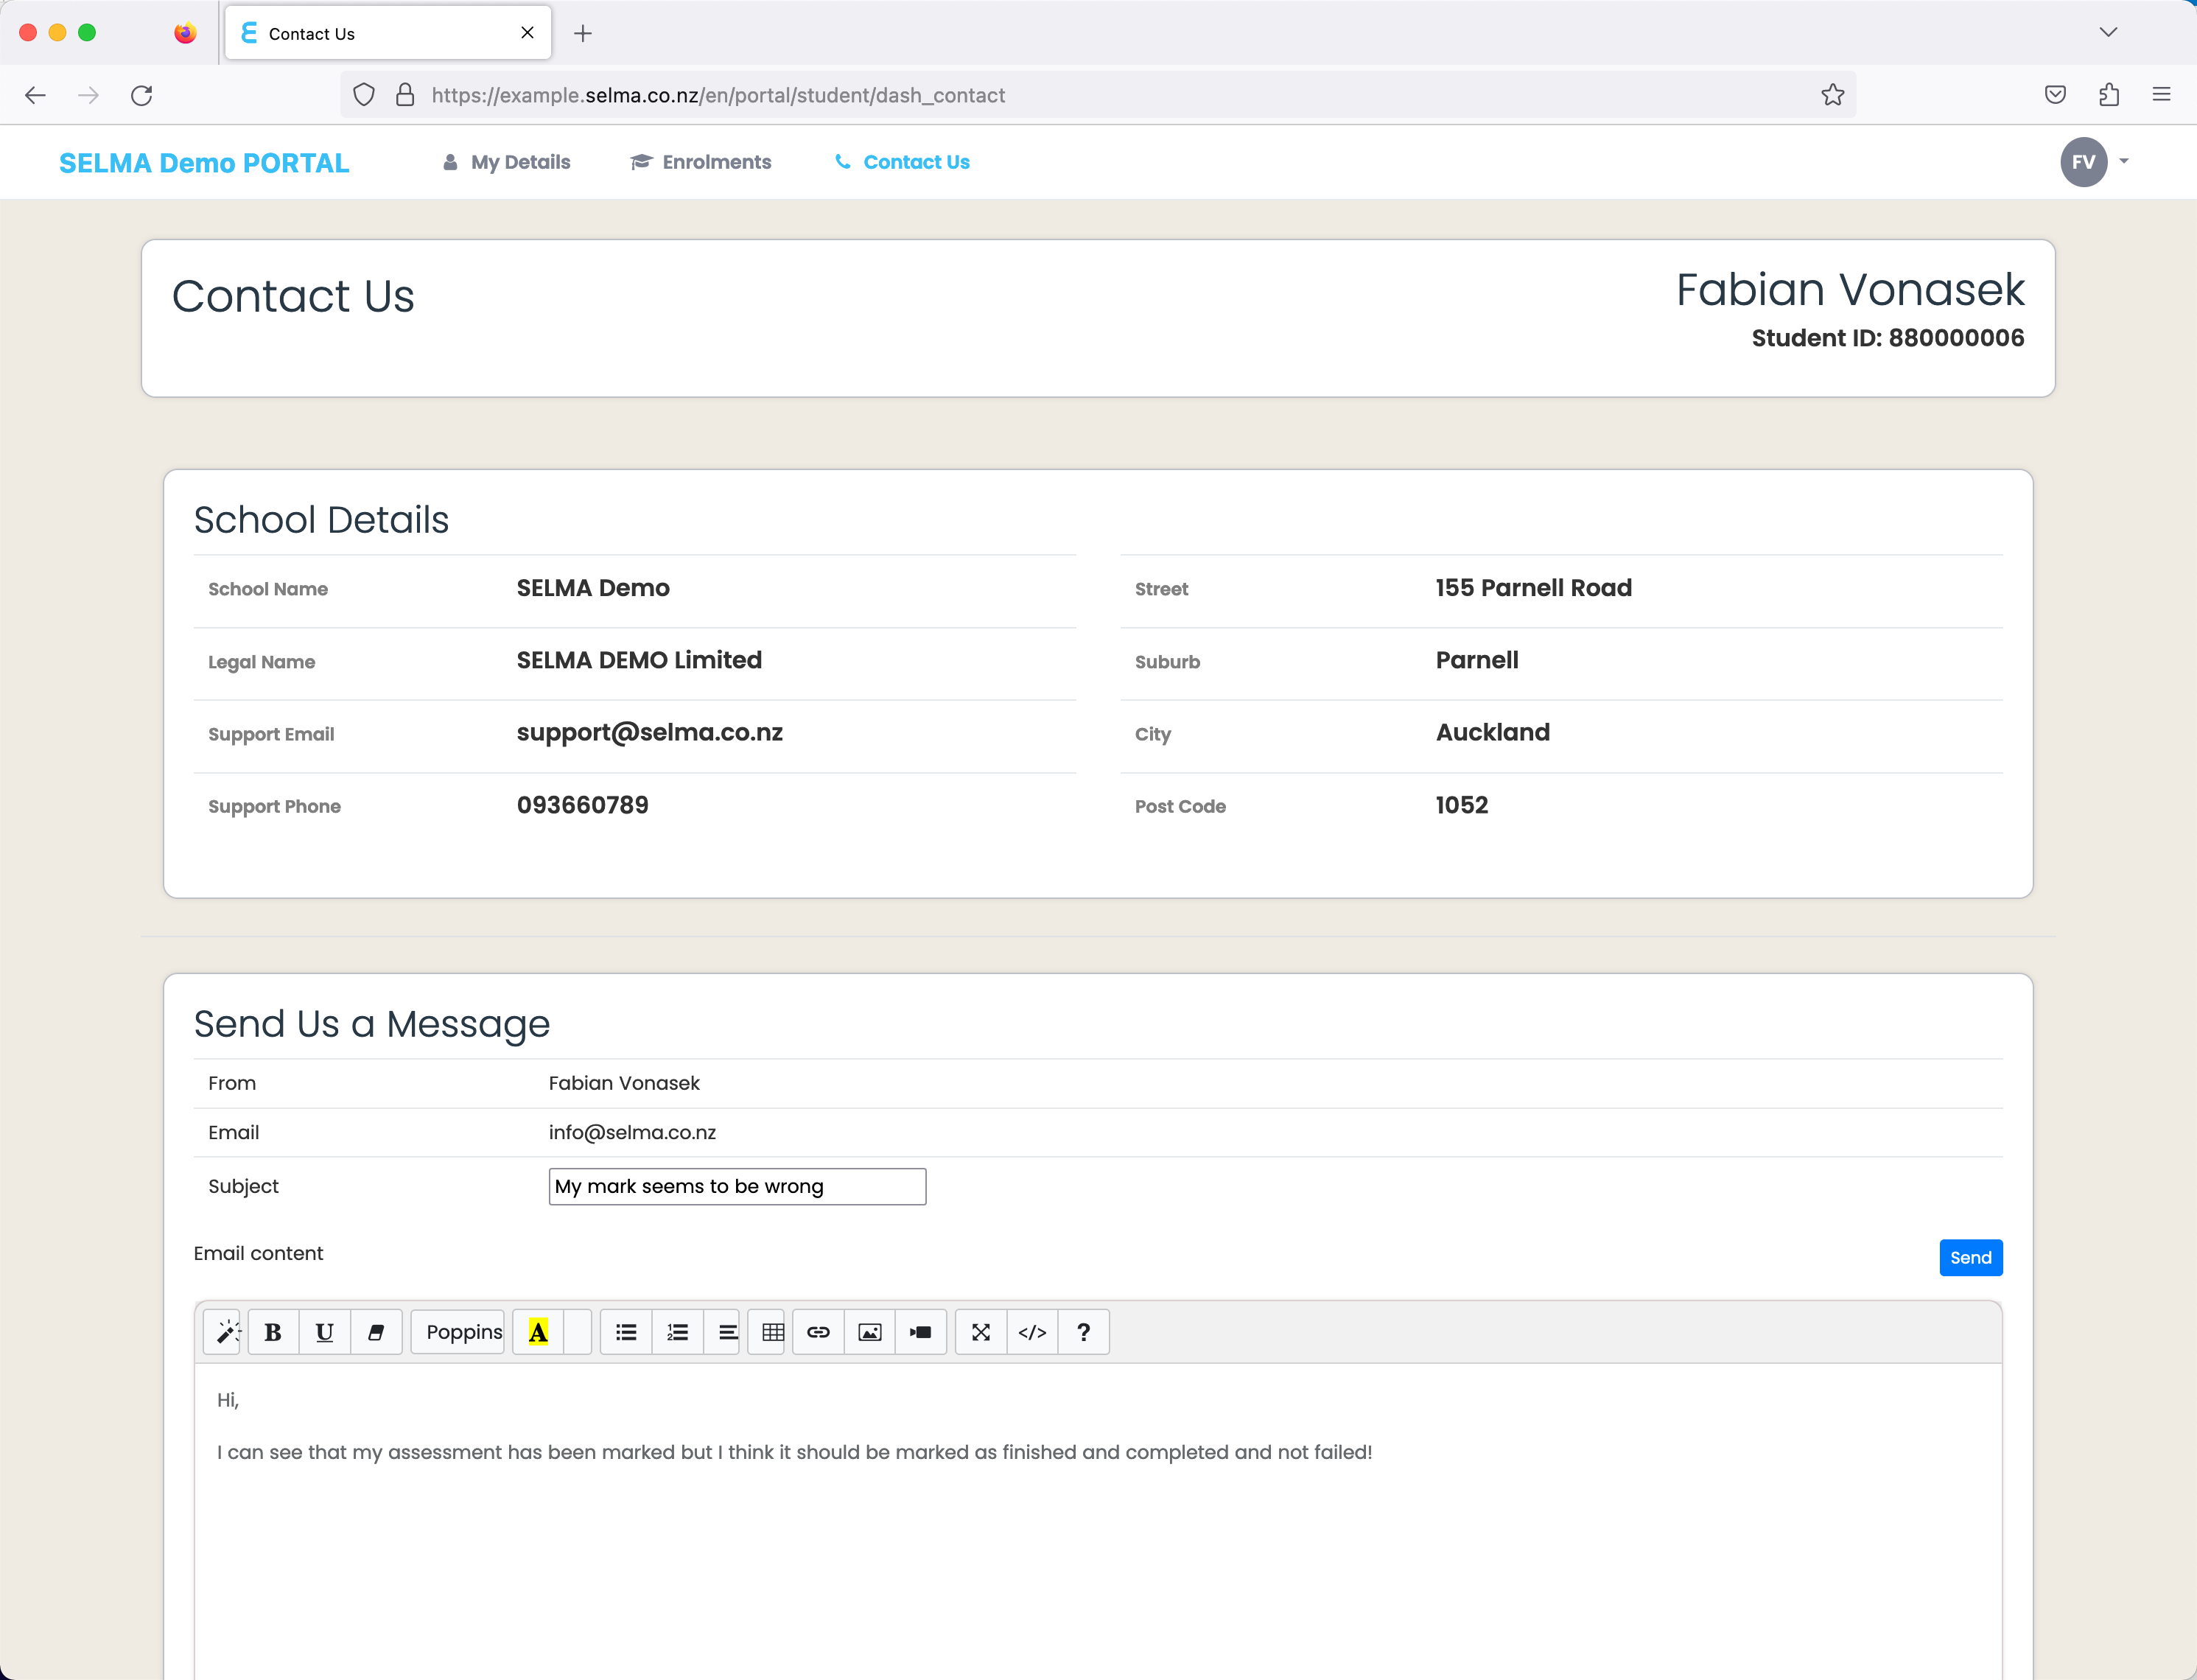
Below is an example of an email that was sent by a student to your support email address:
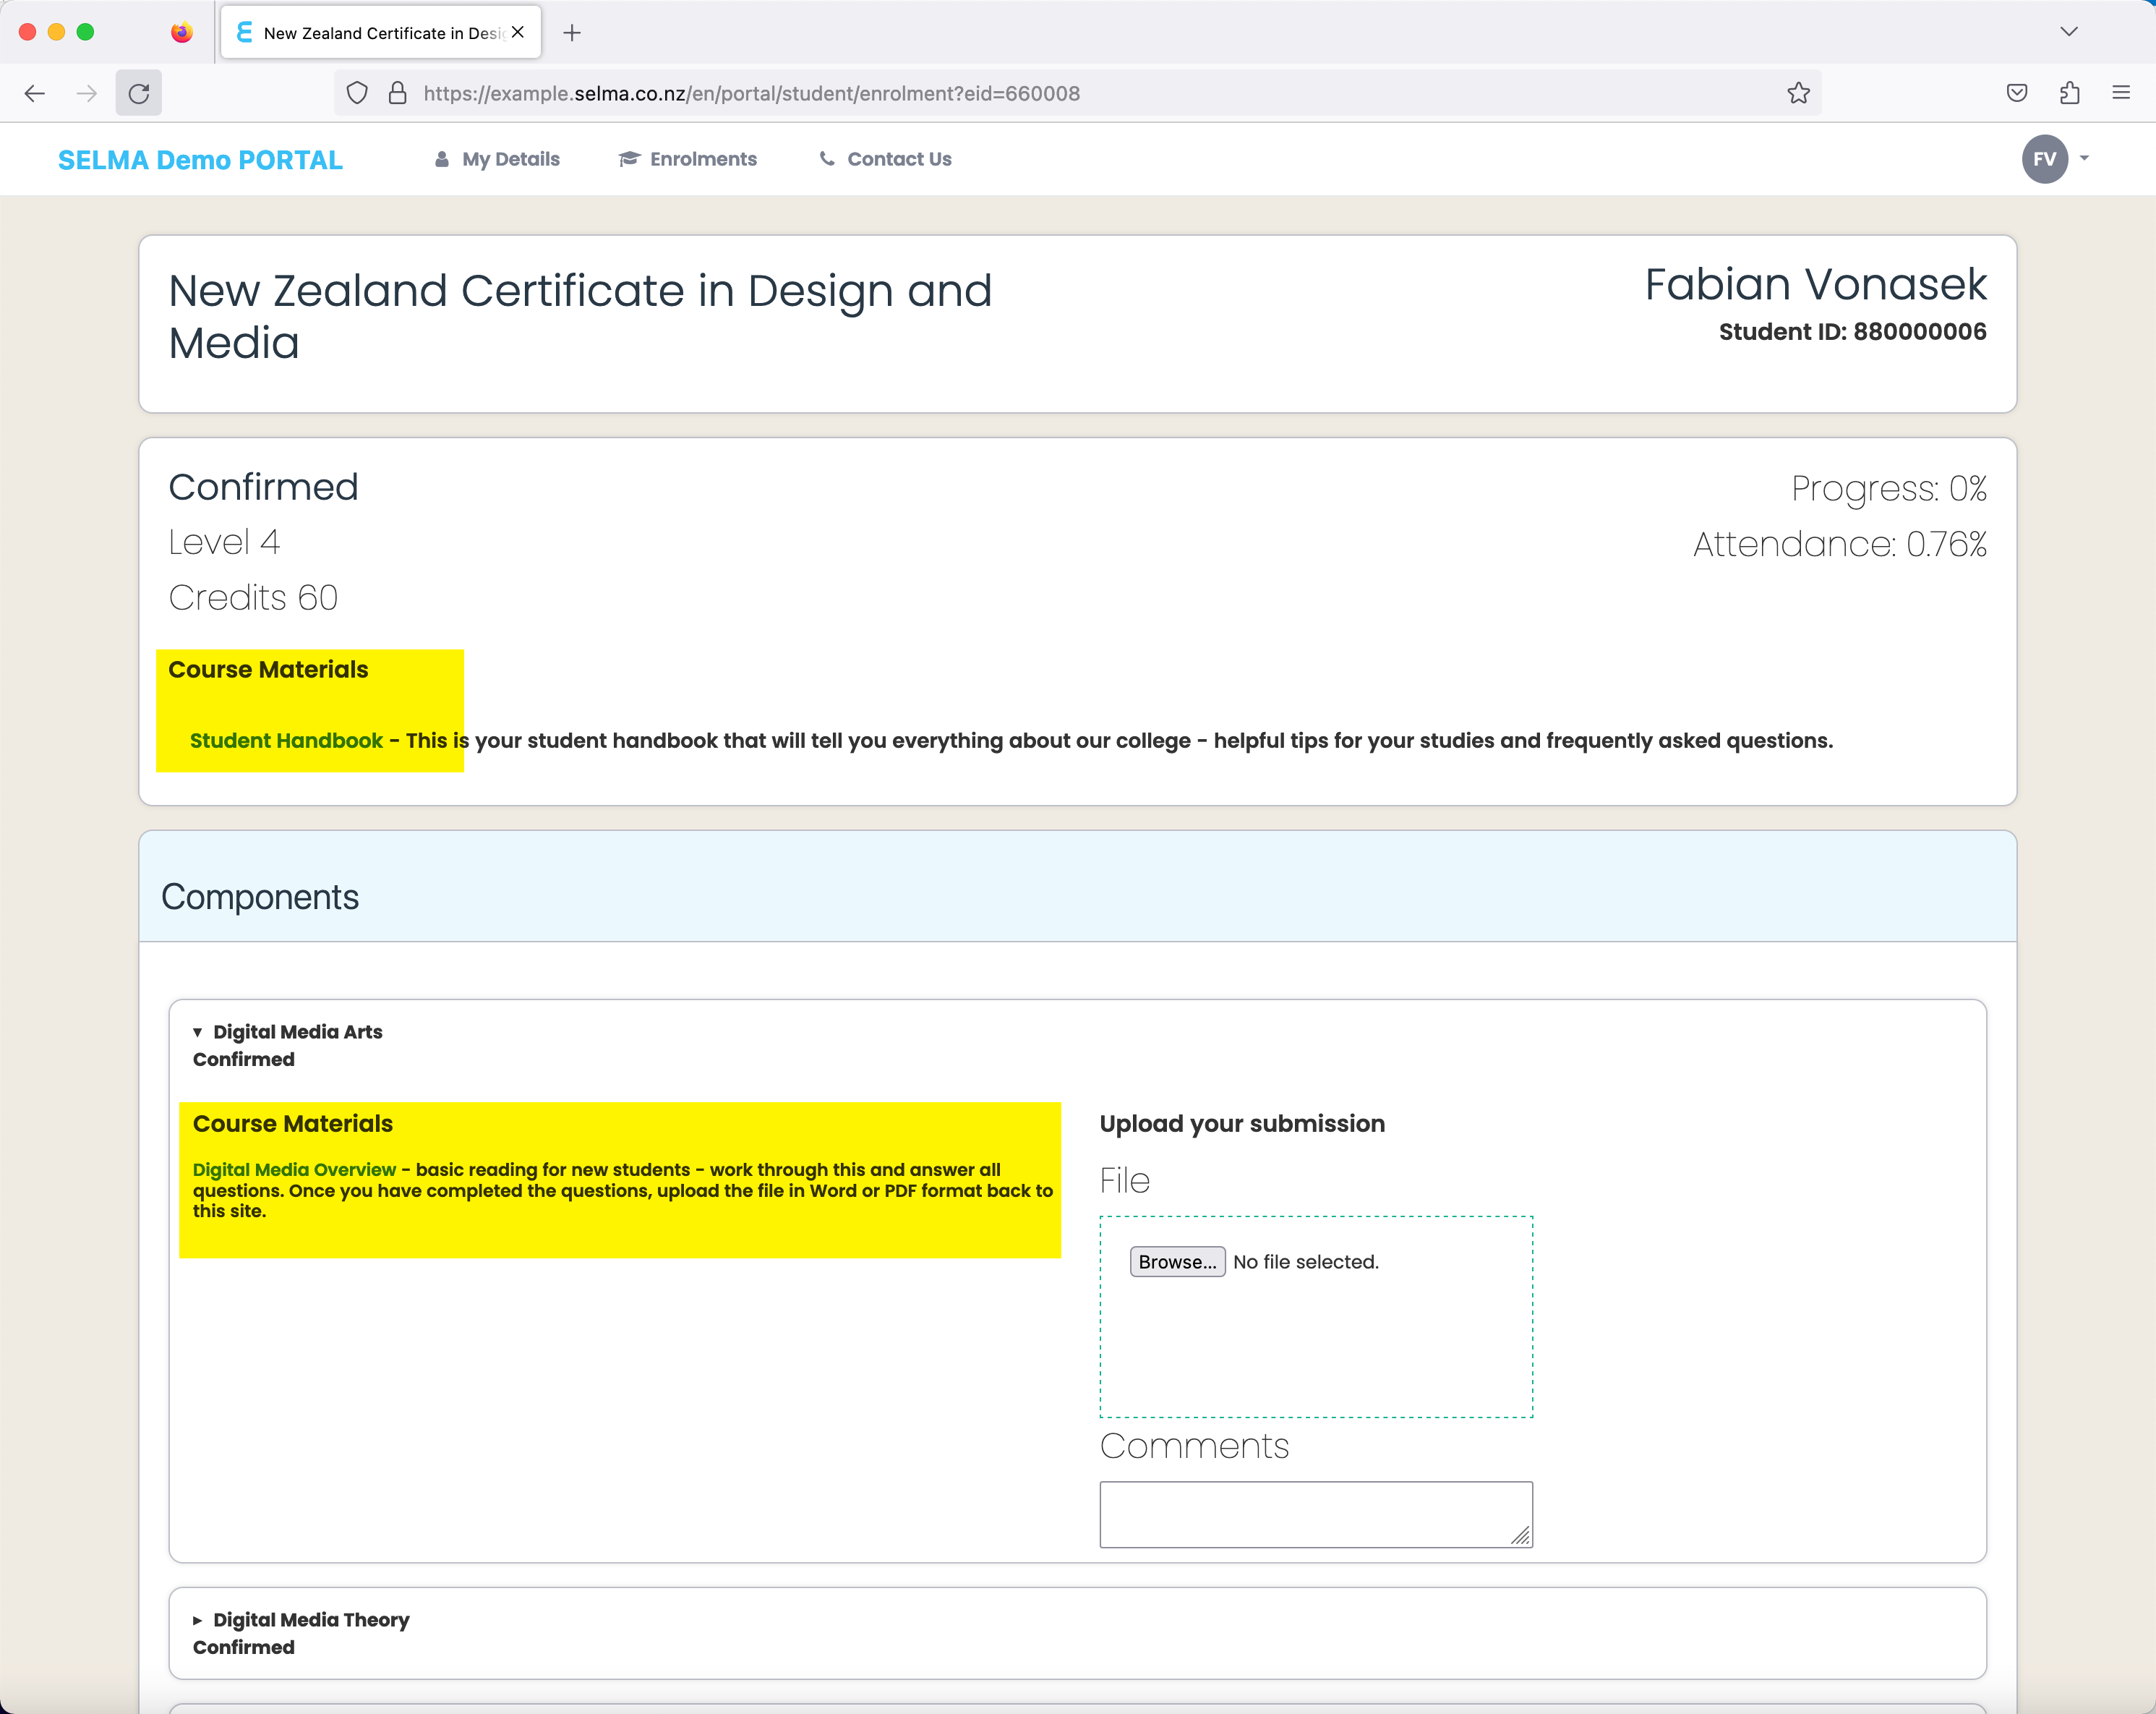
Current Enrolment
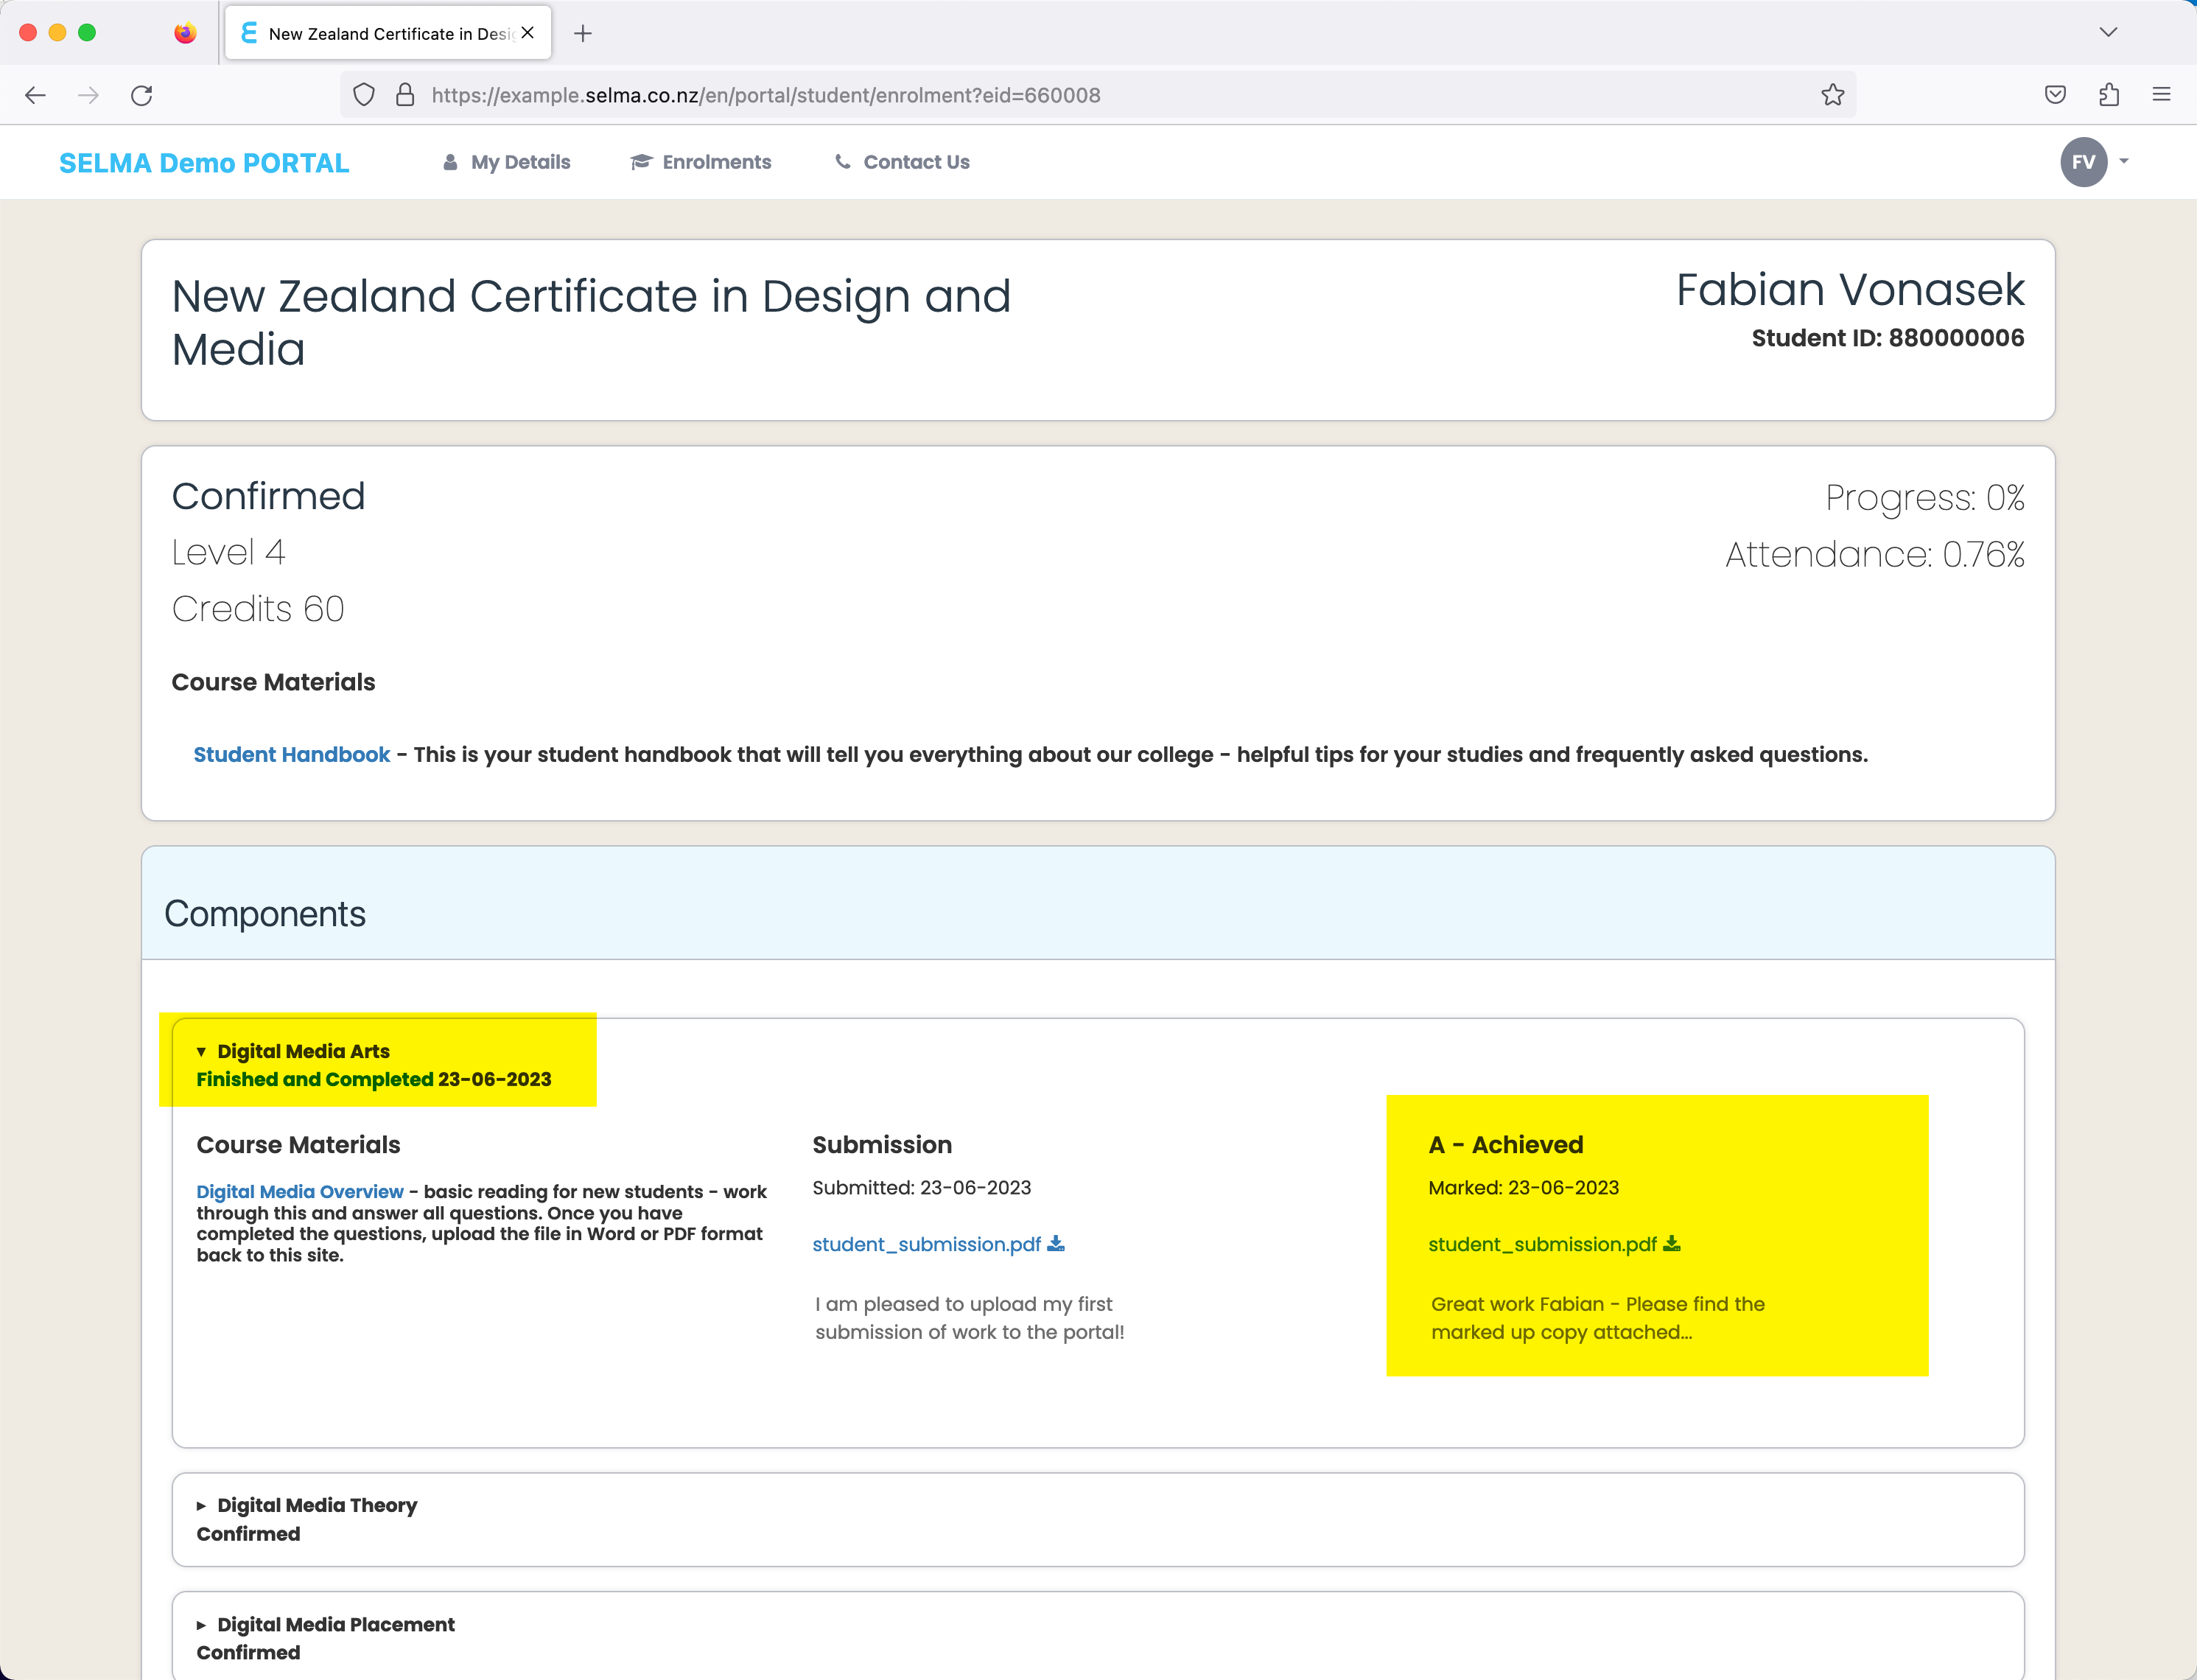
The current enrolment tile will bring the student to their studies. This will be the section the students spend the most time.
In the first section they can see the programme and the status of their studies. The course material presented here is the course material link that you added against the programme.
In the component section, the student can see the links to the course material you have uploaded against each component in the programme. If you have enabled submissions, they can also upload their work here.
Making a Submission
The students can submit an assignment or any piece of file-based work by uploading it to the portal under the correct component. Before they submit it, they can also add a note if they like:
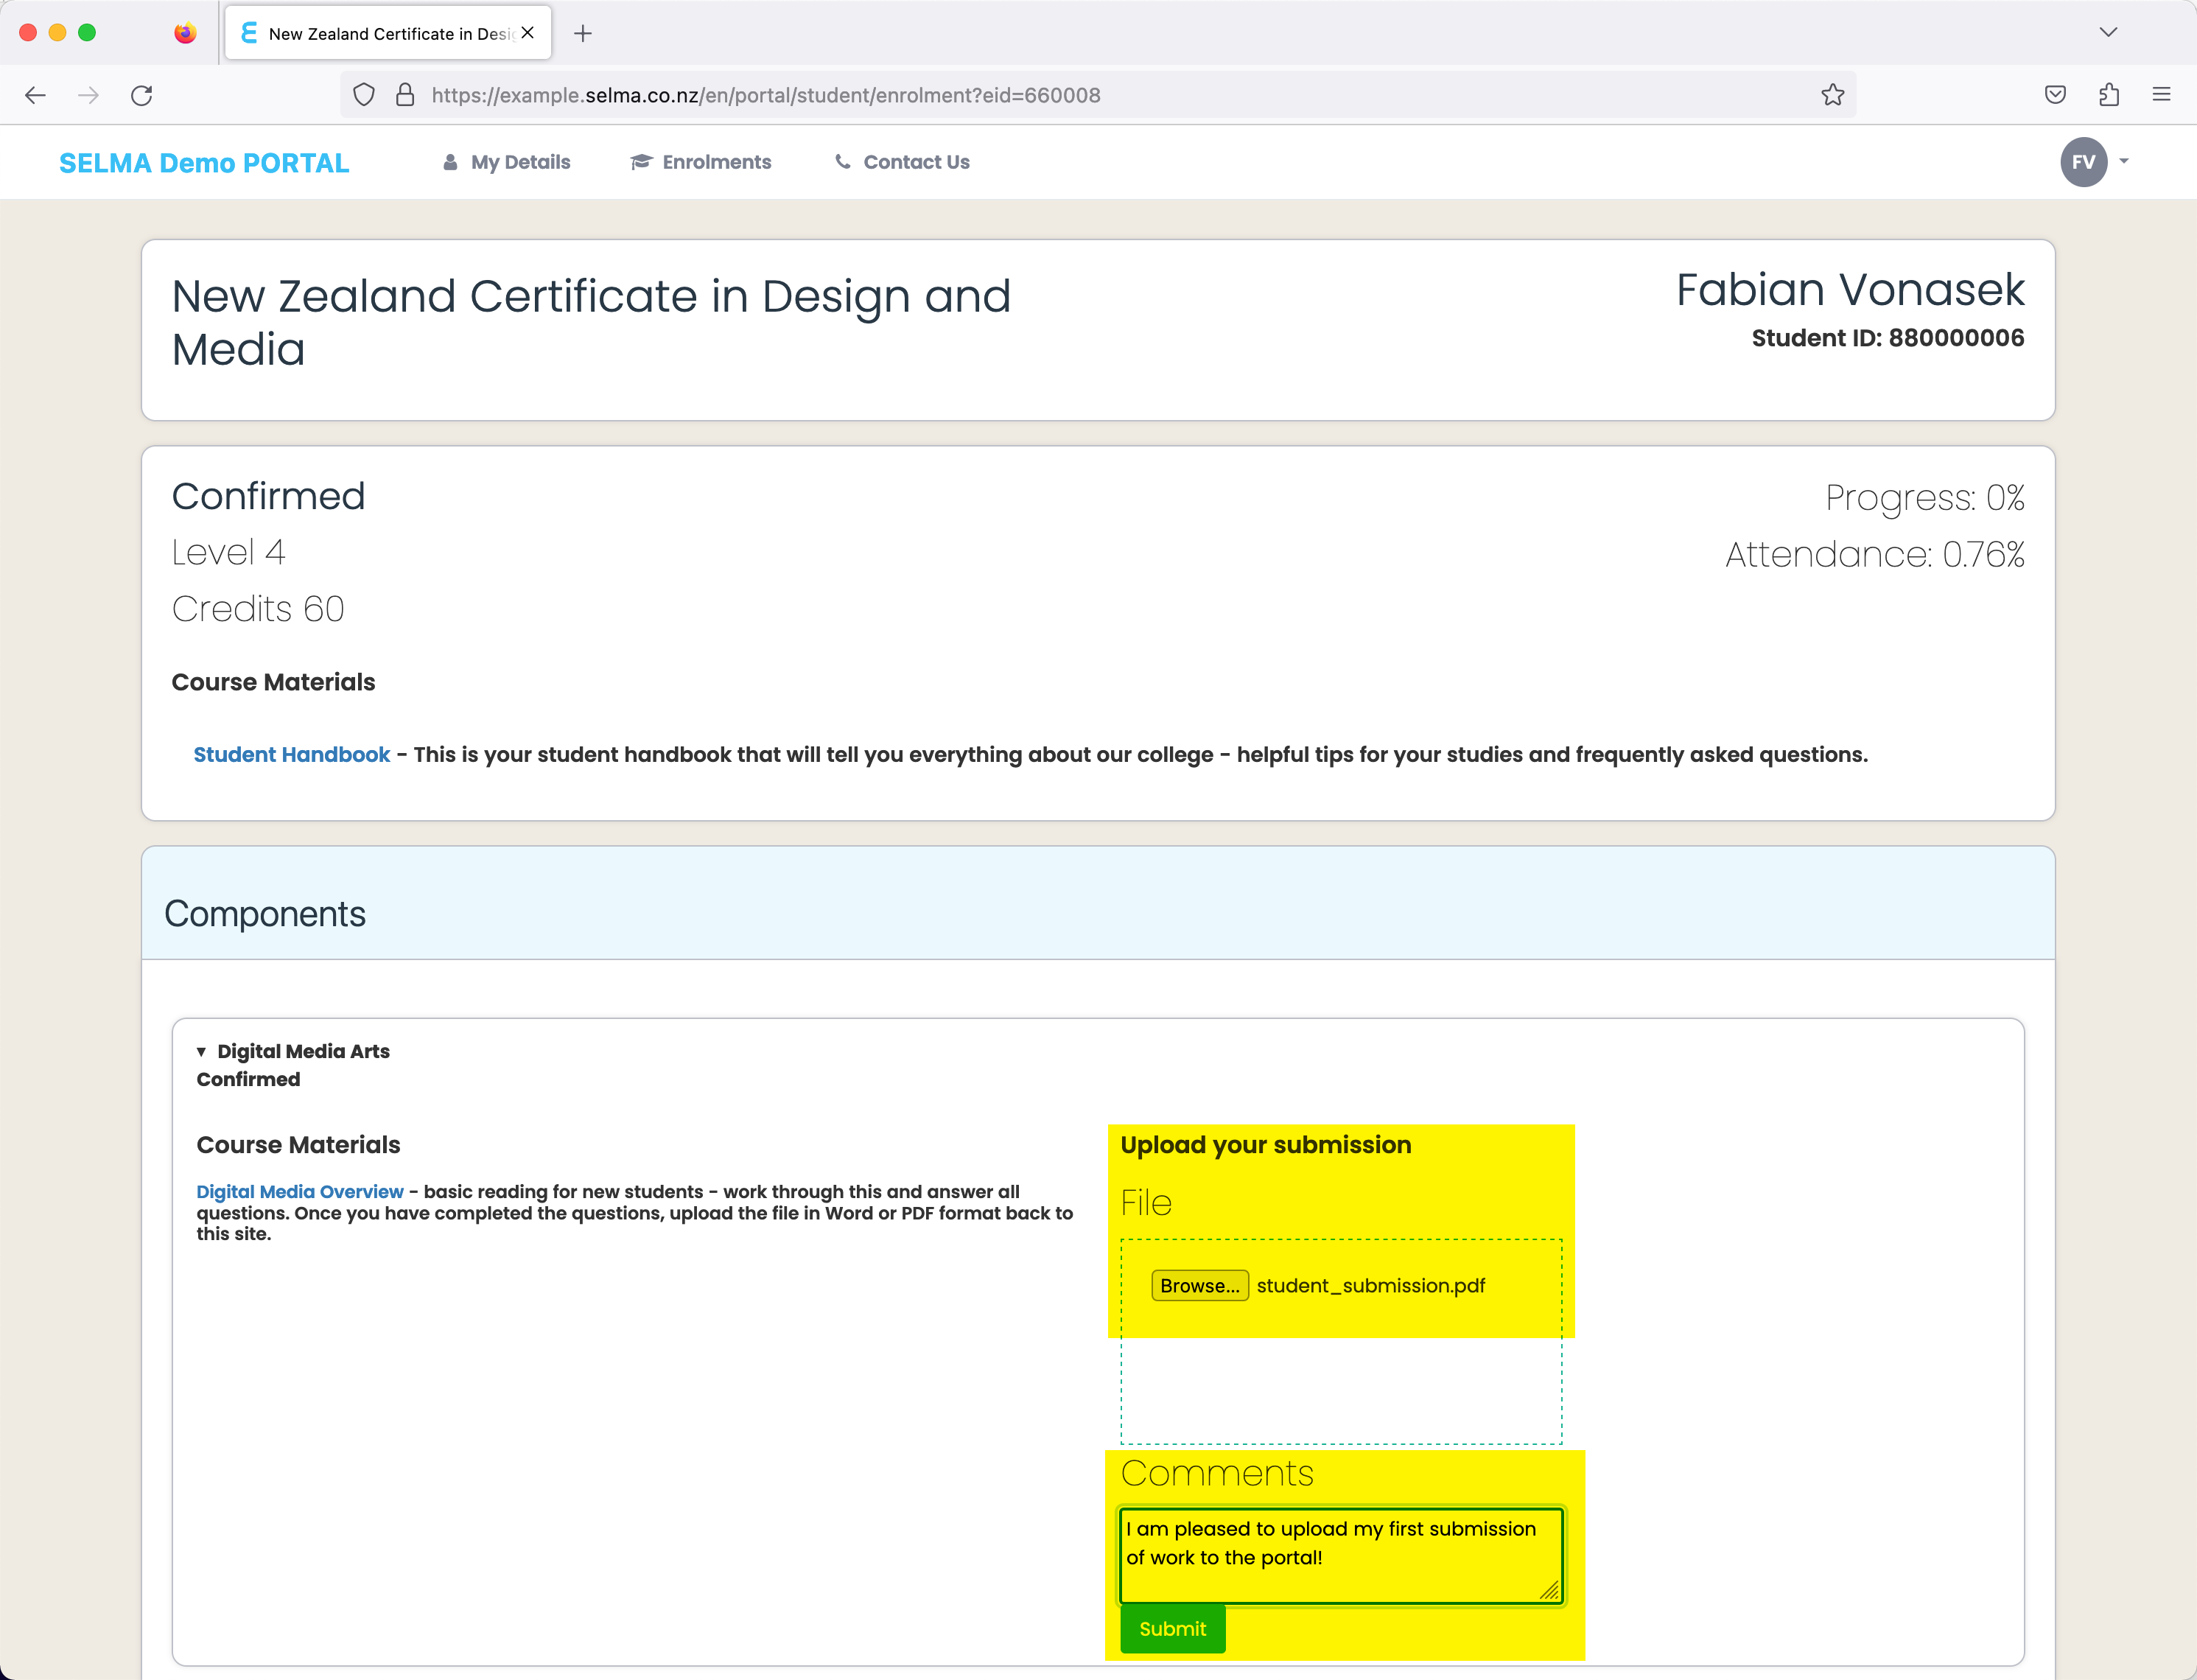
Once the submission has been made, the component will instantly show with a submission and the grade as “Grade Pending”:

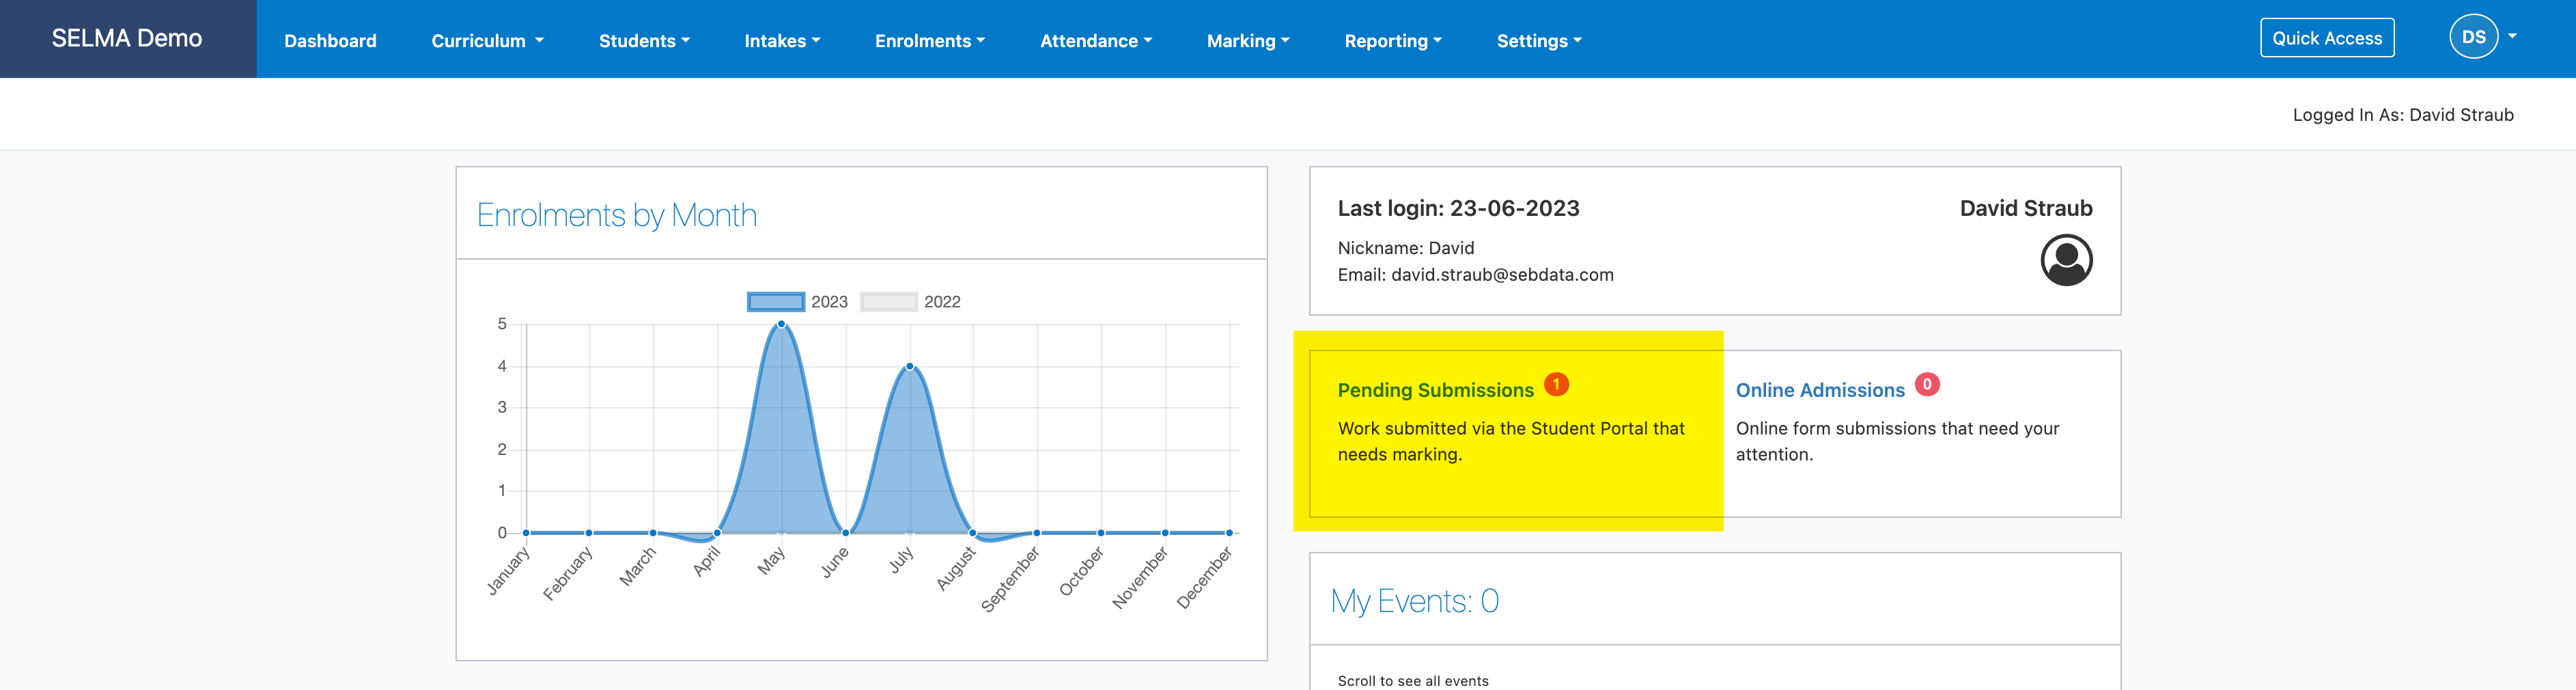
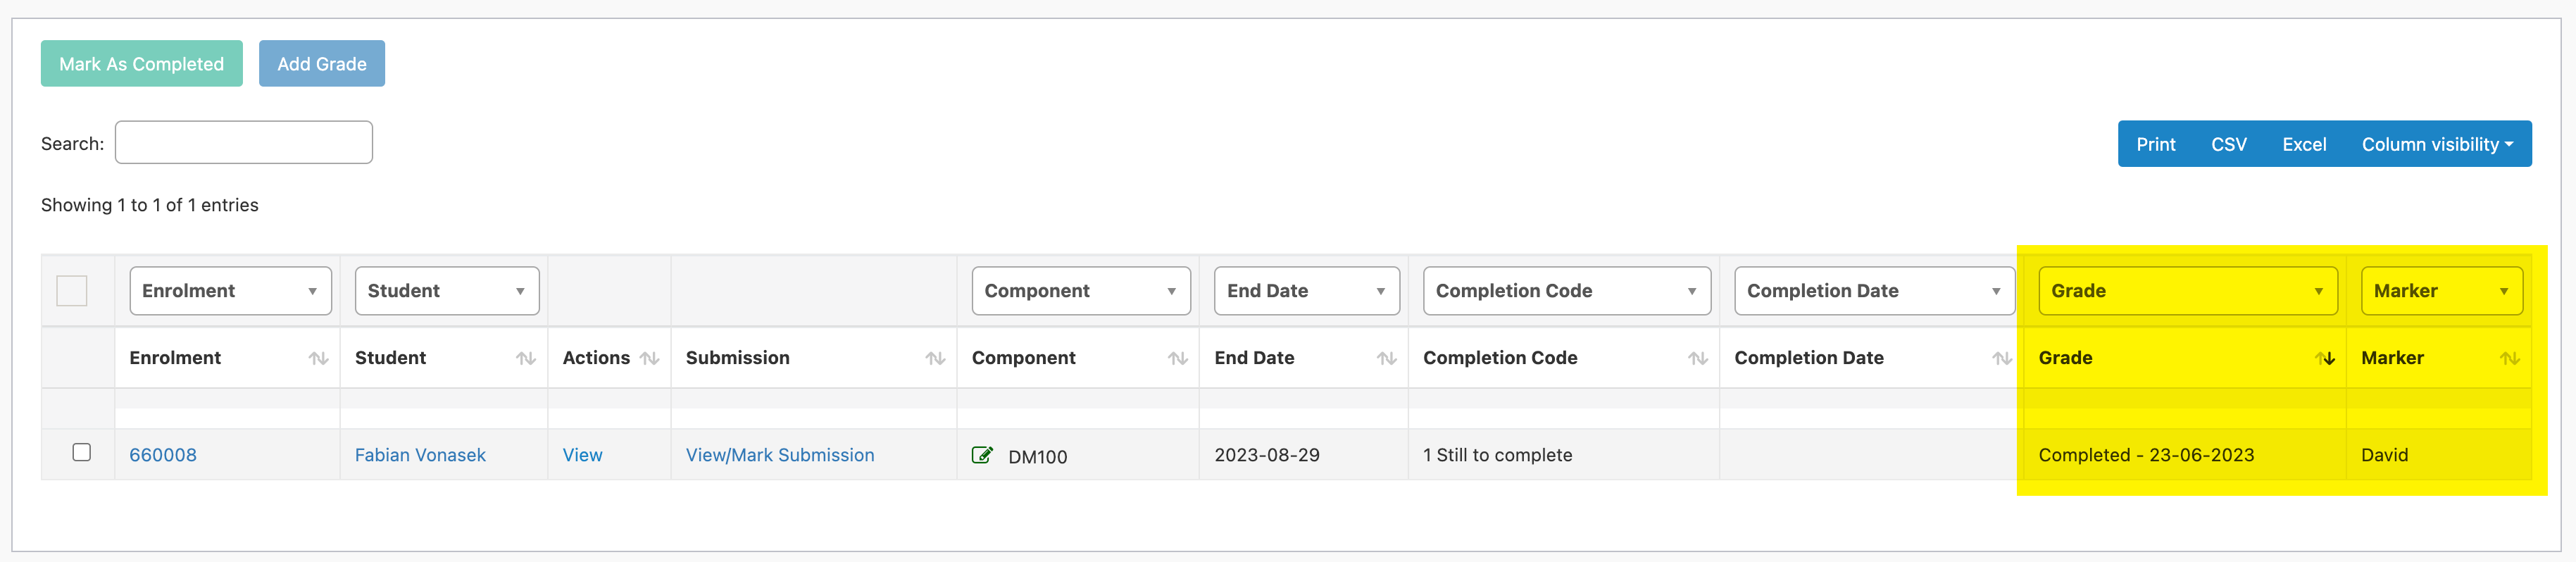
Marking Submissions
Back in the SELMA Admin module, a new submission would have showed up on the dashboard. Clicking on it will bring you to the marking screen filtered by portal submissions only:
Find the submission you want to mark and then click on “View/Mark Submission”. A pop-up menu will show you the submission of the student, the note they left and the file link to download their submission. Like in the normal marking, you can set the grade you wish to give the student. You can now upload a graded file back and add a note for the student. Once you have completed all this you can save the mark:
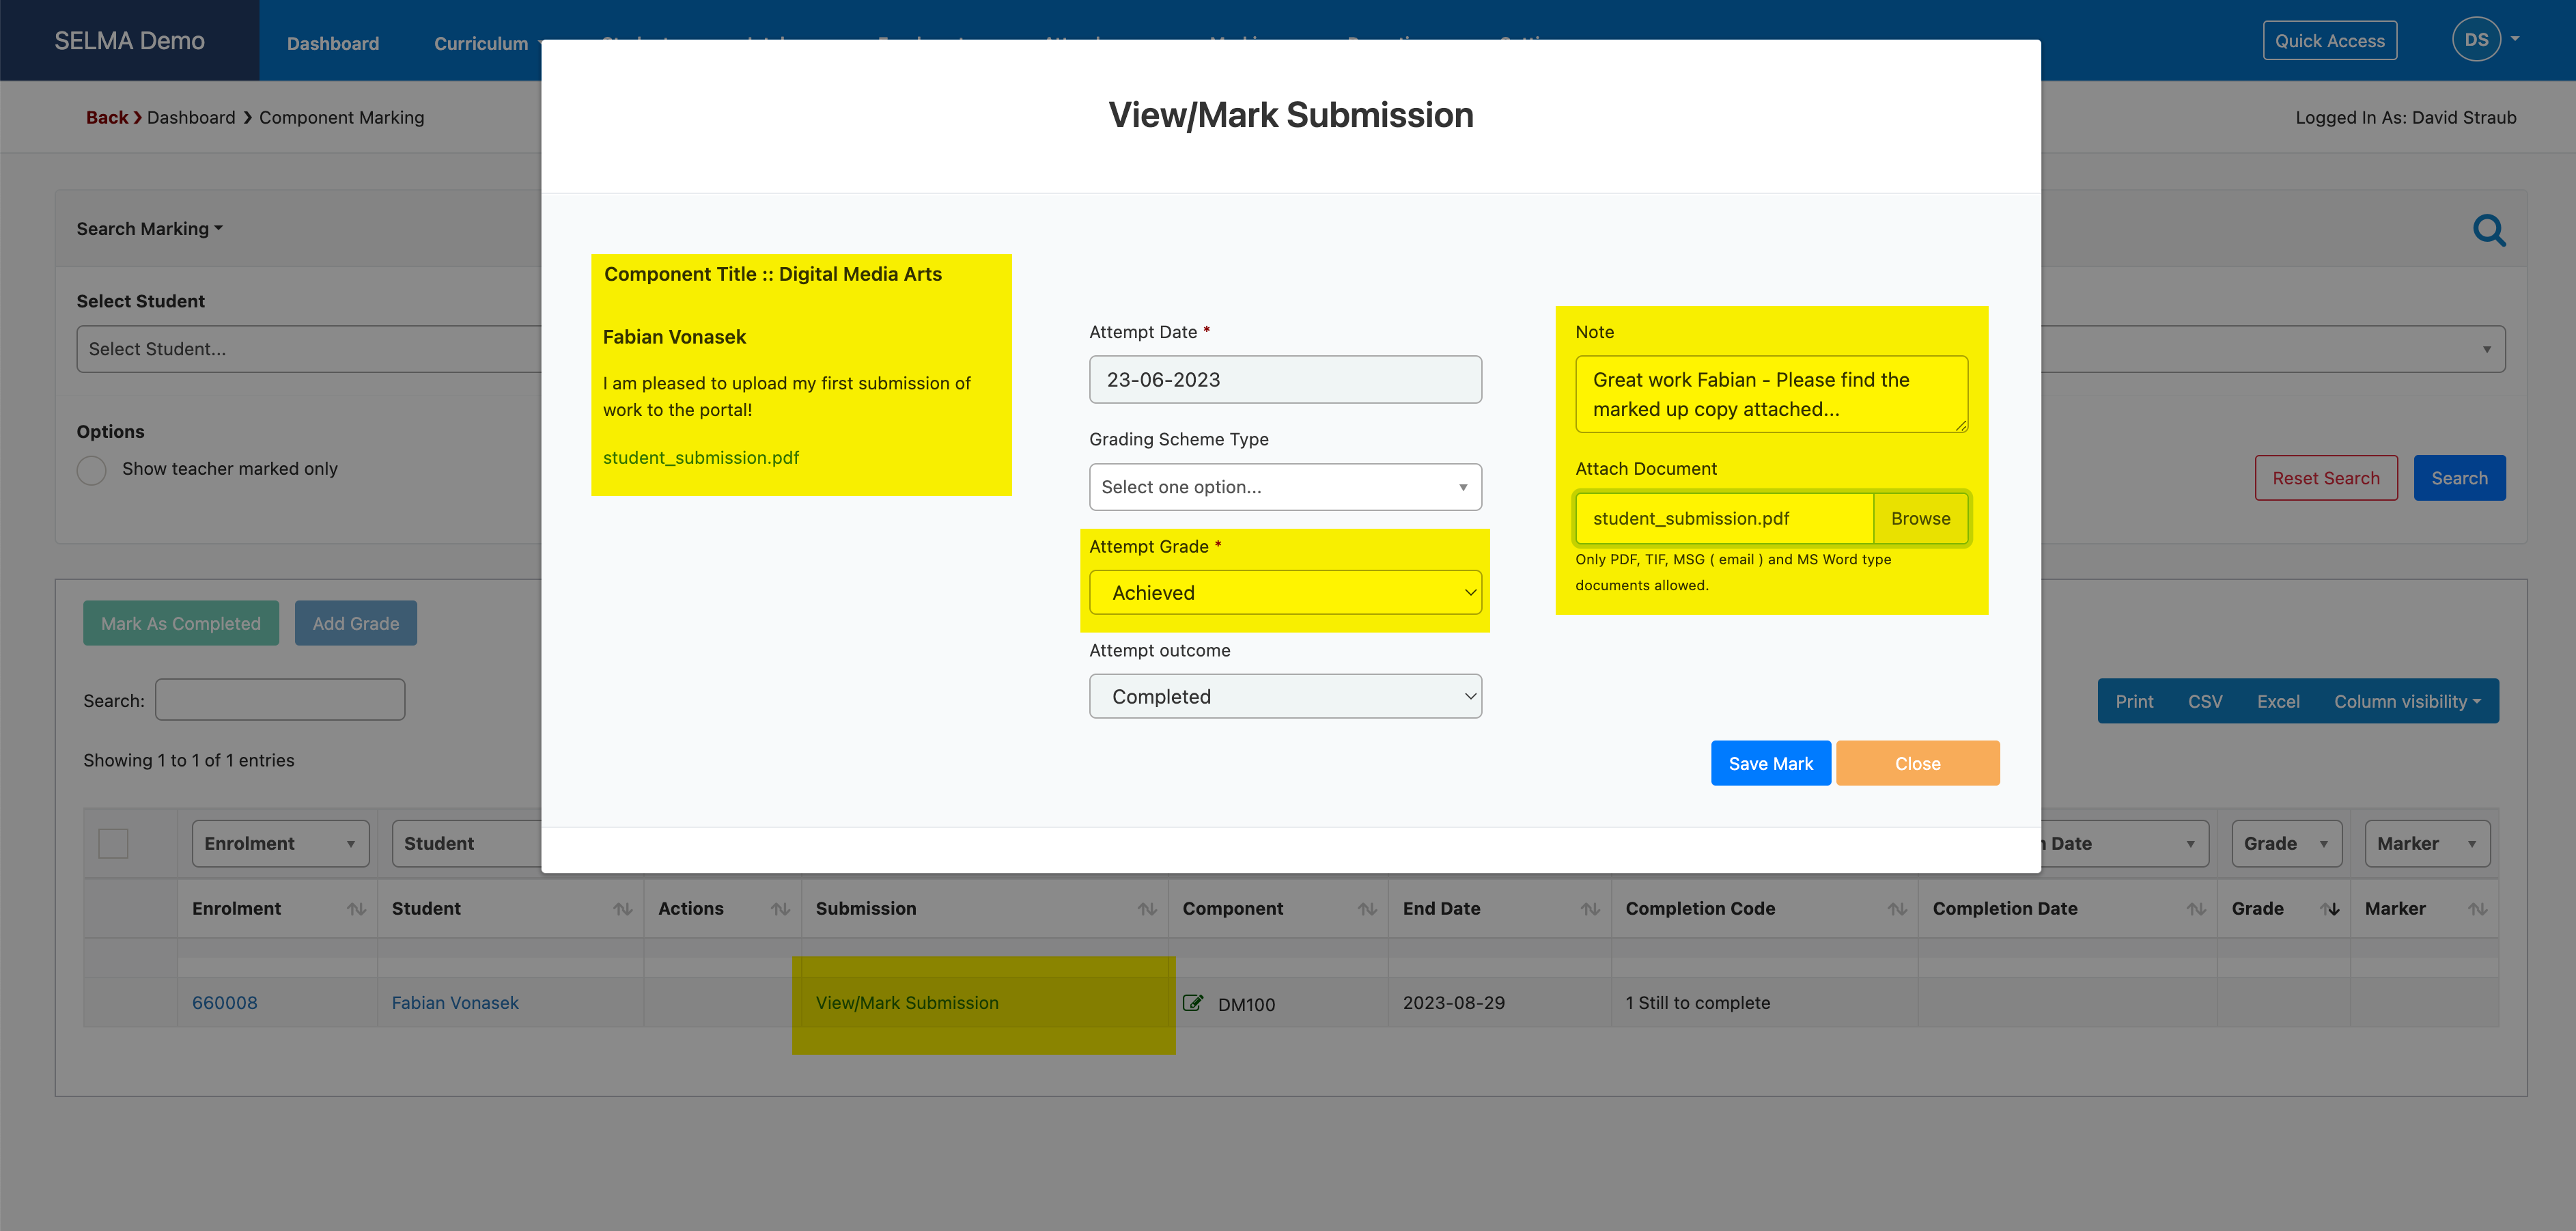
The component is now graded
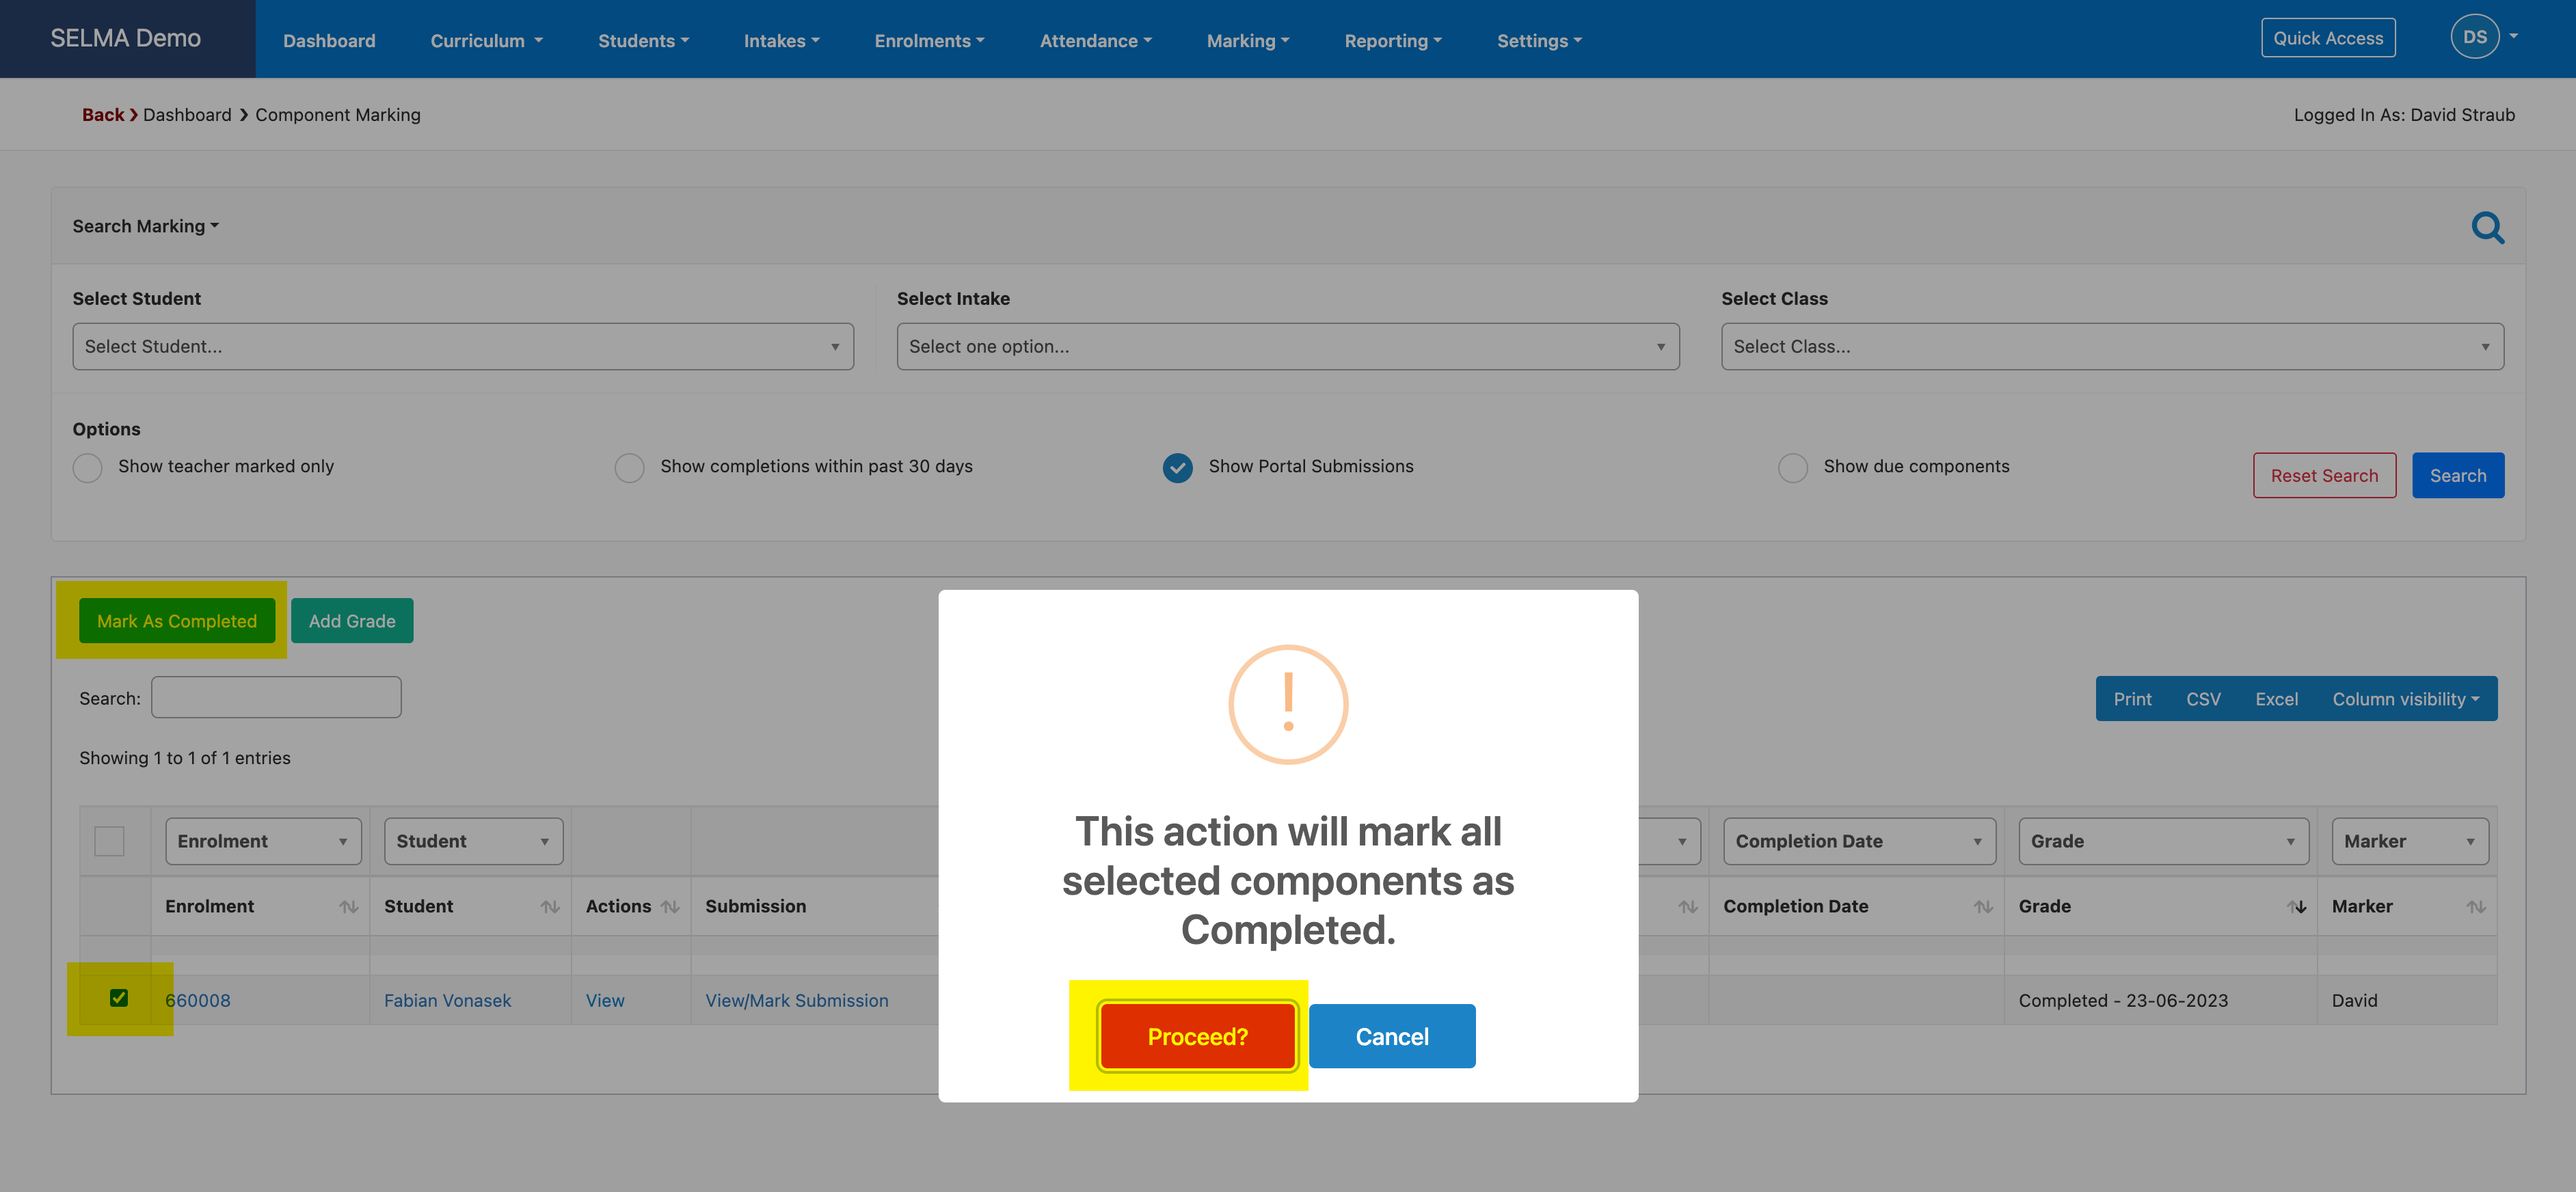
It is important to understand that this alone will not release the grade to the student’s portal. The Registrar or Administrator will now need to mark the component as completed before the grade is visible in the student portal. This is a two-step marking system, similar to what teachers would use to grade submissions. However, the registrars mark the components as completed once they approve the teachers’ grades.
Below is shown how the component is selected and marked as completed:
Student View for Marked Components
Once the component is graded and marked as completed, the grade will now show up in the students’ portal next to their submission: