
Please note that SELMA developers must implement certain steps before client can proceed – please chat with your SELMA Support team to ensure this step has been completed.
- Go to your SELMA instance: Settings ->Integrations
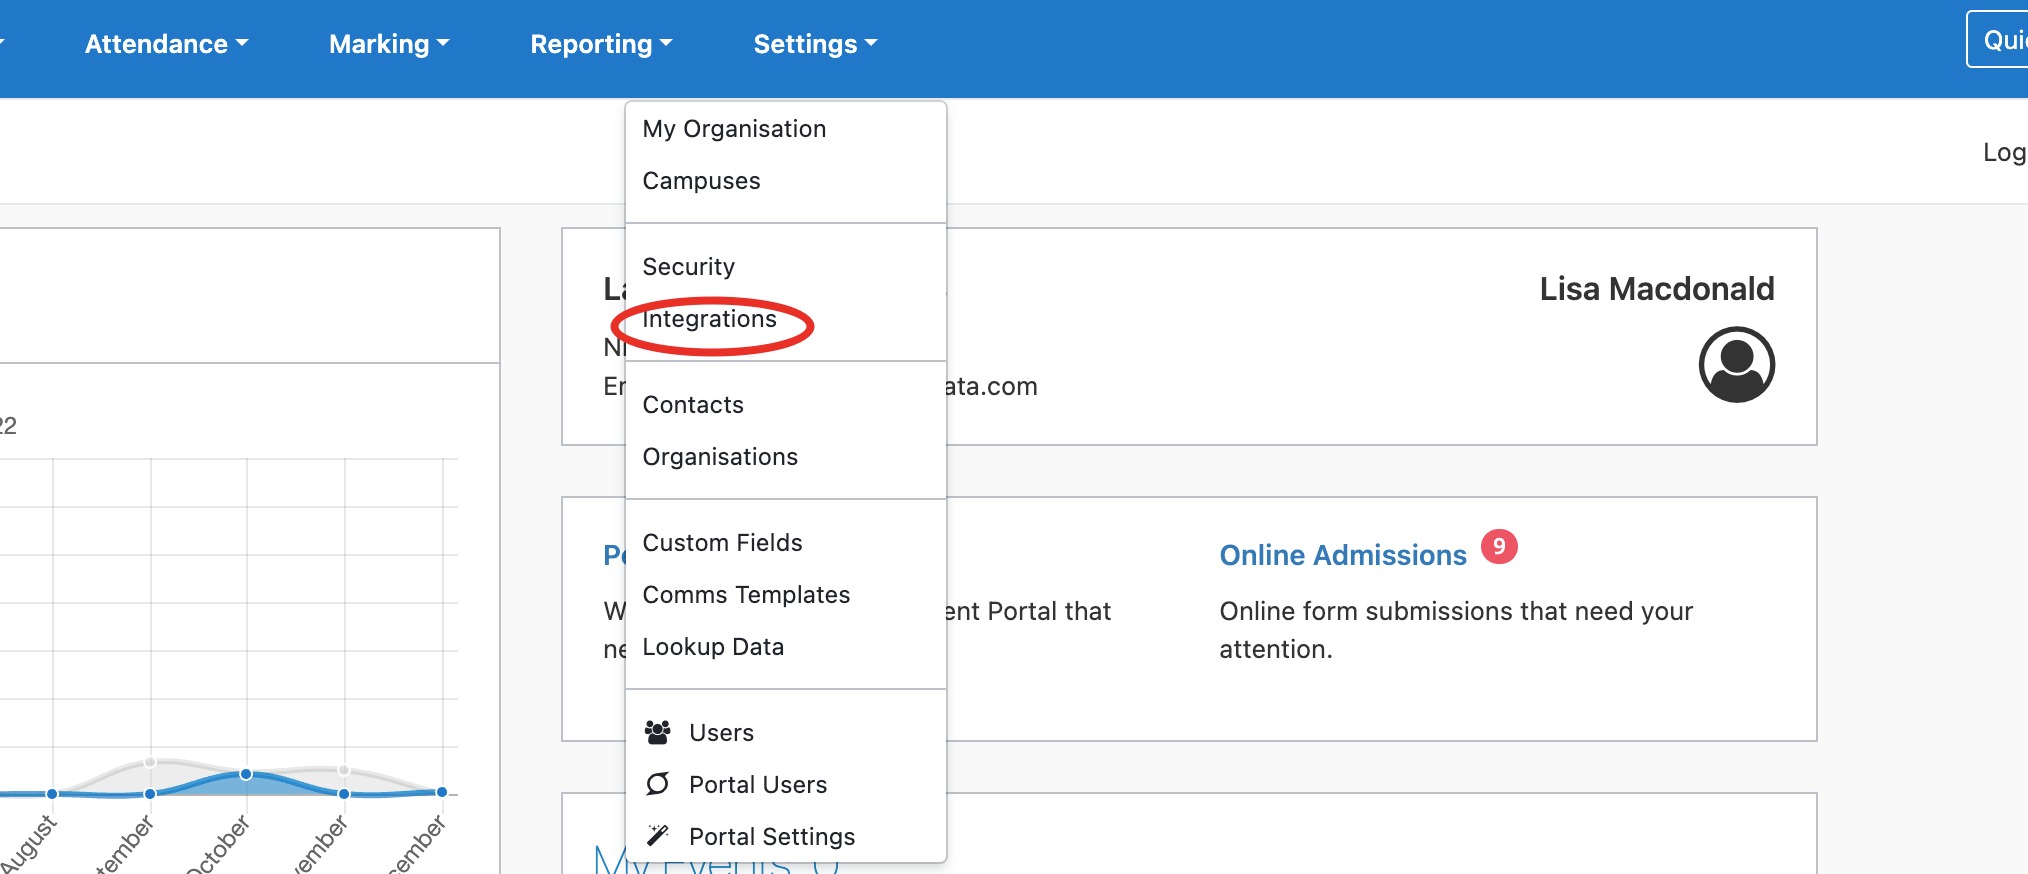
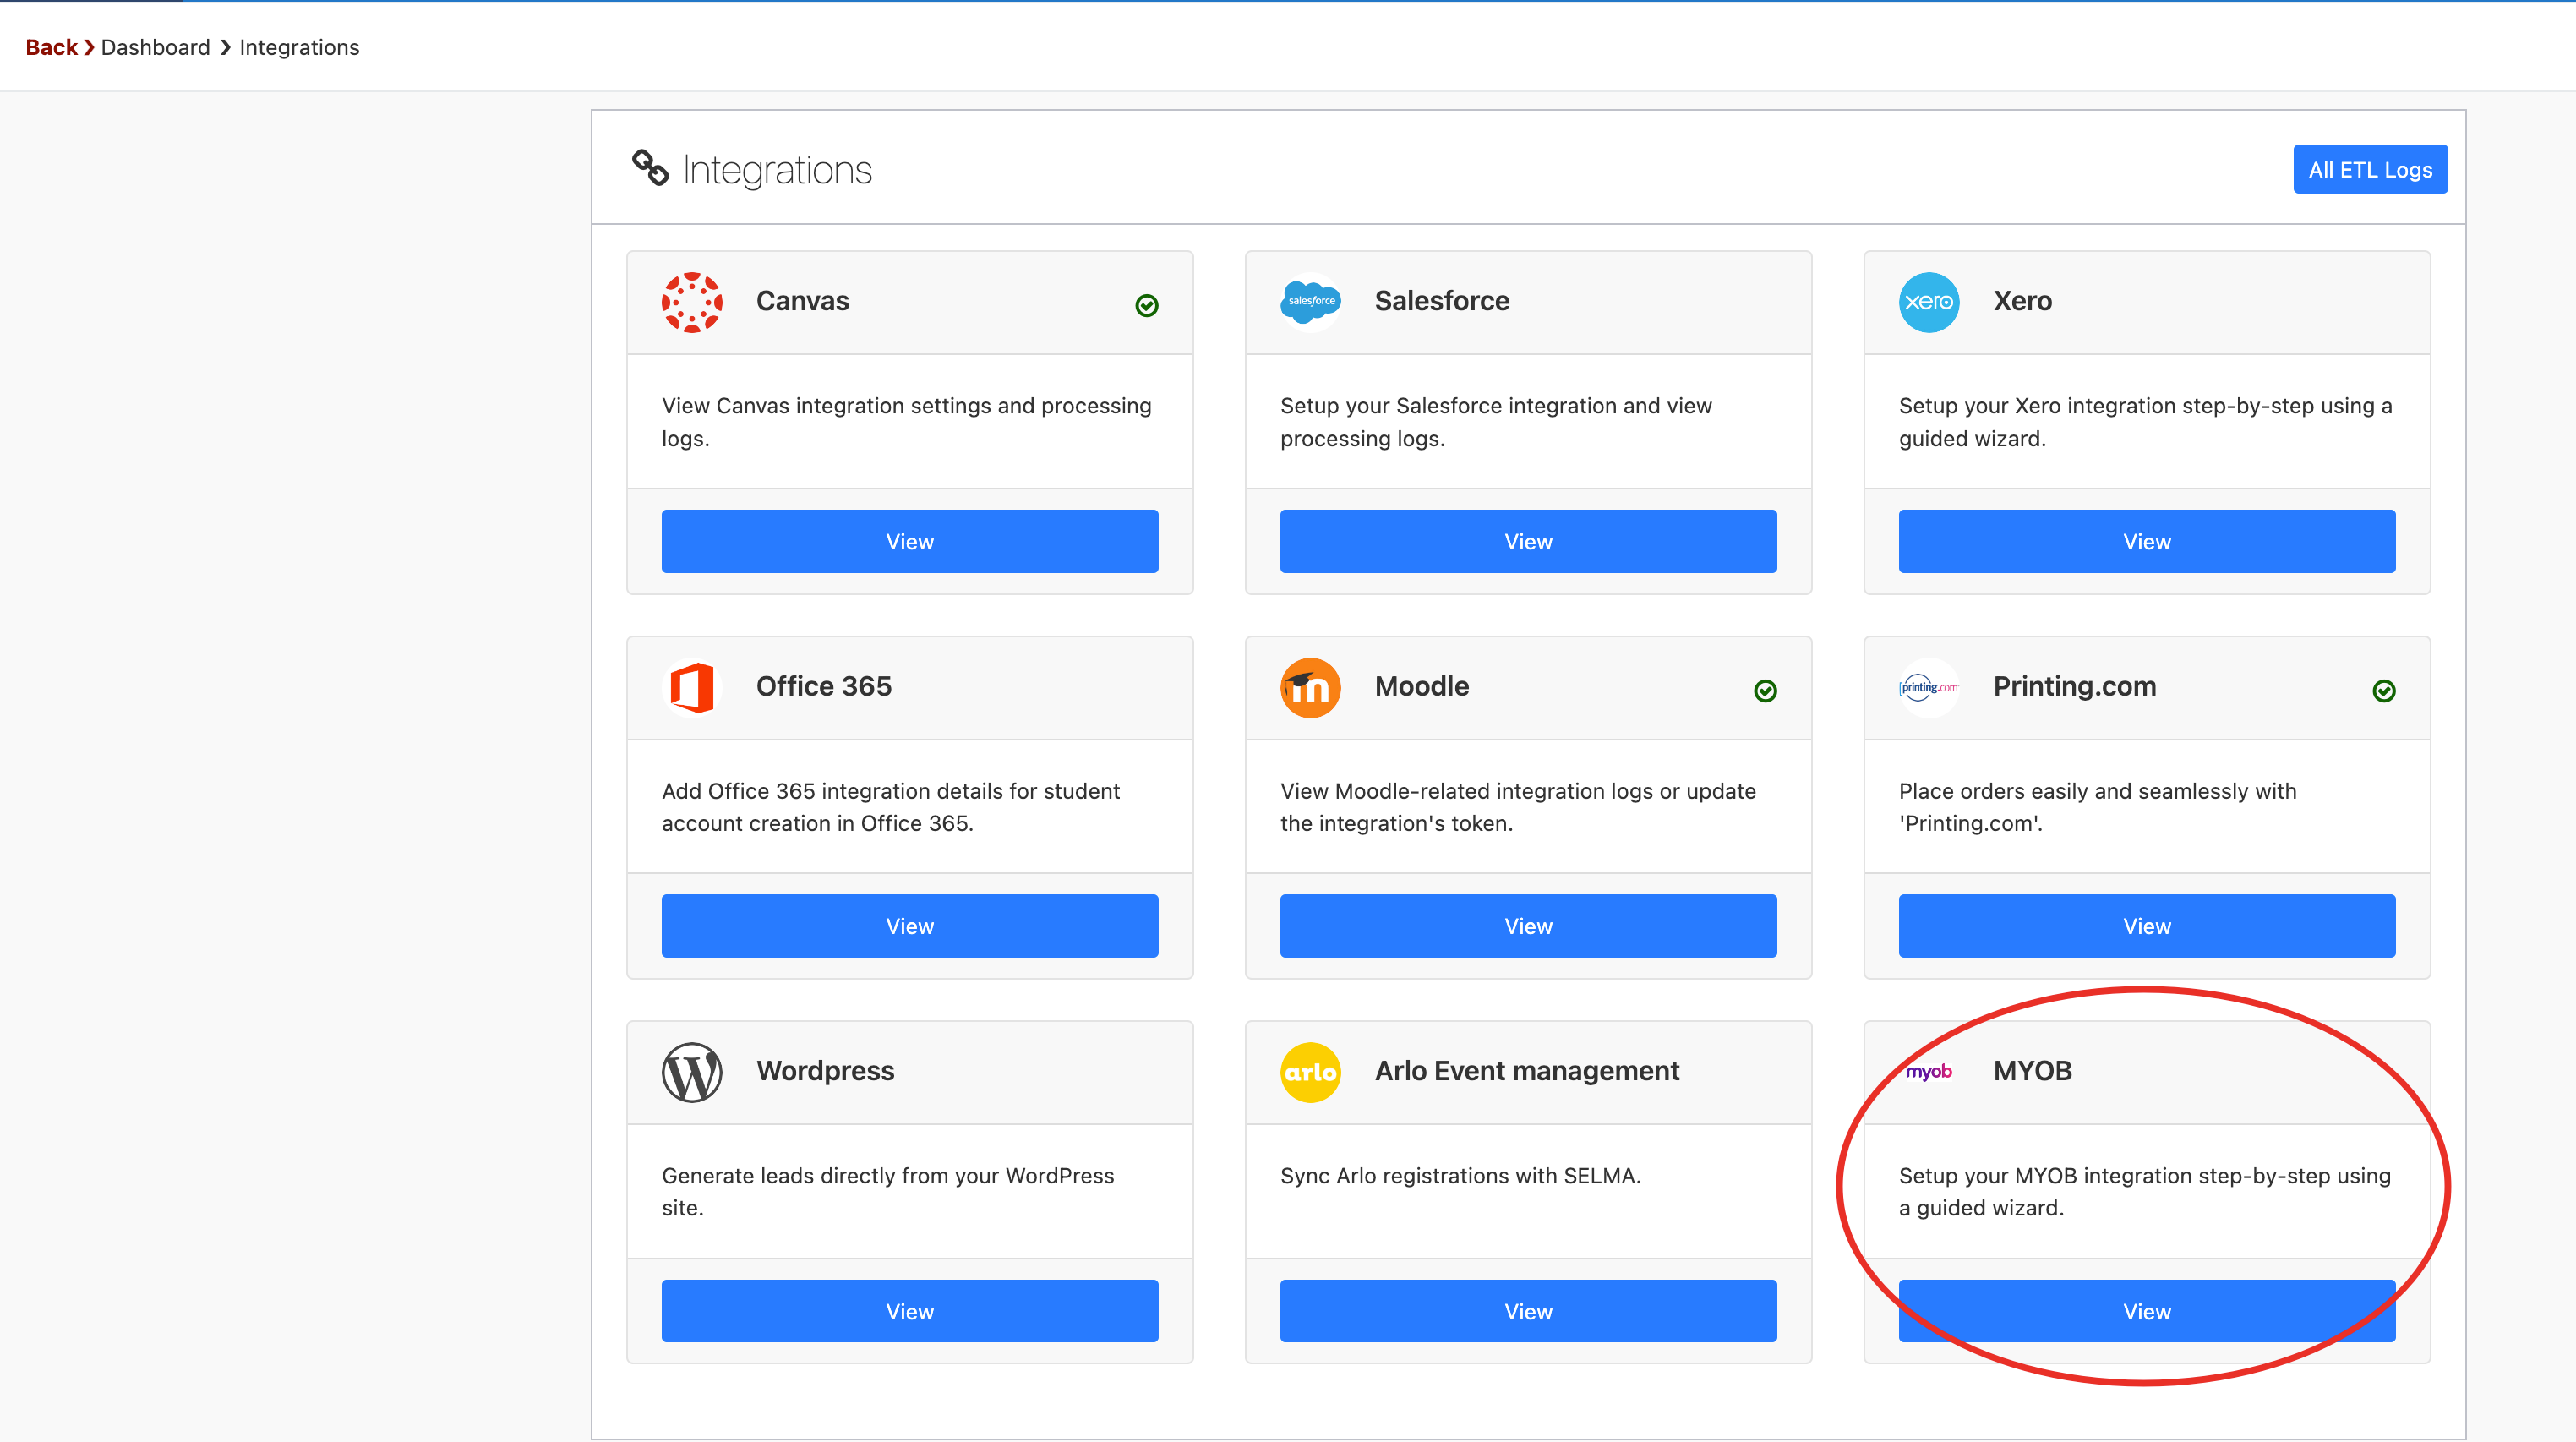
- Click on MYOB
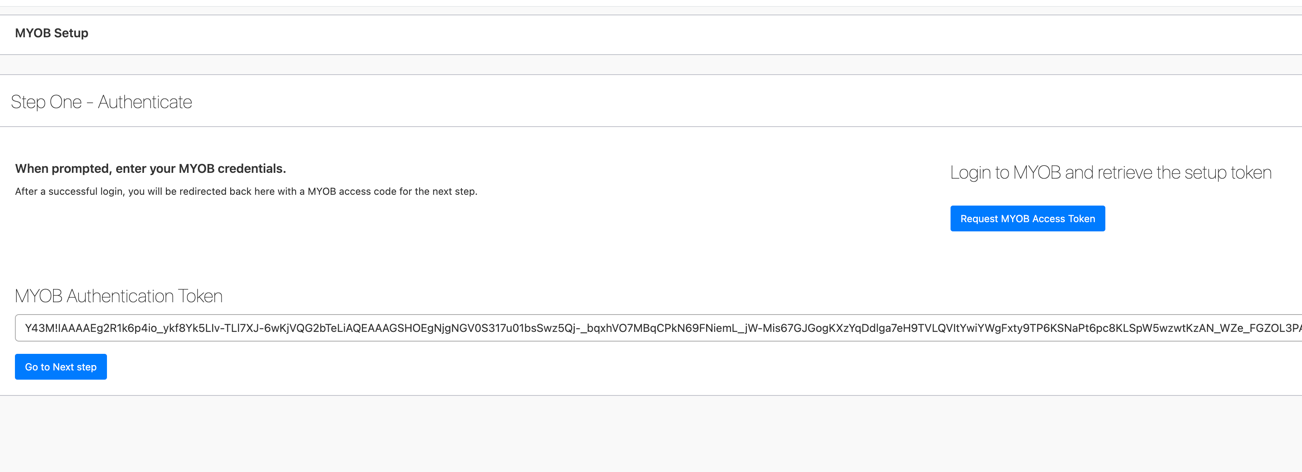
- Request MYOB Access Token –

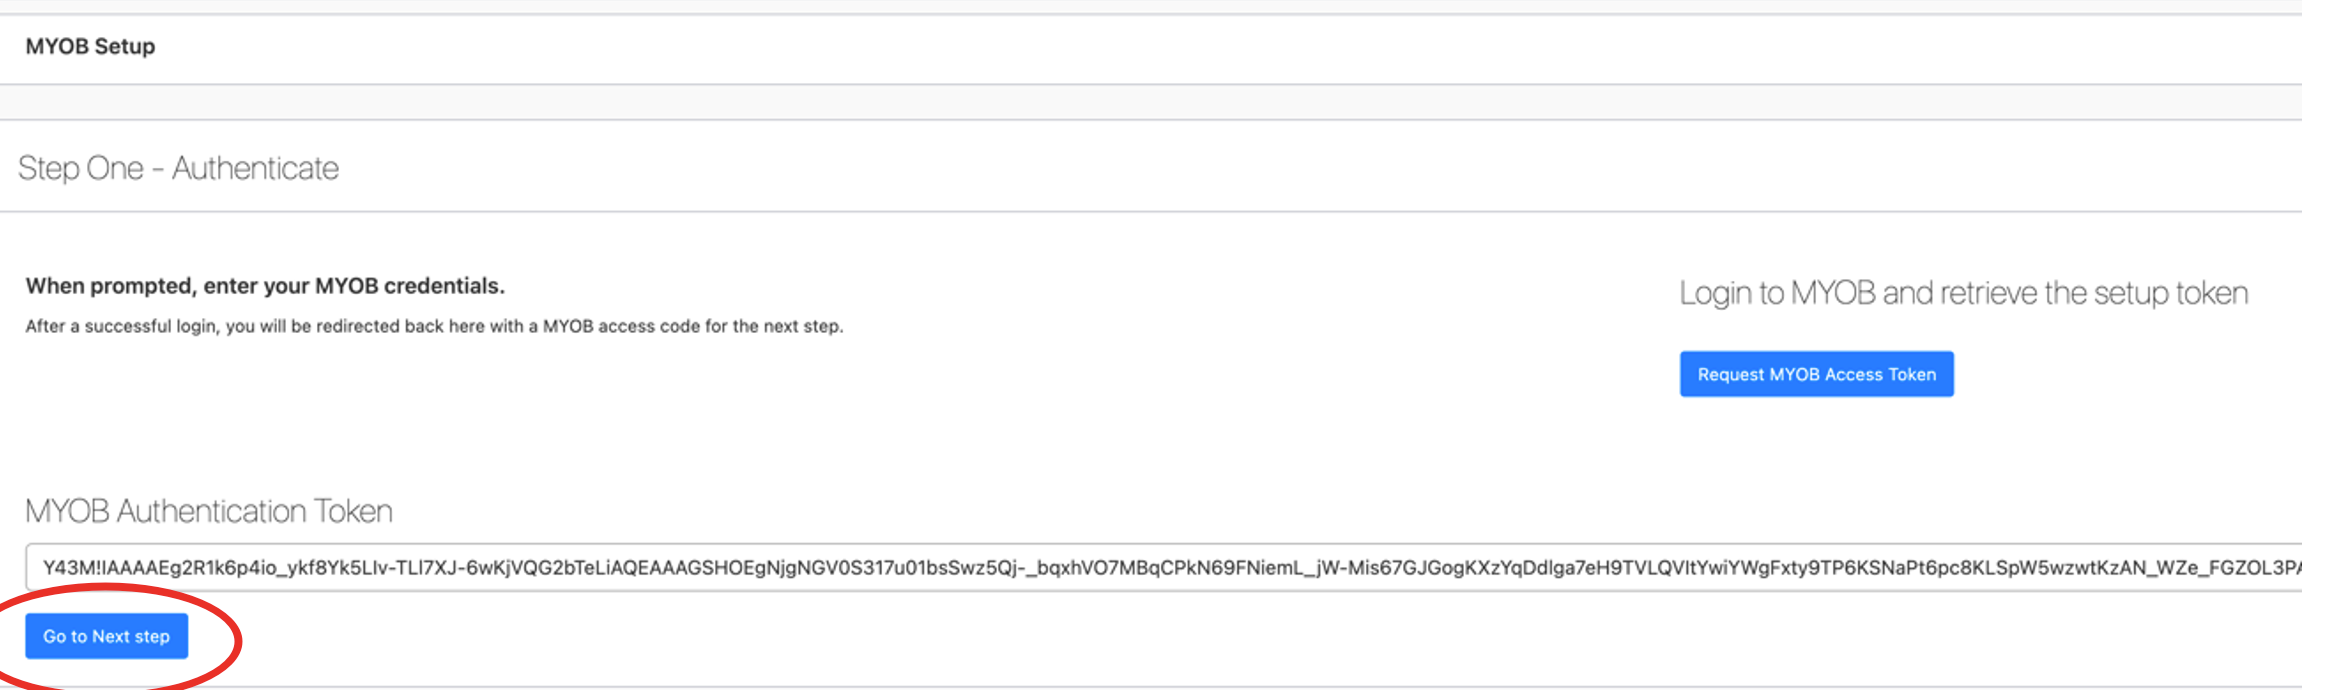
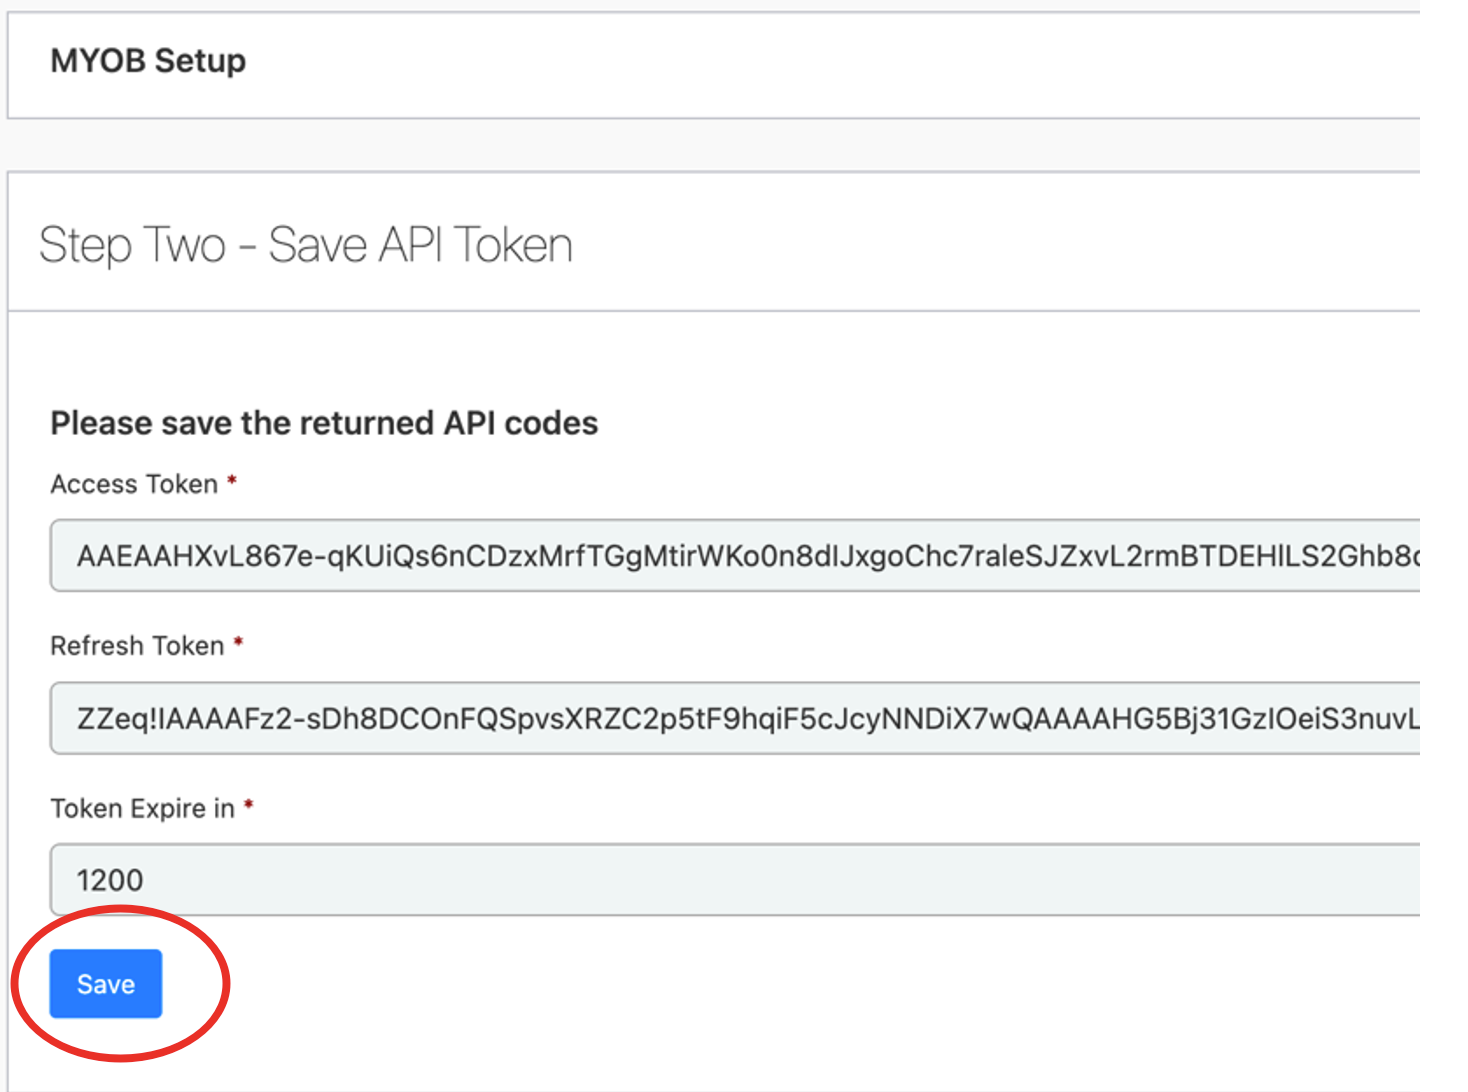
- The token should be returned and will automatically populate the field on the form –
- Click on ‘Go to Next Step’ to set-up client token and session token
- These fields are also auto populated, so just ‘Save’
- Then, click on ‘Save Company File’ – this indicates where the invoice will be sent

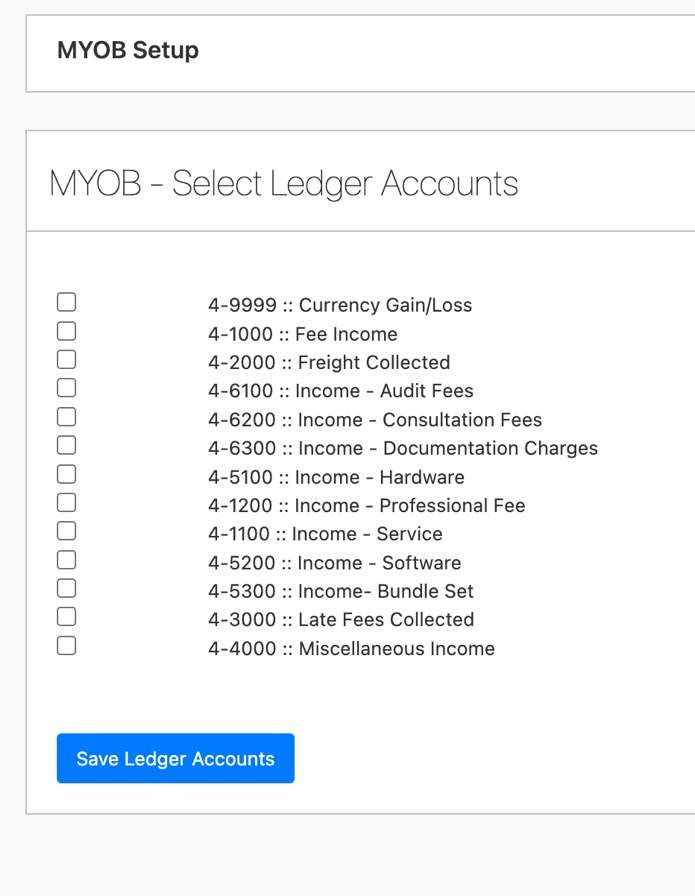
- Select as many MYOB Ledger Accounts as required and click on ‘Save Ledger Accounts’
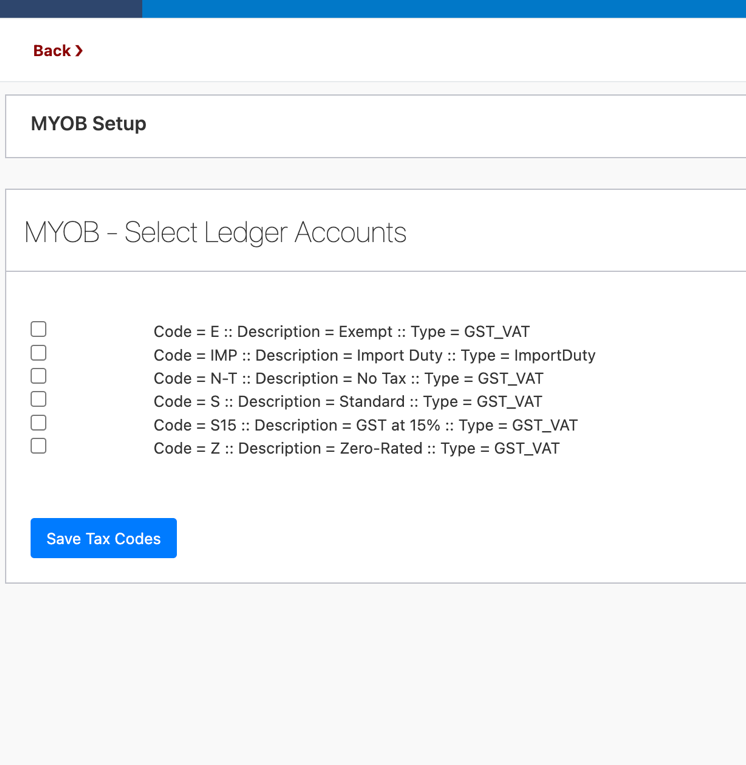
- Select Tax codes – this includes GST/VAT if applicable -and click on ‘Save Tax Codes’
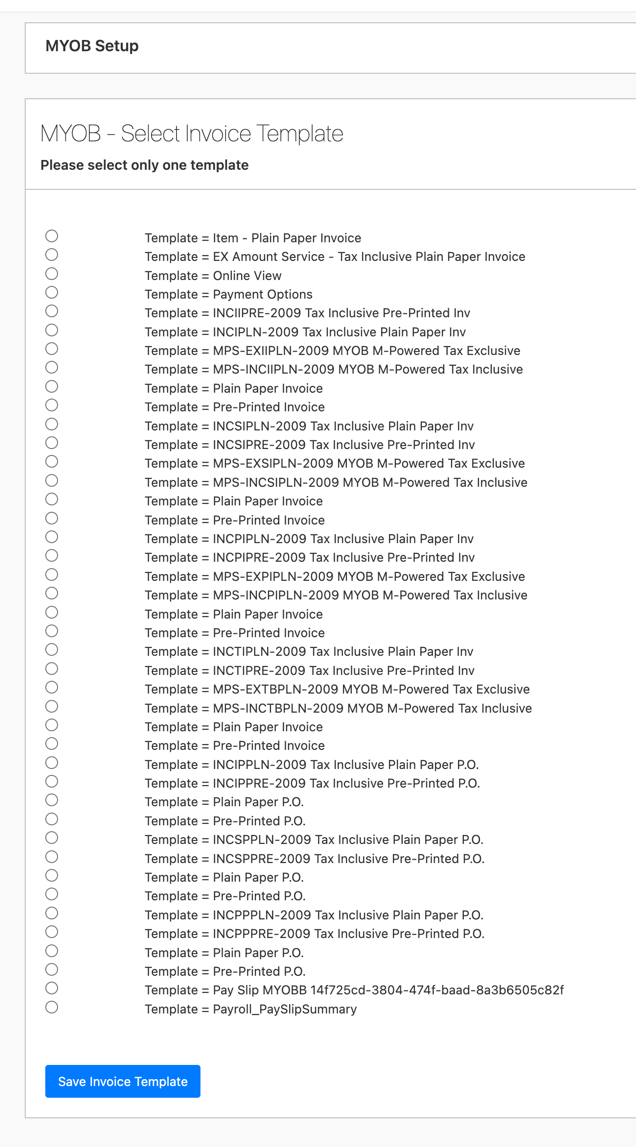
- The final step involves selecting your invoice template (only one is permitted) – and then click on ‘Save Invoice Template’
The set-up should now be complete.
What to remember when utilizing MYOB from SELMA:
- This is not a two-way integration – i.e. there is no data being exchanged between SELMA and MYOB. SELMA is simply pushing invoices created in your production instance, to MYOB.
- If invoices are updated in SELMA, and they have already been posted to MYOB, it will be up to the customer to manually delete the old invoice in MYOB and re-upload the latest version.