Jump ahead:
Enrolment Index
Navigate to Enrolments -> Manage Enrolments
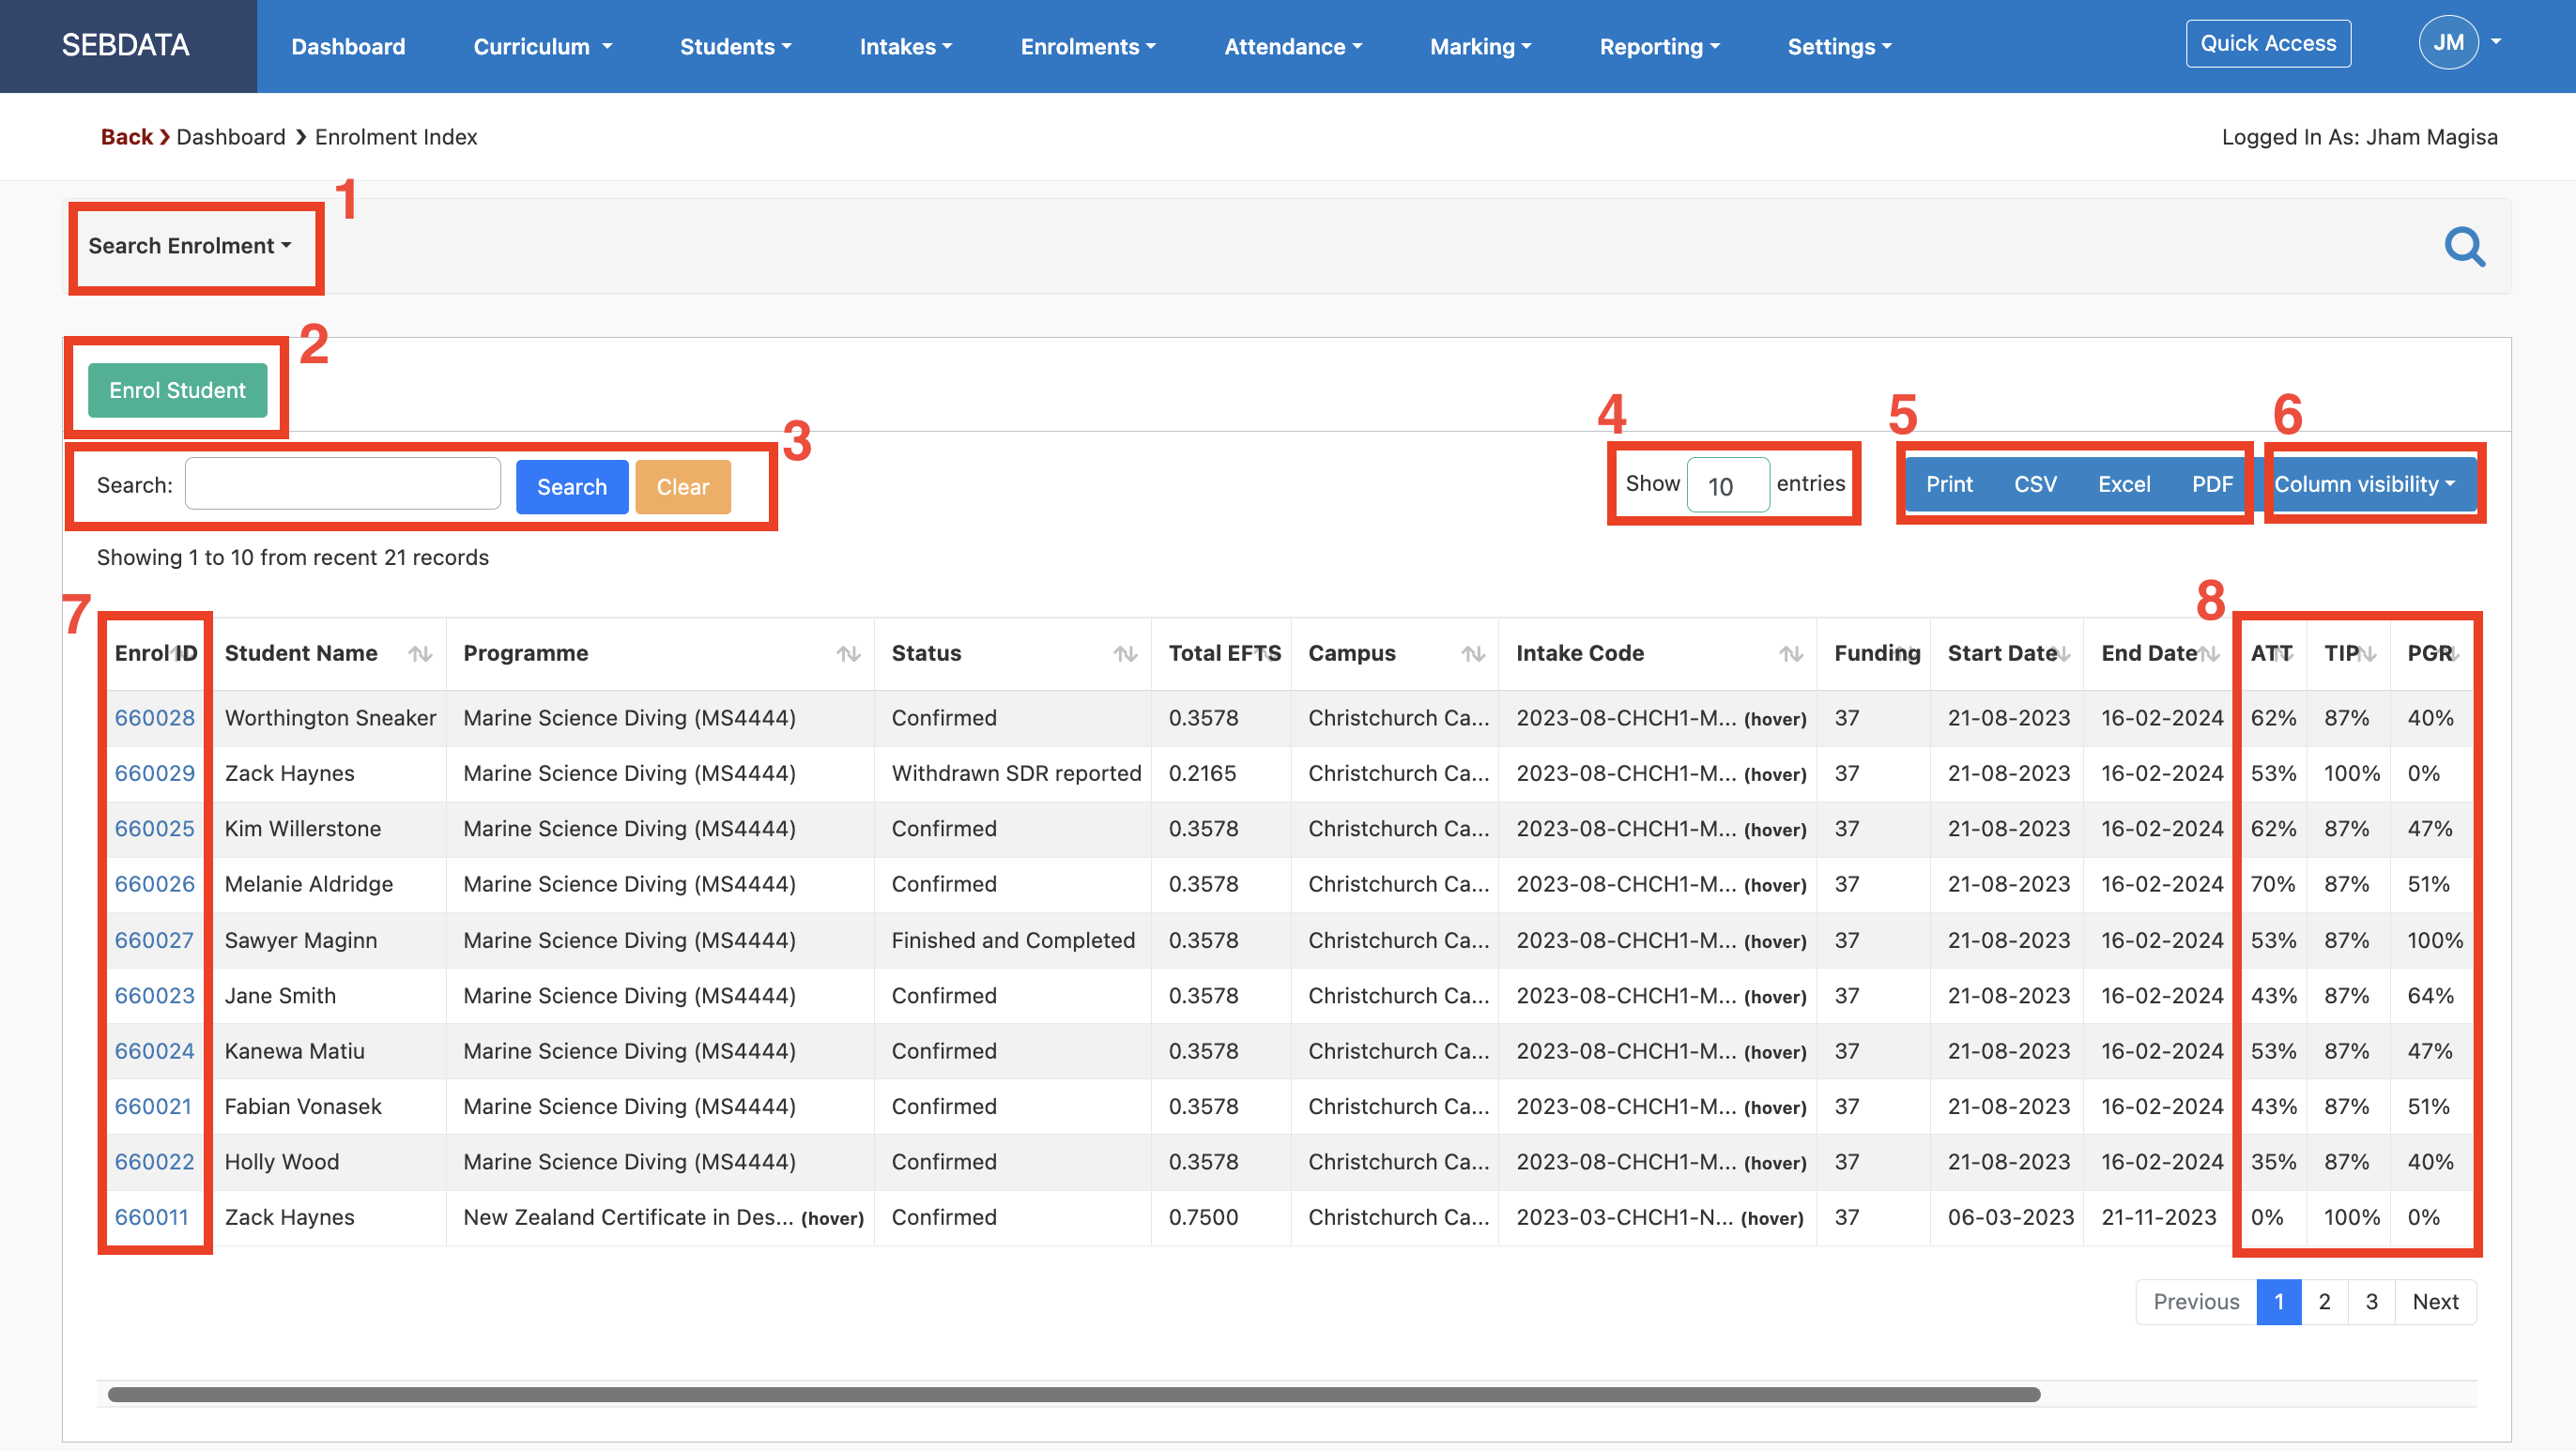
Below is what an enrolment index looks like.

Functionality of the boxed area are explained below:
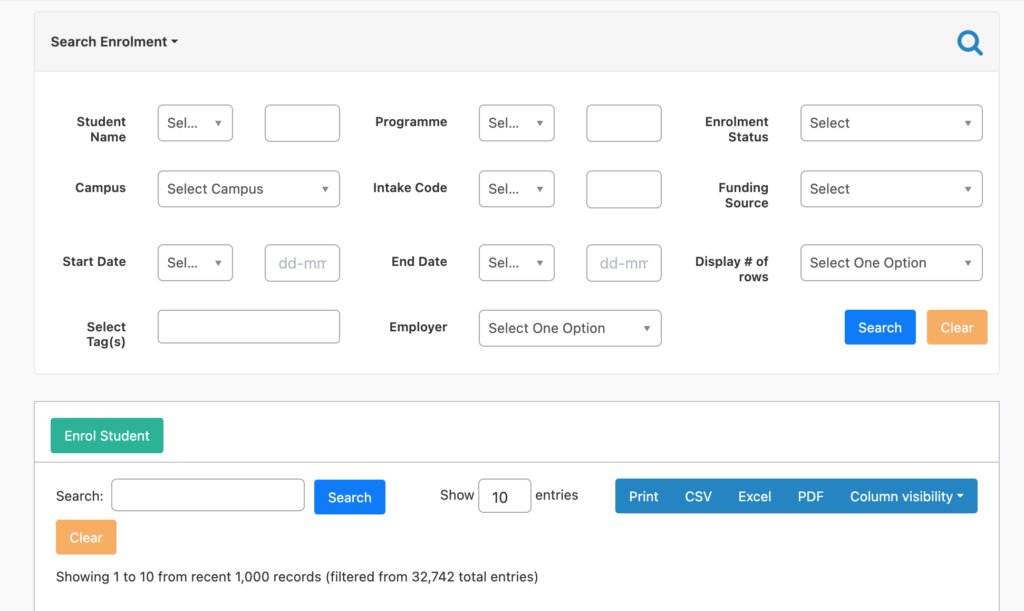
1 – Search Enrolment:

This will allow you to filter specific information to find specific information faster. Note: the blue ‘Search’ button has to be pressed for the filter to be acknowledge.
2 – Enrol Student Button:
This button will allow individuals whose role in the organisation is set to “Admin” or “Registrar” to enrol students. Individuals whose role is only set to “Teacher” will not be able to enrol students. However, they will be able to still manage enrolments by editing student details who are already enrolled.
3 – Quick Search
To do a quick search in the grid, simply use this search bar. You’ll be able to search for specific enrolment ID, student name, programme, campus, or intake code.

To clear the filter/search, simply press the yellow ‘Clear’ button next to the search bar.
4 – Show Entries:
The default number of entries shown is set to 10. However, you are able to show more entries at once by changing the number 10 to your desired amount – preset amount are 10, 25, 50, and 100.

5 – Exporting Data
To export the data in the current grid, simply choose the format you want (Print, CSV, Excel, or PDF). This will automatically export the data to your download folder or give you the option to print it.
Note: you can only export what you can view so if you would like to export more entries simply change the show entries number.
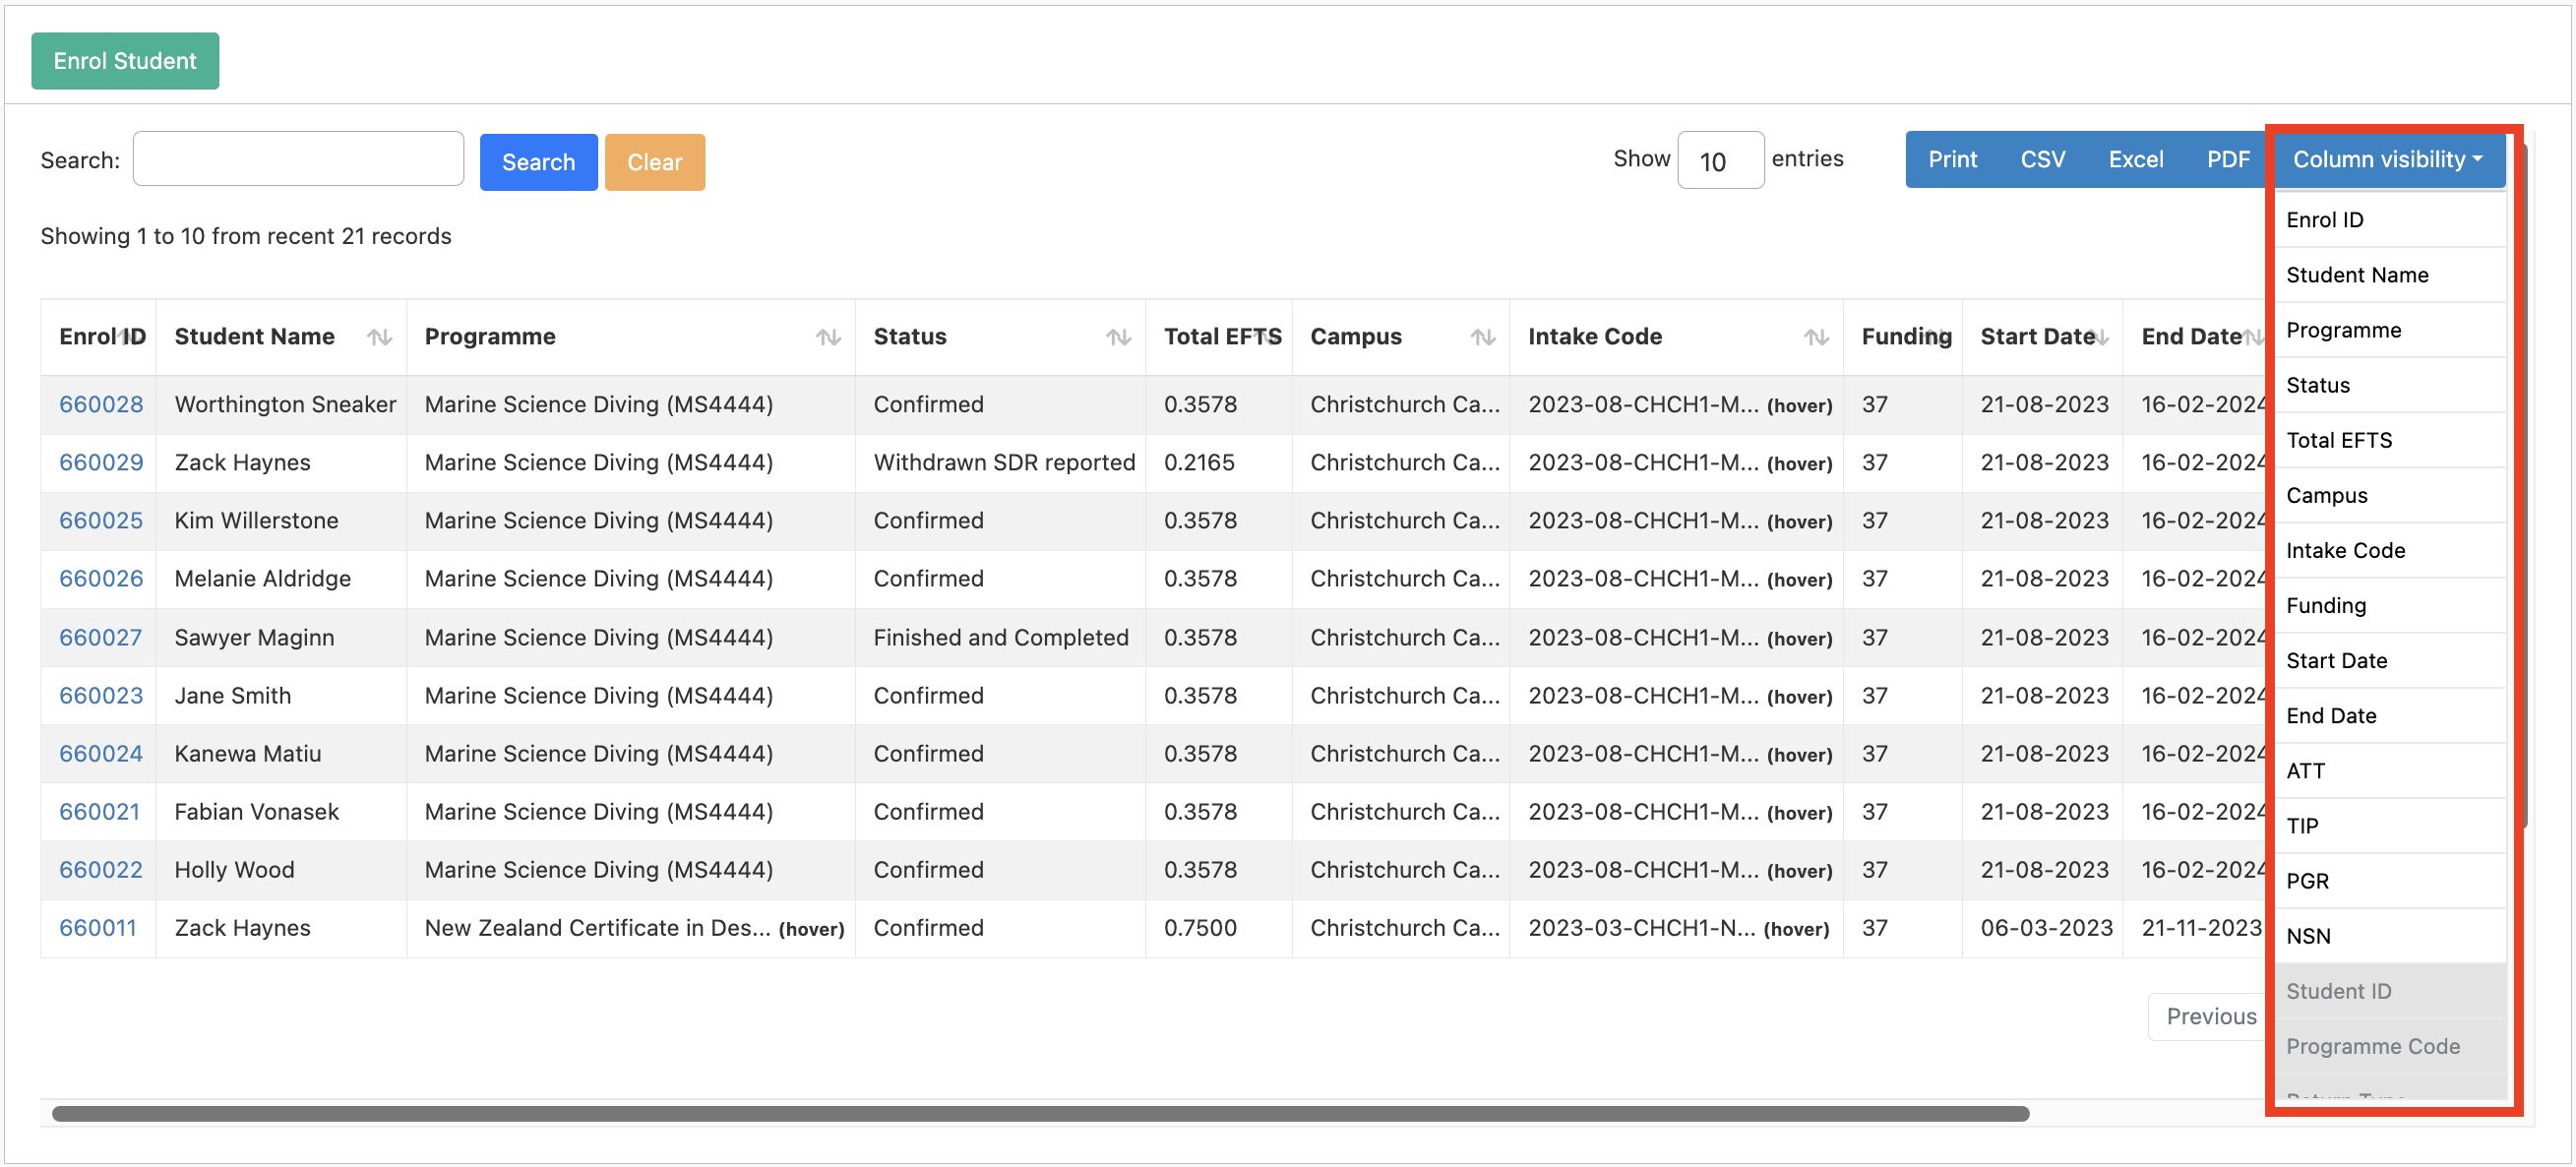
6 – Column Visibility
Column visibility allows you to select and deselect column of interest. This is valuable when you only want to export specific column(s).

Everything that is not highlighted in grey are the columns that will be visible. Column names that are highlighted in grey are the hidden columns. You can select or deselect columns by simply pressing it.
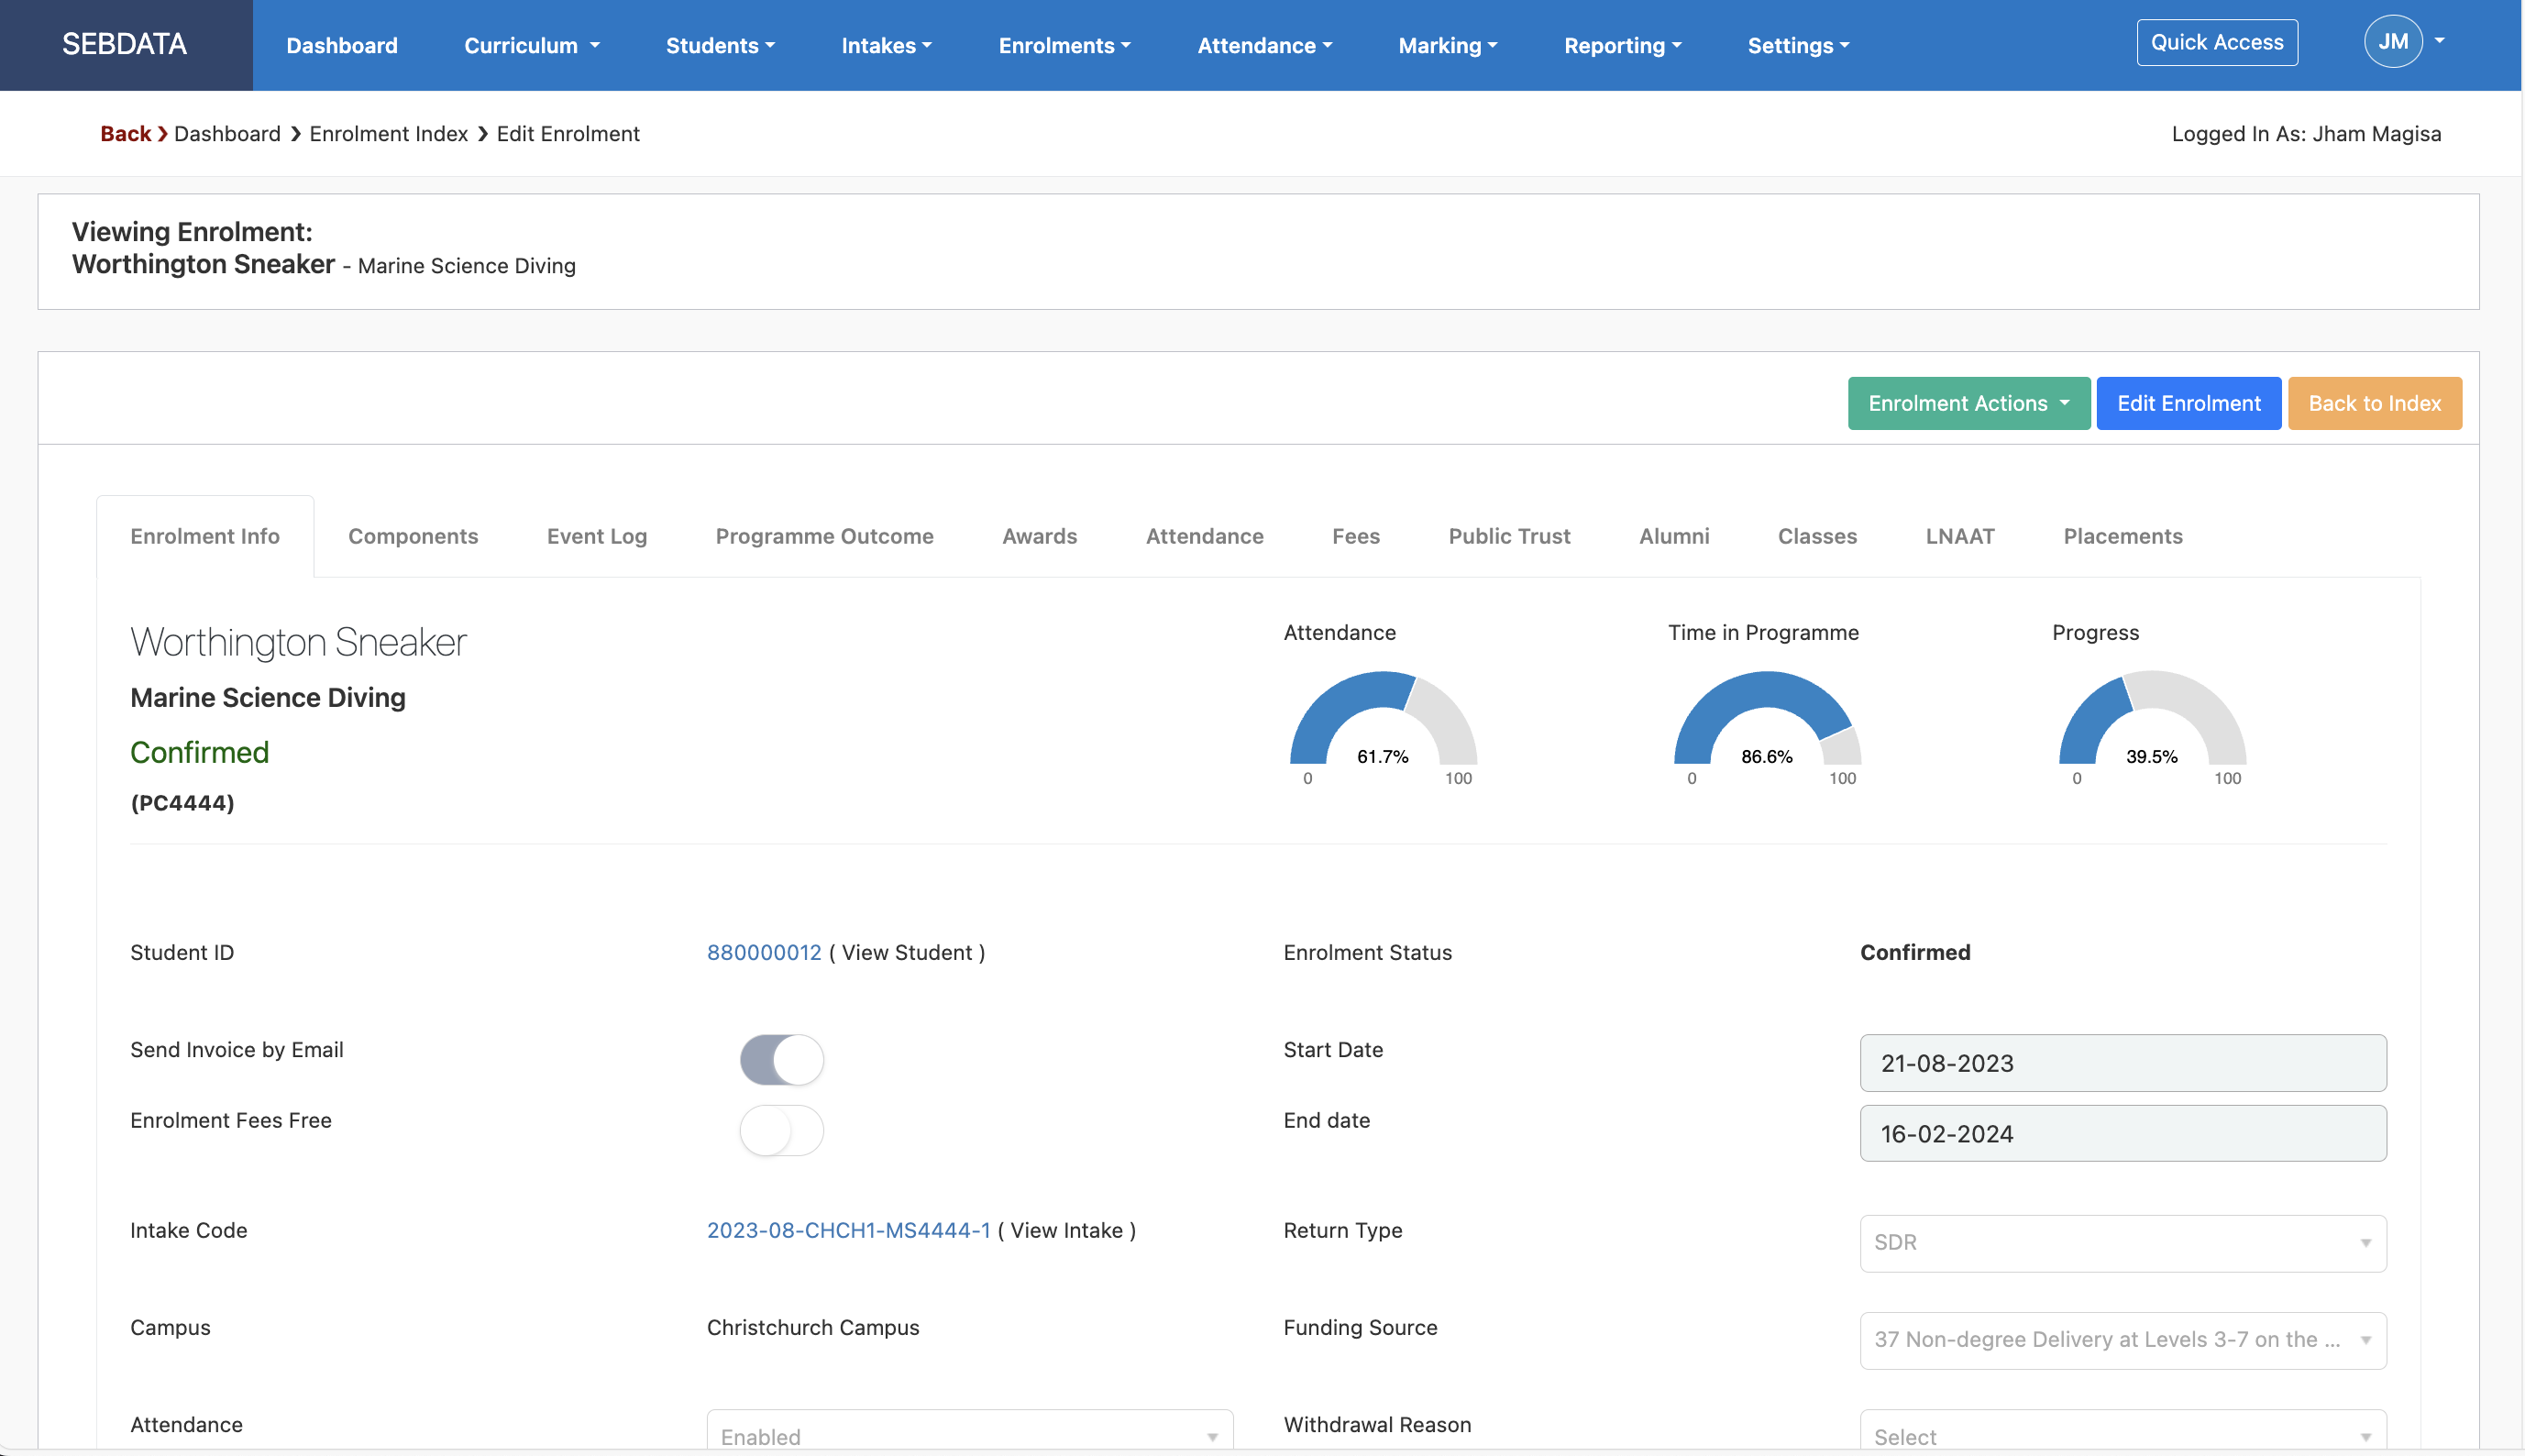
7 – Manage Enrolment
By clicking on the hyperlinked Enrol ID, you will be able to edit/view specific information about the enrolment of the student. You will be able to see similar screen as below

To learn more on how to edit a student’s enrolment go to Edit Enrolment manual.
8 – Quick Measure View
The far-right columns of the enrolment index display the percentage figures for the enrolment attendance % (ATT), time in programme % (TIP), and progress percentage (PGR), for each enrolment, allowing users to quickly assess a student’s attendance, progress, and duration in programme at a moment’s notice while scrolling for enrolments.
