02 – Create and Edit Students: Student Details

Create Student

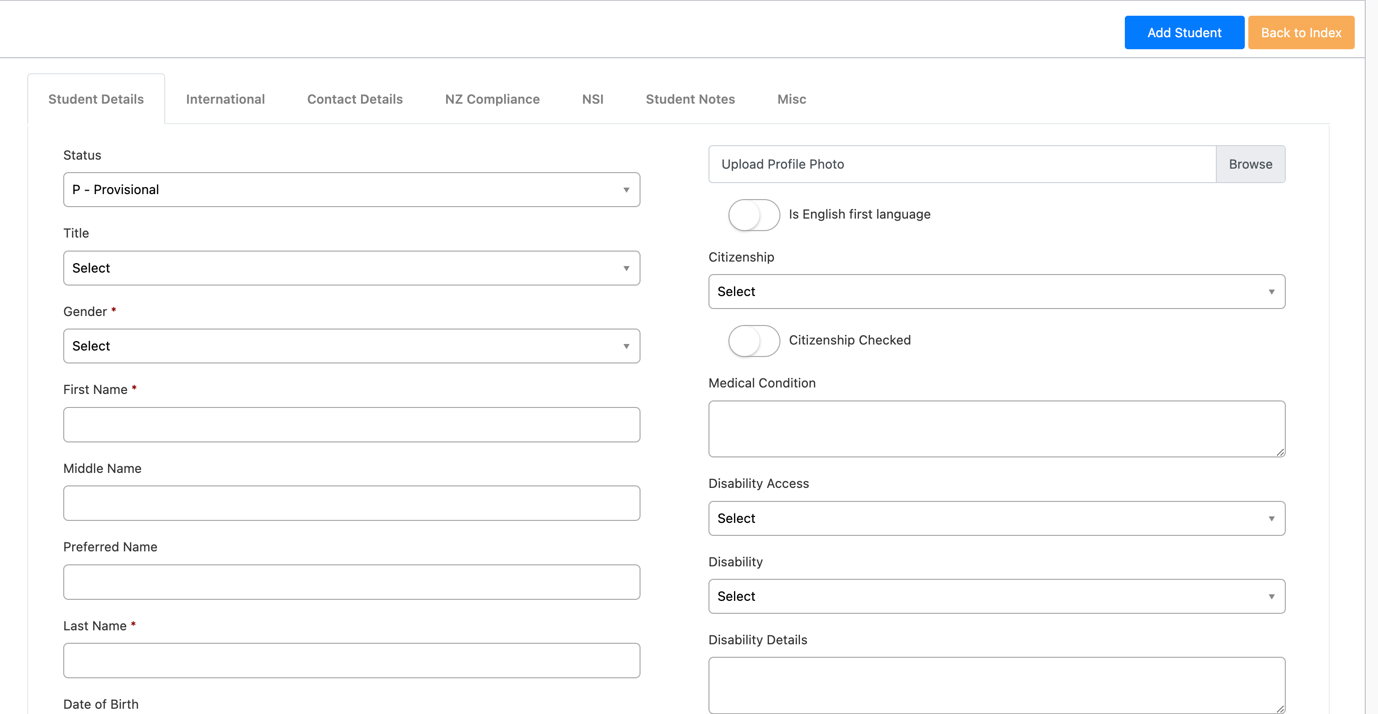
To create a new student, navigate to Students -> Manage Students, and then click the “Add Student” button on top of the Student Index (Grid) or use the Quick Access menu item “Add Student”

Graphical user interface, text, application, email

Description automatically generated
If you use the NSI interface or have a CRM integration – this is where you can click the “Get” buttons on top right to pull information form NSI or the CRM. This will bring across all Student Information you already know without you having to type it into the form.

The minimum information required to create a student in SELMA is –

  • First Name
  • Last Name
  • Date of Birth
  • Gender

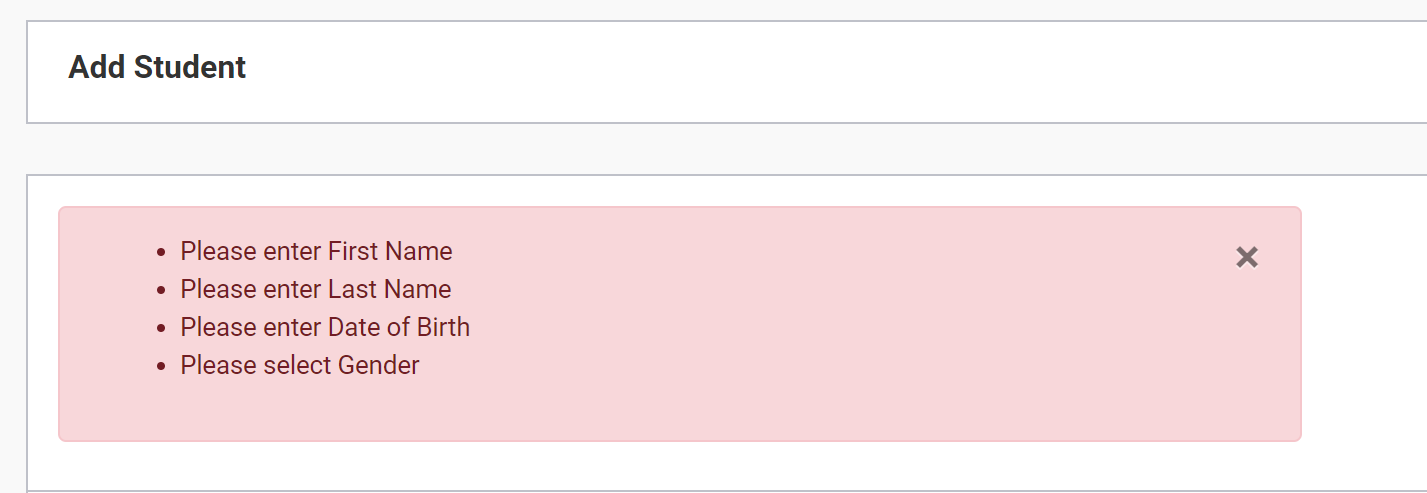
If you neglect to fill any of these fields the following message will pop up:

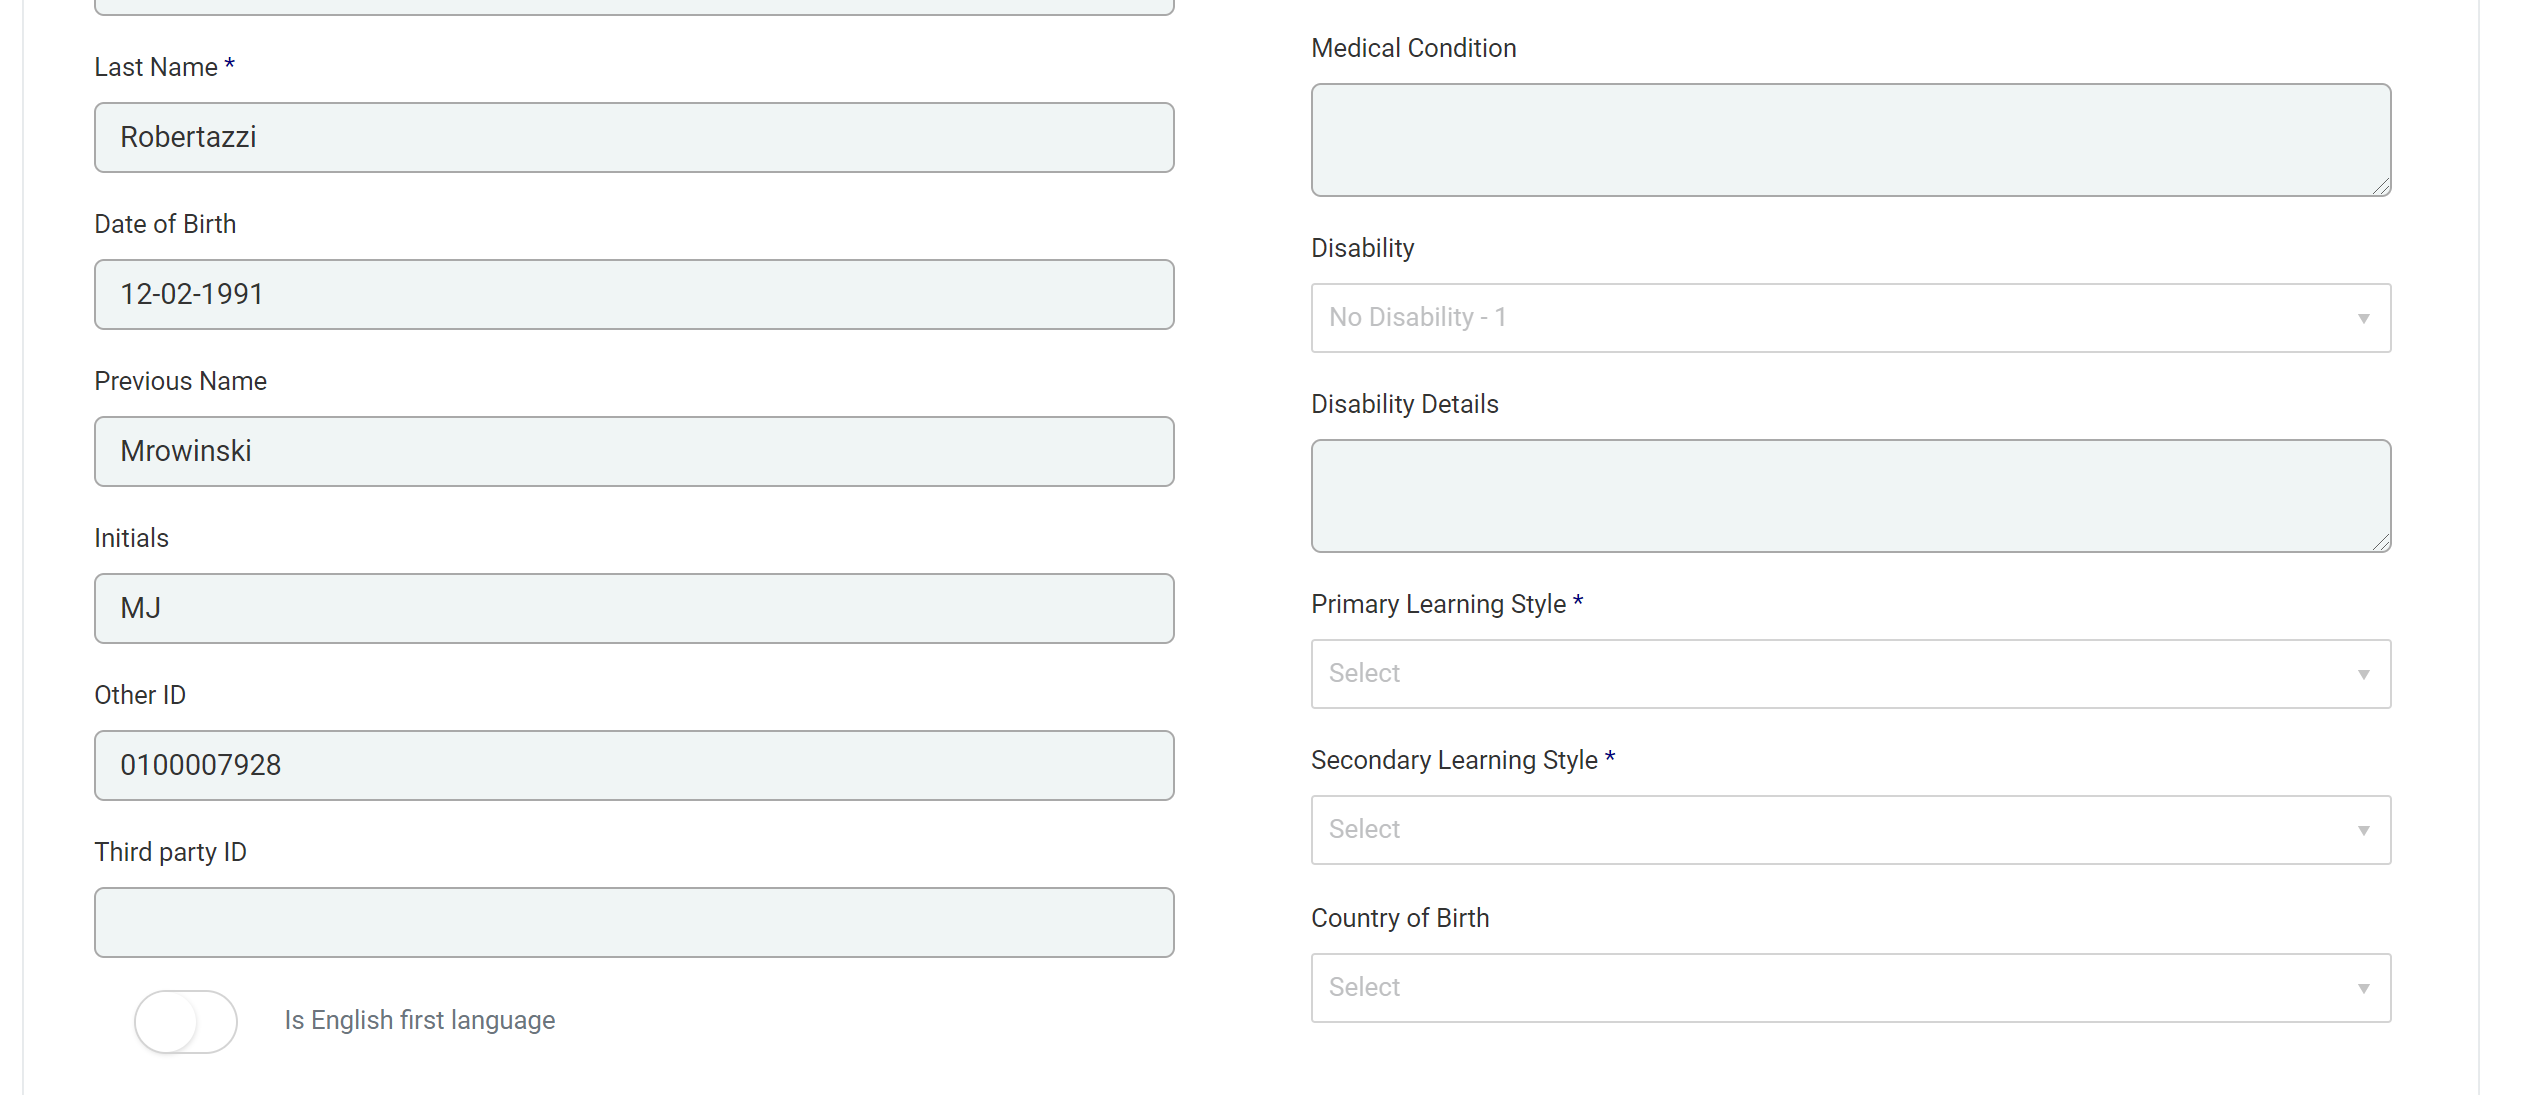
You can also add information pertaining to –

  • Medical Conditions
  • Learning Behavioural Needs
  • Disability Details (if applicable)
  • Primary and secondary learning styles
Graphical user interface, text, application

Description automatically generated

Once you have entered all the minimum/relevant information about the student you can add them.

ID Number

A default ID number is allocated to students when their record is created by the system. There is another field – “Other ID” – which can be used by you to add an internal ID number that is applicable to your education provider.

The default ID number is system generated and therefore cannot be altered or deleted.

Related Articles

6 – International Students

International Students The “International Student” tab allows you to enter all information relevant to international students. Go to the “Other Organisation” section to create Agents, Medical Insurers and Homestay providers which can then be chosen in the drop-down lists of this tab: A few of these fields are reliant on you first setting up the …

5 – Merge Students

Merging Students Students -> Merge Students If you wish to merge two students select the ‘Students’ Tab from the top nav bar, and then click on ‘Merge Students’ from the drop-down menu. You will be presented with the option to provide the User ID of the student you wish to merge (i.e. delete) and the …

4 – Manage Students

Manage Students ‘Manage Students’, allows you to search for students in your organisation. If you have not created a student yet, please refer to the “Create / Edit Student” section. To manage a student, look at the top of the screen and find the ‘Students’ field. You will find a table with all of your …

1 – Students

This page explains what functionalities the “Students” tab at the top of the navigation menu can have. Functionalities will all be dependent on your subscription plan. To find out about subscriptions check out our Plans. This includes managing students, creating new student, merging student, uploading photos, and enrolment form. Table of contents: Student Screen The …