On this page:
Intakes
Intakes are an offering of a curriculum at a certain time and place. You can enrol students into intakes only. If a curriculum item (programme) is not offered through an intake, you can’t enrol a student into it; you will need to have at least one programme level curriculum item setup.
If you run rolling intakes: Create an intake for a year with the start date of 1st January and an end date of 31st December. You will be able to choose an enrolment date on enrolment and SELMA will automatically calculate the end date of the enrolment of an individual learner that enrols into a rolling intake.
If you have fixed intake dates: Create your intake with the set dates, e.g. Aviation 2019 Intake starts on the 14th of January and ends on the 12th of December. All students will follow these dates.
Manage Intakes
Similar to the Student or Curriculum sections, you can search intakes by a variety of searchable columns, save your search if you use it often and use advanced search columns if necessary.
Read the chapter “Working with Grids” in this manual to familiarise yourself with SELMA grids.
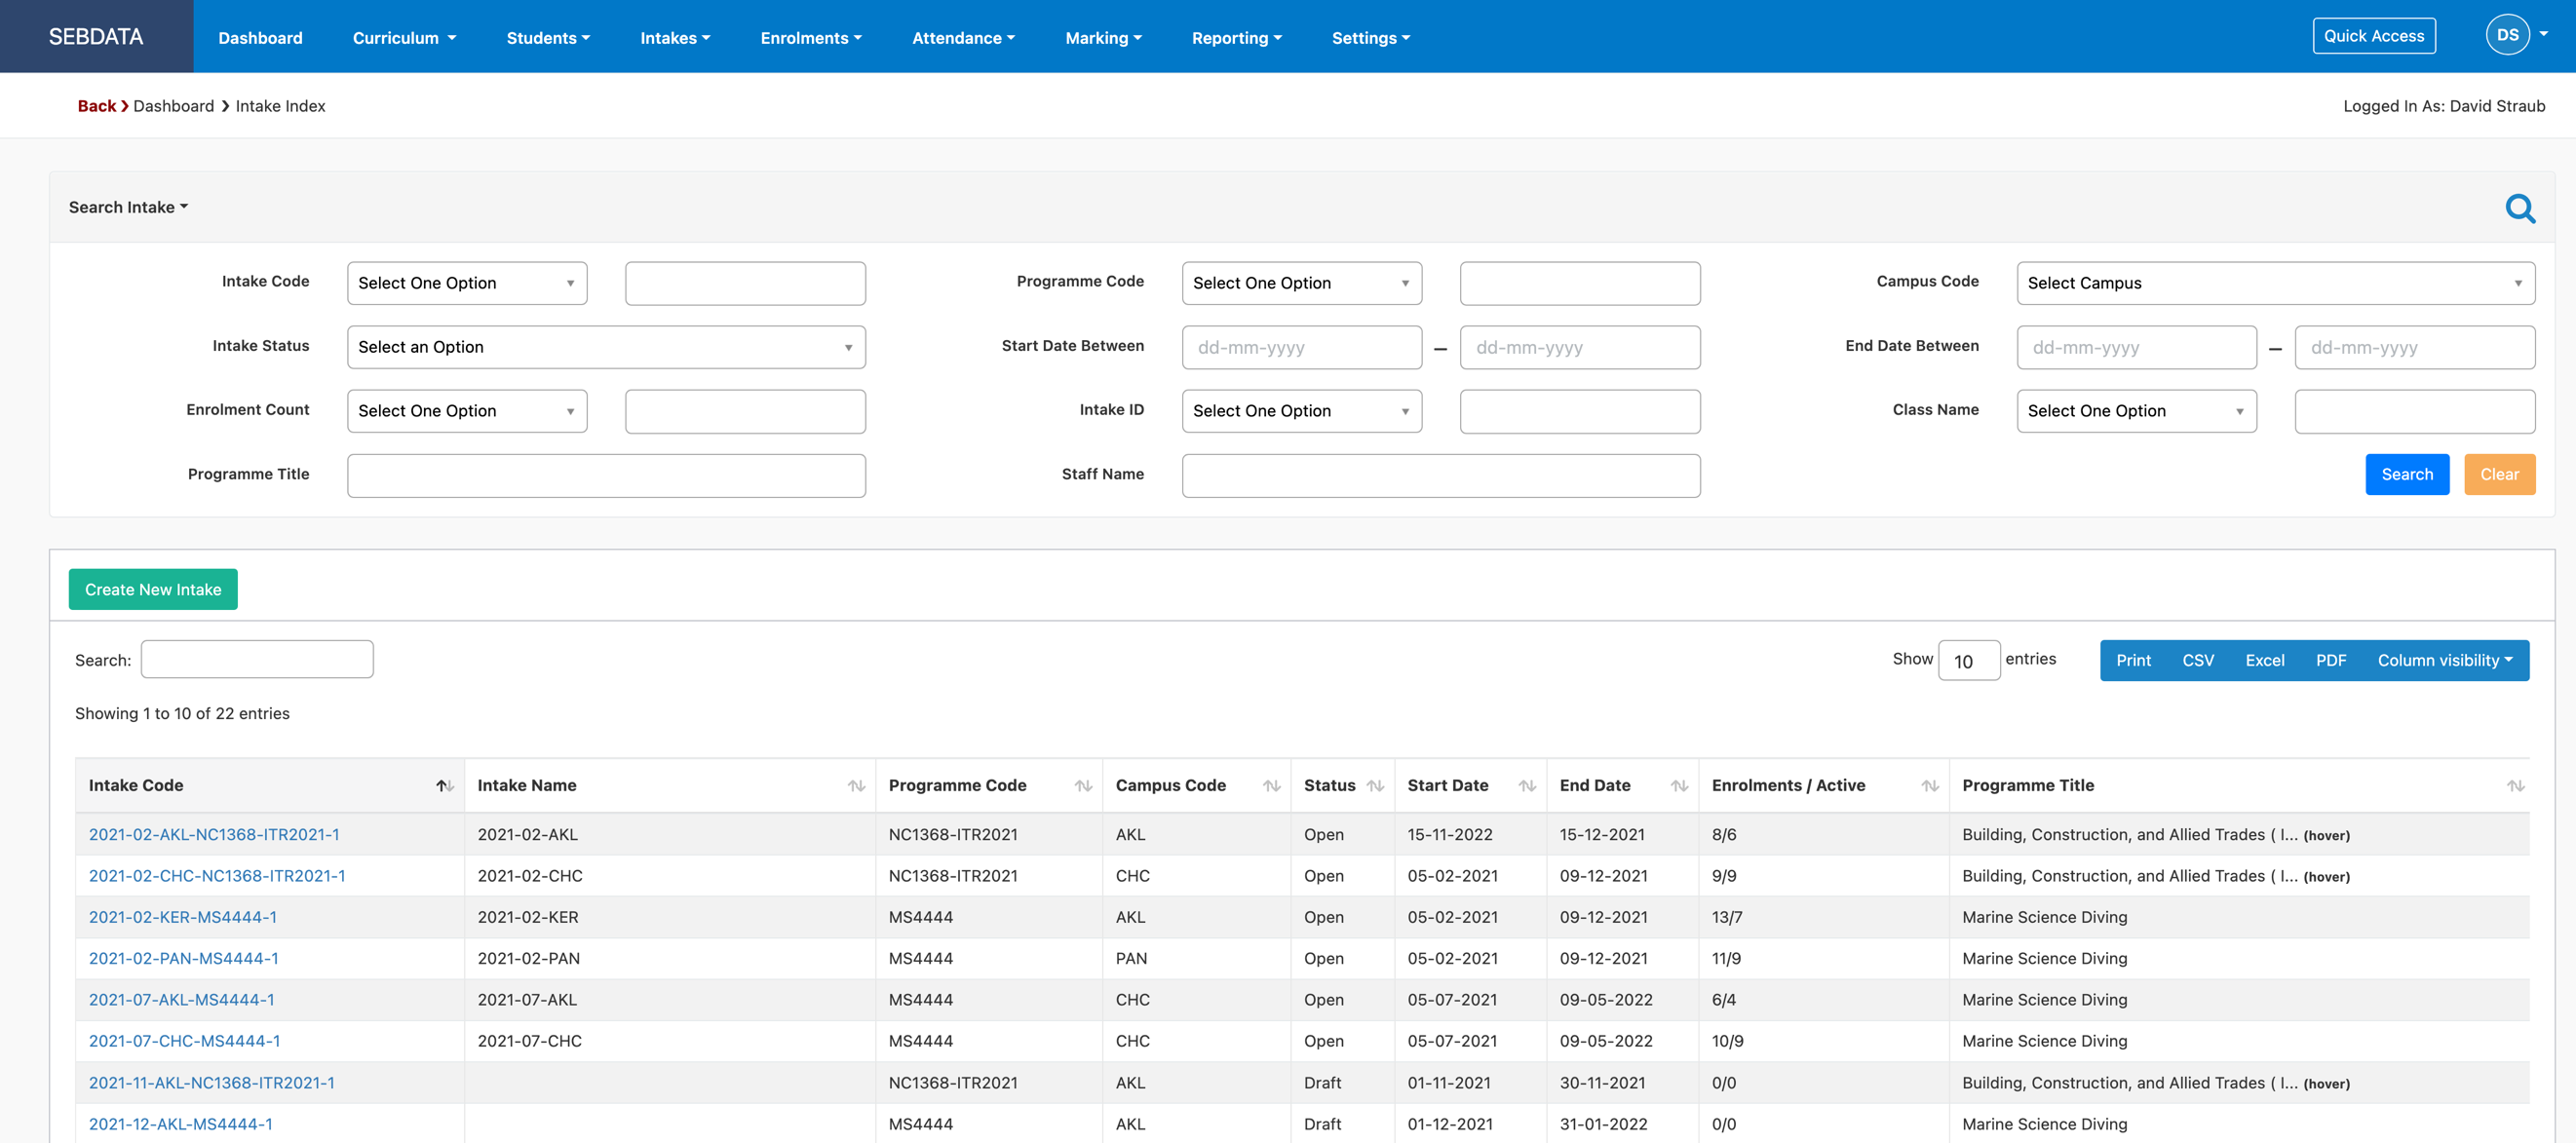
In order to edit an intake, click on the blue intake code in the result list.
Create an Intake
To create a new intake, click on “Create New Intake” on top of the result list, in the Intake menu or through the quick access menu.
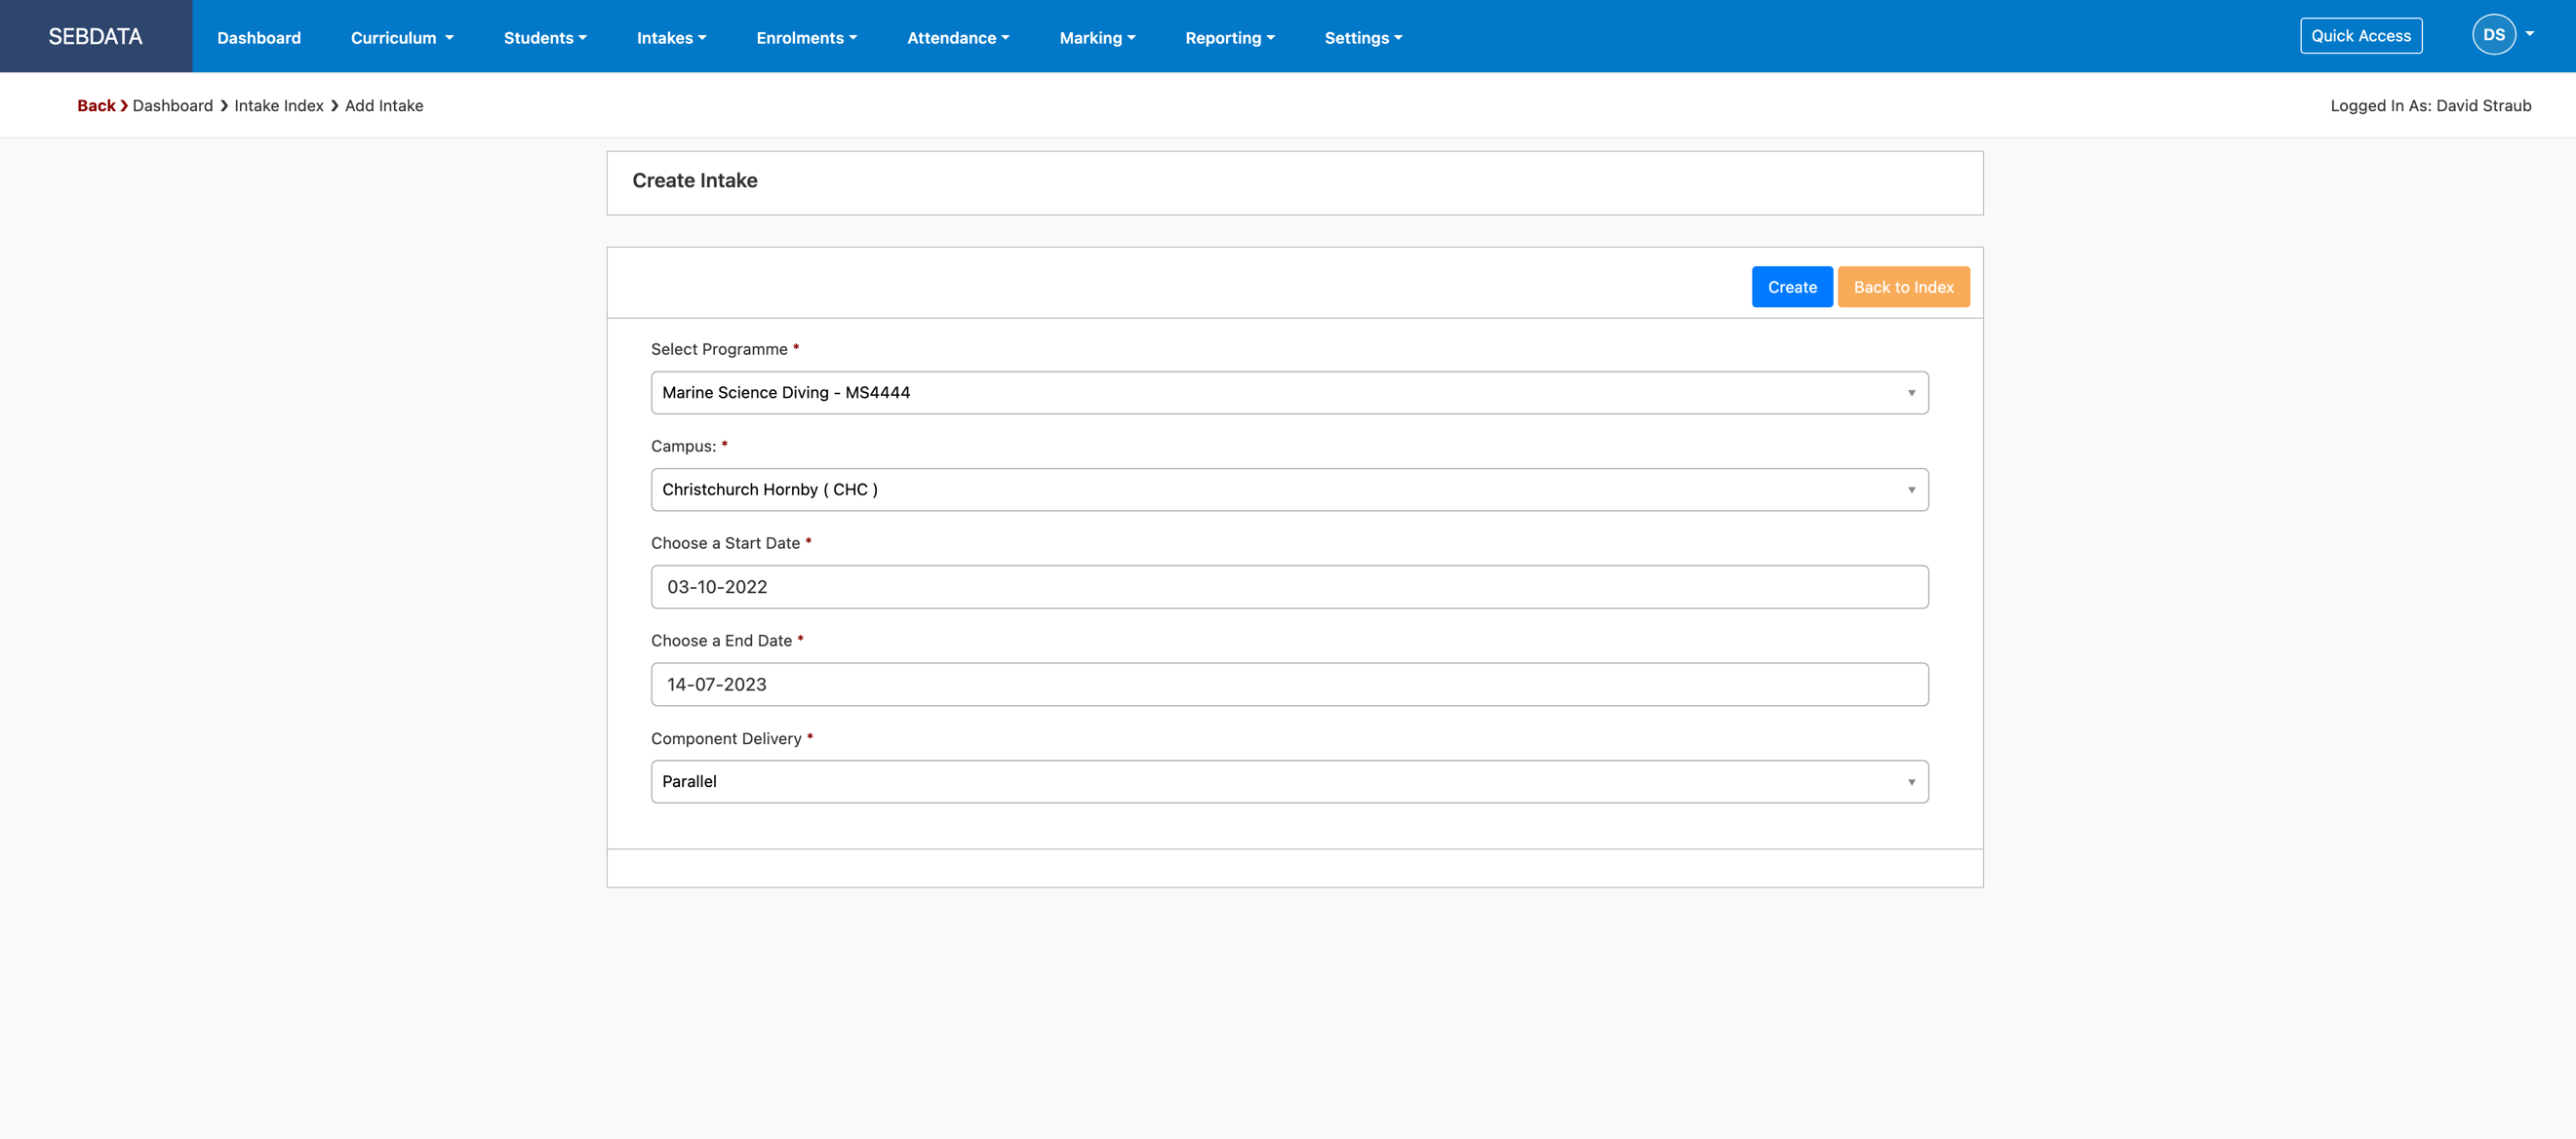
Campus: these are your campuses which can be set-up in the Campus section (see Settings –> Campus).
Programmes: These are all your active programmes setup in the curriculum.
Start and End date mark the start and end of the intake.
|
|
For “Rolling Intakes” we recommend setting the start date to the 1st January and end date to the 31st December of a given year. When you later enrol a student into the intake, you can select the student’s specific enrolment start and end date. This way you have all your students starting each year in the same intake but still all students can have their individual study dates. |
The component delivery specifies whether you would like to deliver the individual components (e.g. courses and unit standards) with the same start and end date (Parallel) or one after another calculated by the duration of the component (Staggered).
Click the ‘Create’ button and you will be forwarded to the newly created intake.
Newly Created Intake
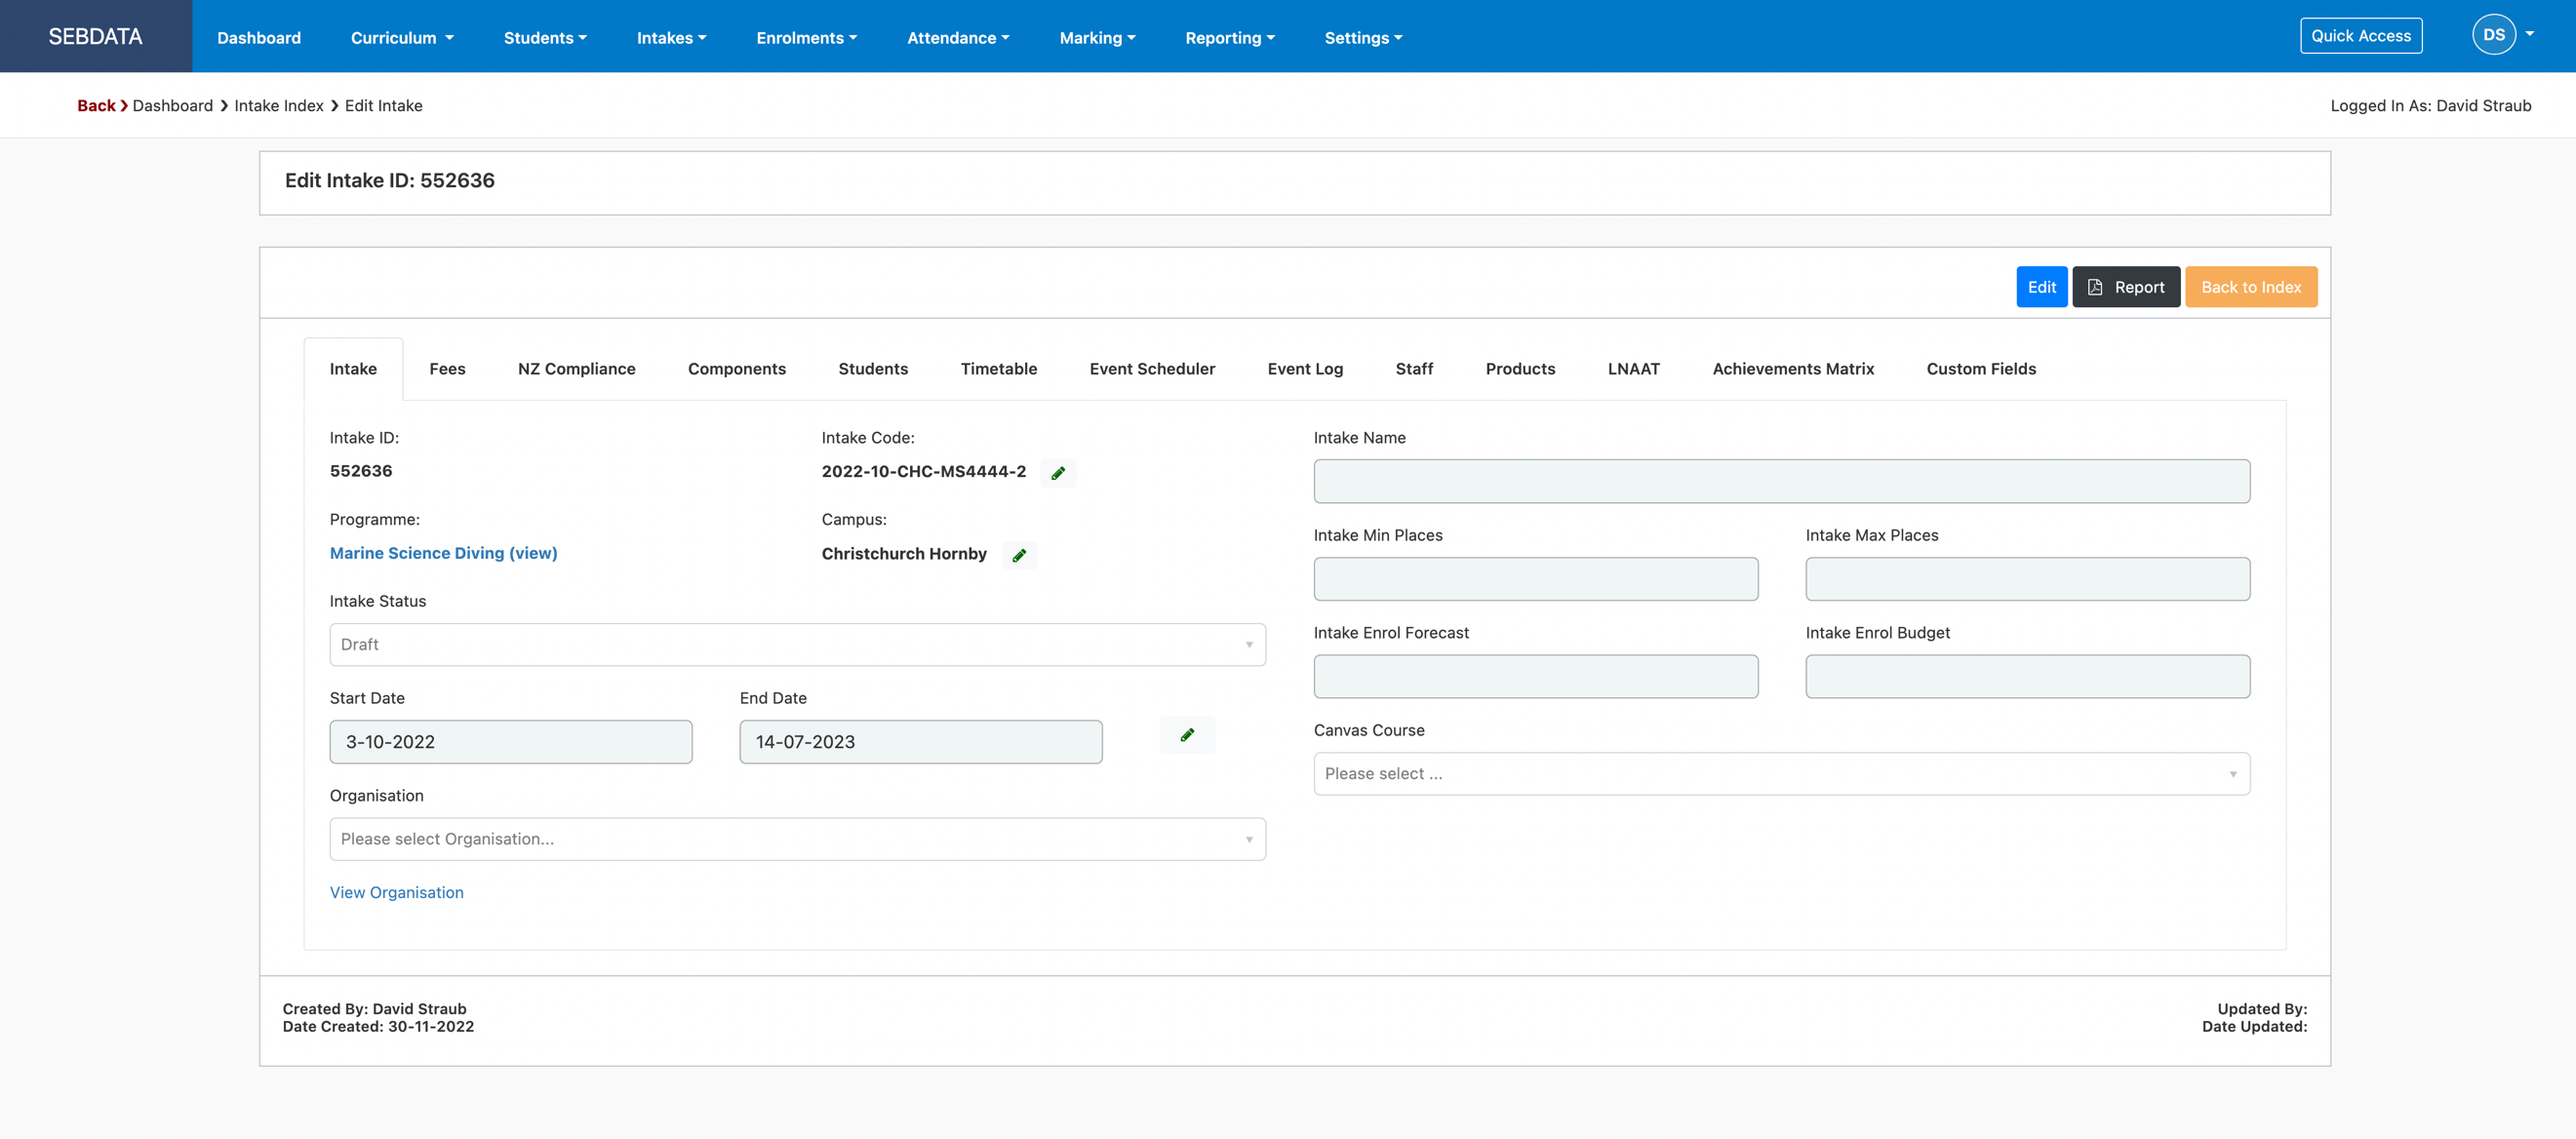
By default, the intake will be in draft status. It will also have a default Intake Code generated by SELMA and the intake name is empty. It is recommended to give the intake a name and change the intake code of you have specific internal coding for intakes. You should also change the intake to status “Open” if you want to go ahead and enrol into this intake straight away.
|
|
Only intakes of status “Open” will show up in the list of possible intakes to enrol into when trying to enrol learners. |
Edit an Intake
Intake Tab
An Intake Code is automatically created by SELMA, if you don’t like the code or you have your internal intake codes, you can change the code by clicking on the pencil button next to the intake code. The Intake Name can also be set to the name for your cohort that can be searched for in many areas of SELMA. By default, the intake name is empty.
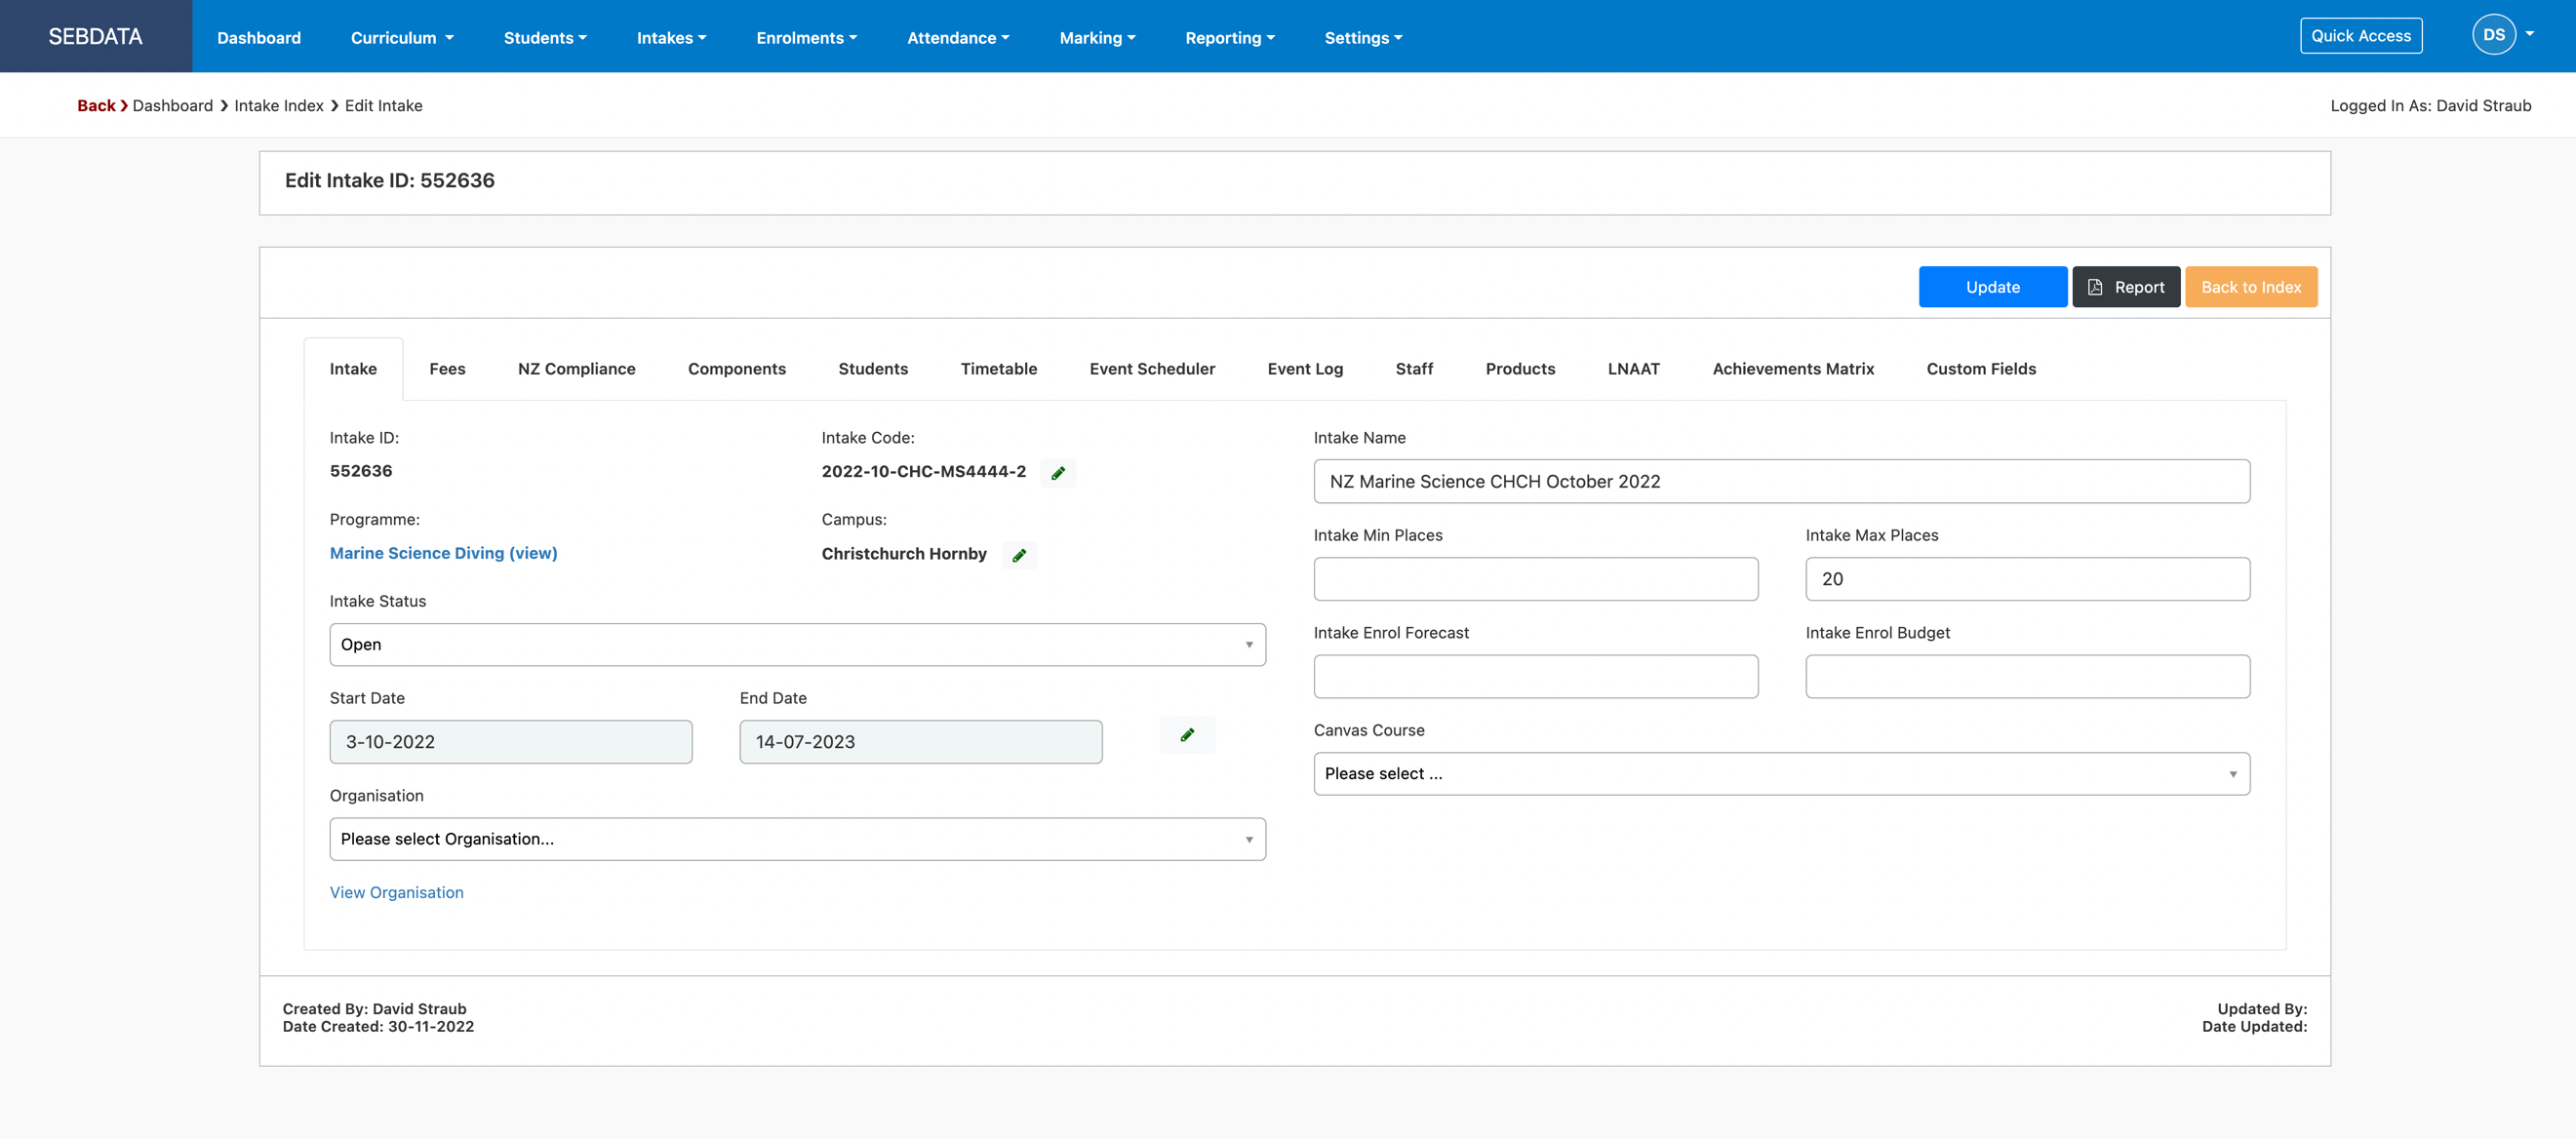
If you control the maximum students for an intake, enter it into the Intake Max Places field. The intake will be marked as full once the number is reached and learners enrolling into this intake will have an enrolment status of “Waitlisted”. If you don’t have a maximum number, leave this blank and you can enrol as many learners as you want.
The Intake Min Places, Enrol Budget and Enrol Forecast are fields that do not drive any functionality in the system and are used for reference only or for custom reports.
The default intake status is “Draft”. Change the Intake Status to “Open” if you want to enrol learners into it. The intake may change to “Full” if the maximum learner number is reached or you may cancel the intake which will also cancel all underlying enrolments.
An intake is always linked to a Campus. You can create e.g. a distance learning campus if you need a generic campus that is used for learners that do not physically attend class. The campus can be changed on the intake by clicking on the pencil button next to it. The campus will then change for all learners and will also change the “Course Site” which is a relevant SDR field.
The intake start and end date can be changed with the pencil button next to the date fields. A workflow will help you to define whether you want to change the intake dates only (and any intake component start and end dates that would fall out of the intake start and end date after the change), update all intake component start and end date as well or even update all or selected underlying enrolments as well.
|
SDR | Be careful when changing the intake component start and end dates and cascading this change to the underlying enrolments. Changing the enrolment component start and end dates may be non-compliant for SDR submitting providers. |
Fees Tab
The fees set in the programme and courses are converted into fee lines when creating an intake. These fees can be edited or deleted with the relevant action button in the very left column of the grid. At this point, international and domestic fees are both showing in the intake fee tab. If you however enrol a learner that is marked as international, only the international fees will be forwarded into the enrolment and vice versa with domestic students.
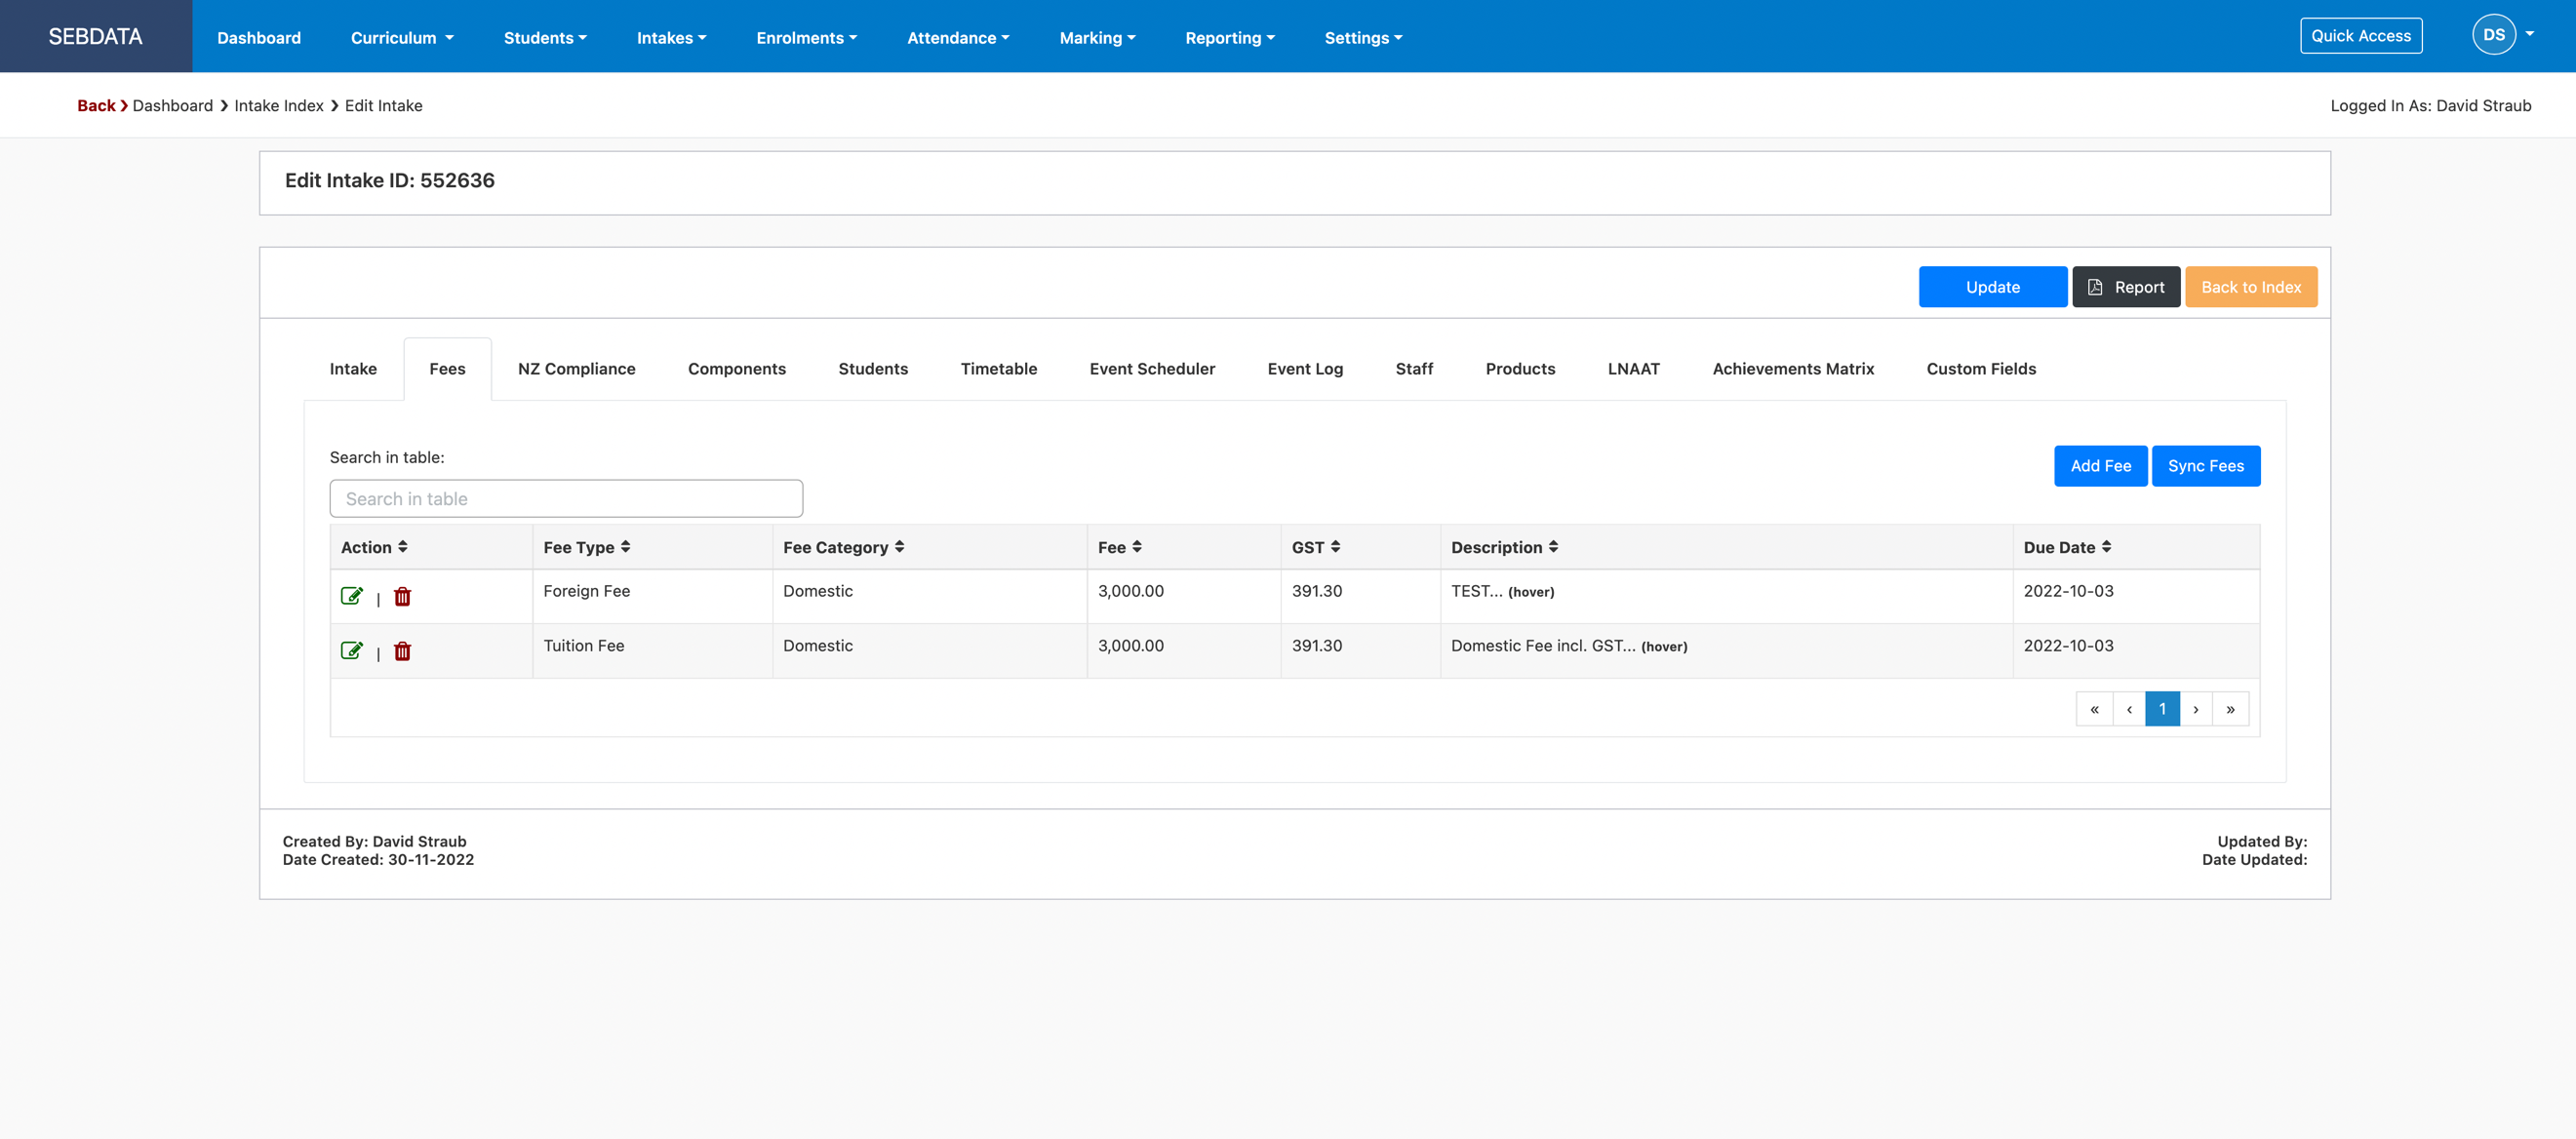
With the “Add Fee” button, further fees can be added to this intake, or you may not have any fees set at all on the programmes and you define the fees in the intake only. Note: you must be in edit mode to be able to make changes.
The “Sync Fees” button will update all fees as they are set in the curriculum setup.
The due date of the fees defines when fees need to be paid. This can be very helpful if your learners’ study for multiple years but only pay annual fees. The due date for the learner will be automatically adjusted if the enrolment start date does not equal the intake start date (e.g. enrolment start date is 6 weeks after the intake start date, the due date will be adjusted by 6 weeks).
|
SDR | The intake fees and enrolment fees are a feature of SELMA to bill and manage student payments and potentially the public trust account. However, the fees set here are not the fees reported in the SDR. The SDR relevant fees are defined in the Curriculum -> Manage Curriculum -> Course -> NZ Compliance Tab |
NZ Compliance Tab
The NZ Compliance tab is mostly a reflection of what is set in the curriculum -> programme setup. Here you may change the funding source (which is useful if you run a usually funded programme as a non-funded offering), the EFTS, length and credits. Please note that besides the funding source, no field here has any impact on the compliance reporting (SDR/ITR) nor any system functionality. The information here is recorded for your reference only.

Components Tab
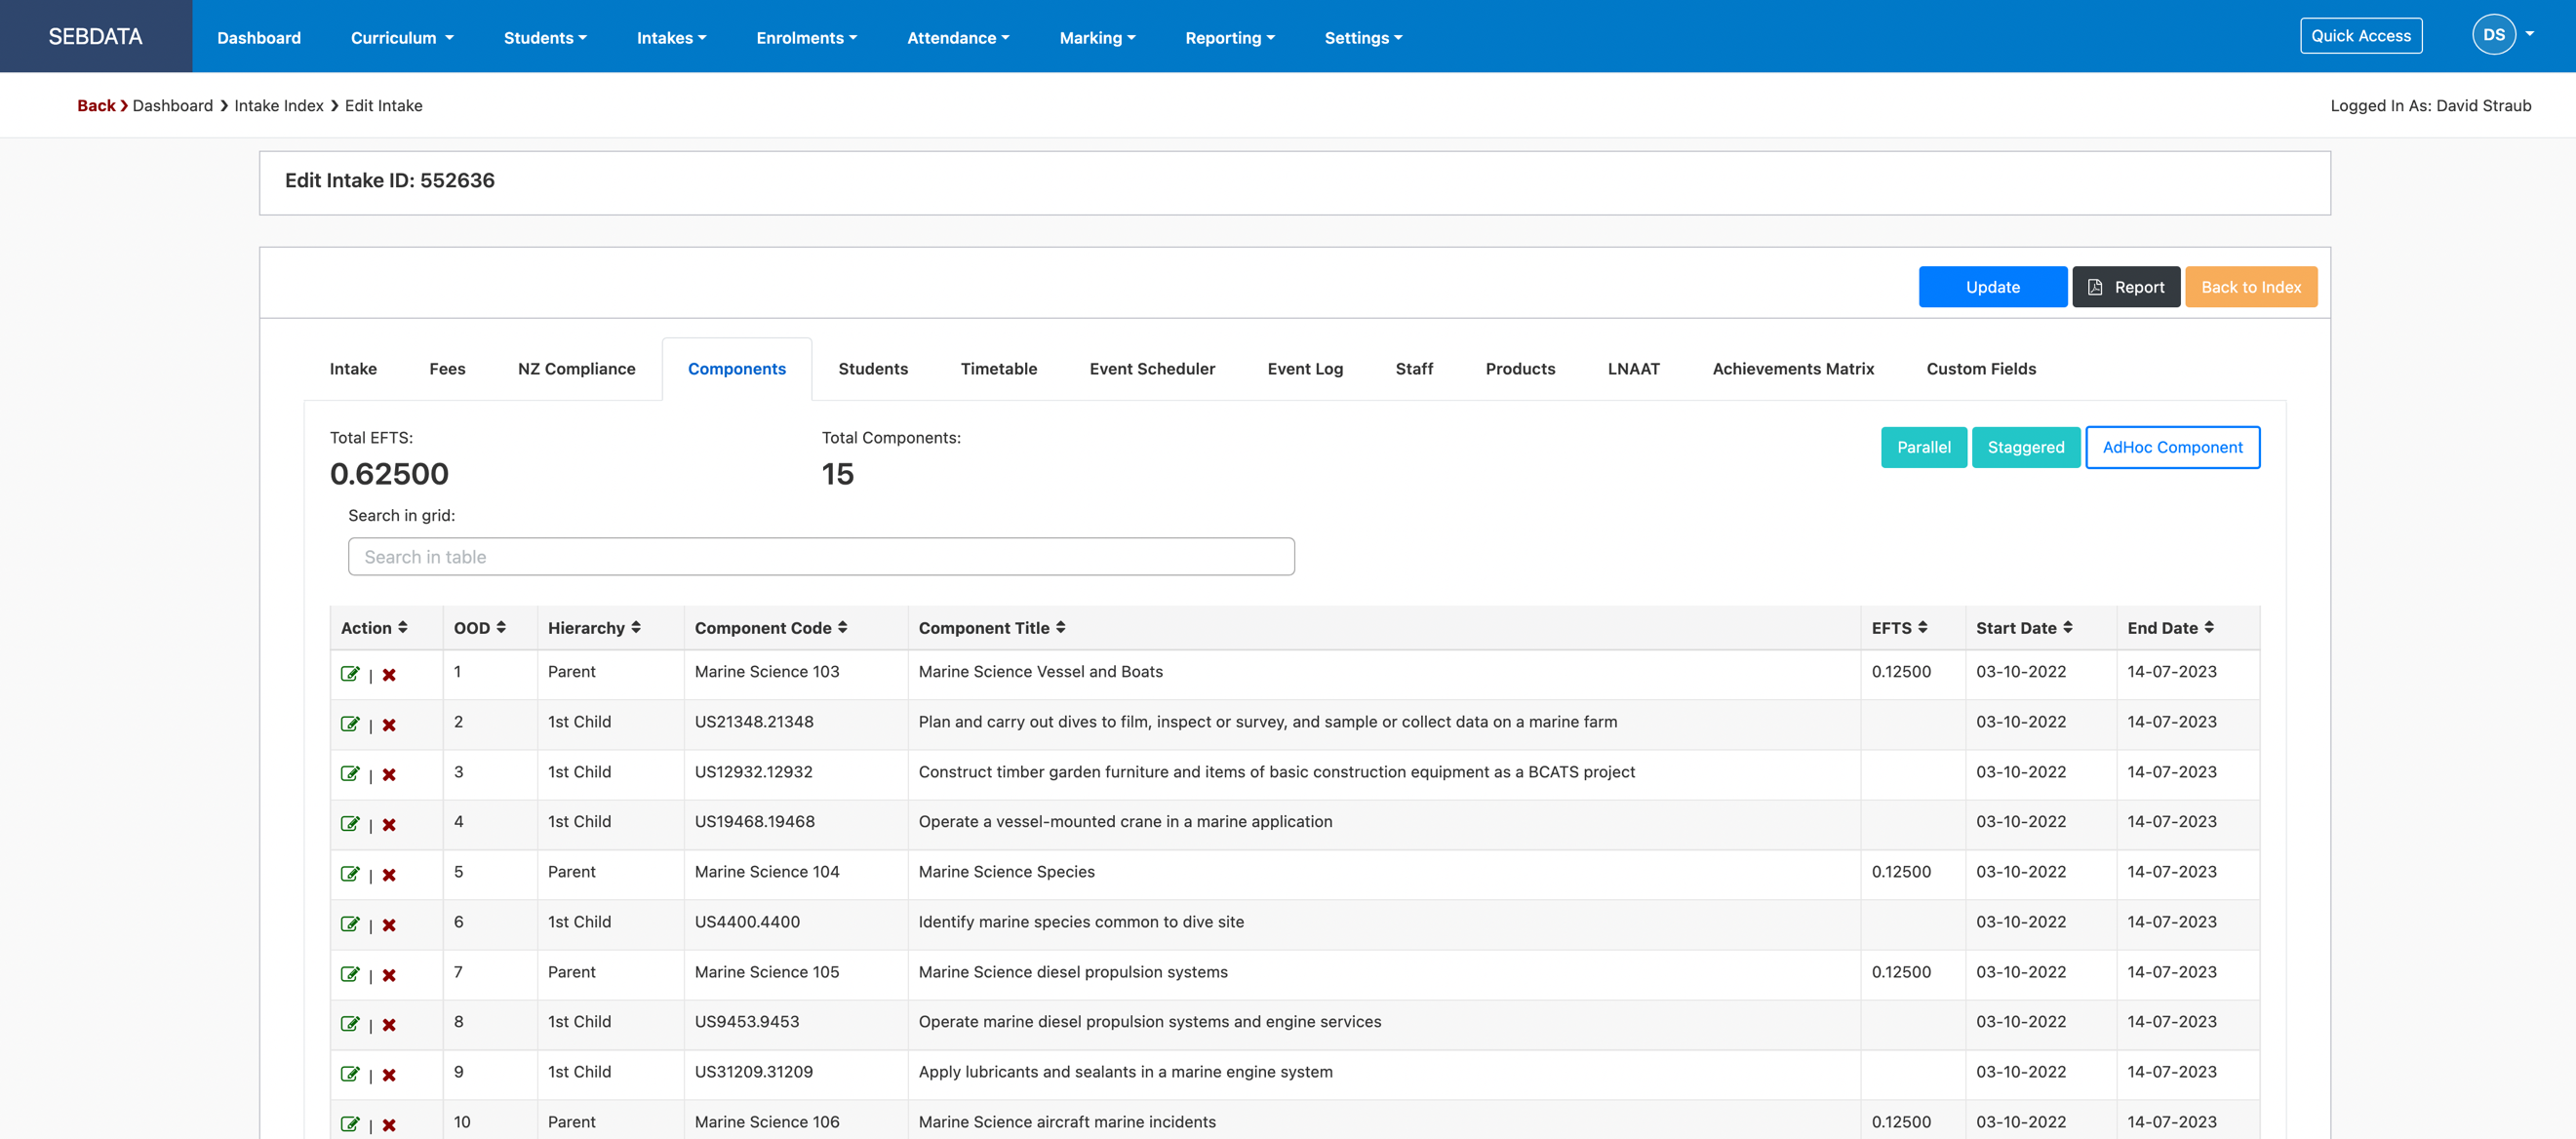
The components tab shows all components linked against the programme in the curriculum setup. The components are automatically copied into the intake upon creation and ordered the way they were setup in the curriculum (OOD). You can also see the defined hierarchy of the components in the Hierarchy column.
Like when creating an intake, you can adjust the individual component dates here with the Parallel and Staggered button. Parallel means all components start, and end dates will be the same and will equal the intake start and end dates. Staggered means, that all components will start, and end based on their order of delivery, the hierarchy and the component length that is defined in the curriculum.
|
SDR | For SDR submitting providers, Parallel is the typical delivery setup of components. |
Components can be deleted with the cross button under the Action column (which will trigger a workflow to delete the components from the enrolments as well if there are any enrolments for the intake) or you can AdHoc components into the intake.
Click on the AdHoc Component button to add further components to the intake. You can only select components that are not already in the intake and you have to search the components with the exact component code. You can define if one of the existing components should become the parent of the component you are about to add.
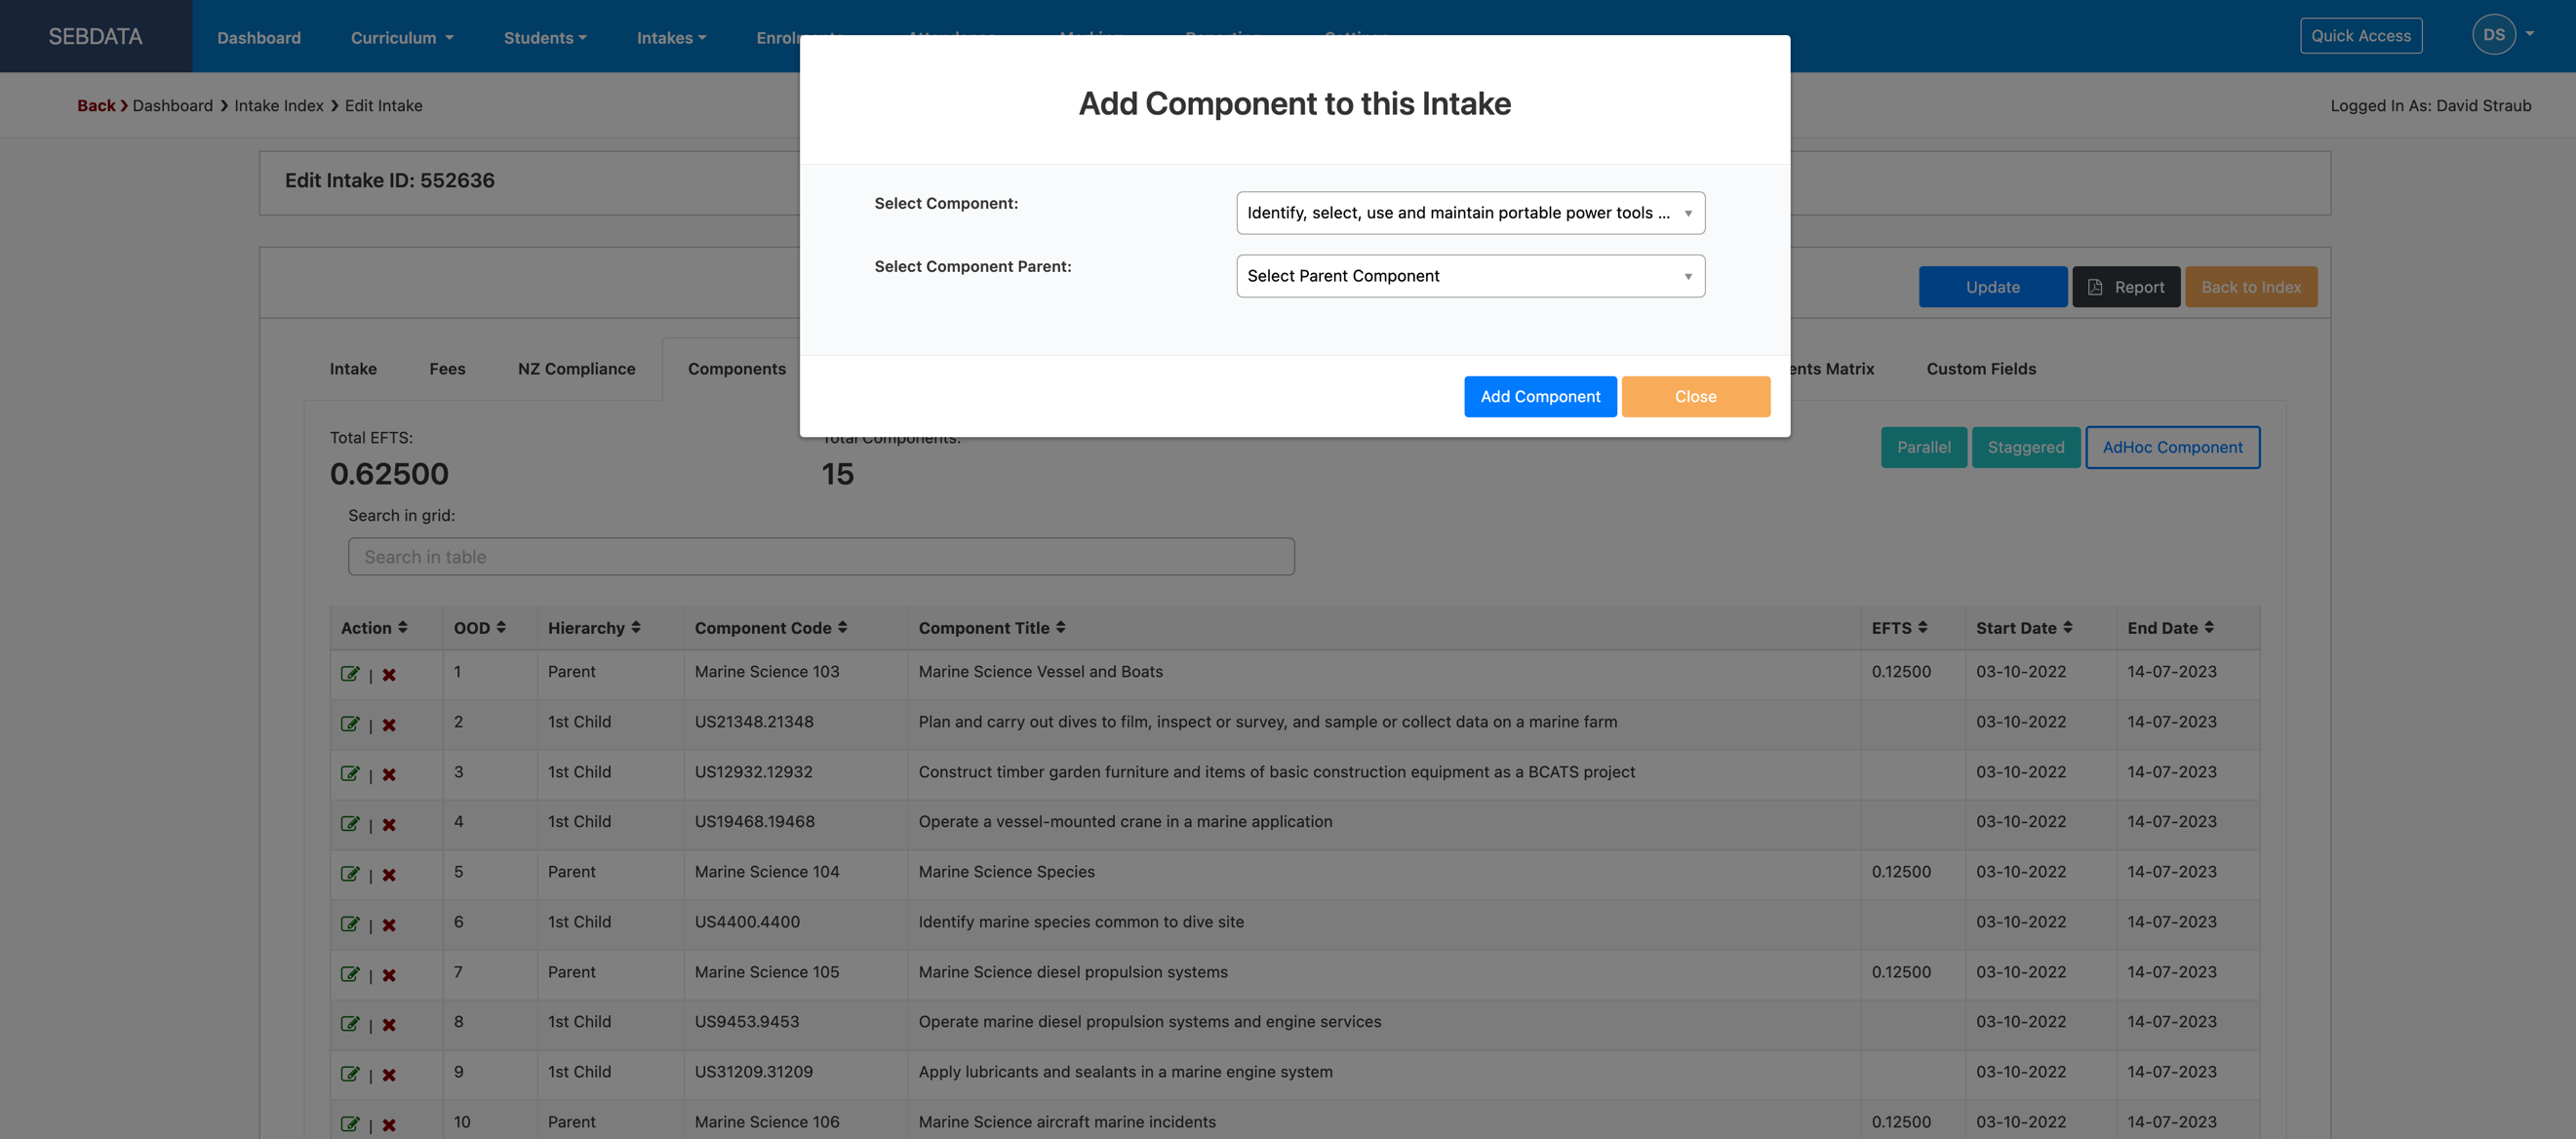
Once you have selected your component and clicked on “Add Component”, the system will ask you if you want to add it to the intake only or to all underlying enrolments as well.

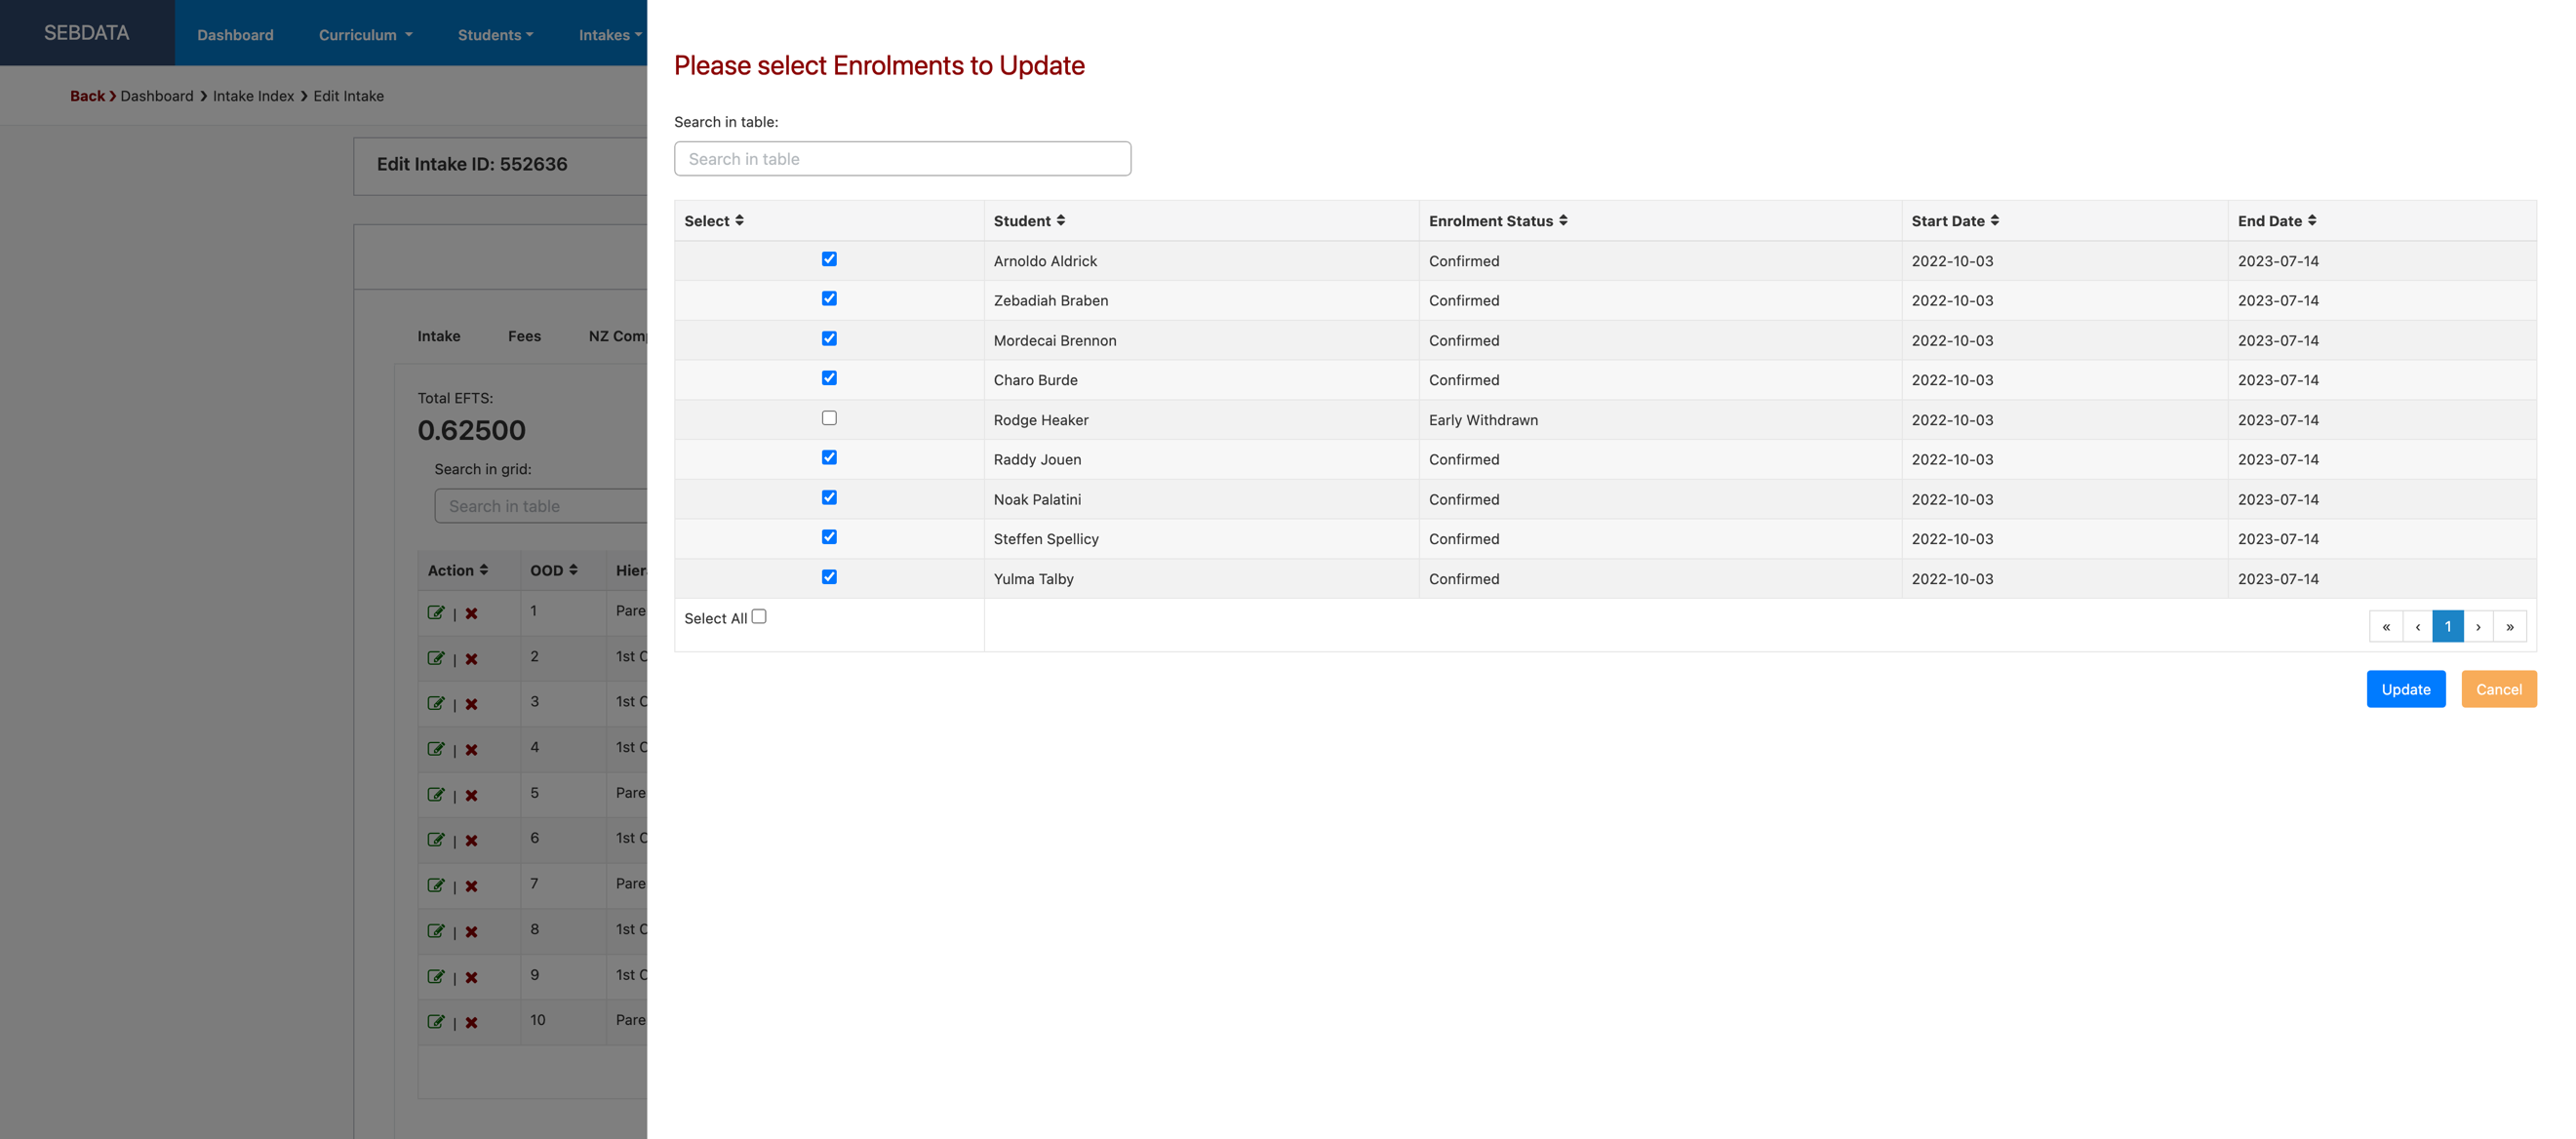
If you add it to underlying enrolments as well, you will be guided through a slide in window to select the enrolments you want to add it to. By default, enrolments that are not of an active status will be de-selected. You can however select all enrolments if you wish.
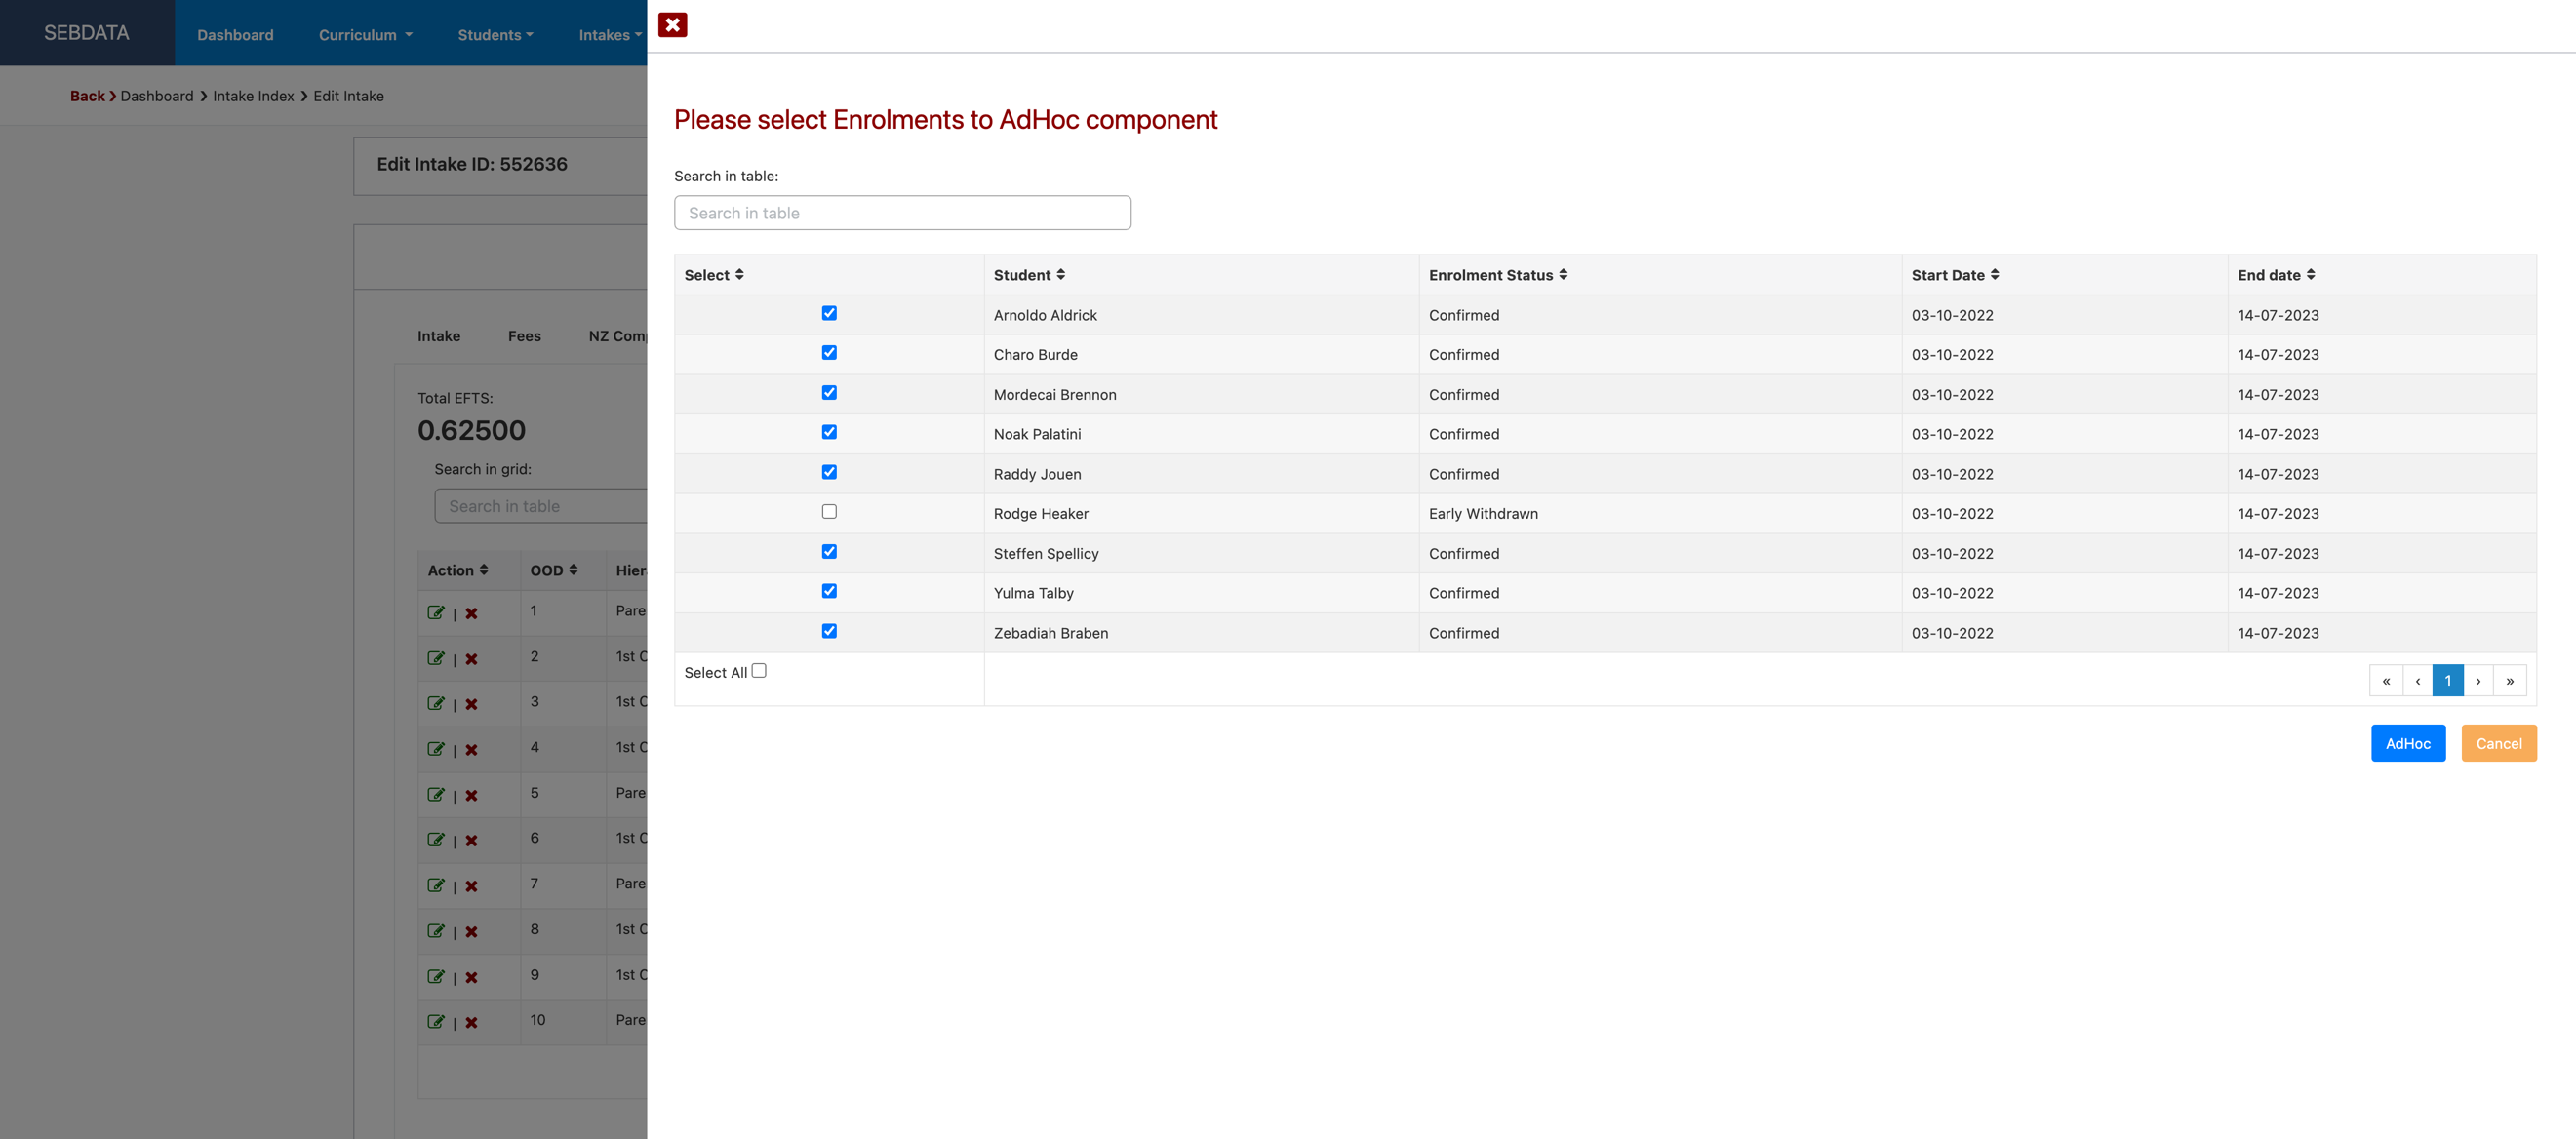
Once you made your selection, you can click on AdHoc and the component will now be added to the intake and all selected enrolments. The component will be added to the end of the list and further updates might be necessary if you want to change the order of delivery (OOD).
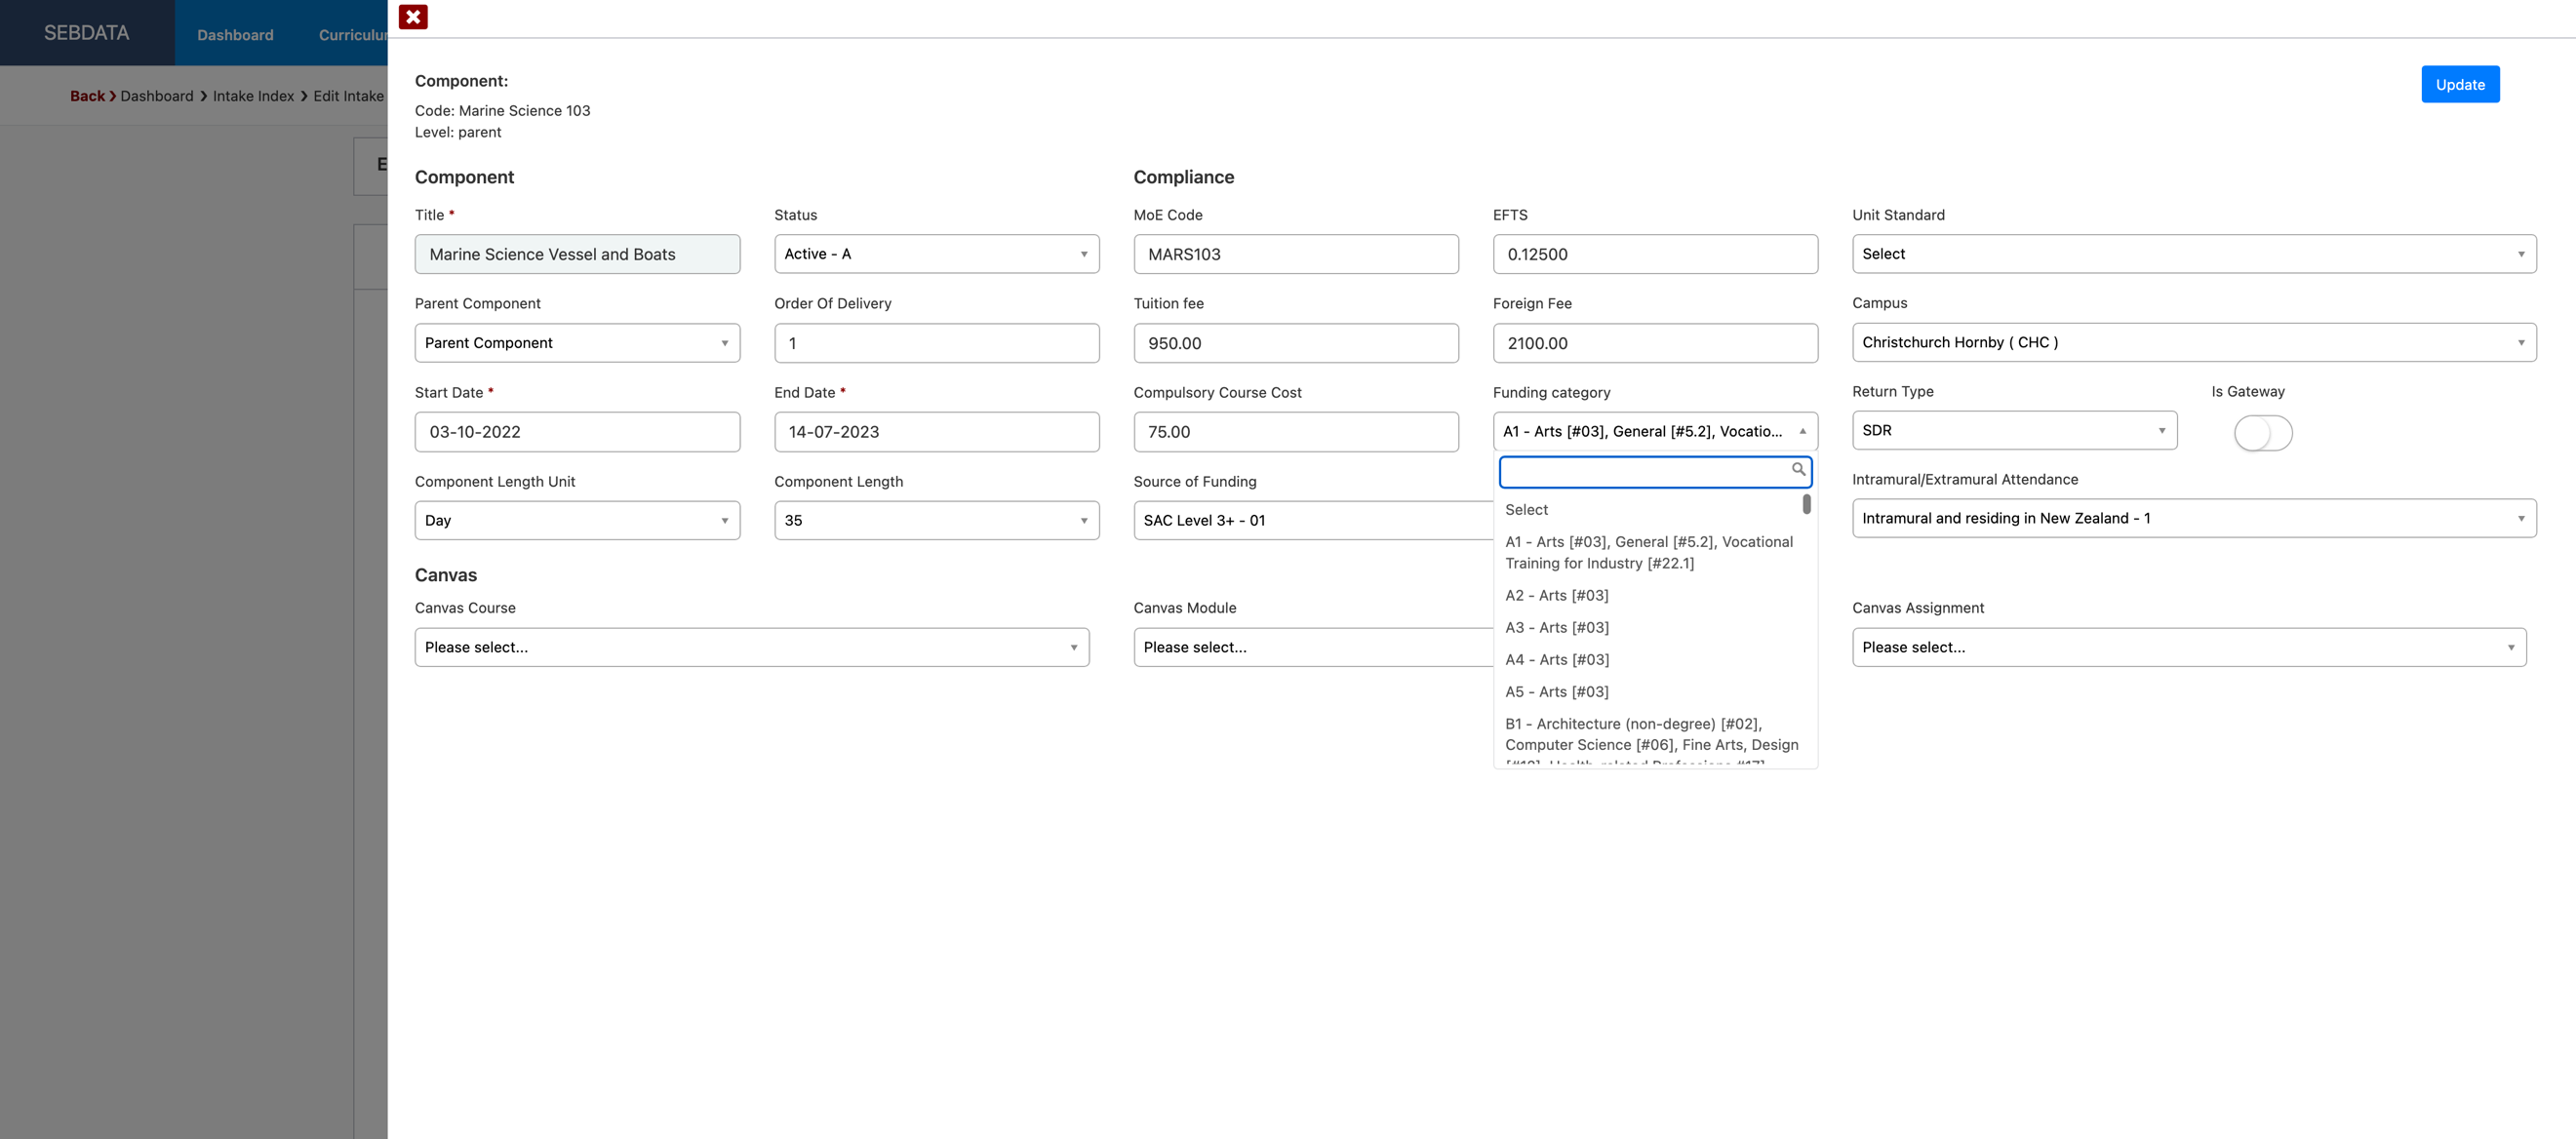
Like with the AdHoc component, changes in components can also be pushed through to the individual enrolments. To edit a component, click on the green pencil button in the component list, a slide in window will show all component details. Below, the funding category is changed:
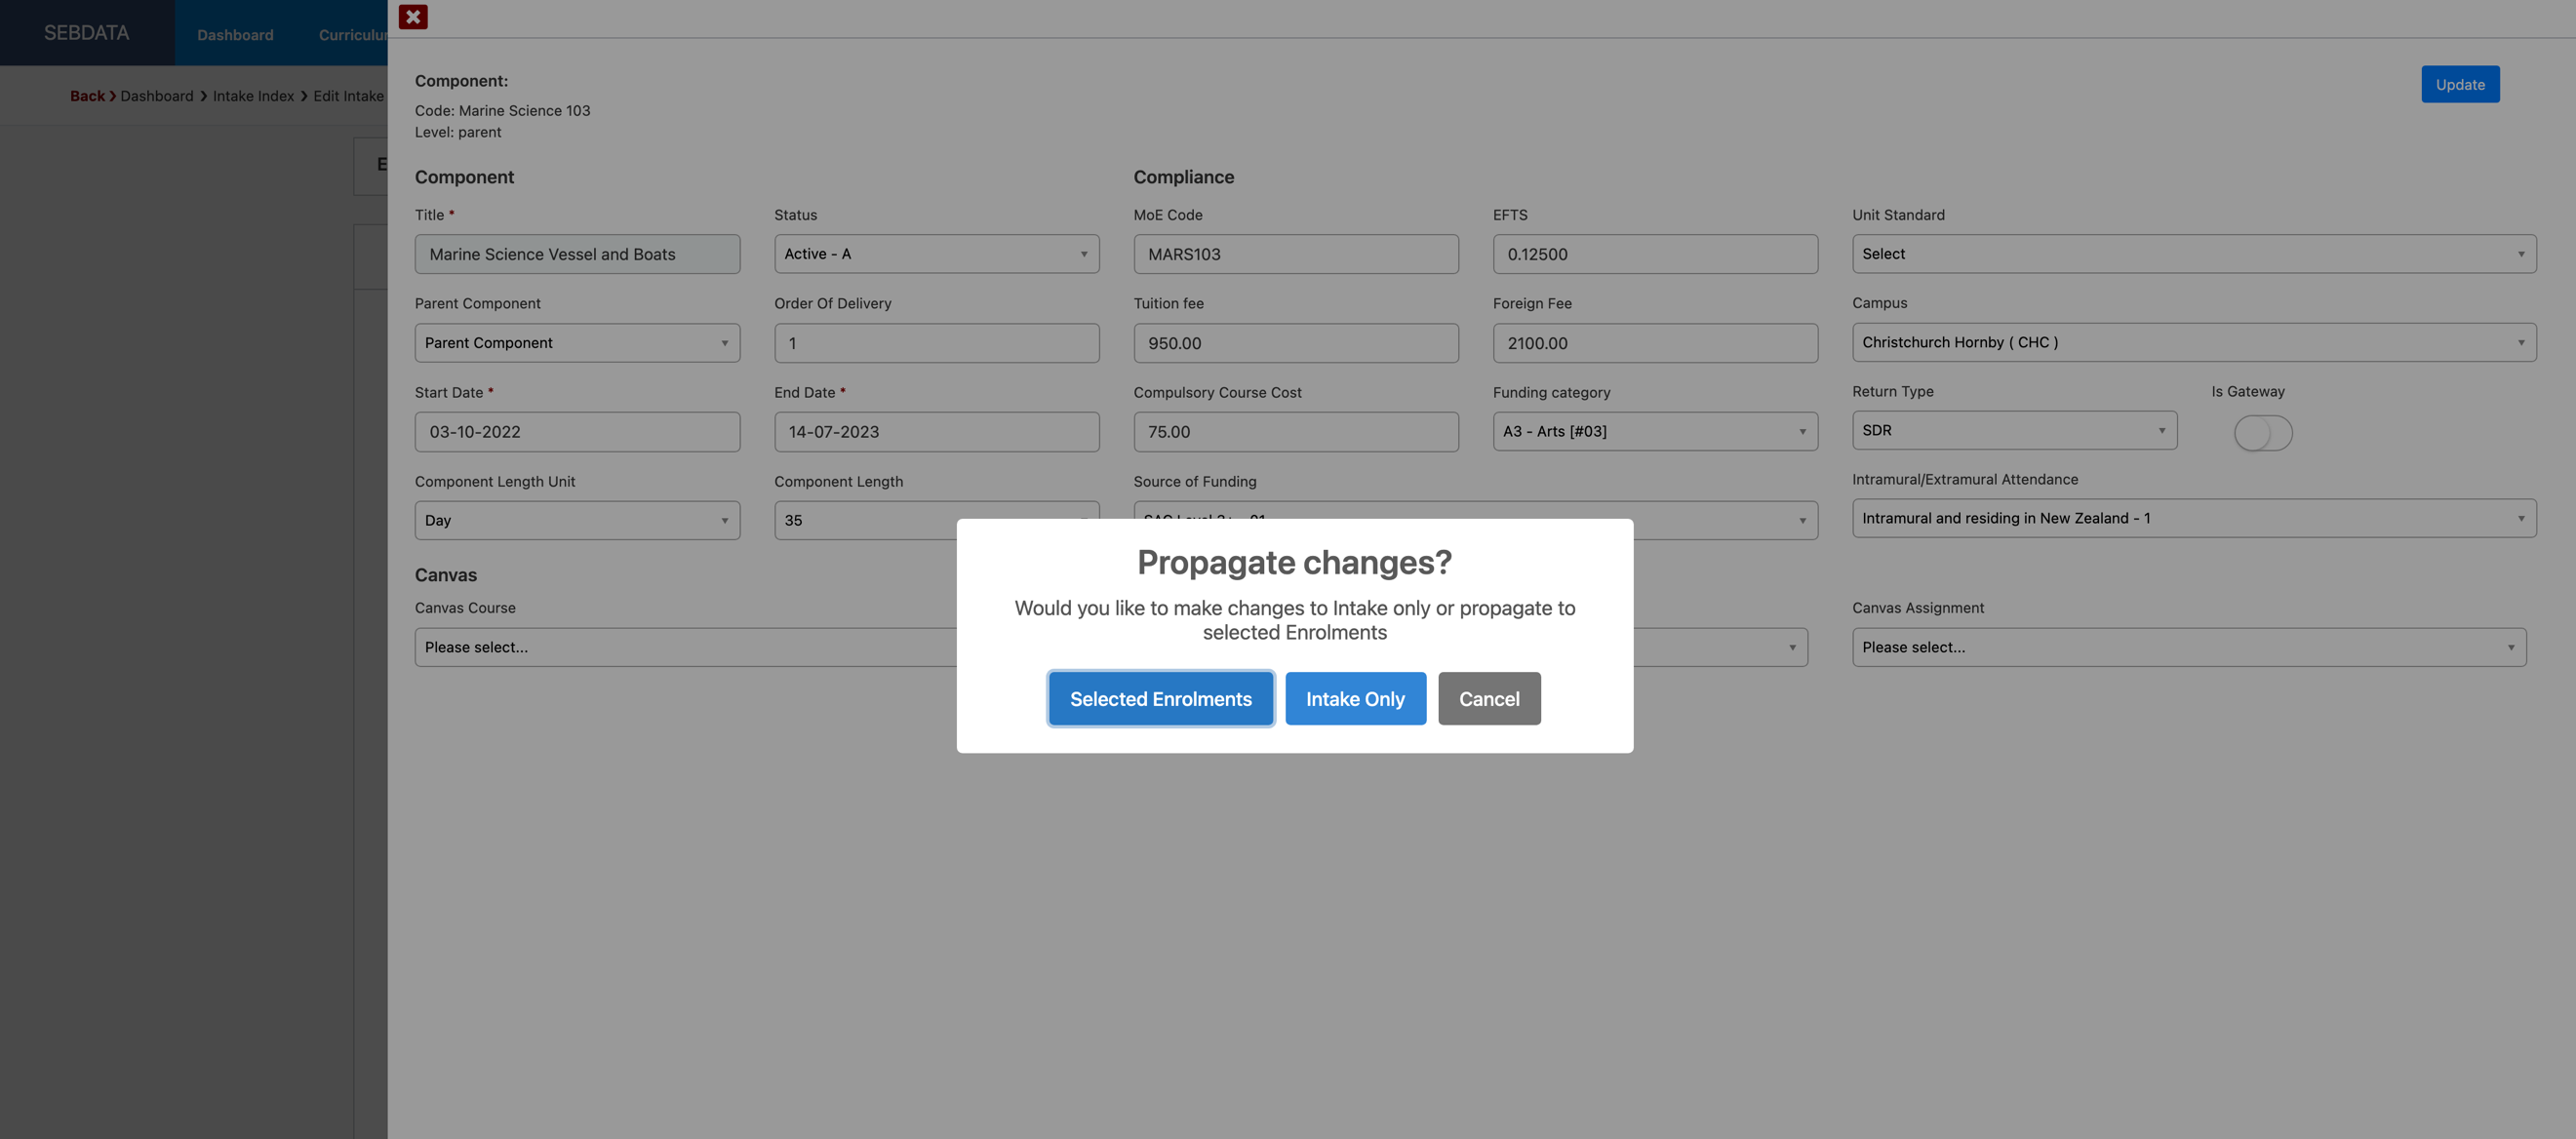
The system will now ask if you want to propagate the changes to all enrolments or make the change on the intake only:
If “Selected Enrolments” is chosen, the slide in window with all enrolments will appear to make your selection and process the change.
Students Tab
The student tab is a very important view to show you all enrolled students in this intake. The enrolment ID in the grid is a link that can forward you directly to the student’s enrolment (hold down ctrl or command (mac) if you want to open the enrolment in a new window). The Student ID and Name is a link to the student’s profile.
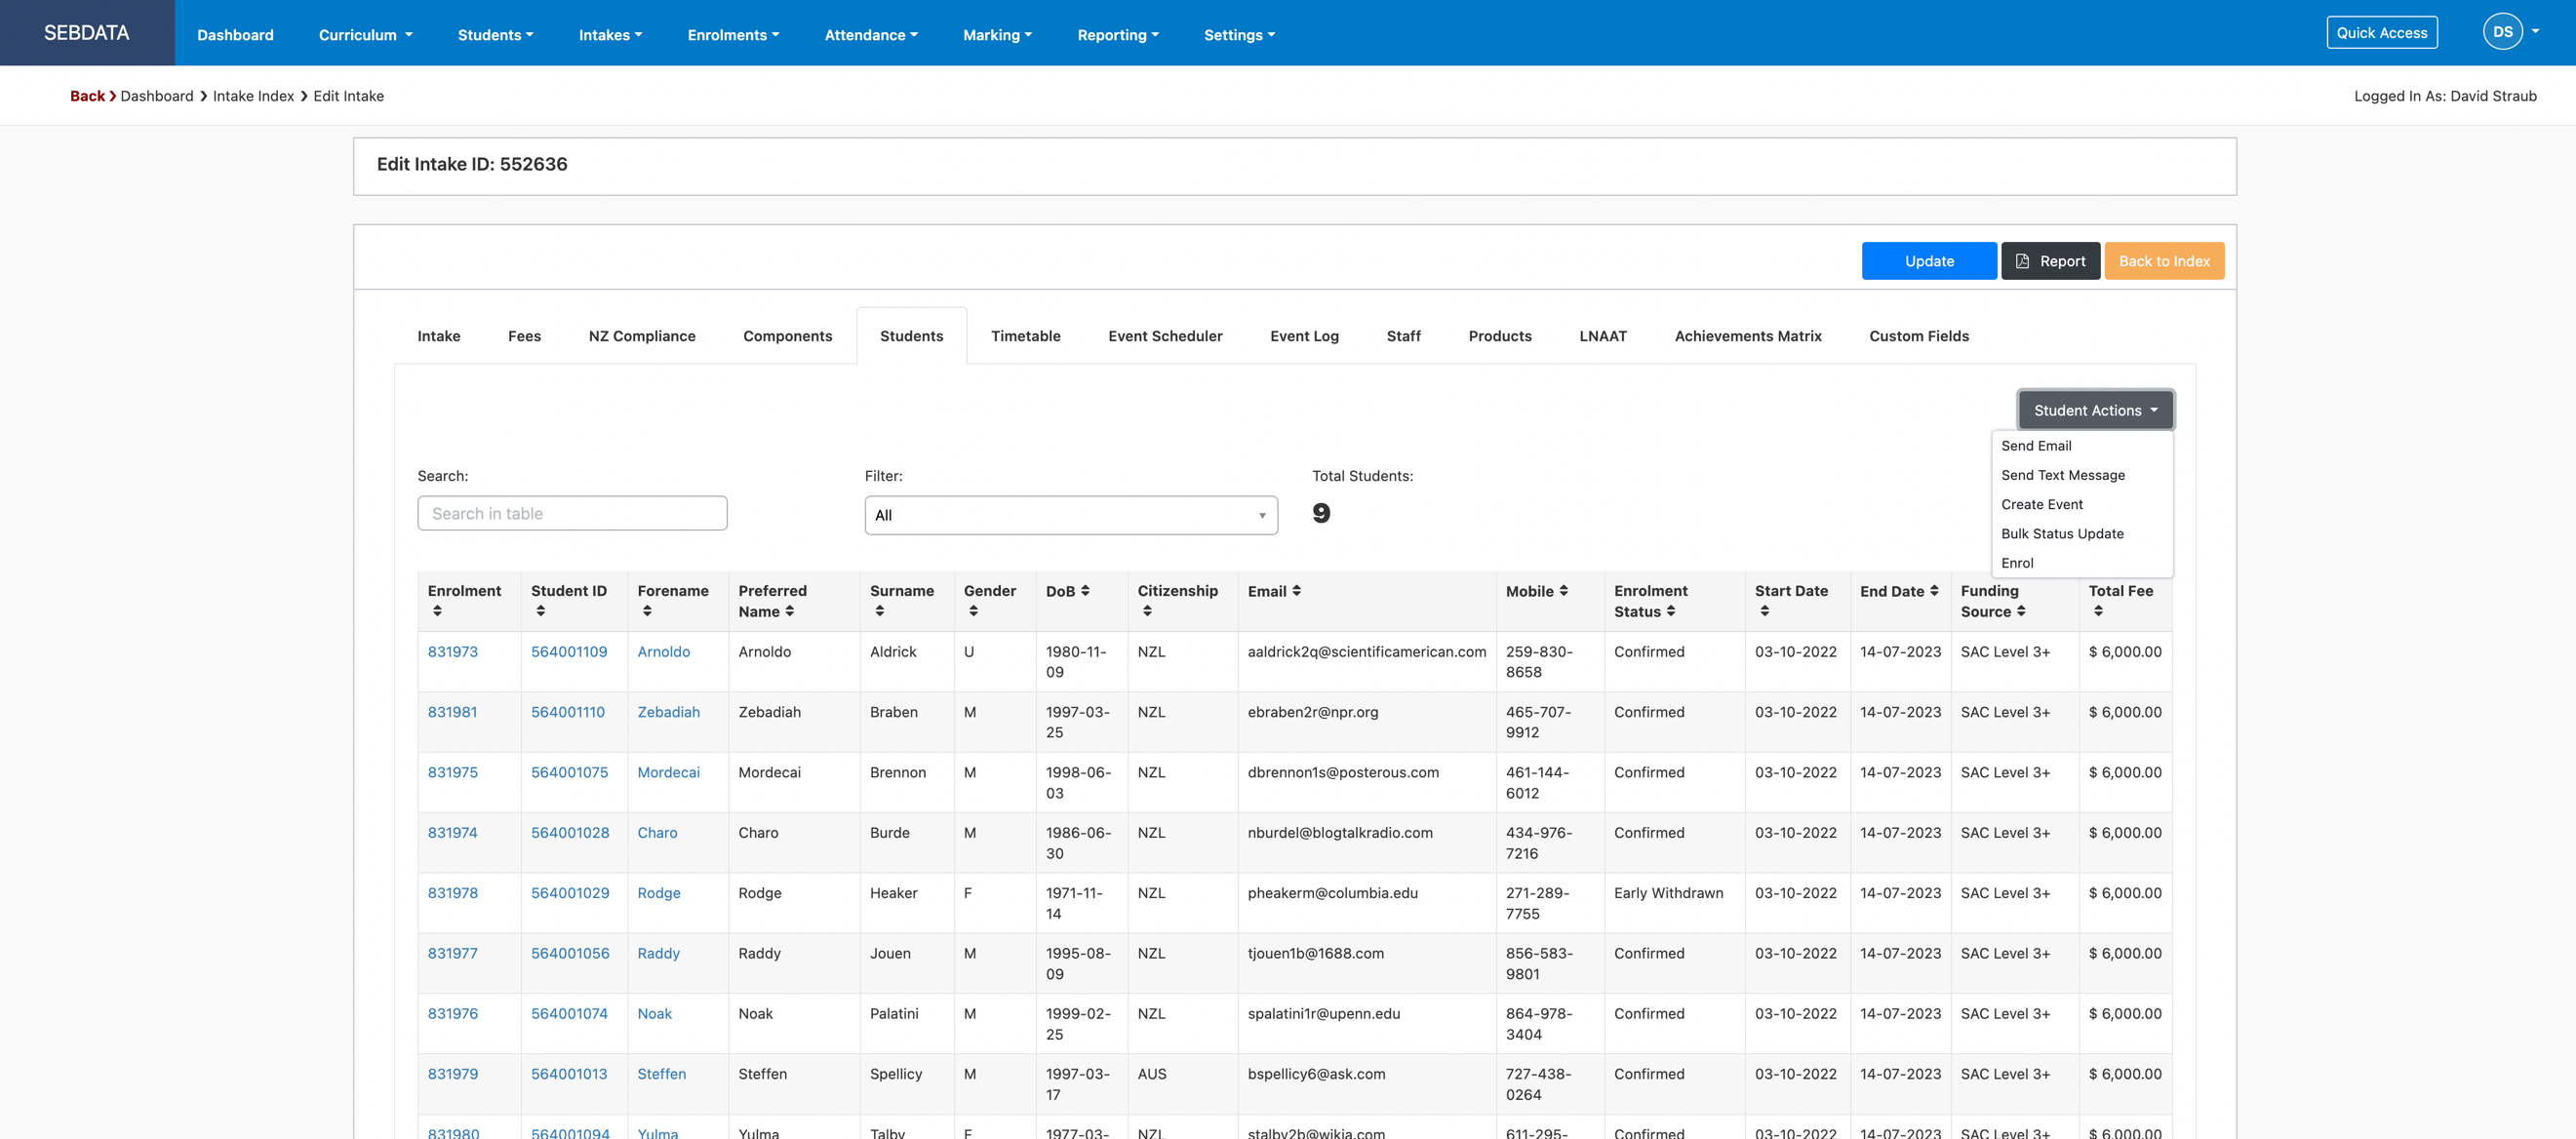
The student list as a fast filter on top to filter the list for e.g. active students only. In above example, all students are selected.
There are also many actions you can take for the students under the Student Actions button that are explained below:
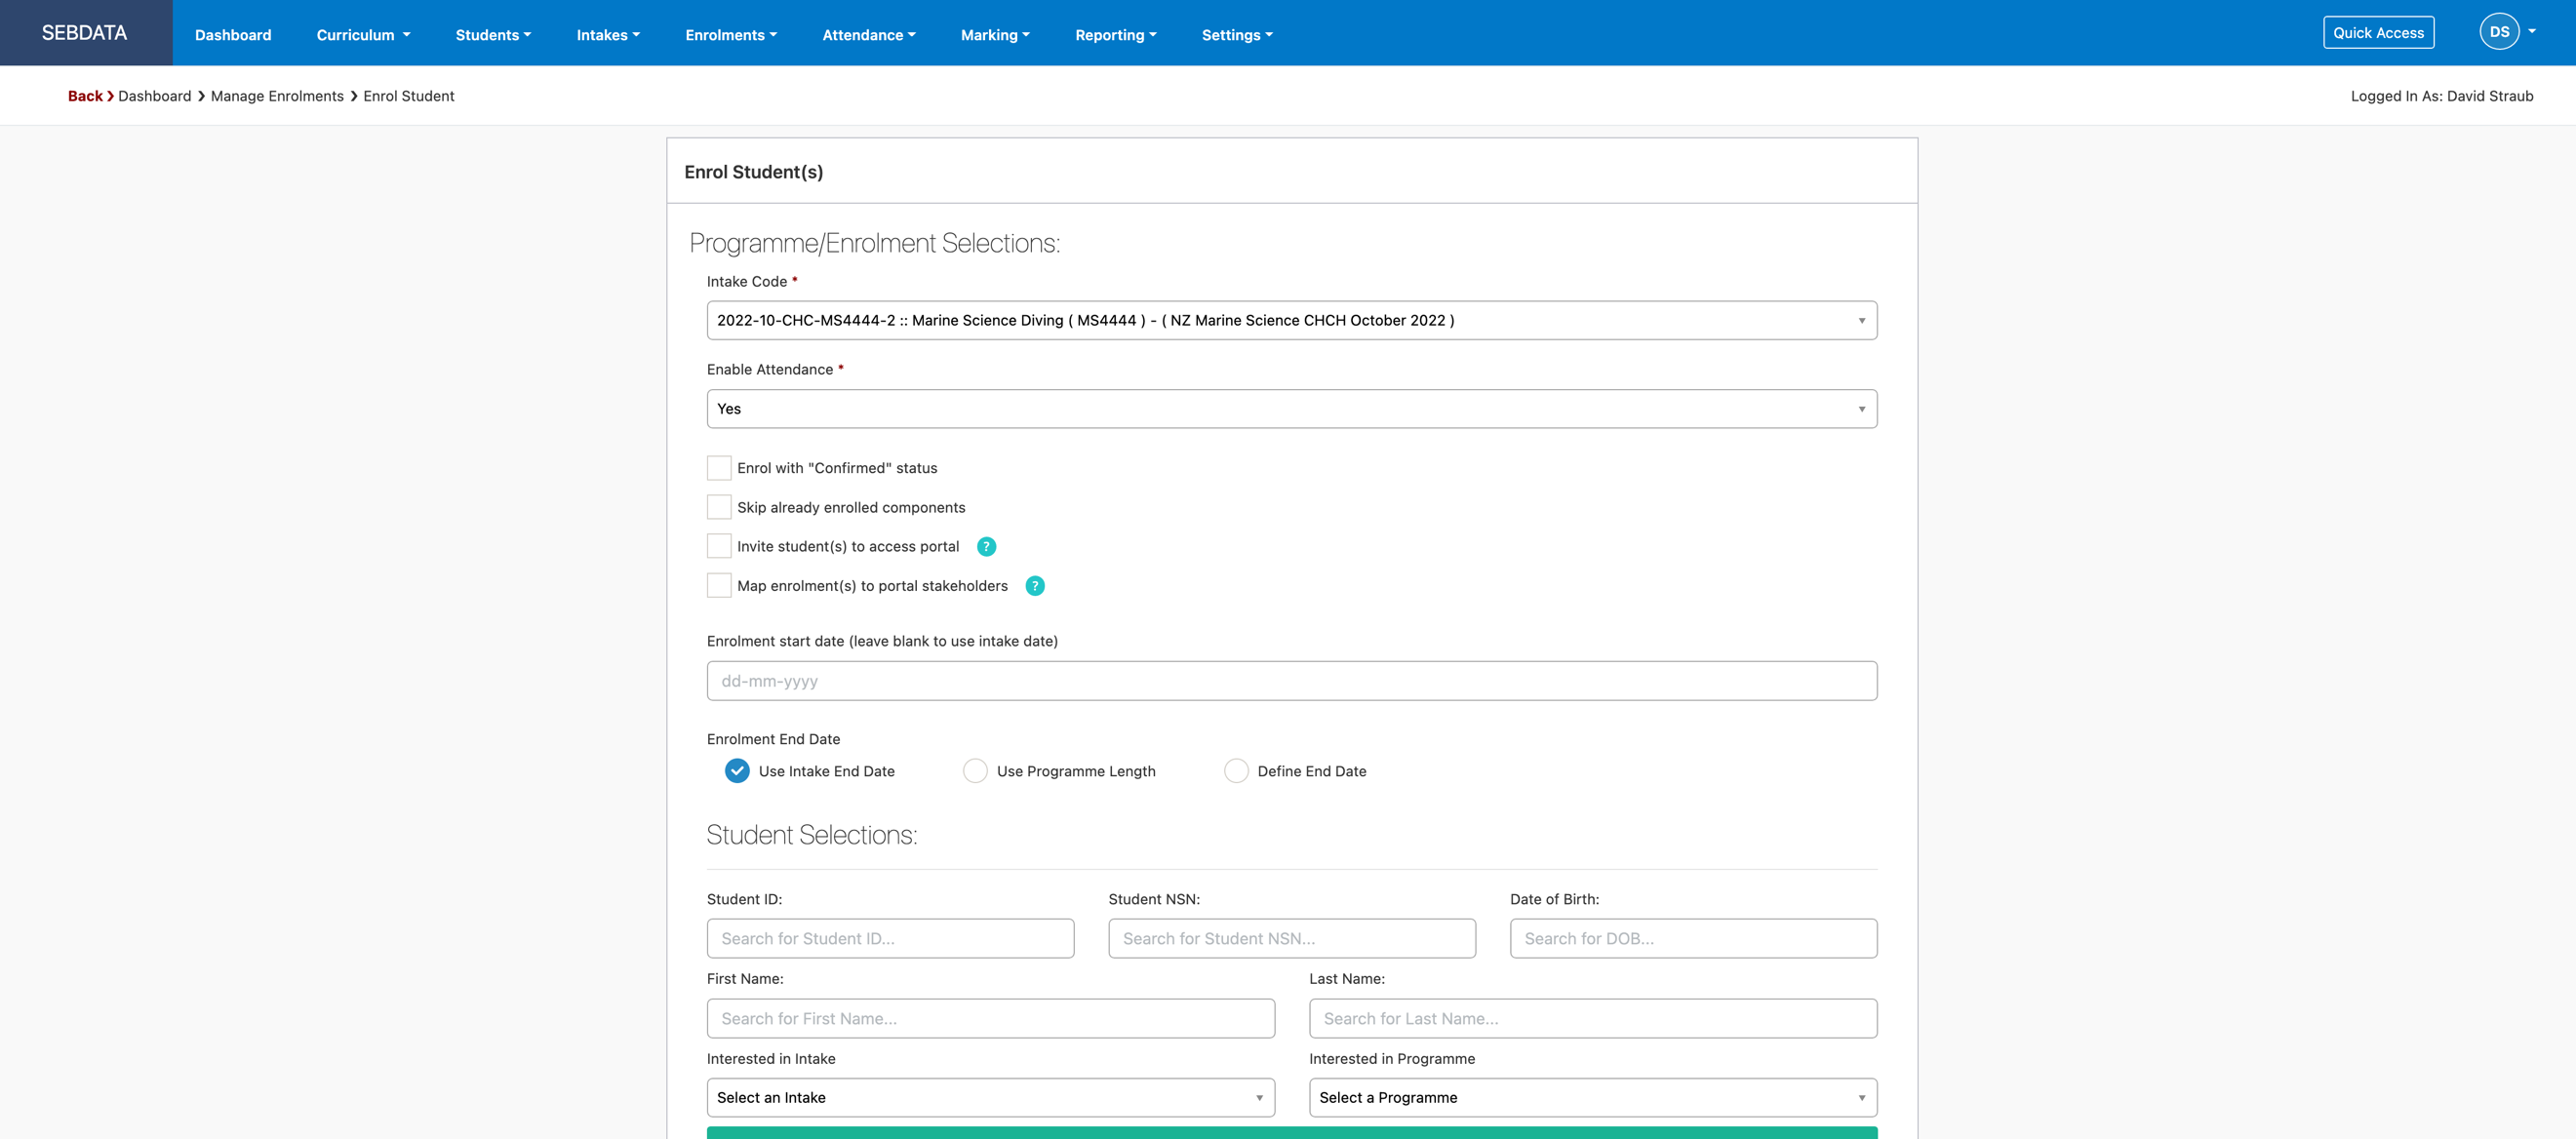
Enrol Students
When you click on enrol, SELMA will forward you to the enrolment screen, but unlike enrolling from the students’ profile or from the top menu, when enrolling from the intake, the intake is already pre-selected on the enrolment screen:
Send Text Message
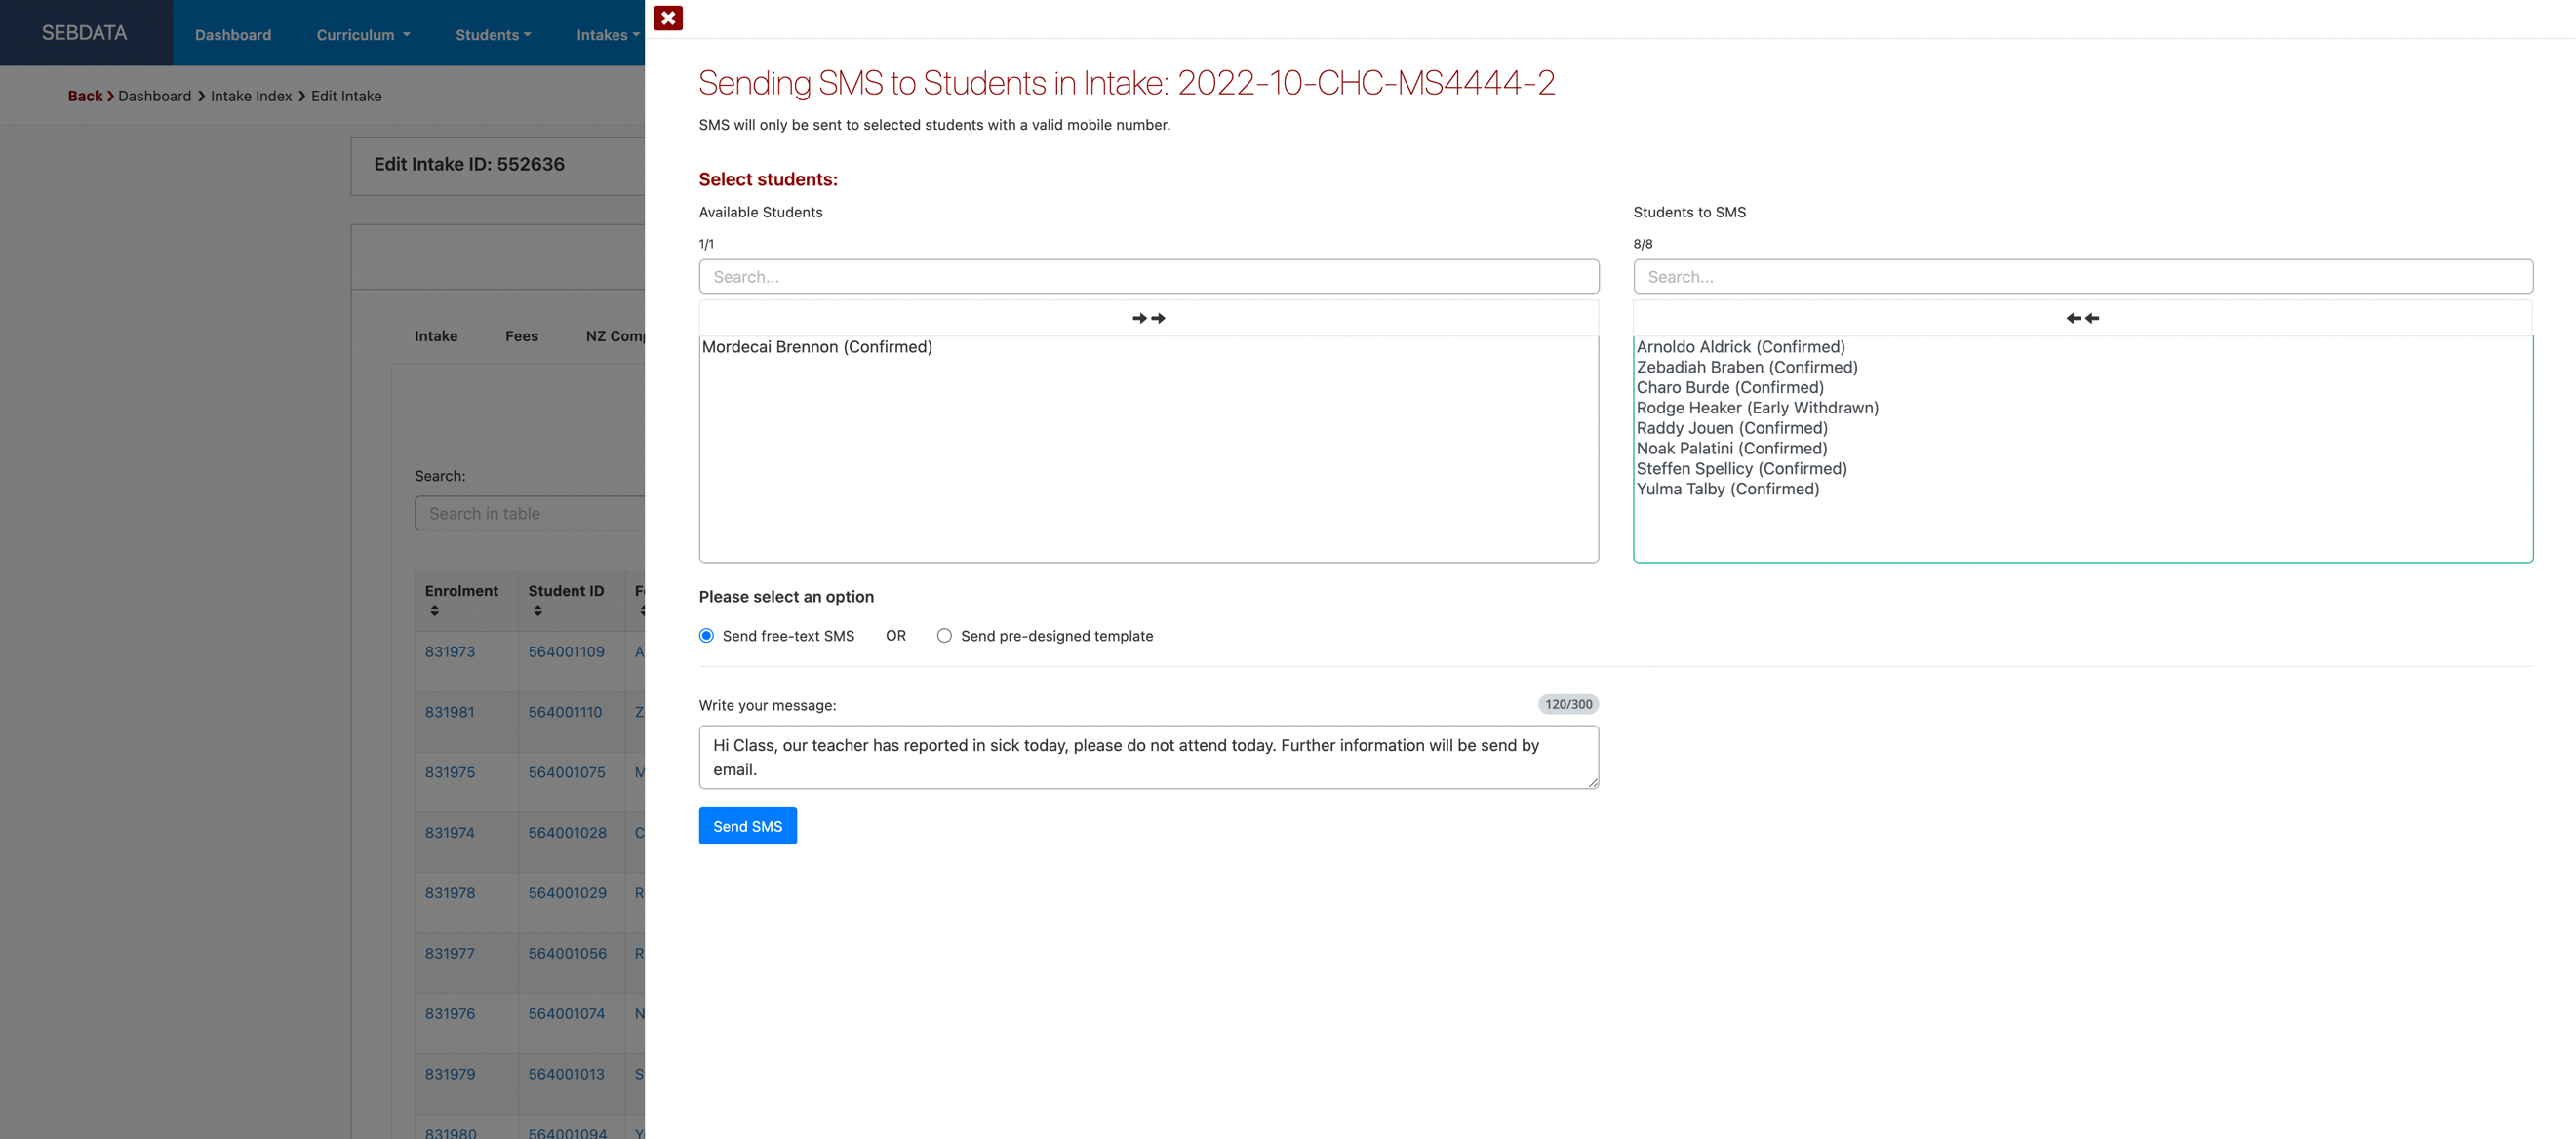
You can send a text message to all students in your intake. A slide in window will help you to de-select students that should not receive the message as well as to select a SMS template or to draft a message for all students.
|
|
Remember that text messages (SMS) from SELMA will incur cost. When sending a text message to all students of an intake, each student will incur a message cost. |
Create Event
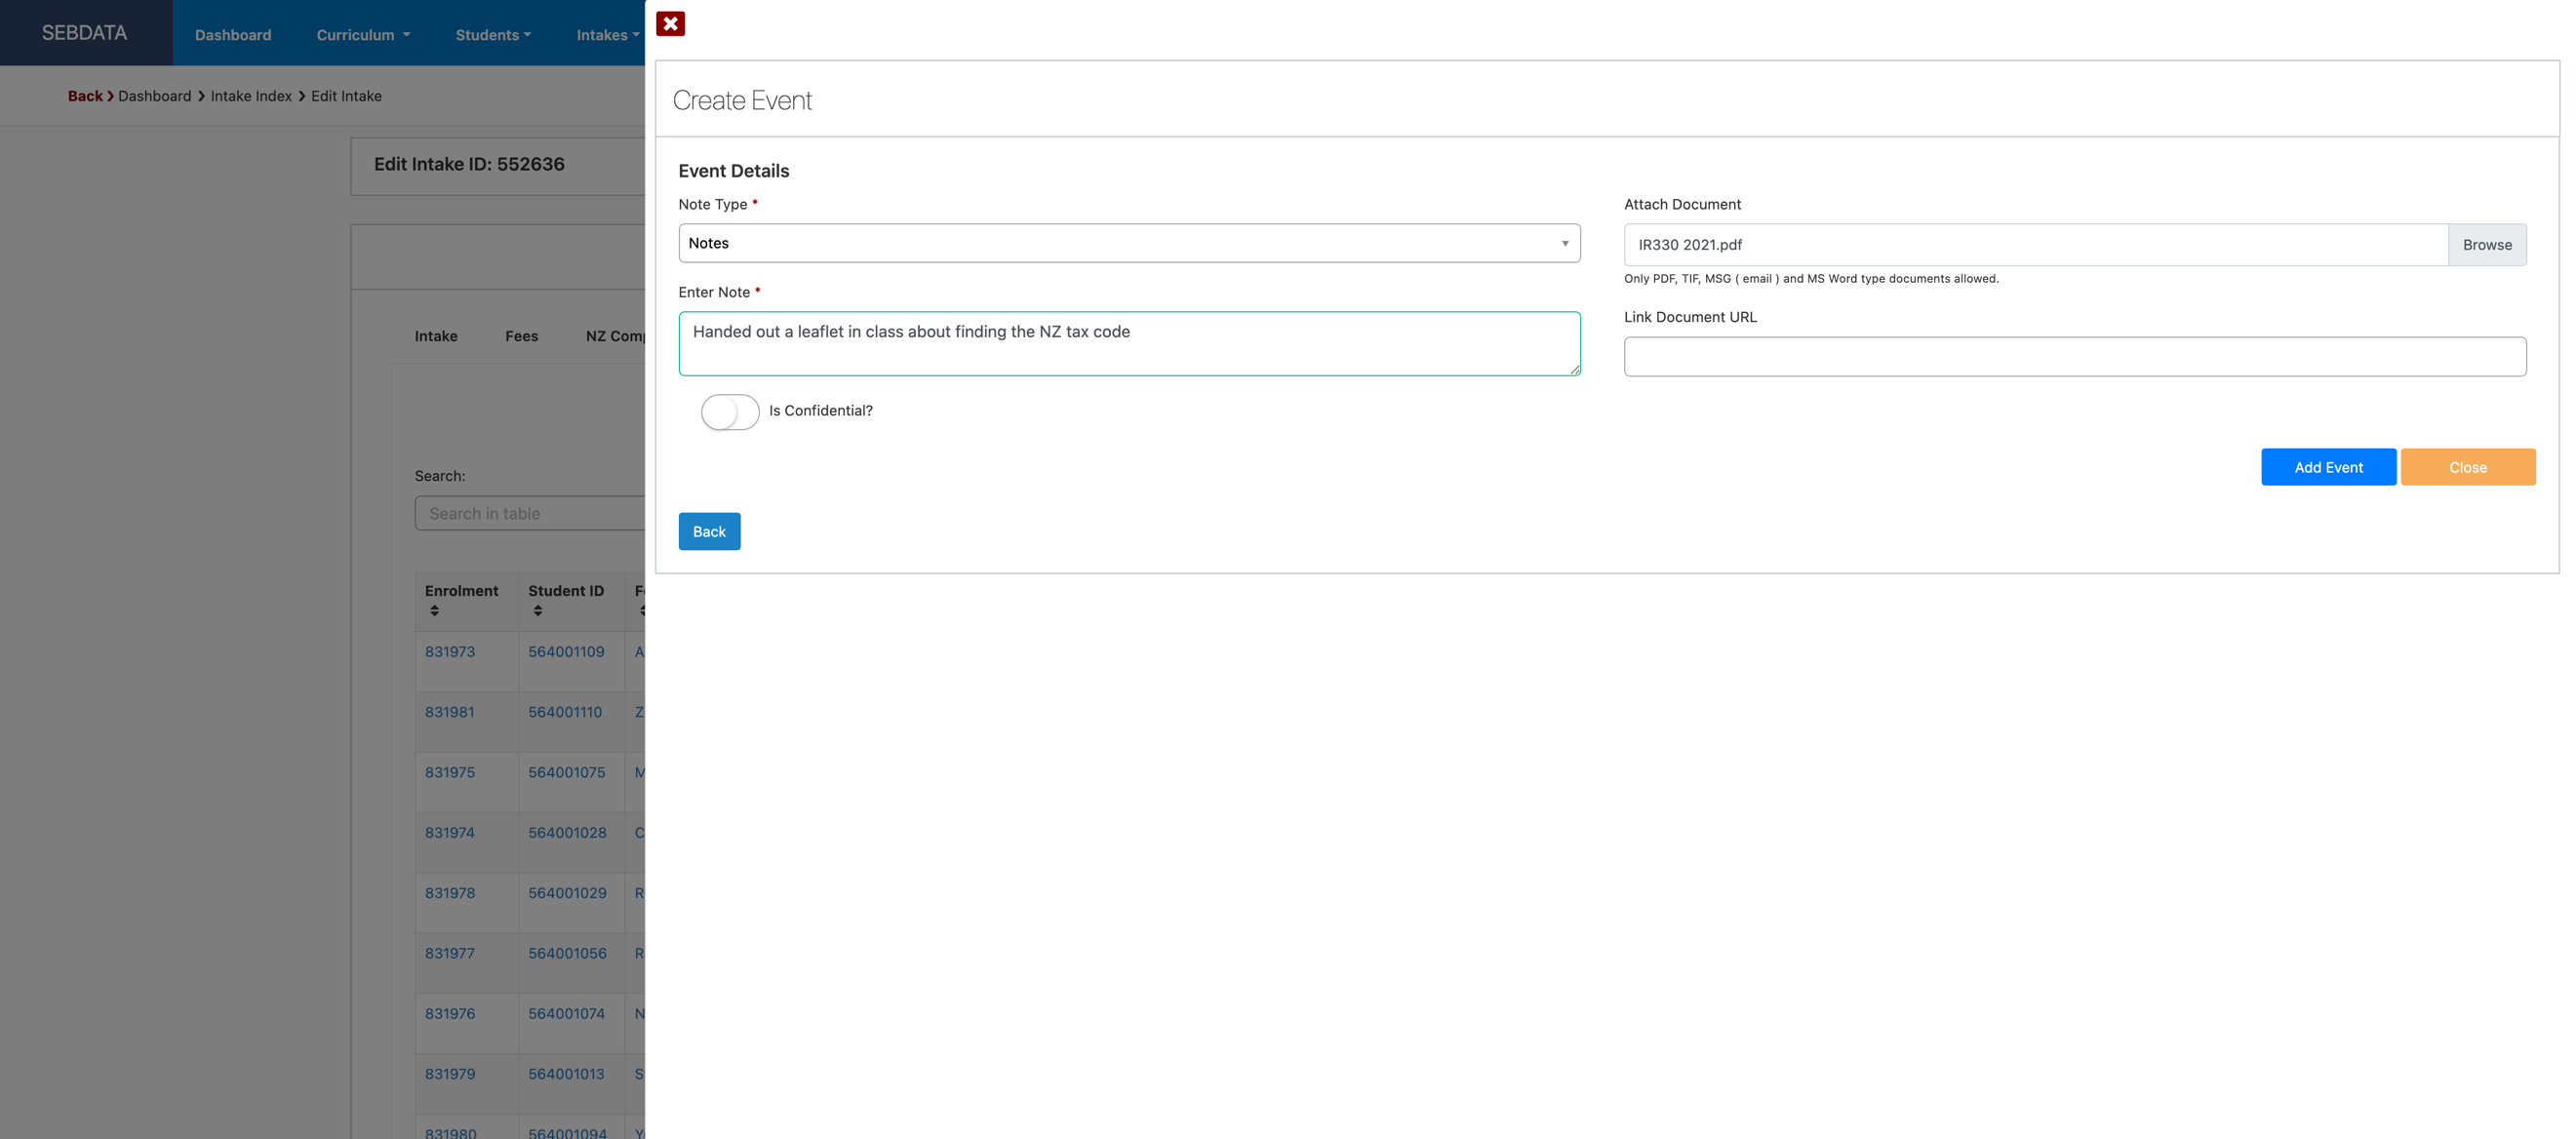
You can create an event for all learners in the intake. Perhaps you would like to make a relevant note in the system for all learners. This note will appear in the event log of every single learner in SELMA.
Bulk Status Update
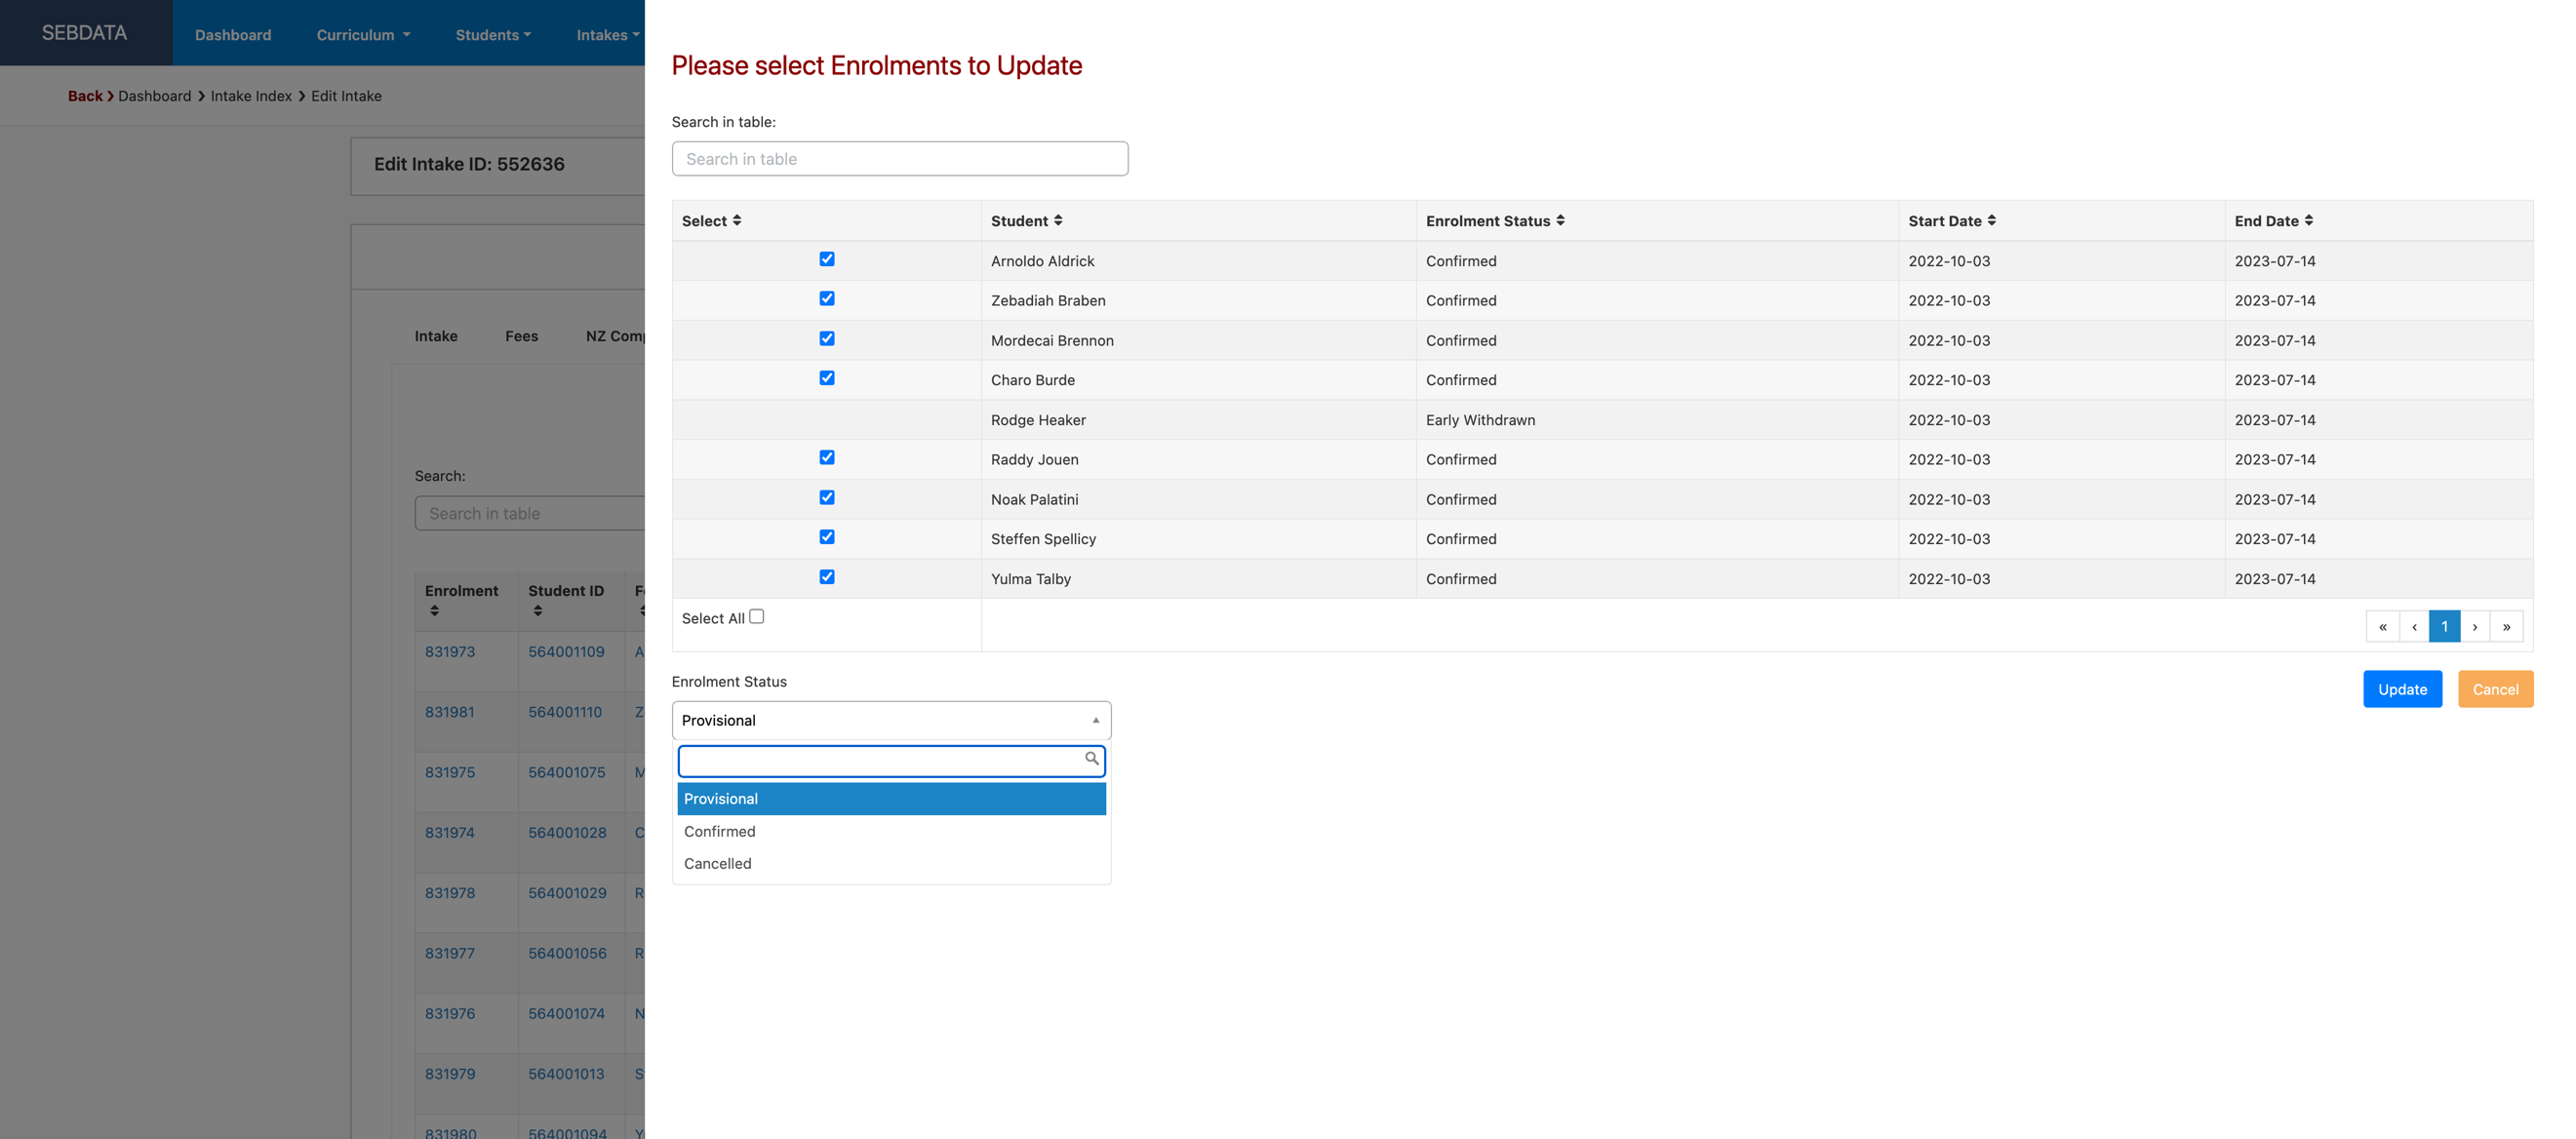
You can choose to bulk change the status of all enrolments in an intake. This is particularly helpful if you need to cancel all enrolments or change them from e.g. provisional to confirmed. Soon SELMA will allow to complete all enrolments from here as well (with certain restrictions):
Send Email
You can send an email to all learners in an intake. The first slide in window will allow you to select the learners an email will be sent to. By default, inactive enrolments will be de-selected.
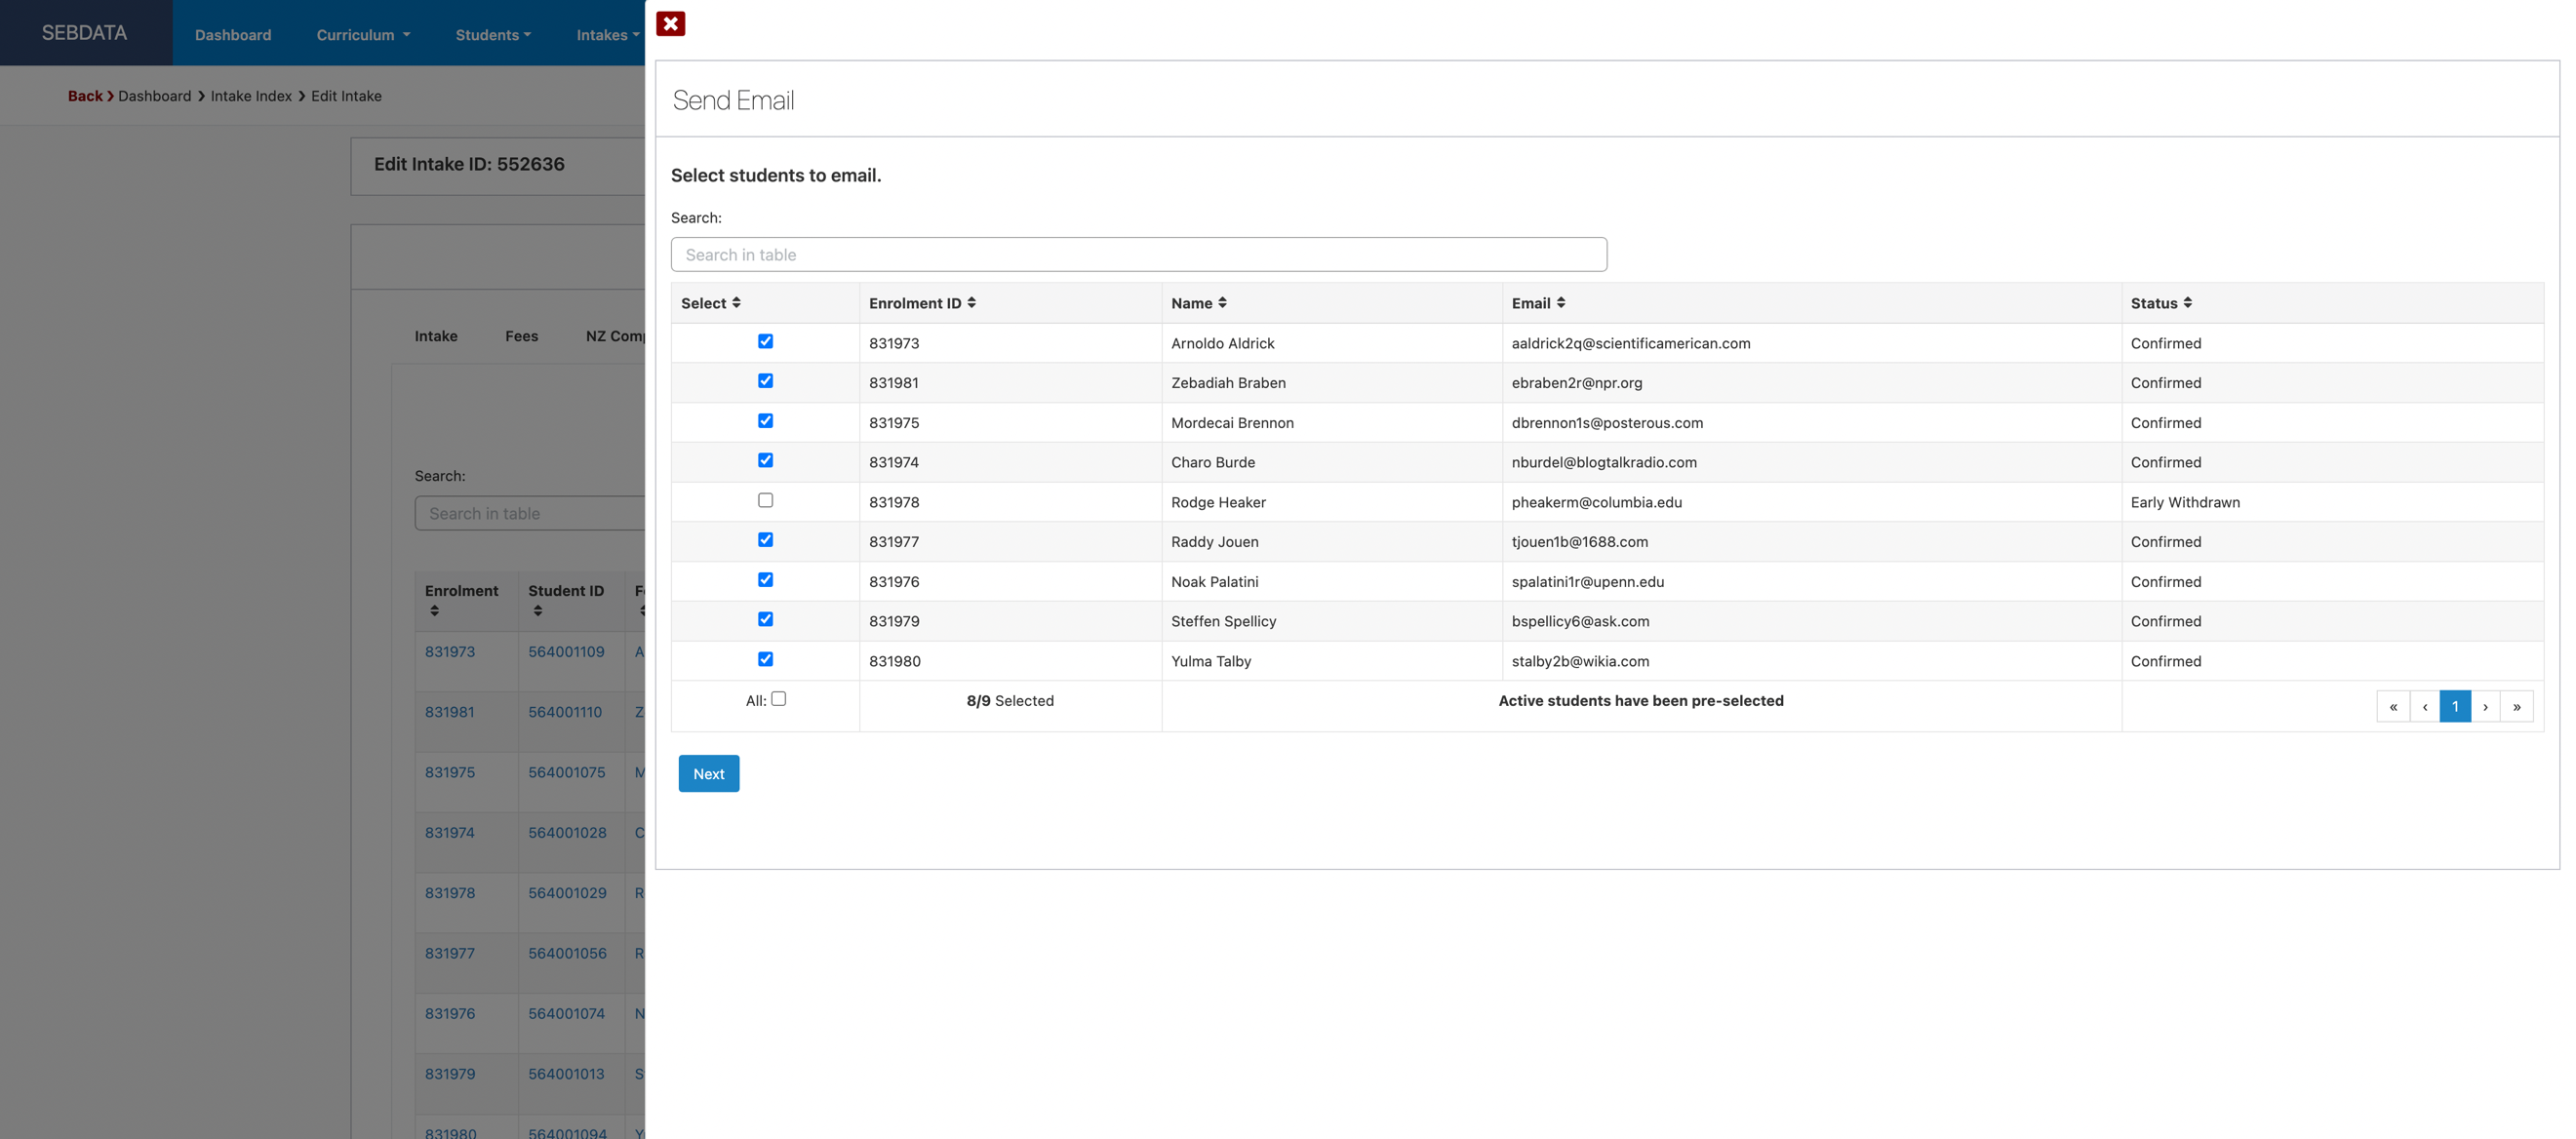
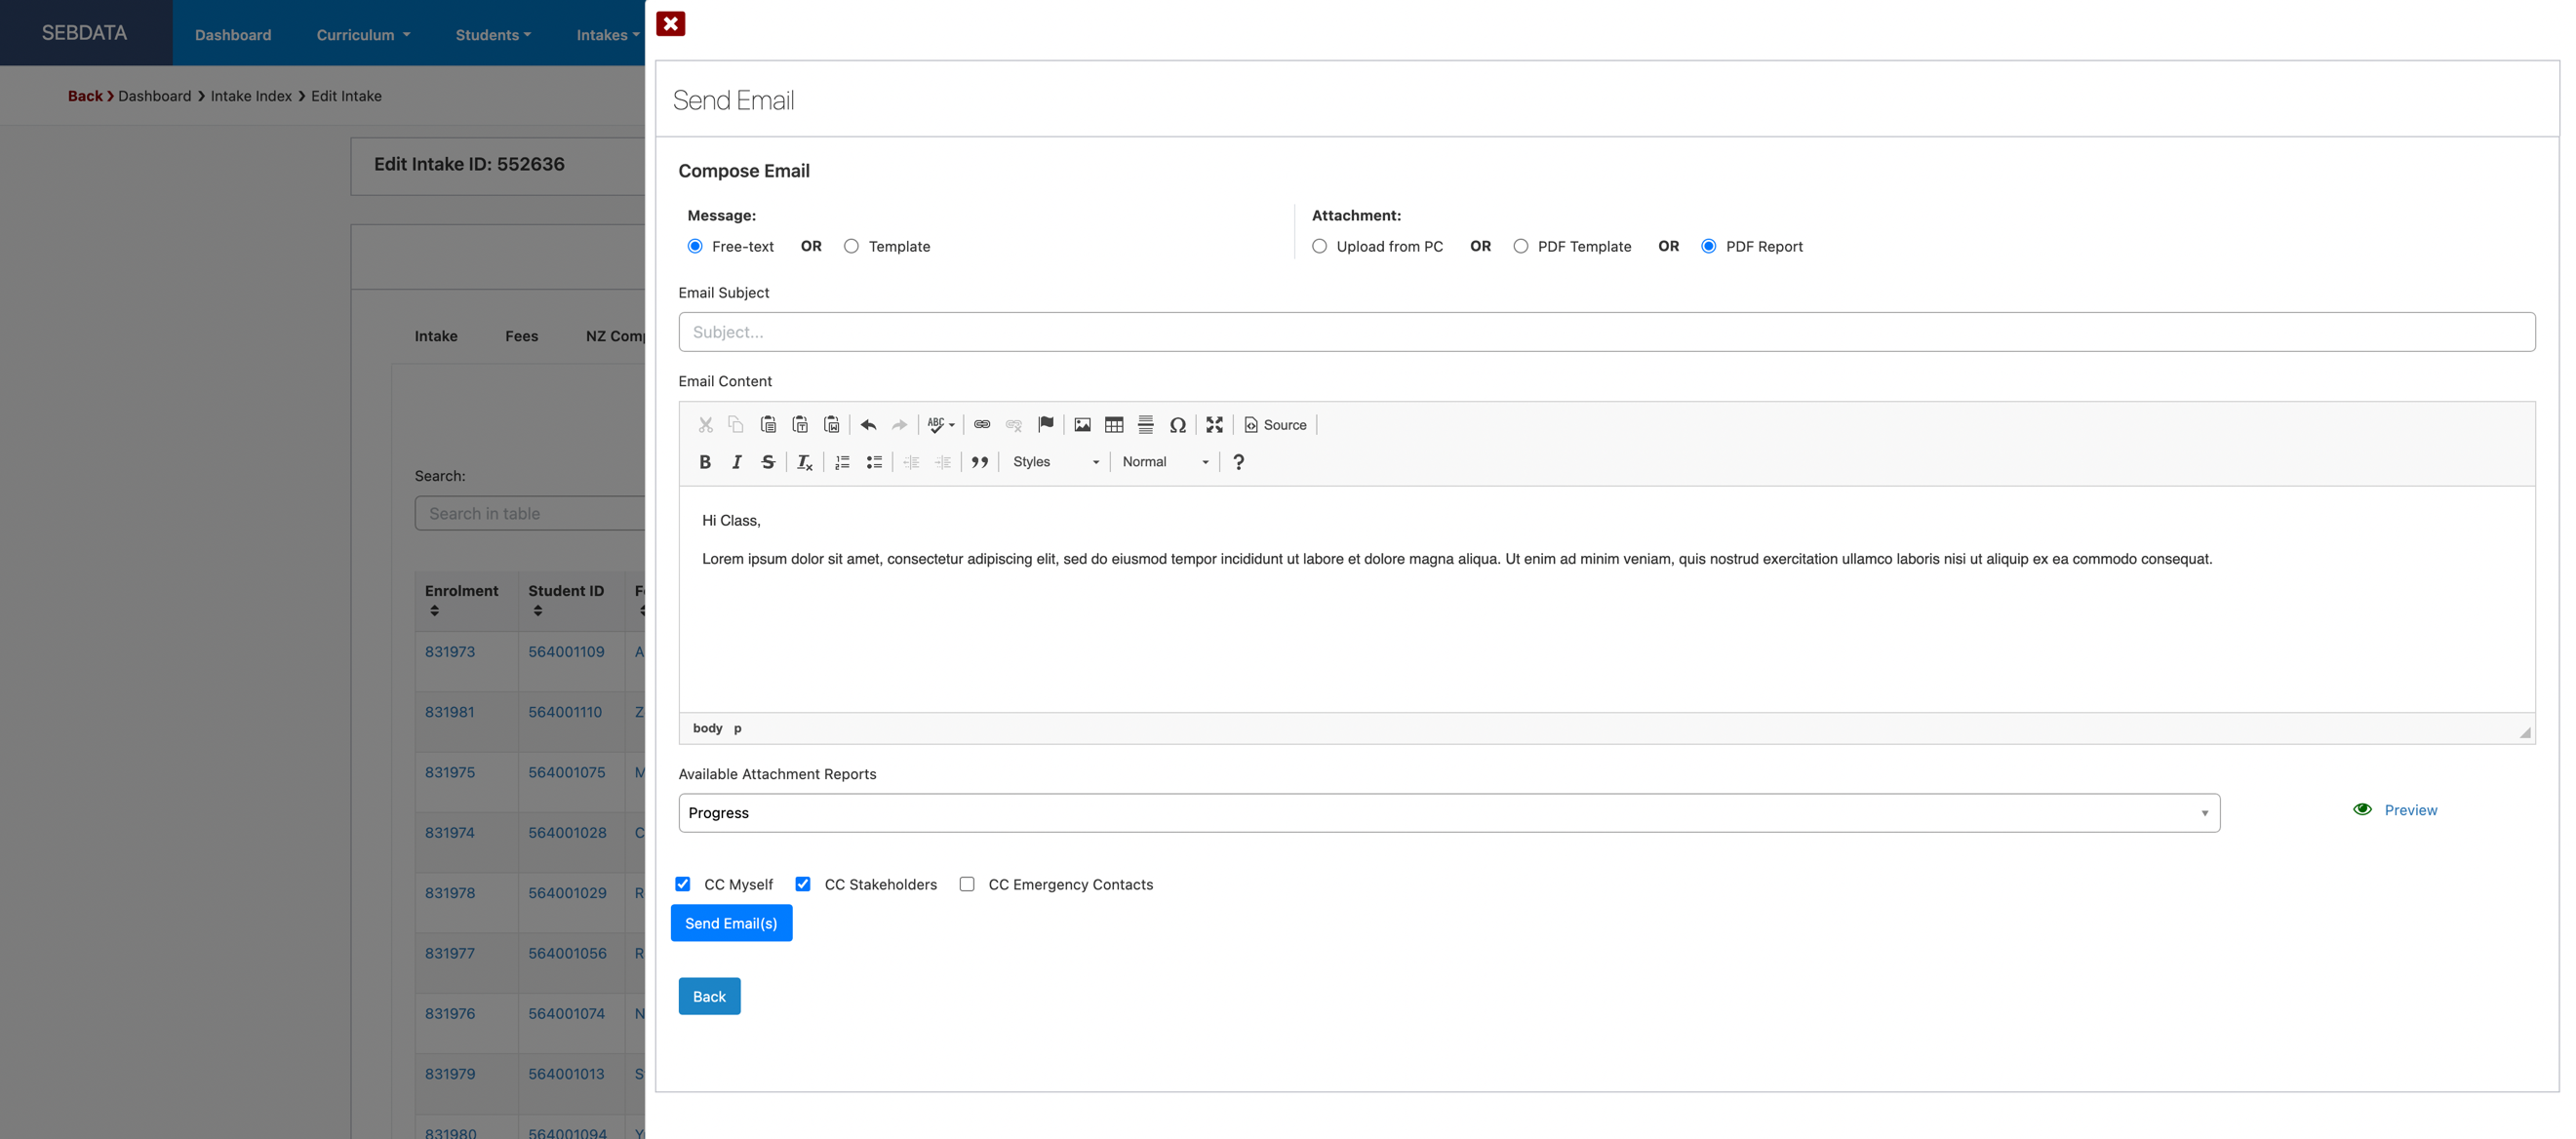
Once you click “Next” you will be able to select whether you want to draft a message or use a templated message as well as define an attachment from your computer or a report or templated PDF from SELMA. This allows you to e.g. send the attendance report to all learners. Every email sent will be logged including the attachments in each individual learner’s event log.
Timetable Tab
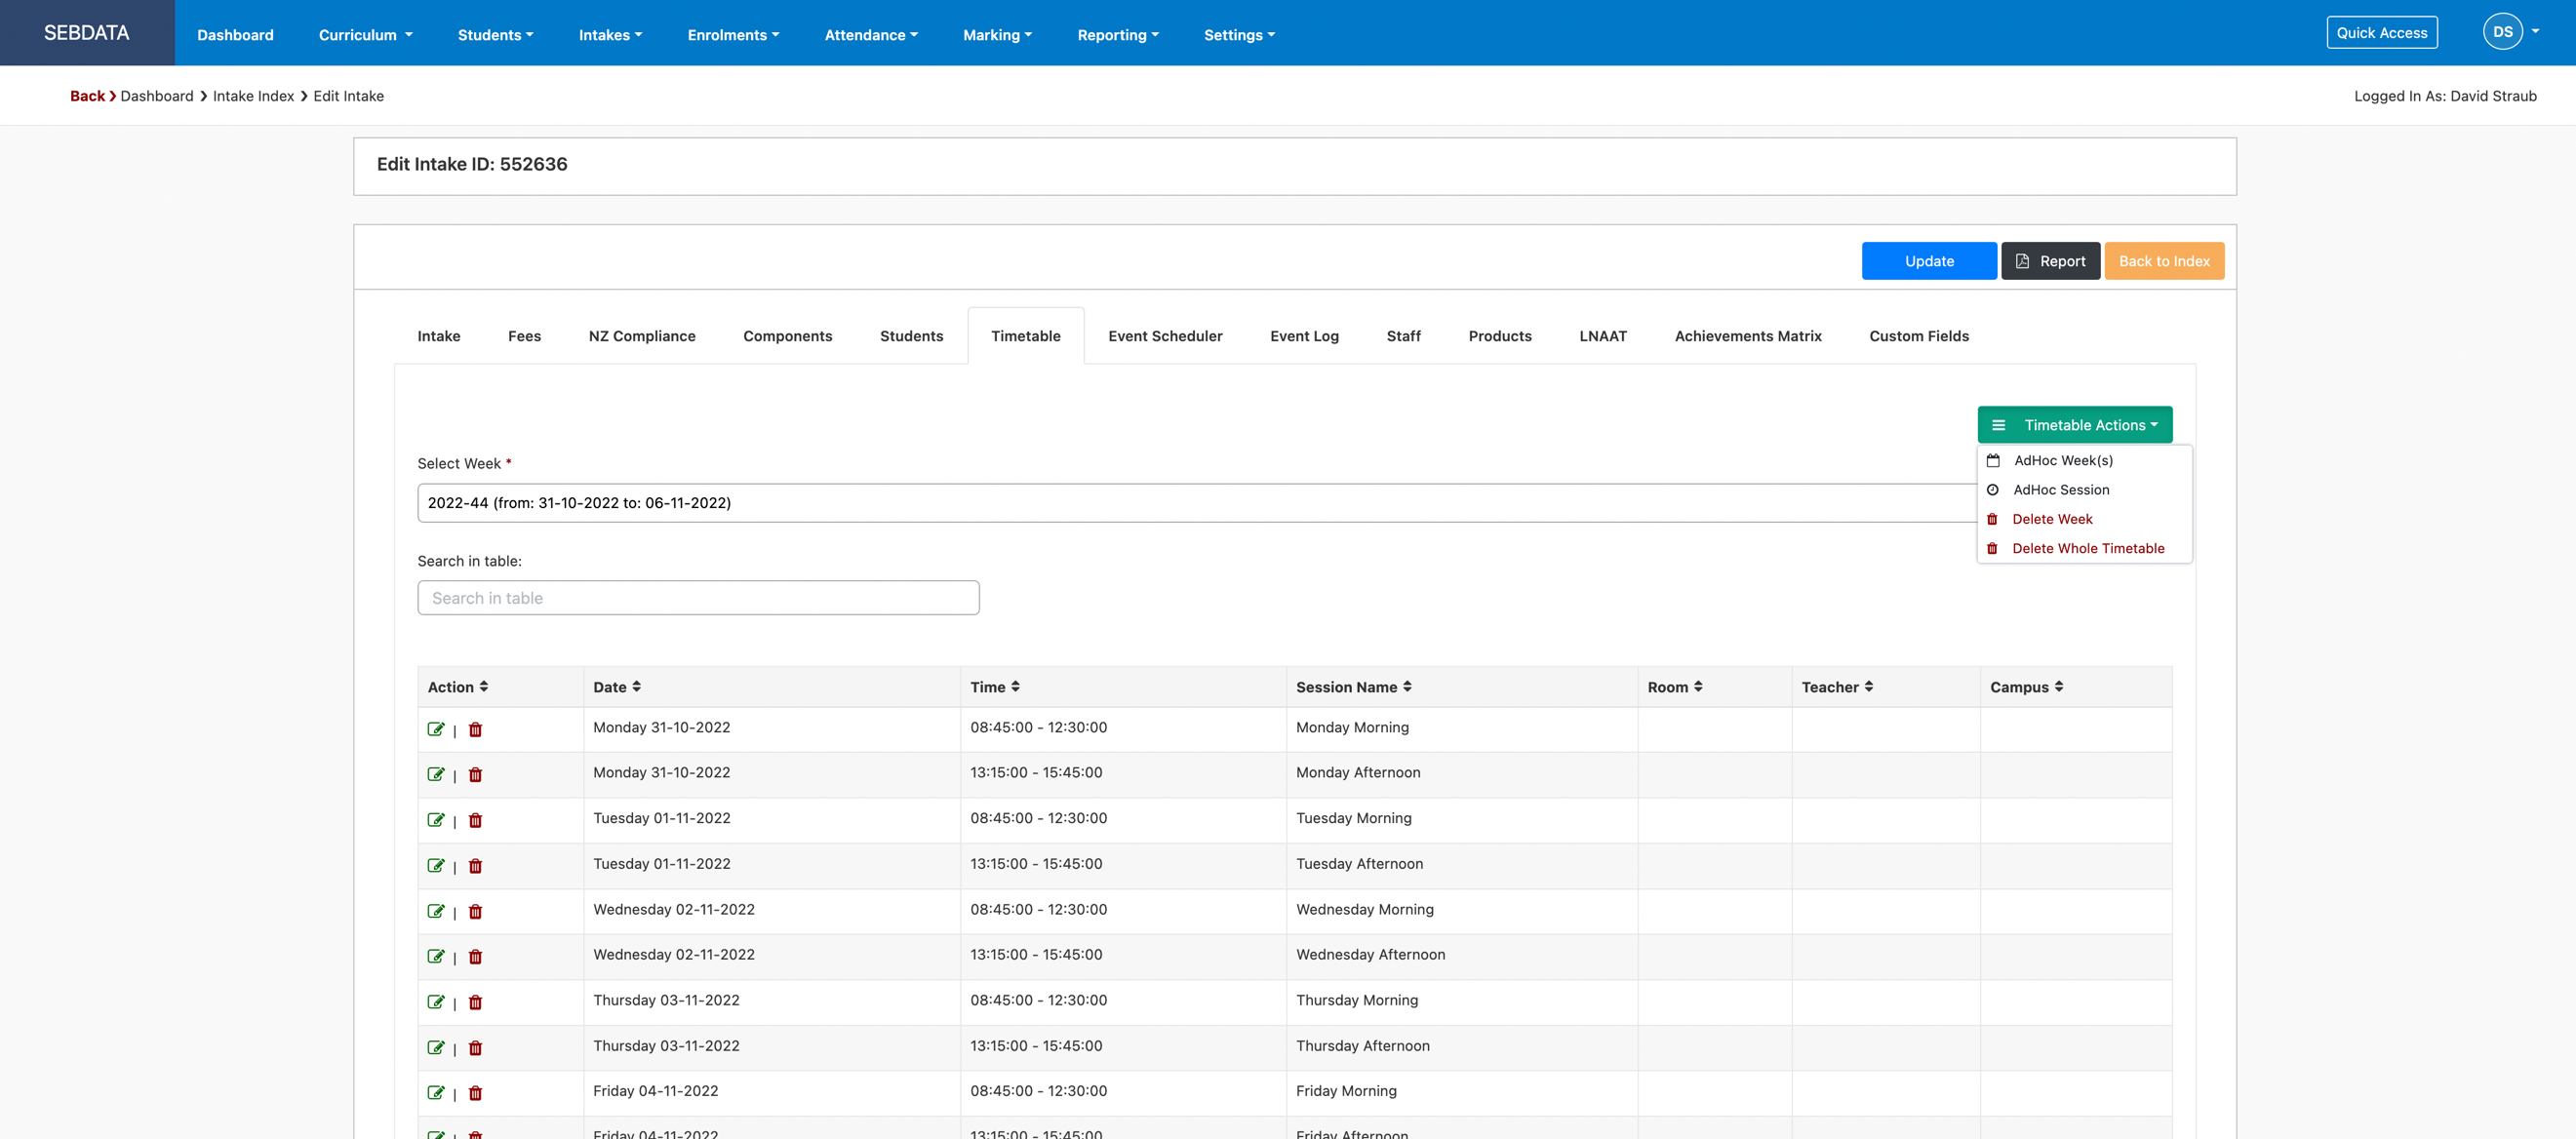
The timetable tab works exactly like the timetable manager under the Attendance main menu. However, on this tab, you can only edit and change the timetable for the intake you are on.
Event Scheduler Tab
In SELMA, events, emails and text messages can be scheduled and triggered by certain events by the system. Perhaps you want to send every student an email 5 days before their studies start to provide them with instructions on how to find you. Perhaps you want to send a text reminder a day before an enrolment starts or create a task for a staff member to follow up with a pastoral care check in for all students after 4 weeks of studying? All this can be done with the event scheduler.
The grid will show you all active events. To create a new event, click the “Add” button:
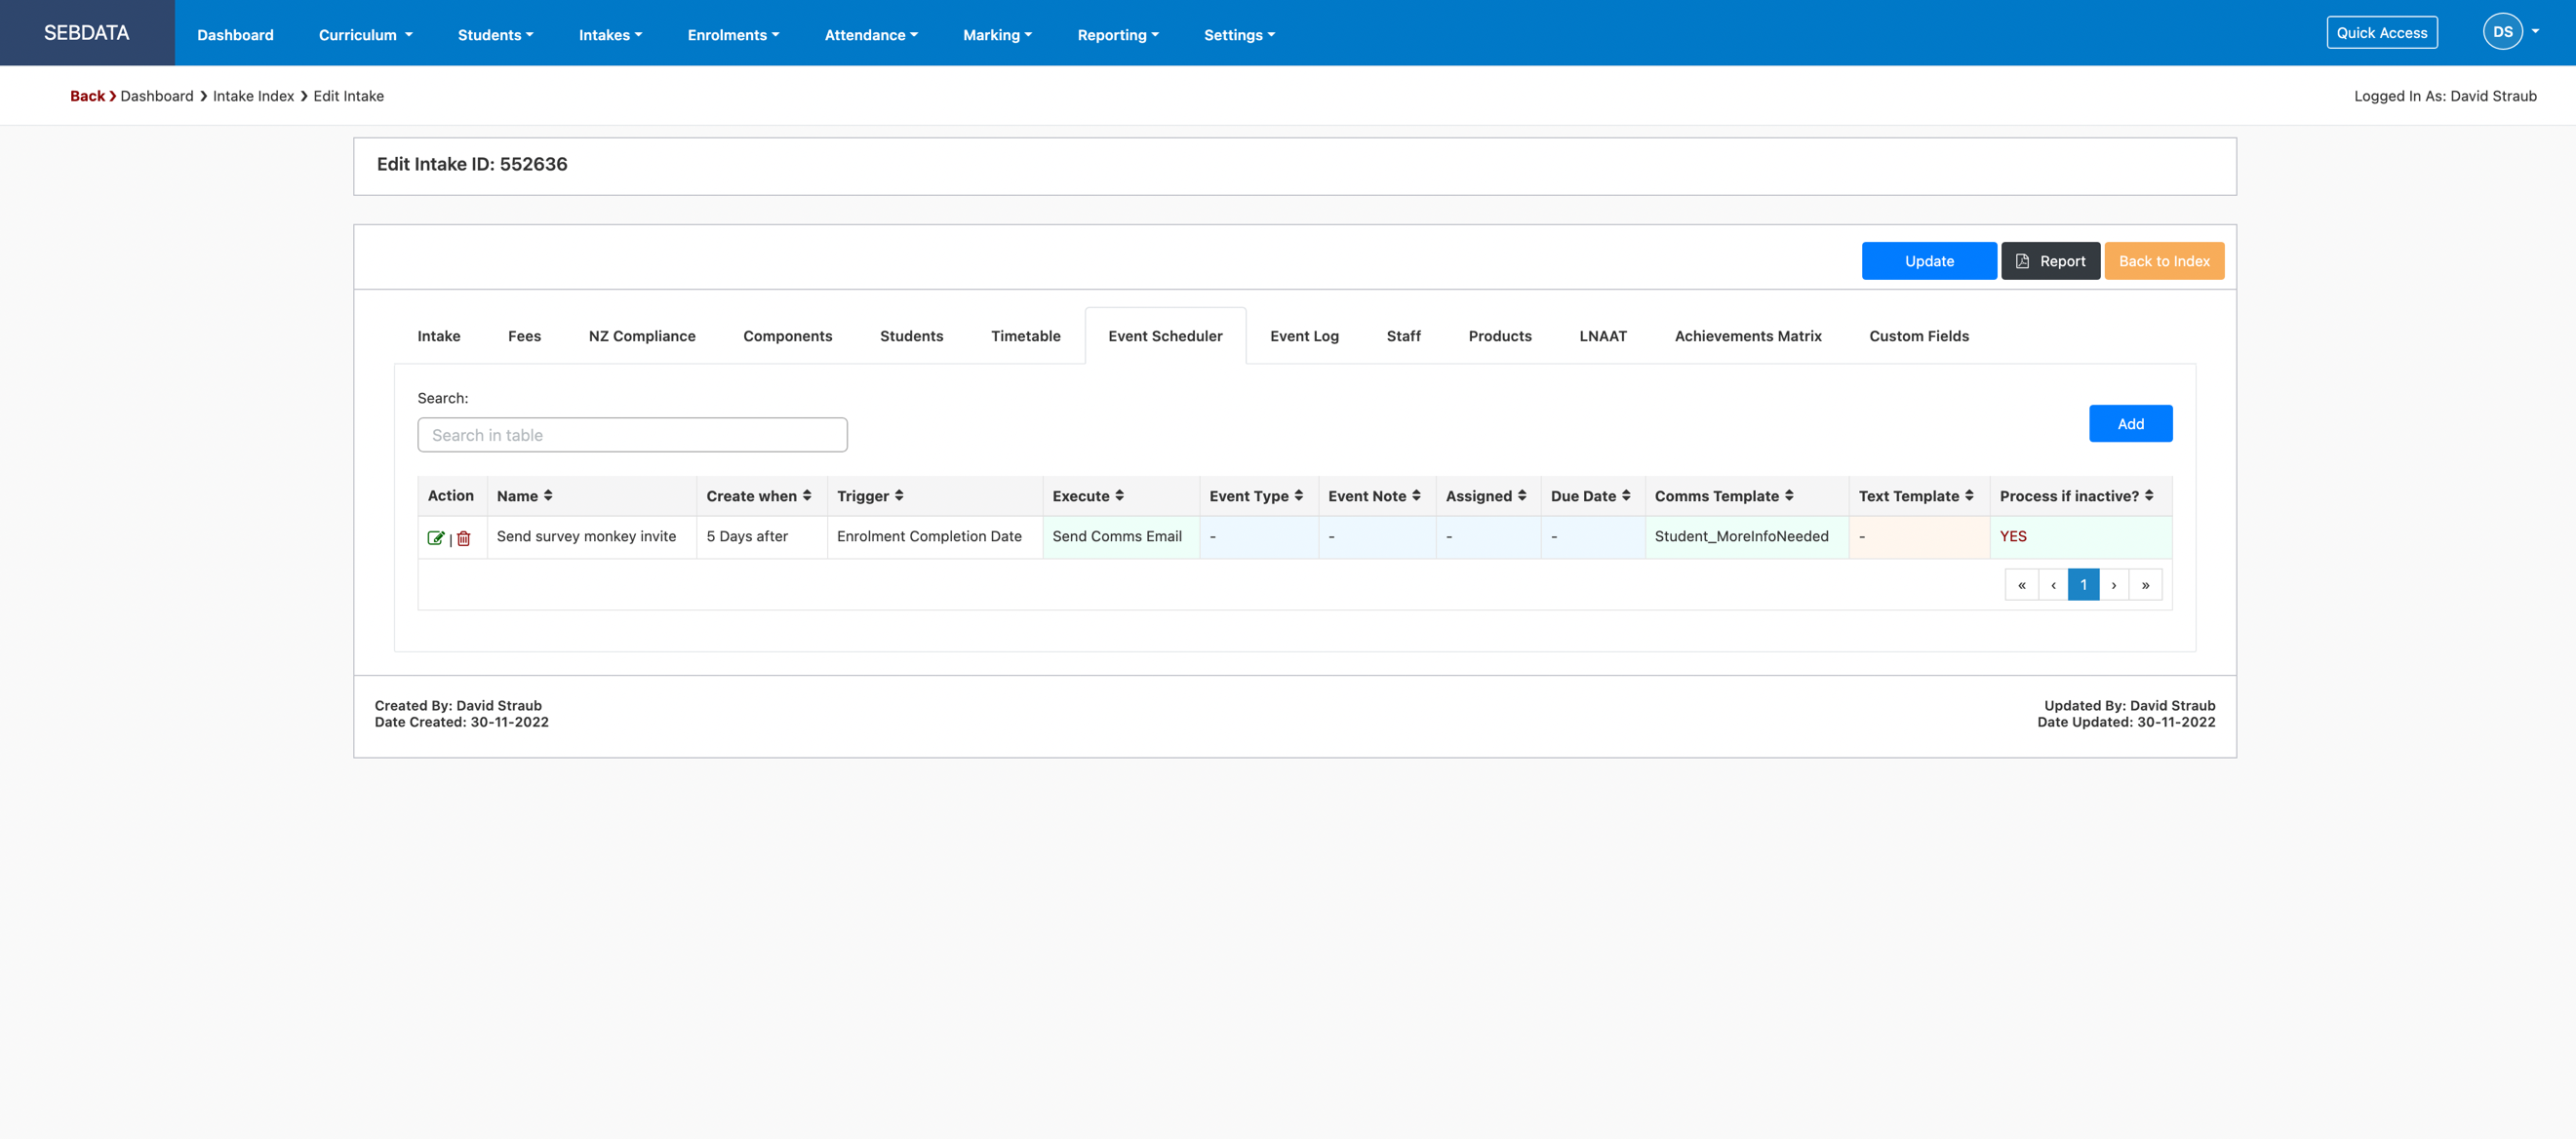
When adding an event, you can give the scheduled event a name, choose the action (e.g. “Send Comms Email” like below) and define what triggers the event (in below example: 5 days after enrolment completion date). Depending on whether you choose to send a text message, email or create an event, the system will show further fields to fill in:
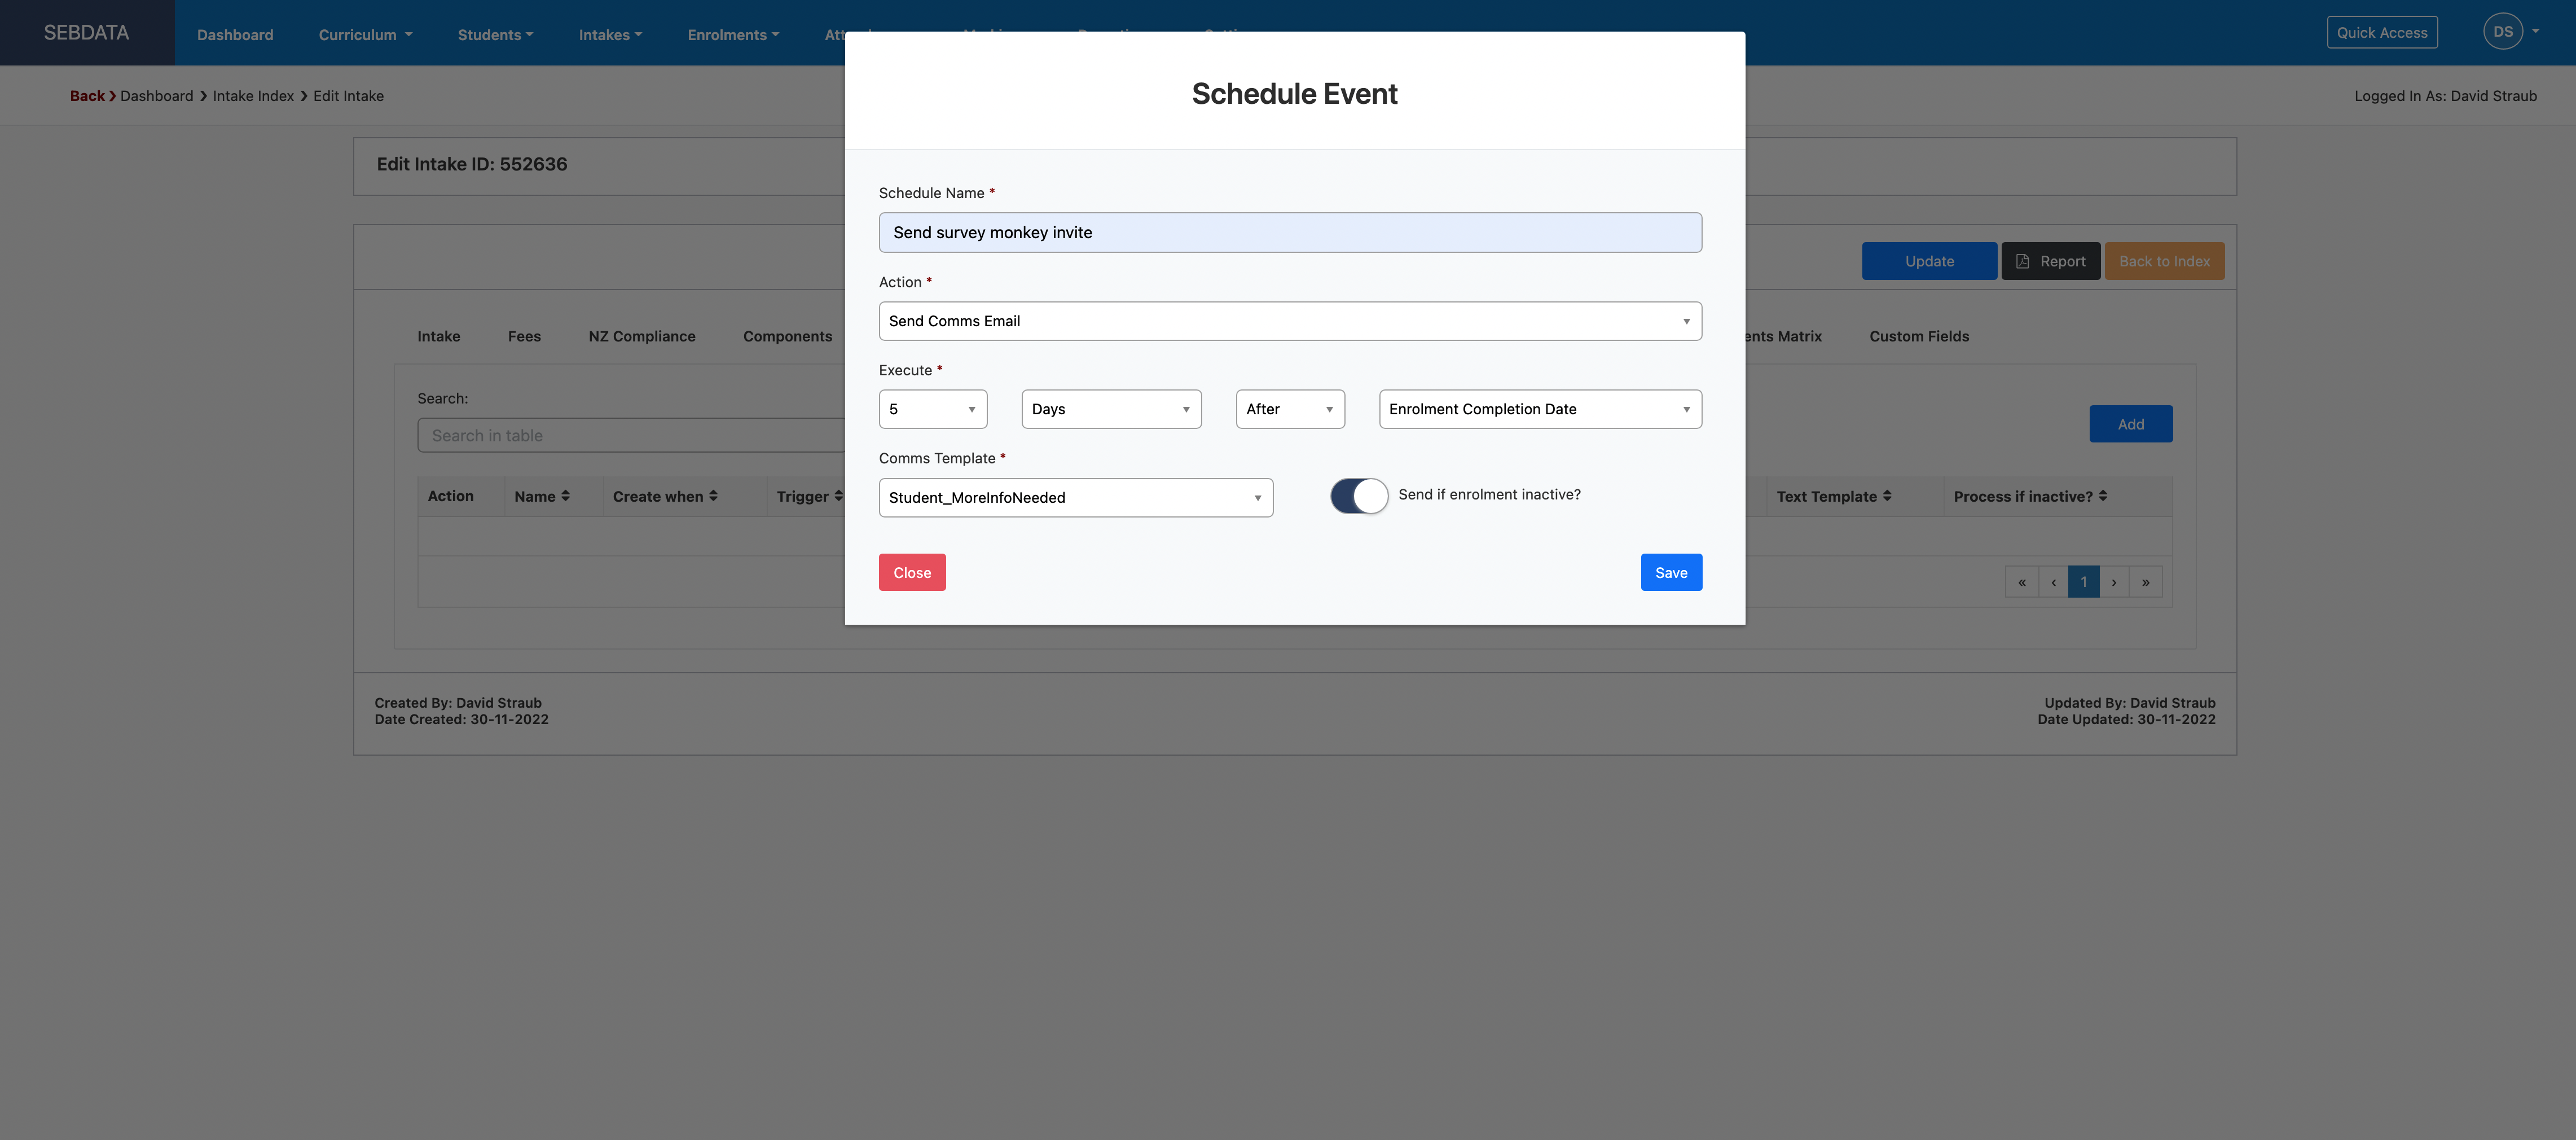
All generated events (emails, comms, text, notes) will be stored against each student’s event log.
Event Log Tab
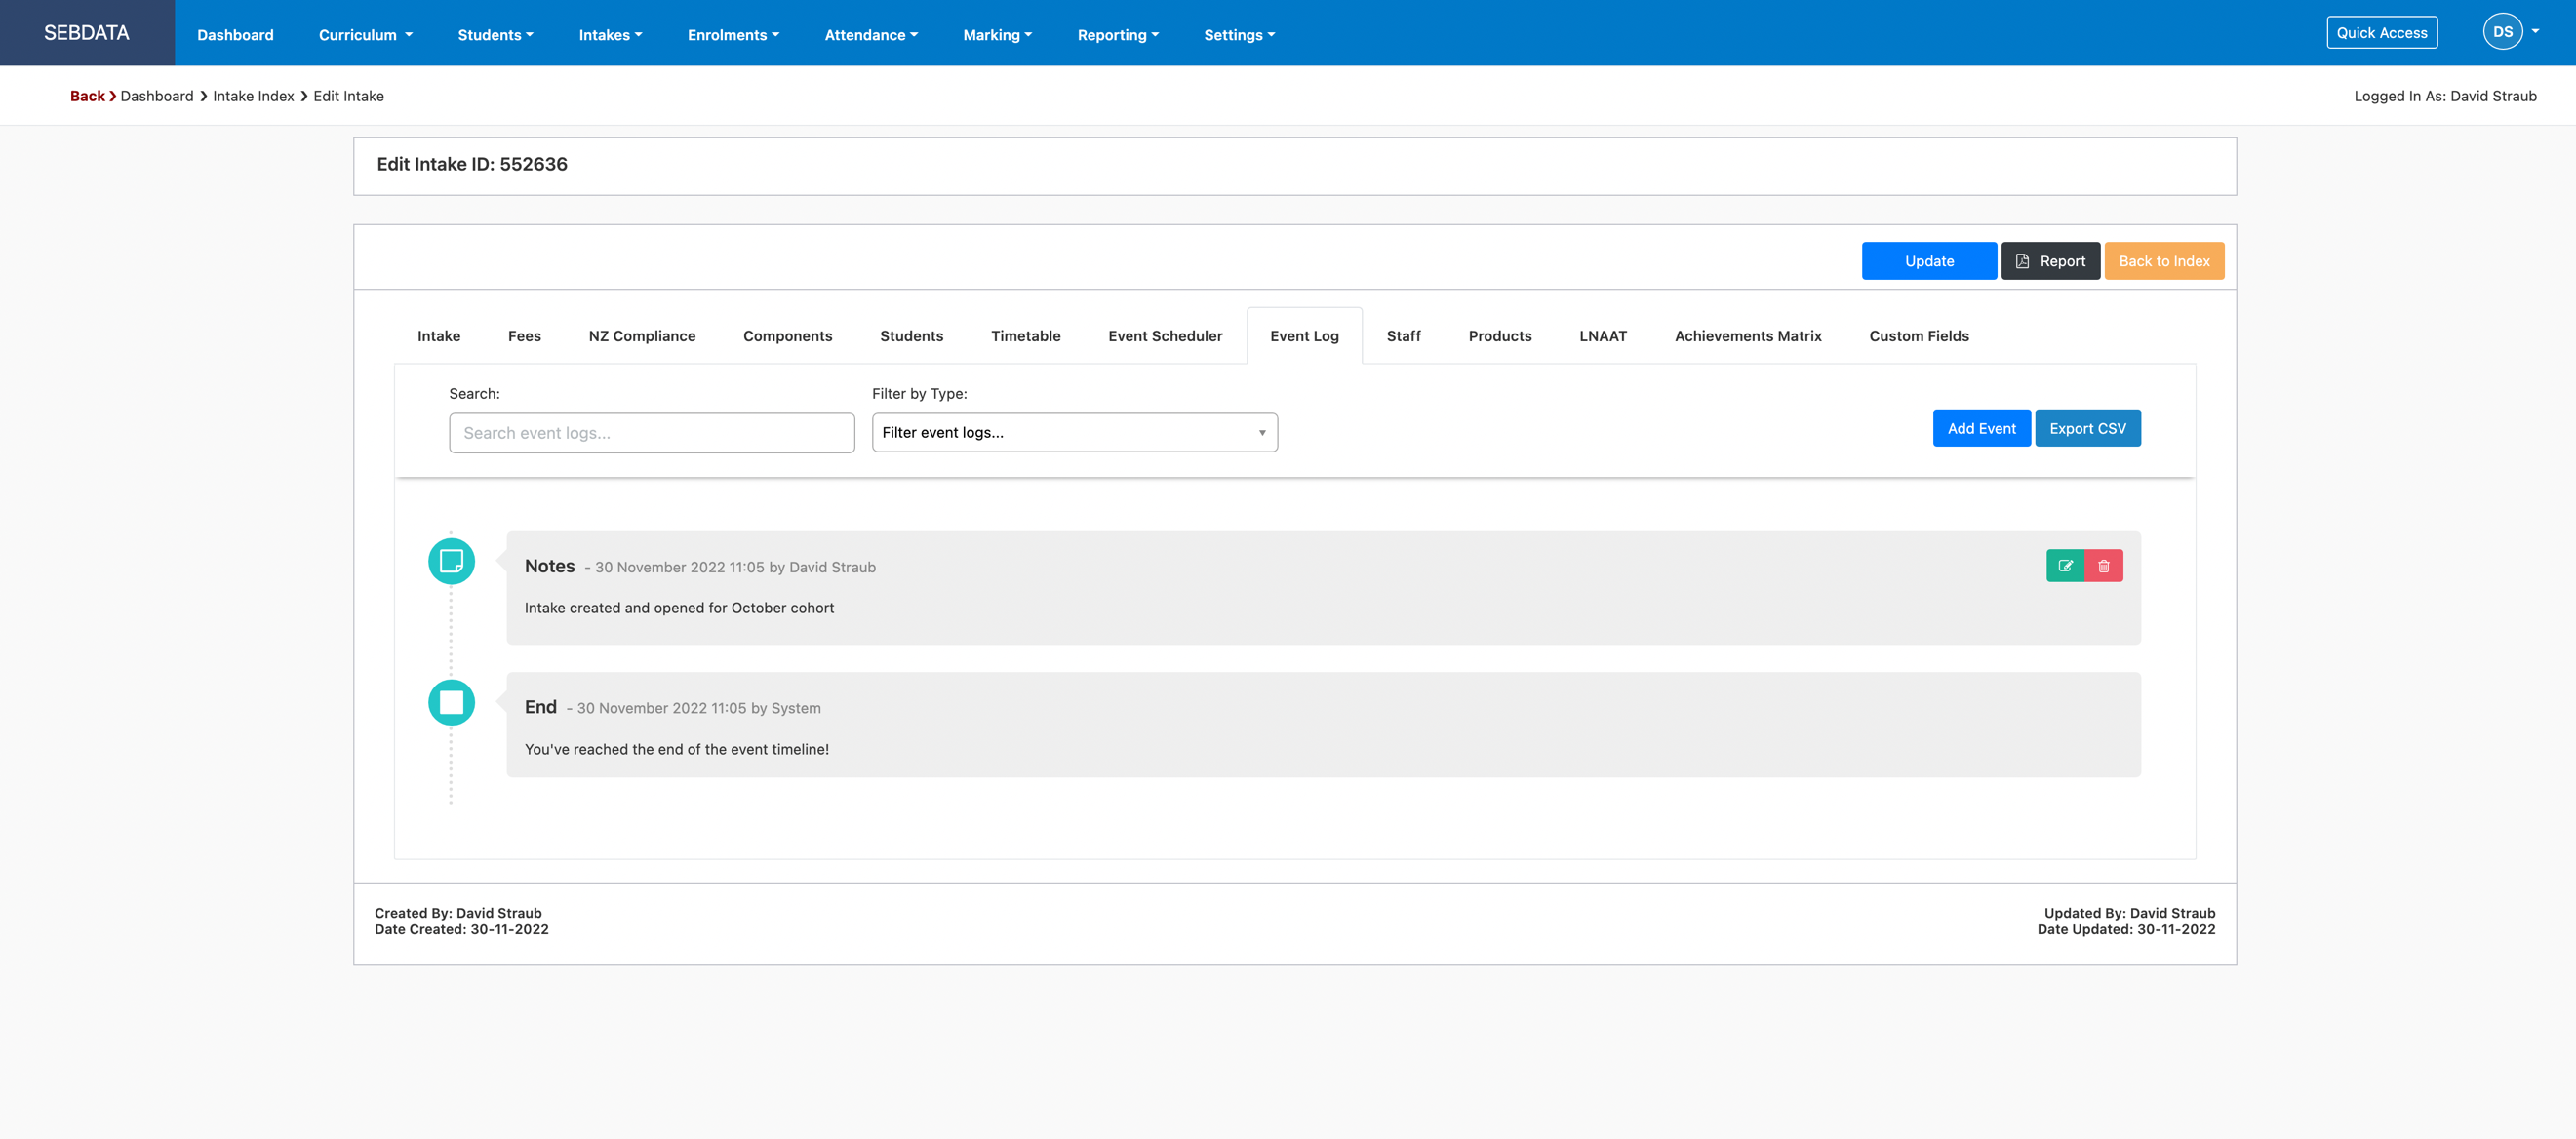
The event log tab on the intake is an area to make notes and create tasks for the intake only. These are generic notes for the intake that are not specifically related to individual students. The events and tasks added here will not display against the individual student’s event log.
Staff Tab
The staff tab allows you to add Teachers/Tutors/Trainers to the intake. These will be the teachers that manage the cohort. It can be one or many. If the staff member you have added here is of user role “Teacher” he/she will now be able to see this intake in their login to SELMA. If the staff member has chosen to be alerted (click on your initials on top right and choose alerts) about being added to an intake, he or she will now receive an email.
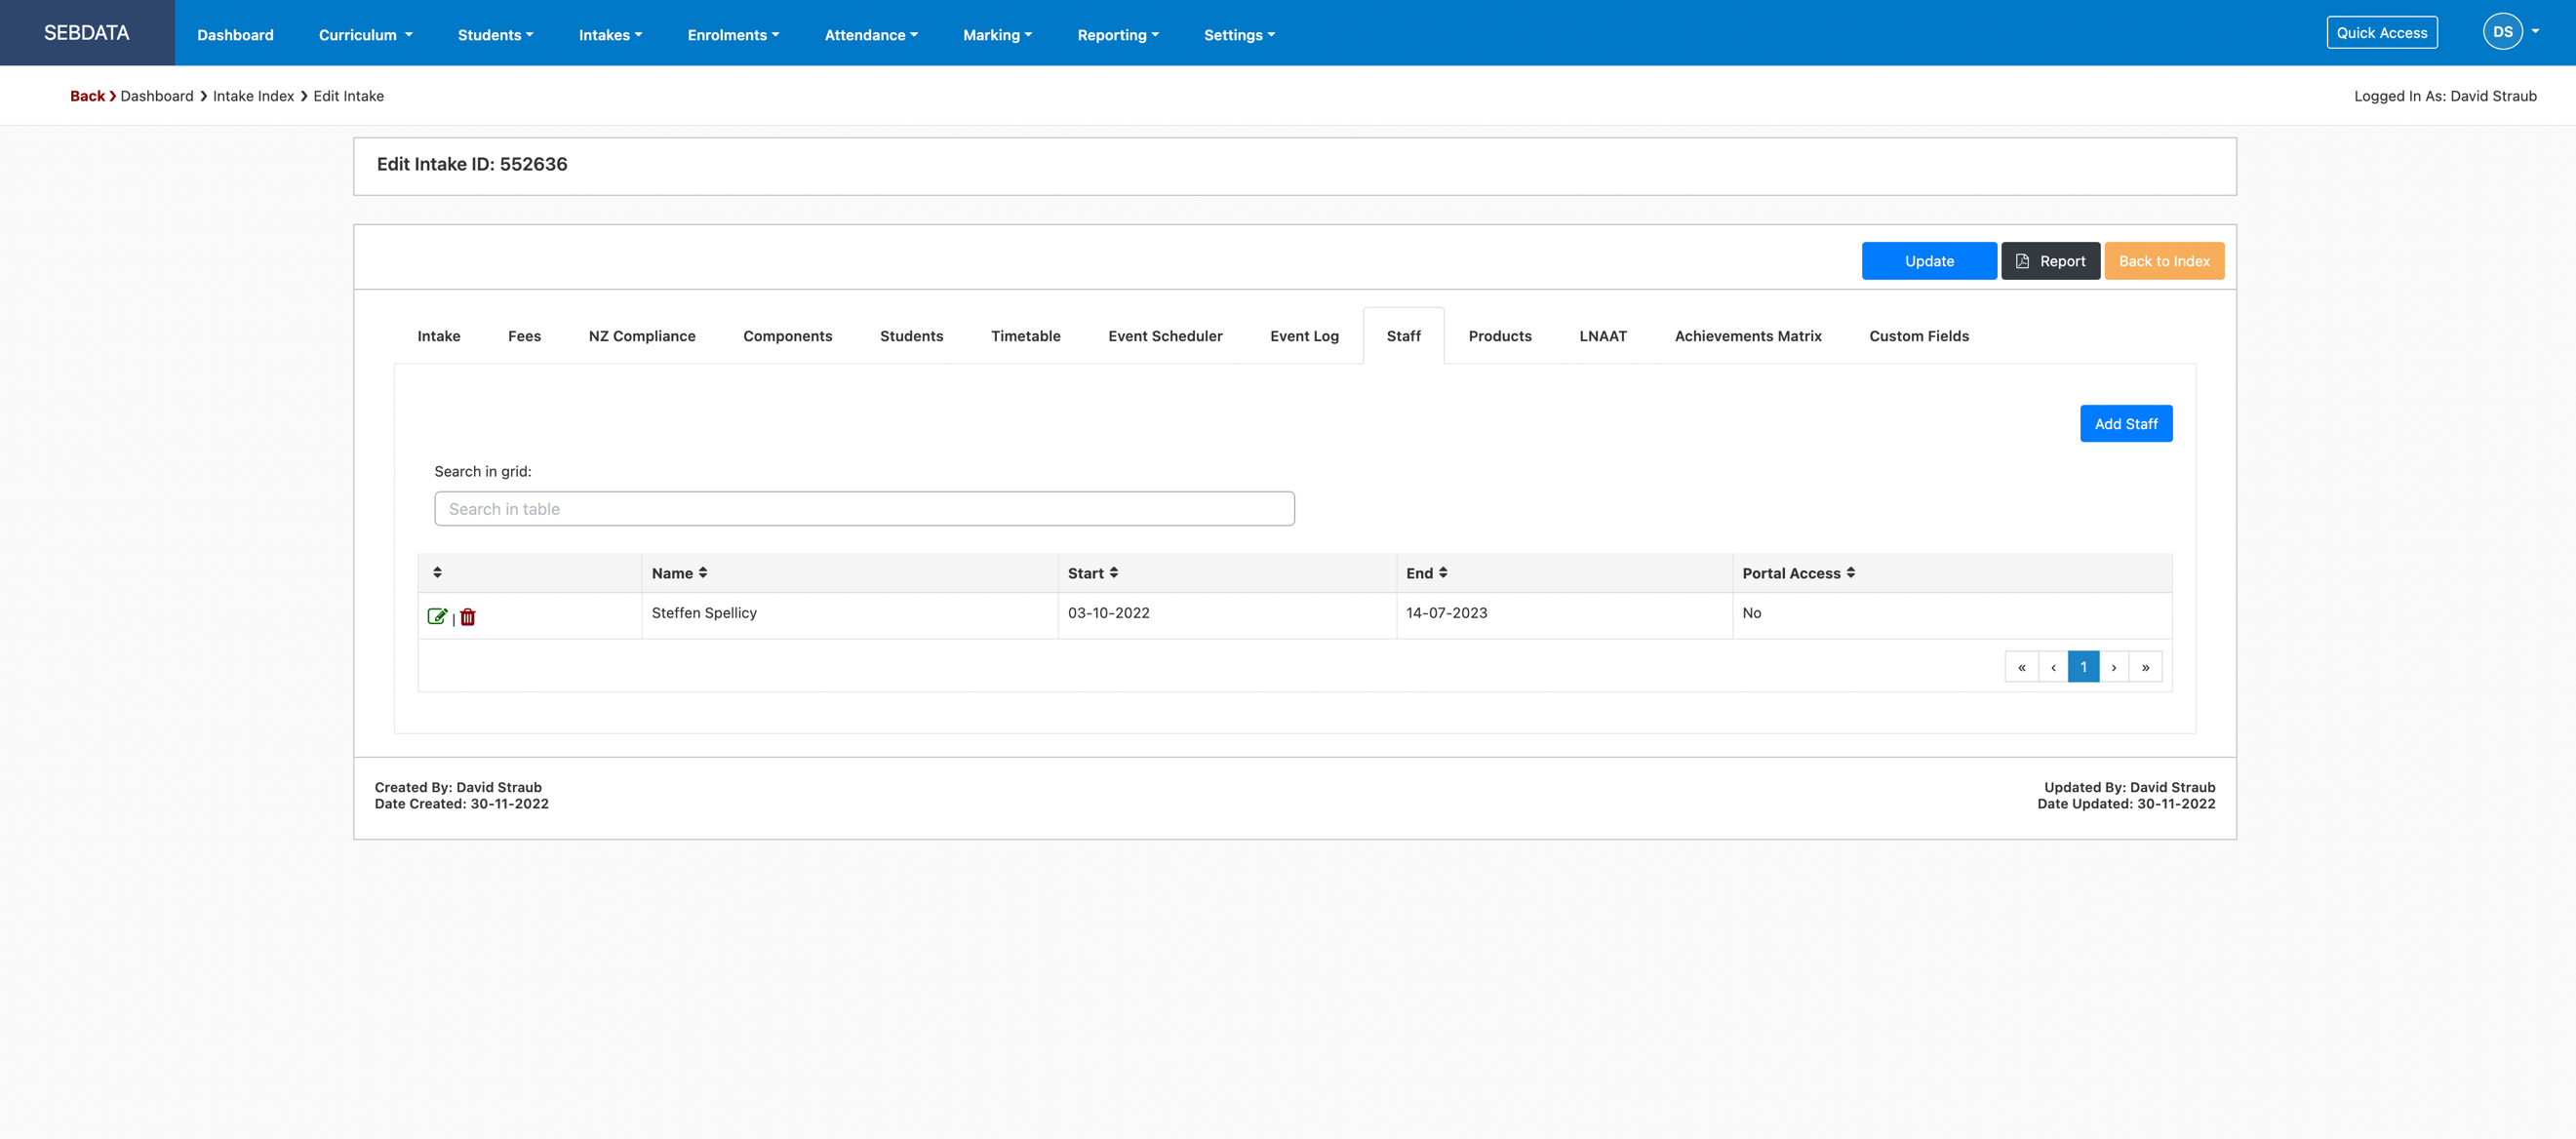
The start and end date as well as the portal access field have no more relevant in SELMA and will soon be deprecated.
Products Tab
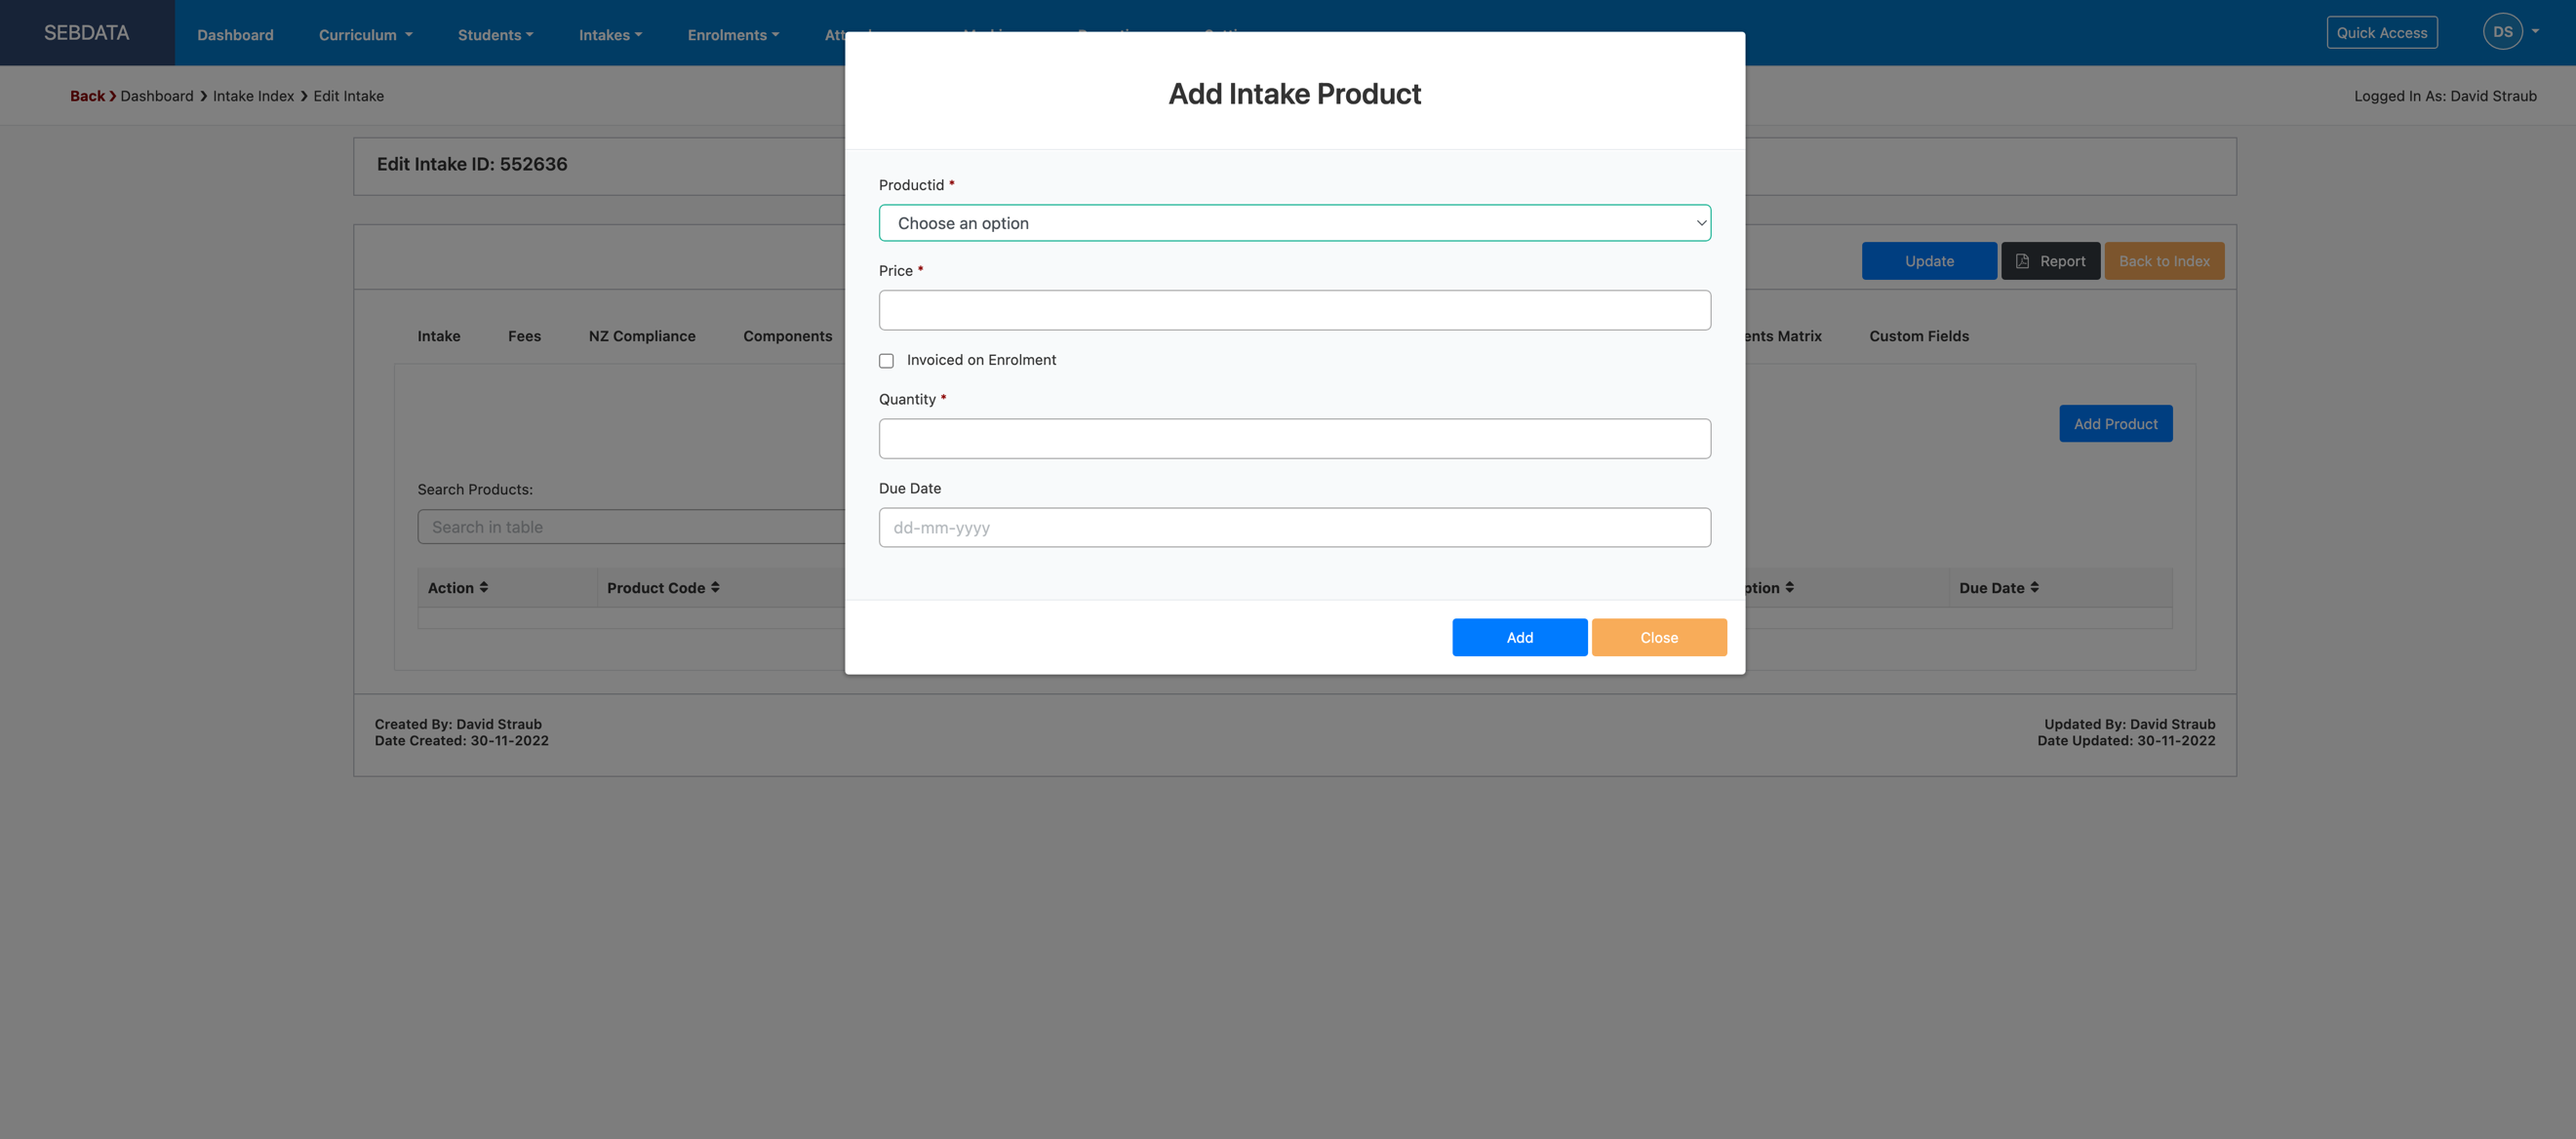
This tab allows you to manage the order of products for students in the intake (e.g. printed study materials). It is only enabled if you have subscribed to the product ordering module in SELMA.
LNAAT Tab
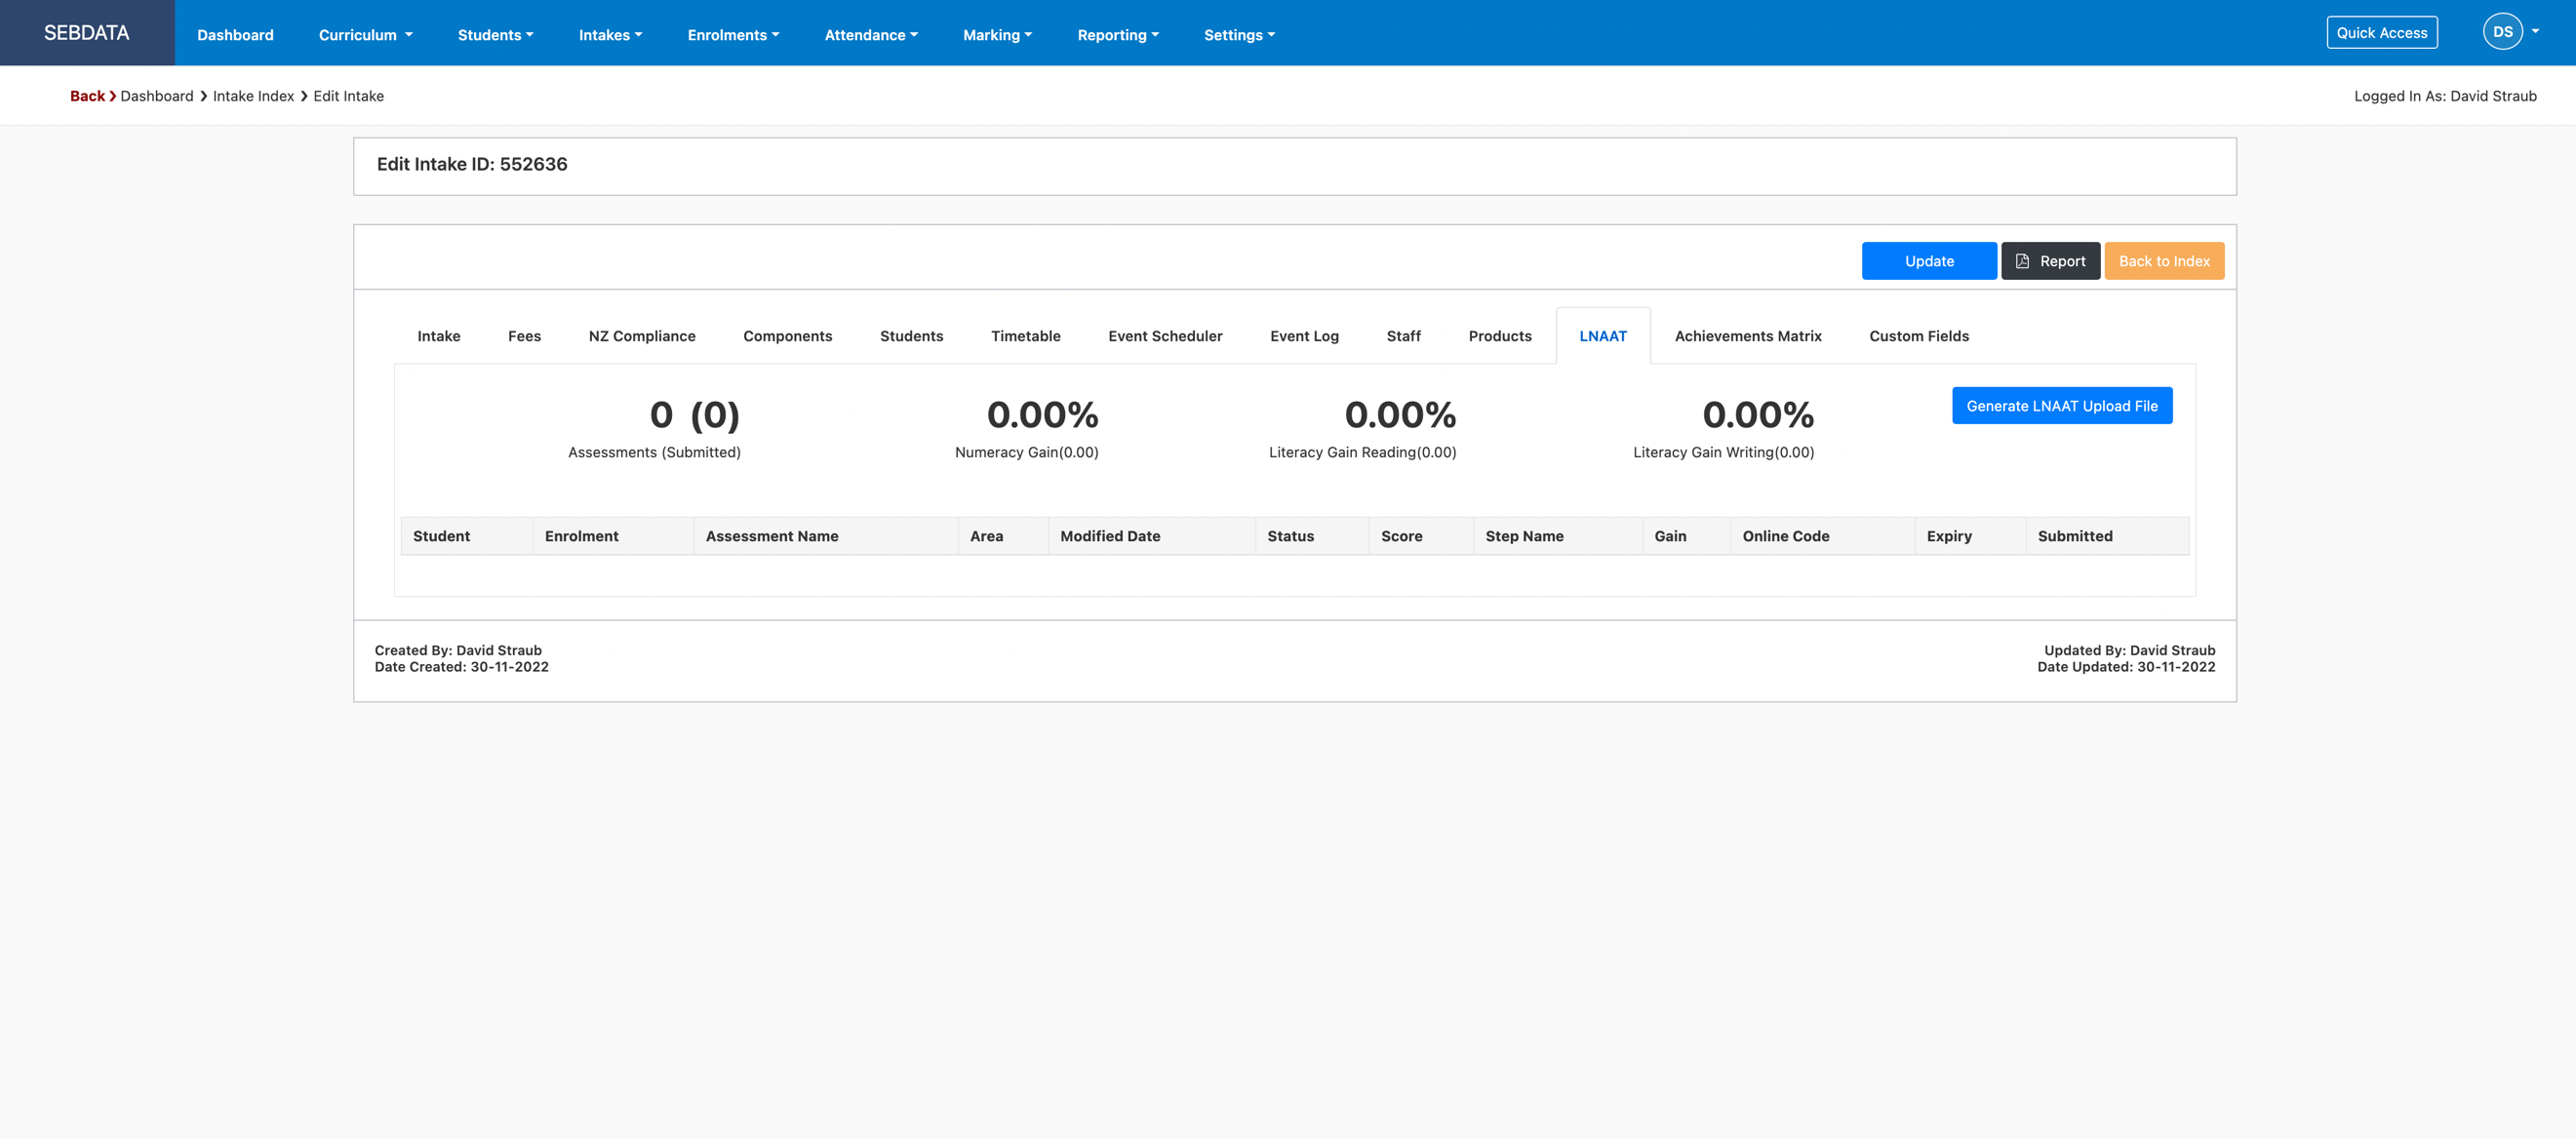
The LNAAT tab is only visible if you have the LNAAT function enabled in SELMA. From here you can generate the LNAAT upload file, and you will be able to see the performance of your intake once you import results back into SELMA. Please read the LNAAT guide for more information about this.
Achievement Matrix Tab
Last but not least, the achievement matrix tab is a very useful view of the performance of your class. You will see all students in the intake listed against all components in the intake. From here you can track on one screen how your cohort performs.
The fast filter on top allows you to e.g. only show active students.
Red crosses mean withdrawals or cancelations, green ticks mean the student has achieved the component, blue ticks mean the component is cross credited, an empty square means the student still needs to complete the component.
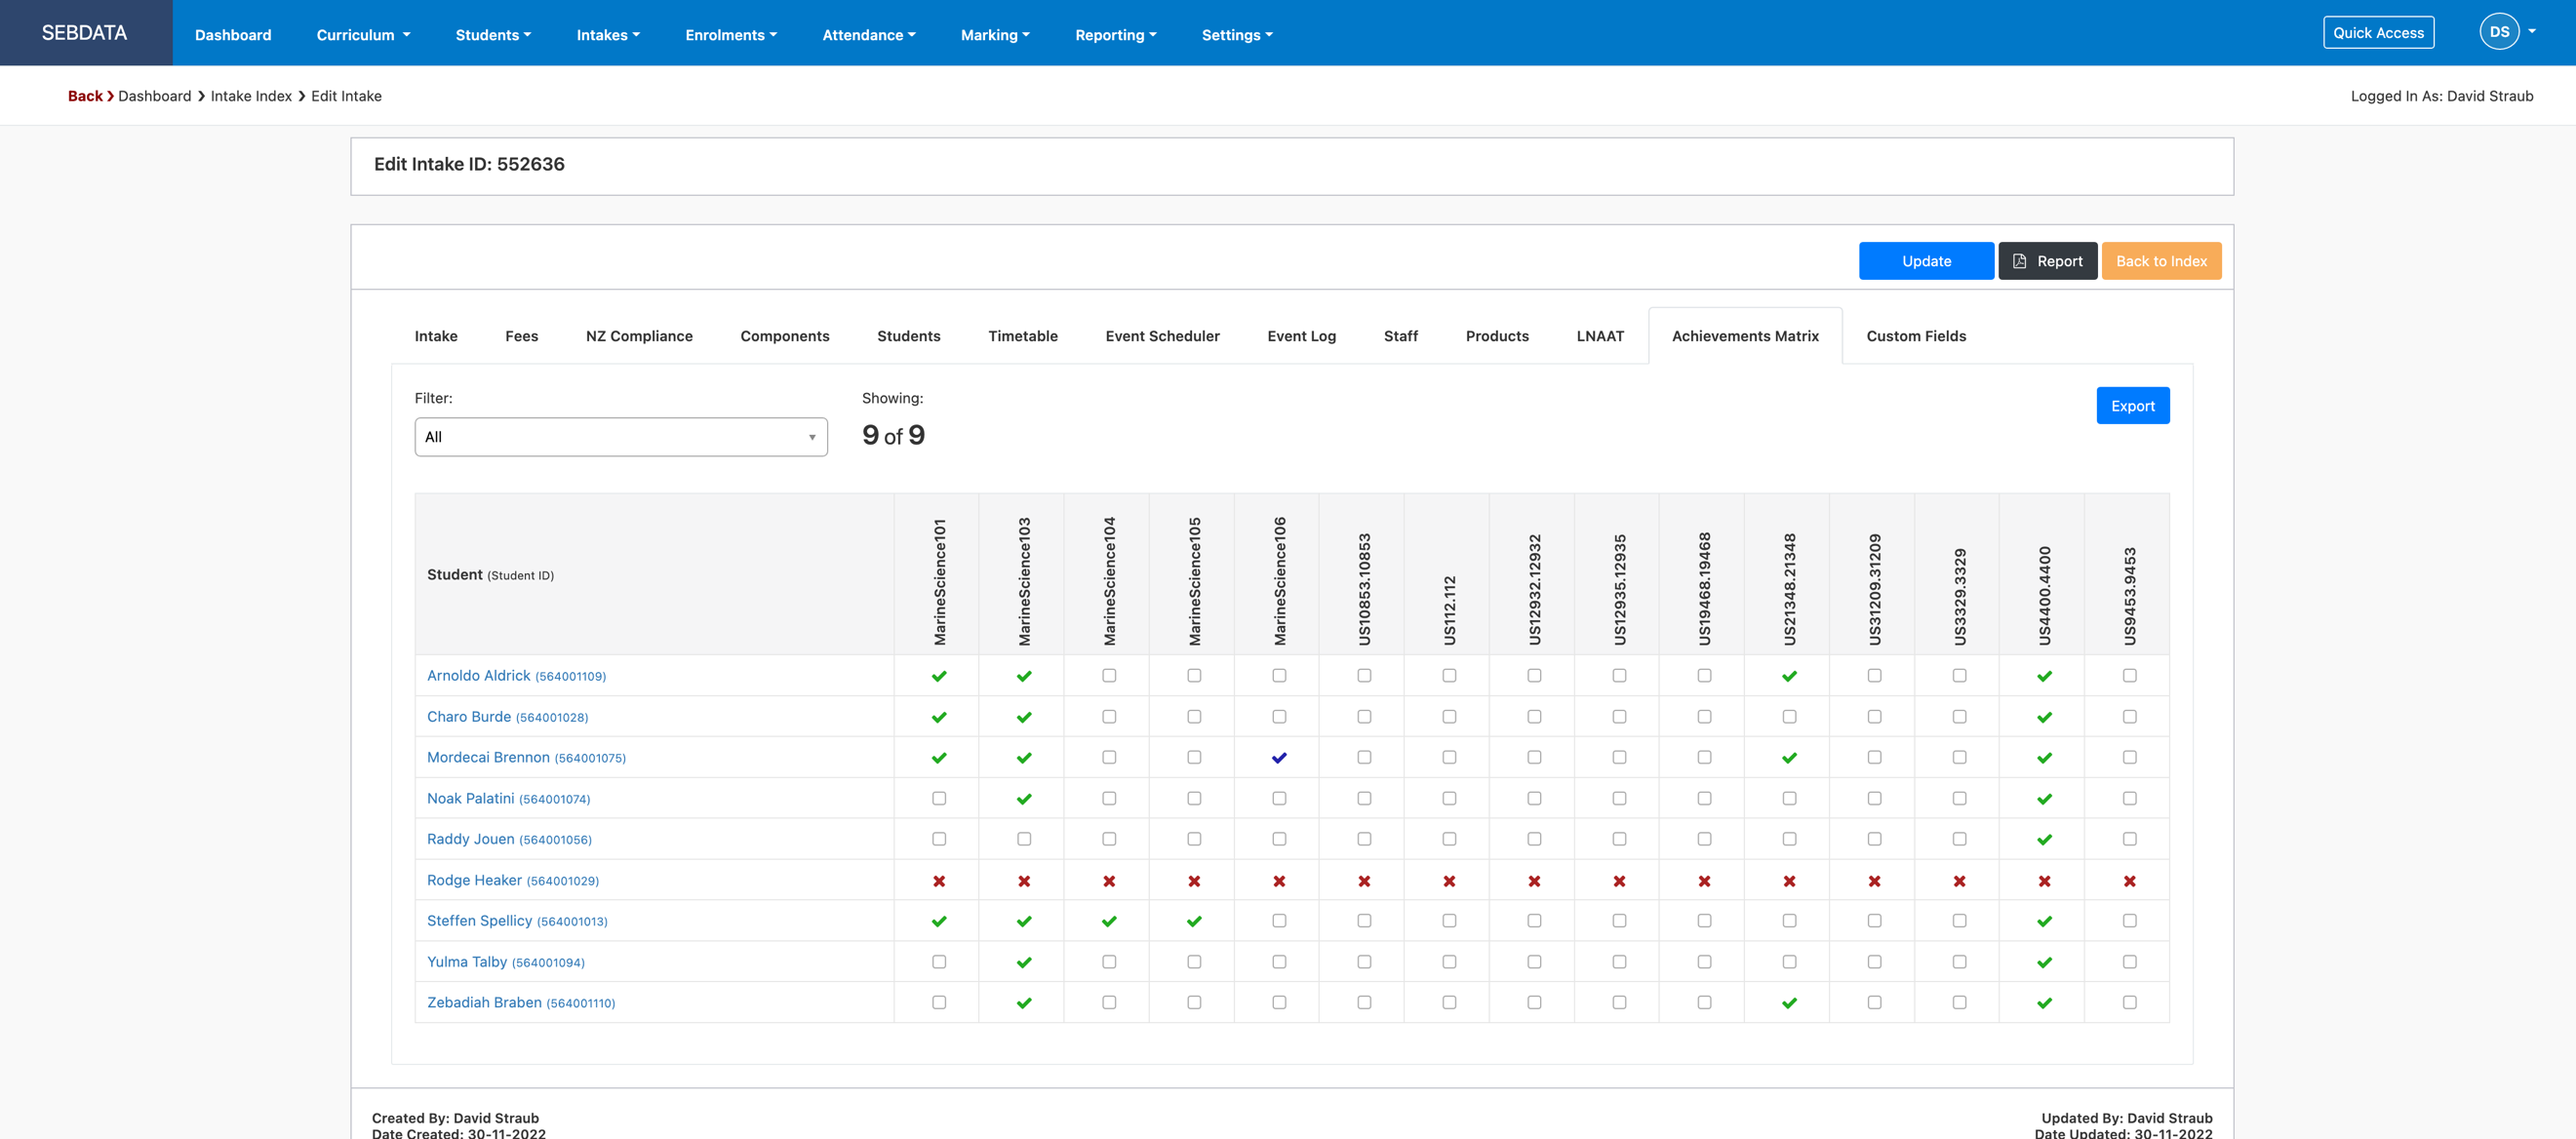
If you click on the crossing point of a student and a component, you can edit the component and change the outcome right from this screen (Admin and Registrar roles only). You can also export this screen into excel for further work on the data.
Clone Intake
If you would like to create an intake that is like an intake you have offered before (e.g. delivery of components and attendance register) you can use the “Clone Intake” function.
To get to the “Clone Intake” function, use the top menu Intake -> Clone Intake:
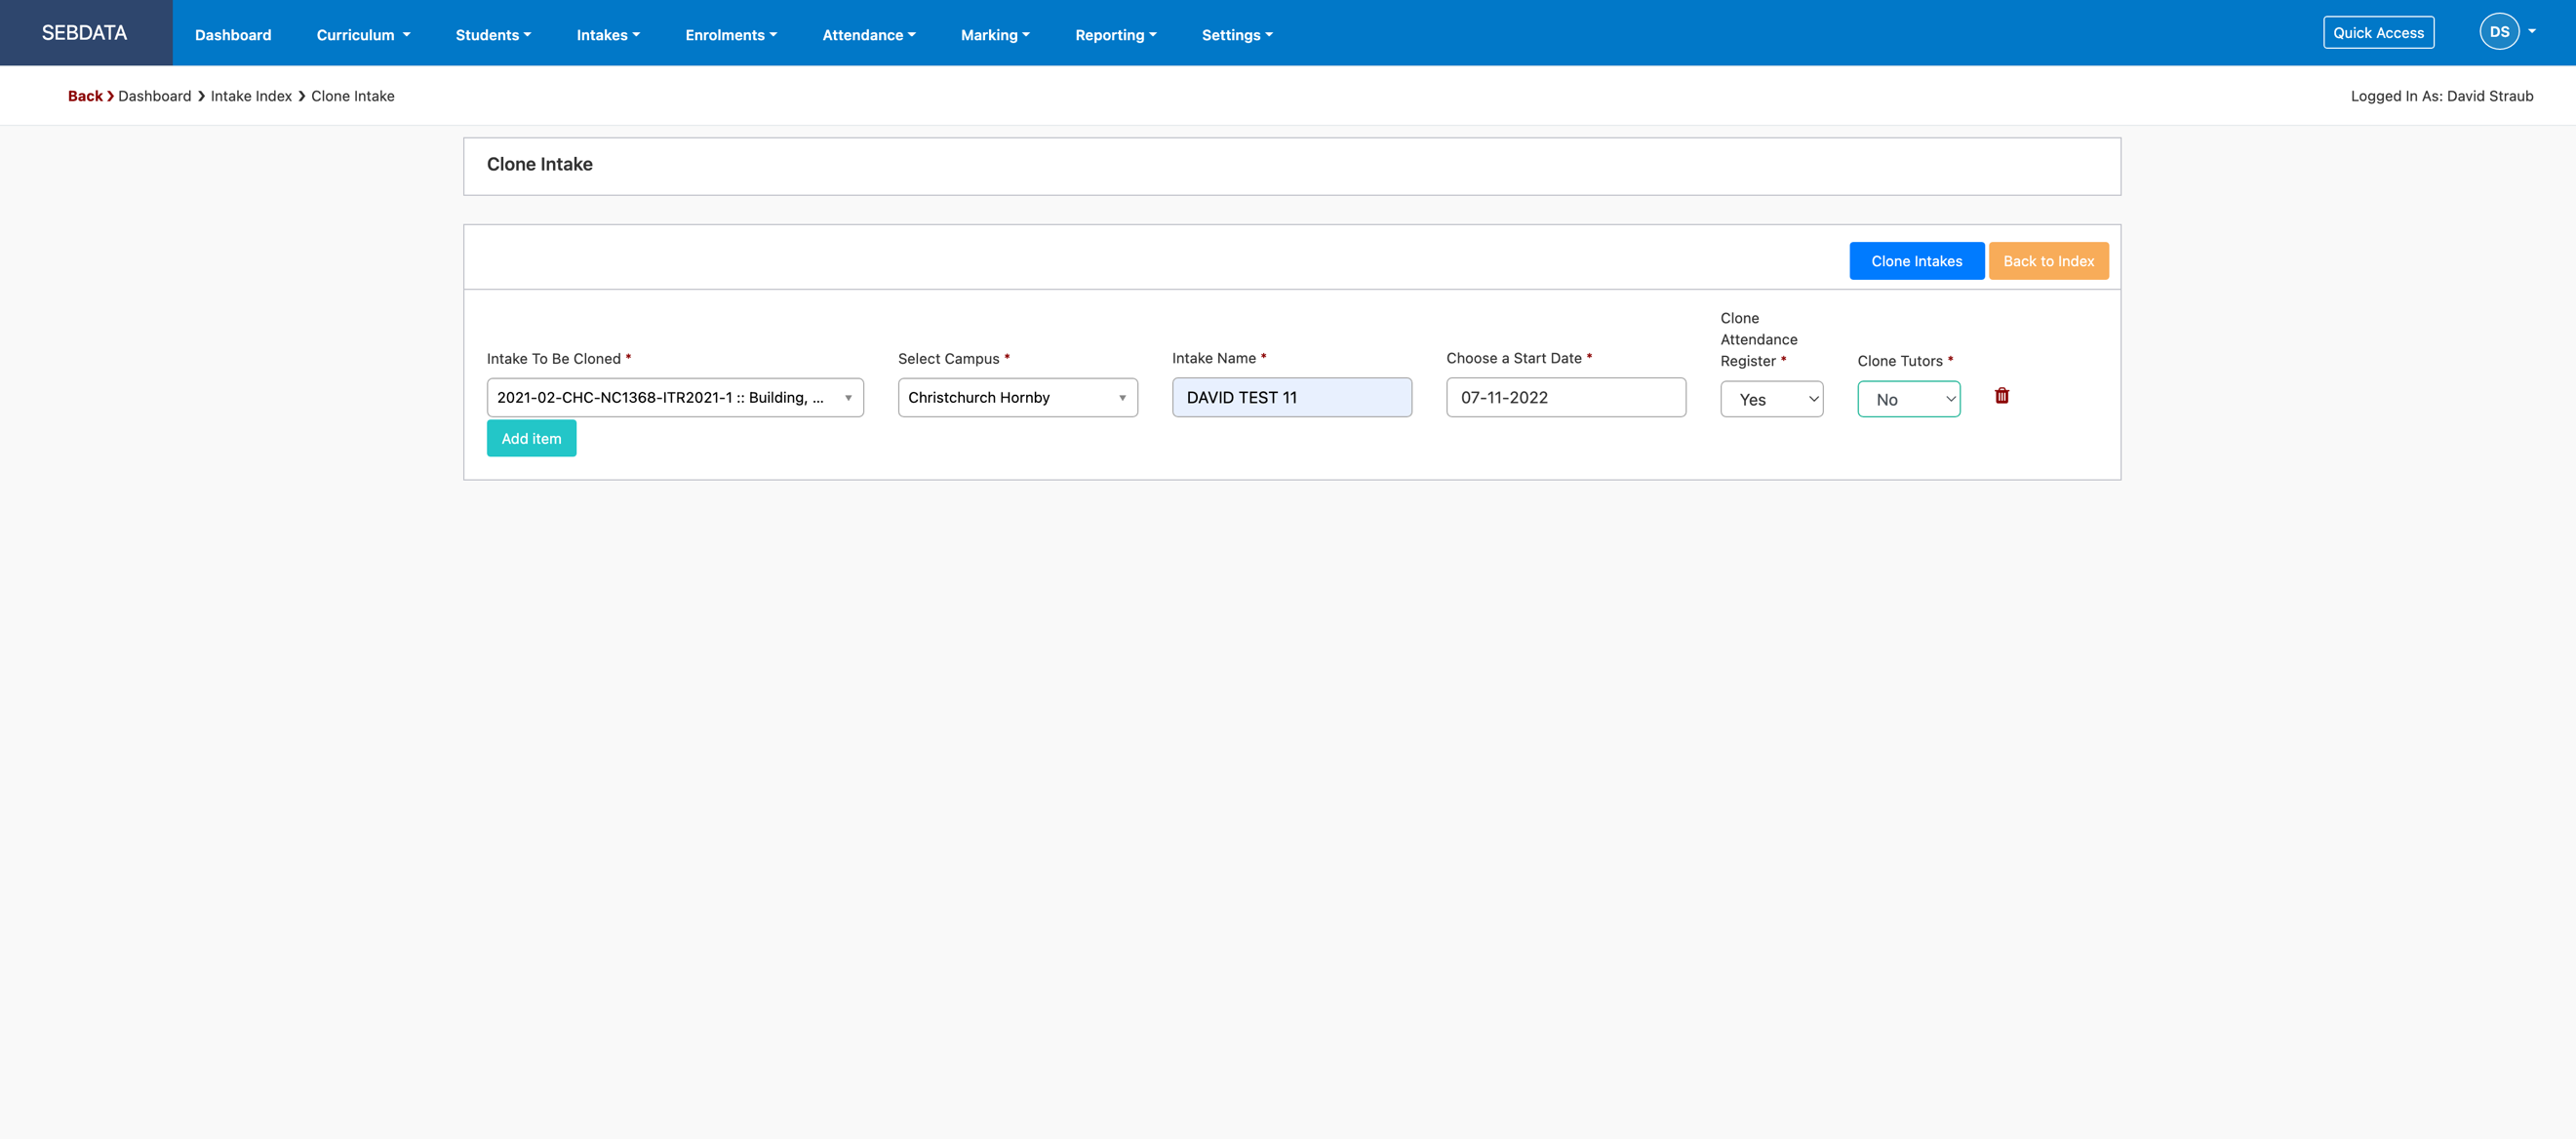
Choose the intake you would like to clone, choose a new start, select if the attendance register should be cloned as well and click ‘Clone’.
 | All dates will be calculated based on the new start date. The attendance register (if “Yes” is selected) will be cloned with new dates. This can save a lot of time for setting up an attendance register from the beginning. |


