
Components are the building blocks that form the structure of a Programme. They can be courses, modules, assessments, Unit Standards and subjects that are organised to deliver specific learning outcomes.
A Programme may contain one or multiple components. Each component contributes to the overall educational pathway by focusing on particular competencies or knowledge areas that learners must master, and collectively they create a coherent educational experience that leads to programme completion and certification.
On this page:
Create Components
 | SELMA allows the creation of components that do go through NZQA and those that do not (SDR or Non-SDR). Control what you are creating by selecting the correct Return Type (NZ Compliance Section). It is highly recommended that you verify every case to ensure that components are configured correctly in SELMA, and that you are meeting your obligations as an education provider. Be sure to confirm all details with your management team. |
There’s two ways to create a component in SELMA:
Click on ‘Curriculum’ on the top navigation bar and then ‘New Components’ as shown below.

Or click on ‘Manage Curriculum’ and then ‘Add Component’ as shown below.

You will be redirected to the Component Setup Form. Please fill out all details accurately, refer to the programme approval document if your programme is NZQA Approved.
Component tab
| If it is an NZQA approved course, use your programme approval document or have DXP Ngā Kete (formerly STEO) open in the browser to enter the correct values. |
Mandatory fields are marked with a star symbol (*)

NZ Compliance tab
Please fill out all details accurately, refer to the programme approval document if your course is NZQA Approved.
If the component is not relevant for SDR purposes, leave this section blank.
| If it is an NZQA approved course, use your programme approval document or have DXP Ngā Kete (formerly STEO) open in the browser to enter the correct values. |
IMPORTANT: Fee related fields ($) as seen above on ‘NZ Compliance’ tab in Components are exclusively for SDR reporting purposes, and DO NOT correspond to invoicing information.
For further details, please refer to Fees section on this resource centre.
Edit Components
To edit an existing cmponent, navigate to Curriculum -> Manage Curriculum.

Find the curriculum item in the grid and select it by clicking on the link.
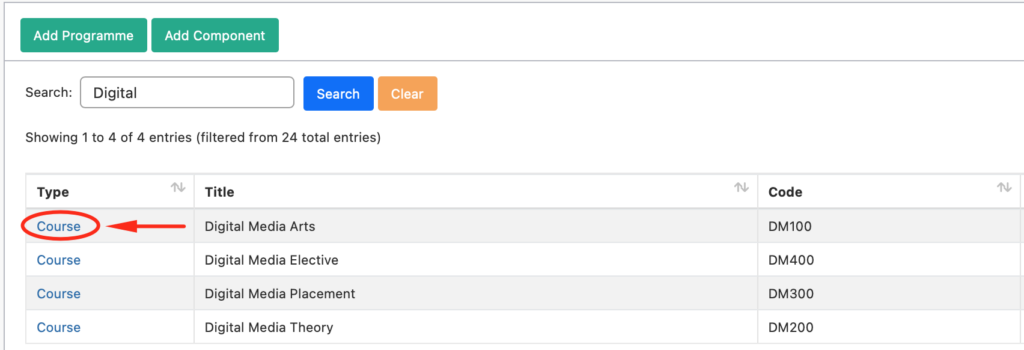
In the example below, we searched for ‘Digital’, which narrowed down the list to all items containing the word ‘Digital’. In this case, there are four matching records. Select the one you would like to modify by clicking on the highlighted link:
Once the component is selected, you will be redirected back to the Component Form:
To edit, click ‘Edit Component’.

Once you have updated all the necessary information, click ‘Update Programme’ to save your changes.
You may be able to delete the record using this screen, however, if it has been used in any intake or programme, the ‘Delete’ option will not be functional. In that case, the component status can be changed to ‘Inactive’.

Once you have created the appropriate course components, you must map the Components within the corresponding Programme. Please refer to Programmes – Map Components section on the Resource Centre.
.