Azure Application
On this page:
Register Your Application
For this to work we need a few credentials for an ‘app’ in Azure.
Please go to your Azure Applications and register an application.
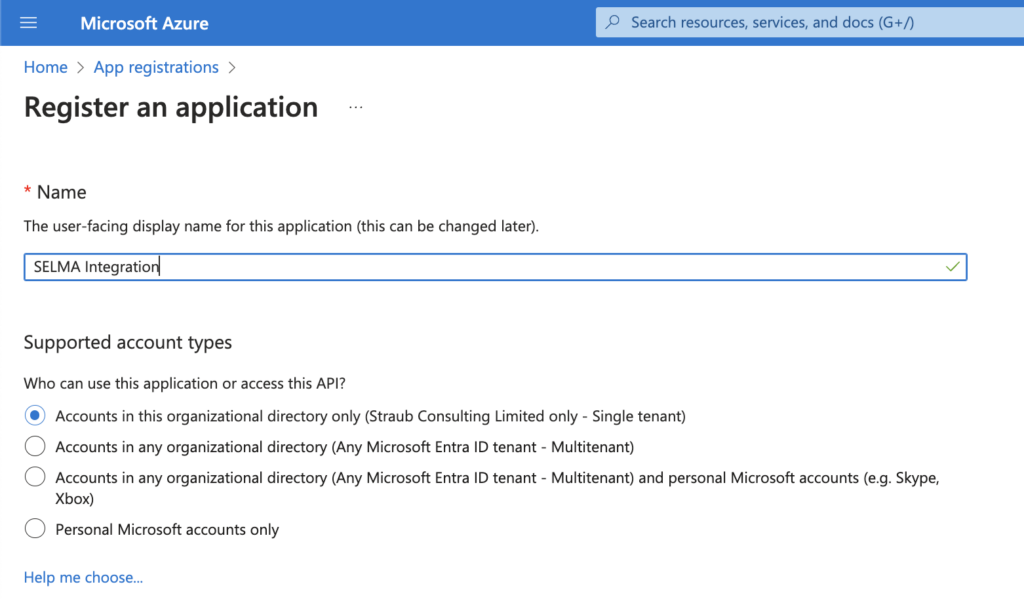
When we are creating an application, it just needs to be named at this point – something like “Selma Integration” to make it easy to identify it in the future. The remaining fields can be left with their default values.
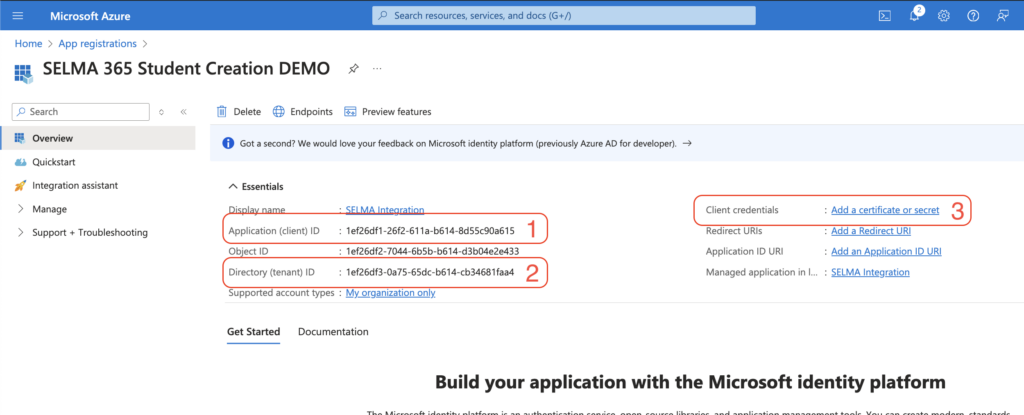
Once created, we require the following details from the App:
- Application (client) ID
- Directory (tenant) ID
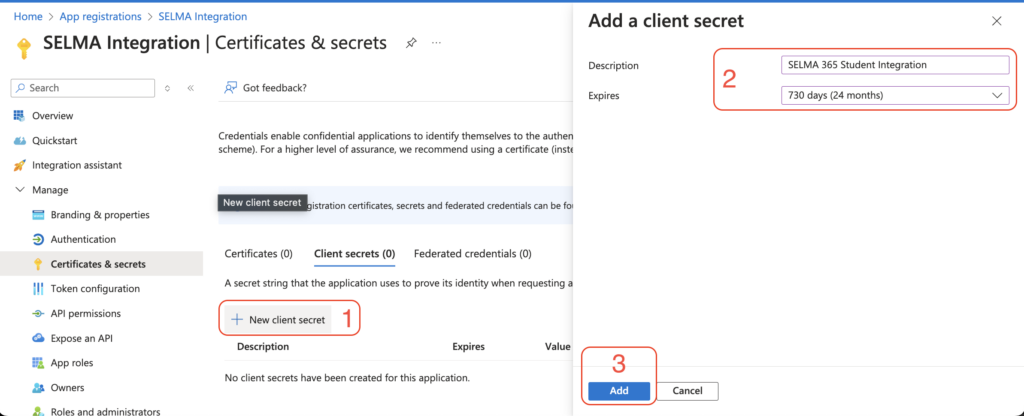
- Client Secret – this needs to be added to the App. Click on “Add certificate or secret”
Client Secret
- Click on ‘new client secret’
- Set a name and expiry duration for the new secret
- Set a reminder somewhere to create a new secret before the expiry. Send us the new secret when the time comes so we can add it to your SELMA system.
- Click “Add” to set the secret to your app.
Copy the secret value immediately at this point, as it won’t be shown again, to make it easy to send it to us later.

If you can’t copy the secret anymore (if the page was refreshed, for example), please redo the entire step 3 (client secret).
In addition to the above, we also require the following information:
- Domain – your o365 domain, this will also be used to generate the student emails. For example,
@example.com? - Licence SKUID – often this is ‘Office 365 A1 for Students’ Licence (314c4481-f395-4525-be8b-2ec4bb1e9d91) – Education SKU reference – Microsoft Teams, but can be set to any licence required by your organisation.
Permissions
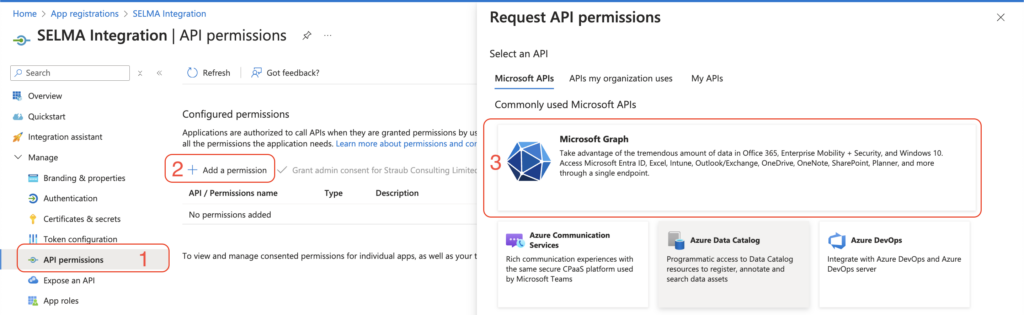
Lastly, the App also needs the appropriate permissions granted to perform the required actions.
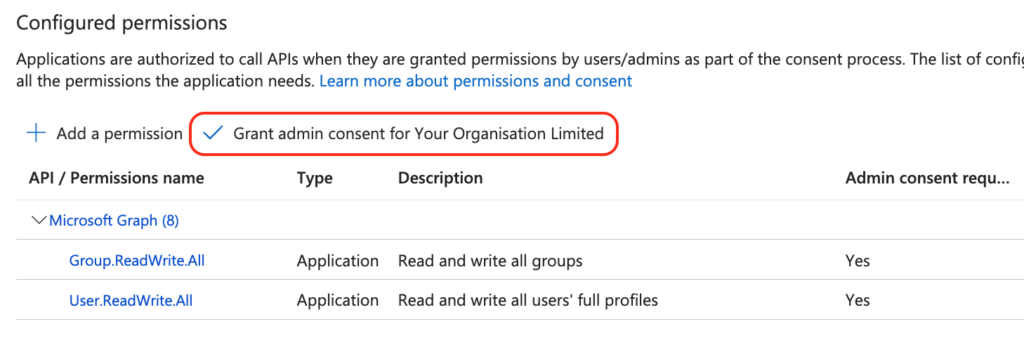
Add the permissions by clicking “API Permissions” → “Add a permission” → “Microsoft Graph”.
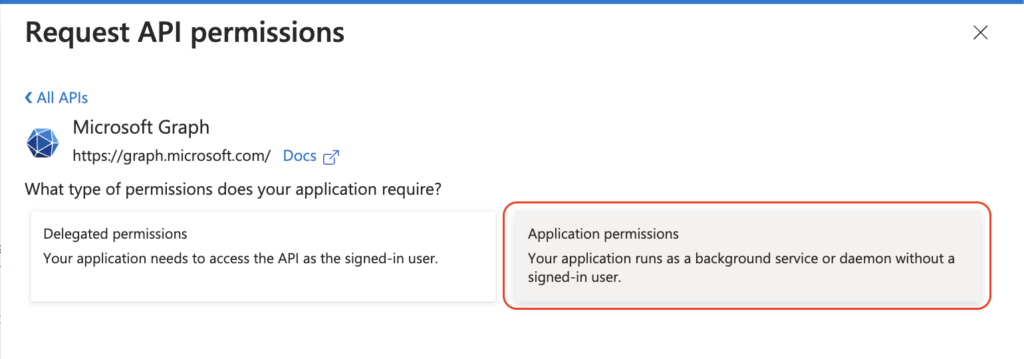
Choose the “Application permissions” option, as the integration needs to perform actions without the need of a logged in user (it performs processes in the background).
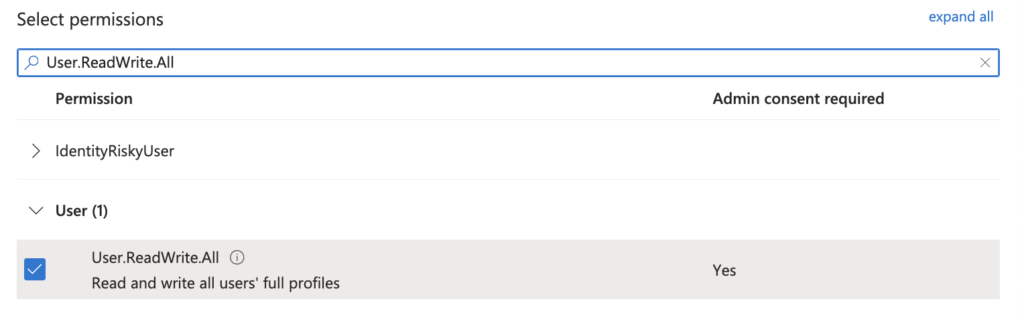
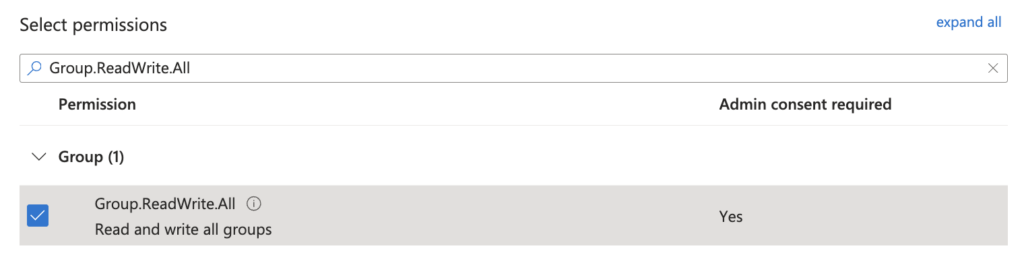
Add the “User.ReadWrite.All” permission. This is required to create the user/student accounts.
Add the “Group.ReadWrite.All” permission. This is required to create the groups in Microsoft 365 based on the intakes. Licenses are also assigned to the groups, so any user/student added to the group inherits the licence. This also allows you to quickly revoke licences for a whole group.
Once both permissions are added an admin needs to ‘grant consent’ for the permissions.
Once the above steps have been completed and we receive the required information, we can continue to set up your integration to start processing students.
Integration Logic
Students are processed upon enrolment into an intake. The process per student are as follows:
- Student’s Microsoft account is created, if it doesn’t already exist.
- Name is based on student’s preferred name and last name (if there is no preferred name, the first name will be used.)
- A Microsoft email address is generated
- By default, based on the first 3 letters of their first name, last name and an incrementing number if the combination already exists.
For example, John Smith will have an email generated as johsmi1@example.com – if there’s more than one John Smith, the 7th John Smith will have the email johsmi7@example.com - If enabled, the generated email can also be based on the student’s NSN field.
For example, a student with the NSN 12344321 will have the generated email address of 12344321@example.com.
- By default, based on the first 3 letters of their first name, last name and an incrementing number if the combination already exists.
- A temporary password is set and on first log in the user/student is forced to change their password to something secure.
- The student’s Microsoft email and default/temporary password is stored against their record and can be viewed under the Miscellaneous tab on the student page in SELMA.
- Intake’s group is created, if it doesn’t already exist.
- A group is created in Microsoft based on the intake name and ID. For example, the intake named “Certificate in Marketing” with the SELMA ID of 555555 will result in a group called “Certificate in Marketing (555555) in Microsoft.
- The specified licence is assigned to the group. Any users added to this group in Microsoft will inherit the licence.
- The user/student is added to the group in Microsoft.
- The user/student is emailed their Microsoft login credentials. This will be sent to their (primary) email address that is recorded in SELMA – if no primary email address is found, the secondary email field will be used.
- The content of the email can be customised by creating a Comms Template in SELMA and give it a name of “o365”. The template with that name will be picked up and used instead. Set the “Use Case” to “Student.”
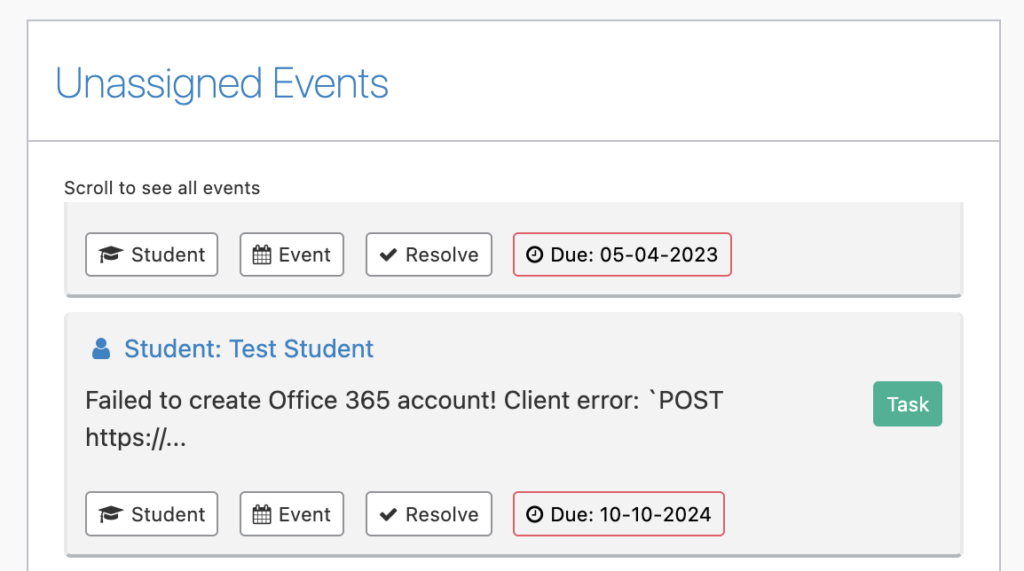
Errors
If something goes wrong at any step, an ‘Event Log’ is created in SELMA against the student currently being processed and assigned a due date of today. This ensures it shows up on the dashboard of admins and makes it easy to detect and deal with the issue. It should have a note attached explaining the cause of the issue.