This release note will update current SELMA users with the new features that have been added to the SELMA system, to be released over Easter weekend 2020.
We hope you get lots out of these new system features – we put a lot of work into them.
Questions, Issues, or Comments
If you experience any issues while using the new updated version of SELMA, or if you have any general comments we would love to hear from you.
We can be reached by phone, email, or support ticket creation: Phone: (09) 366 0789
Email: support@selma.co.nz
Support ticket:
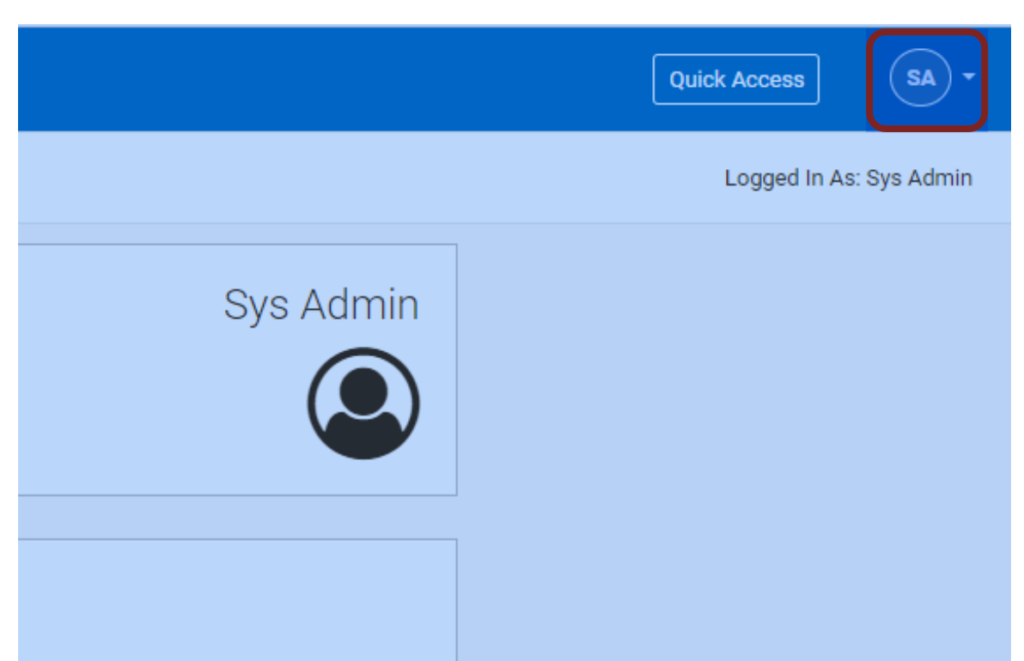
Support tickets are readily accessible in your SELMA instance to be submitted to us. To do this, click on the user initials at the top right corner of the SELMA dashboard:
Then, click “support”:
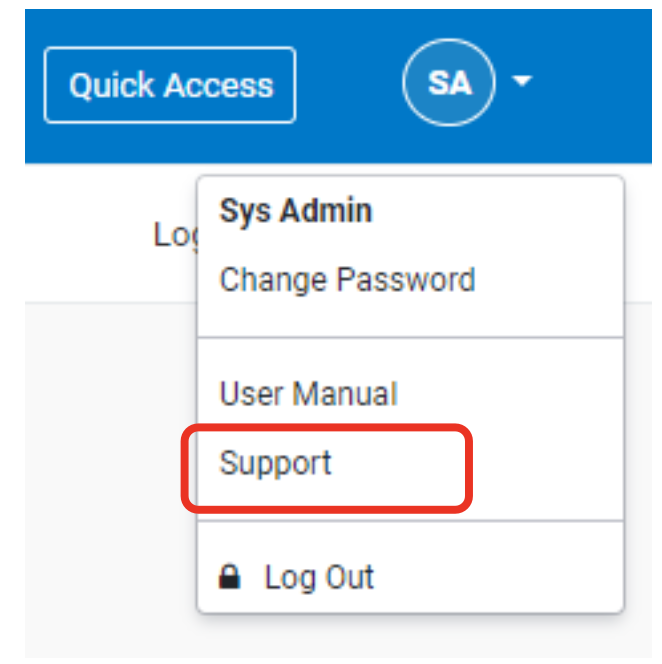
You will be redirected to a Freshdesk ticketing form: fill out this form as completely as you can, and we will be in touch as soon as possible
With this in mind – let’s dig into some of the changes on your new SELMA system!
Fees Free
The updated SDR manual recently released by STEO has updated the Fees Free codes which we have implemented into the new SELMA system.
New Fees Free Eligible Codes (Field Number #1.14.1)
As per the SDR manual, this field is used to identify if the student is eligible for Fees Free or not, as at the extraction date of the SDR.
As a result, the following options are now selectable in your new instance of SELMA:
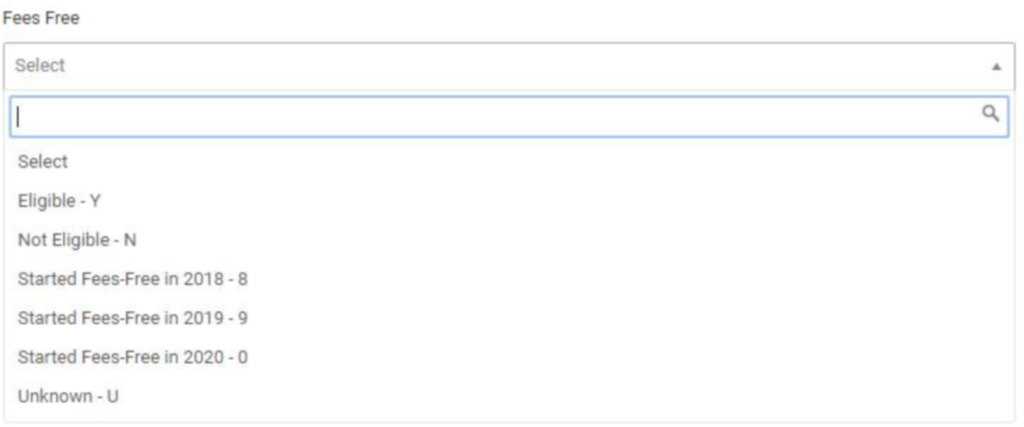
As you can see in our selection grid, there are the following options:
Y: Student is eligible for Fees free
N: Student is not eligible for Fees free
U: Student’s Fees free eligibility is unknown
8: Student is eligible for fees-free, started fees-free consumption in 2018, and will always have status as 8
9: Student is eligible for fees-free, started fees-free consumption in 2019, and will always have status as 9
0: Student is eligible for fees-free, started fees-free consumption in 2020, and will always have status as 0
This field is located in the student grid: select the relevant student, go to the NZ Compliance tab, and then you will see the Fees Free box as the second one down from the top, on the left side (see screenshot):

Fees Free Status Check function
This function will allow you to generate a NSN number listing of active students for the purposes of checking the Fees Free eligibility status of these students with TEC. The following process will walk you through how to perform this function in SELMA.
To access the new Fees Free Status check function, go to the Reporting tab, then click “Fees Free Status Check”:
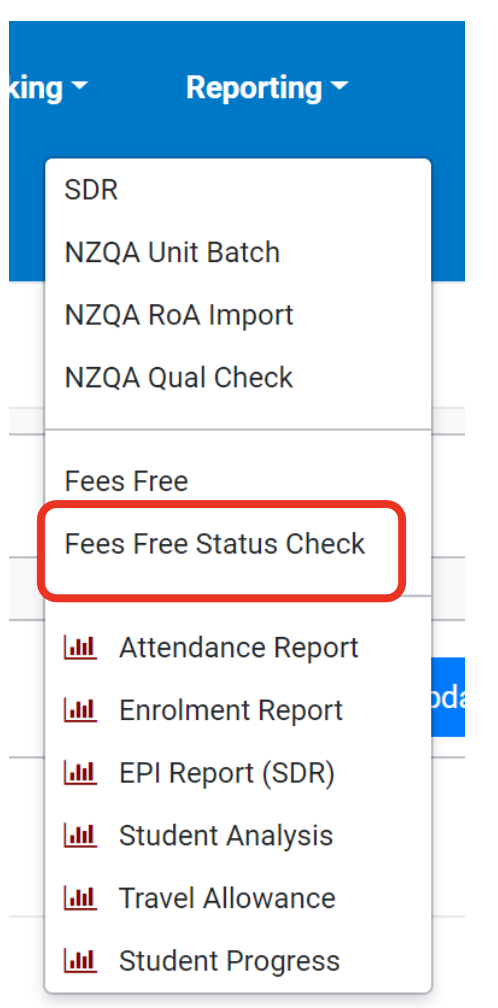
When you click this button, you will be presented with the following screen:
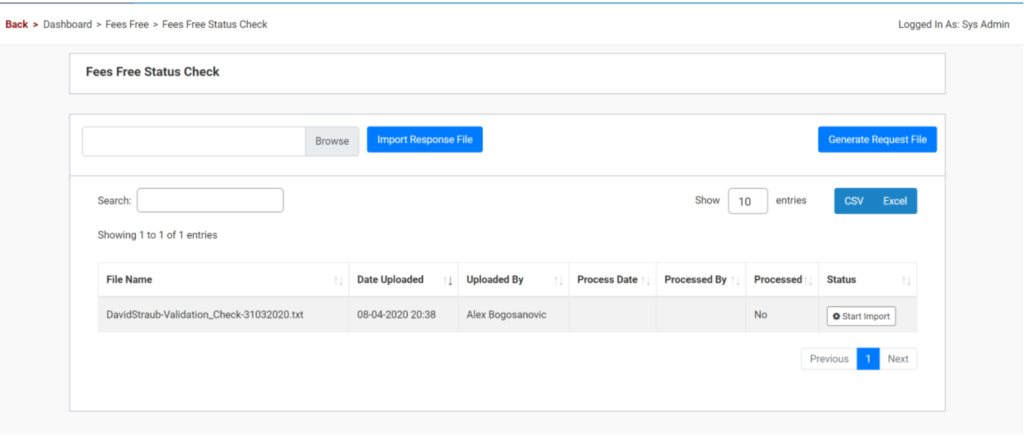
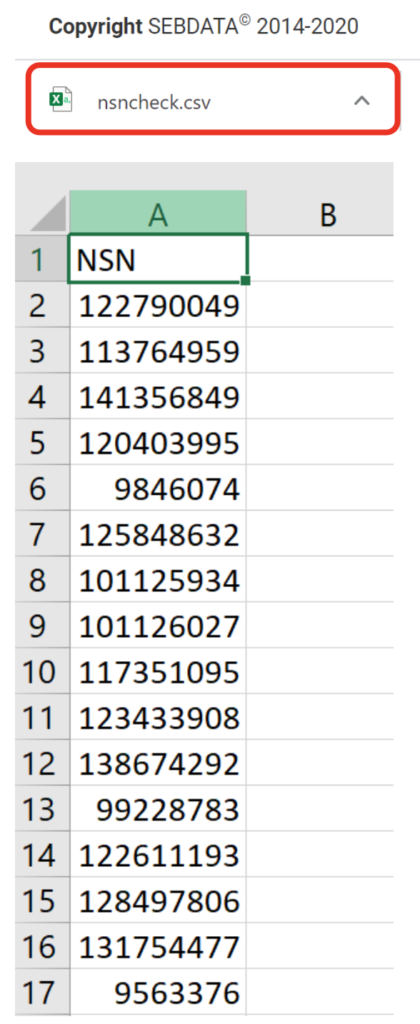
To start the process, generate a Fees Free request file by clicking on “Generate Request File”. This will download a CSV file onto your computer (nsncheck.csv) that contains a listing of all NSN numbers of active students within SELMA (if they have an NSN number)
Next, you will want to send this CSV file in an email as an attachment to the following email address:
customerservice@tec.govt.nz
In the title of the email, input the following text so that the customer service representative at TEC will know what to do with this file:
“NSN FF Status Check”
Then click “send”. This will send the email off to TEC, who should answer back to you within 24 hours. In their email response, TEC will include a responding file which will contain the Fees Free status’ of the students who’s NSN numbers were included in the original file that you sent to TEC.
Next, download this “response file” that TEC replies back to you with. Then upload this file into SELMA, using the “Import Response File” box

Once you have done this, SELMA will automatically update the Fees Free status of all the students who’s NSN numbers are in the response file with TEC’s designated status.
Event logs
Who created the event log?
In the new SELMA release, you are now able to see who created the event in the event log:
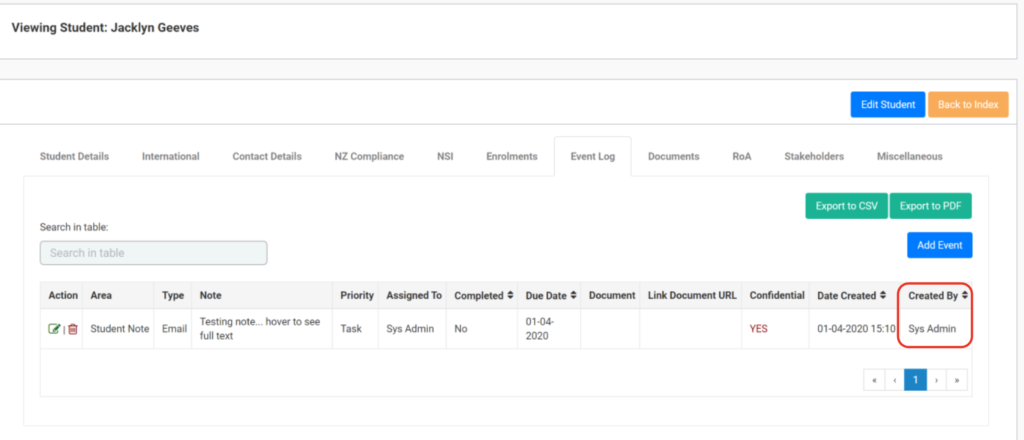
This was in response to a few inquiries we received, which highlighted the valid need to be able to see at a high-level who created which ticket to assist with the creation of an electronic trail.
Exporting event logs into different file formats
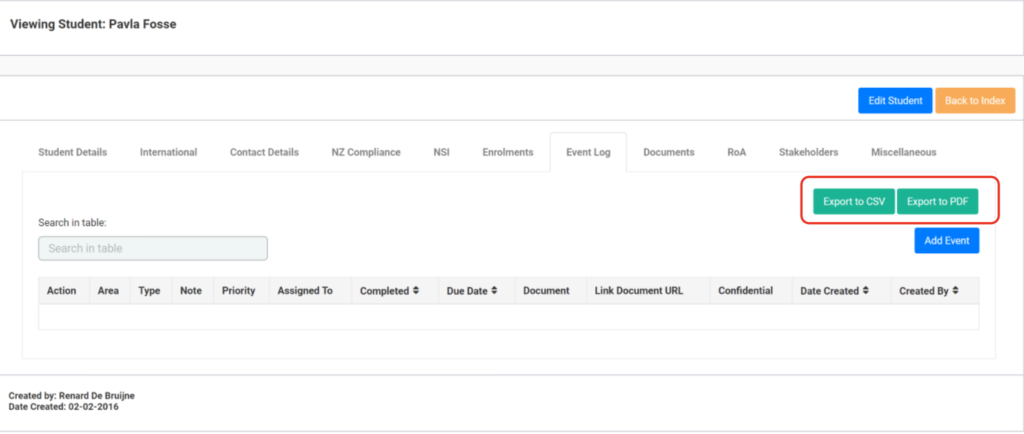
With your new SELMA instance, you will now be able to export student events into either CSV or PDF file format.
Simply go to the events log section of the student who’s notes you want to export, and select one of the buttons highlighted in the screenshot below:
Tutors can now see student notes on their new Events dashboard
Before this software update, users with only ‘Tutor’ level access to the system could only access notes assigned to them by locating the relevant student and looking into the student’s Event Log.
With this new software release, Tutors now have a dashboard – much like Admins and Registrars – which display notes assigned to them in an easy to interact with widget on their dashboard that they see first thing when they log in! They will only be able to see notes assigned to them, and thus will be unable to see any notes assigned to other tutors and admins.
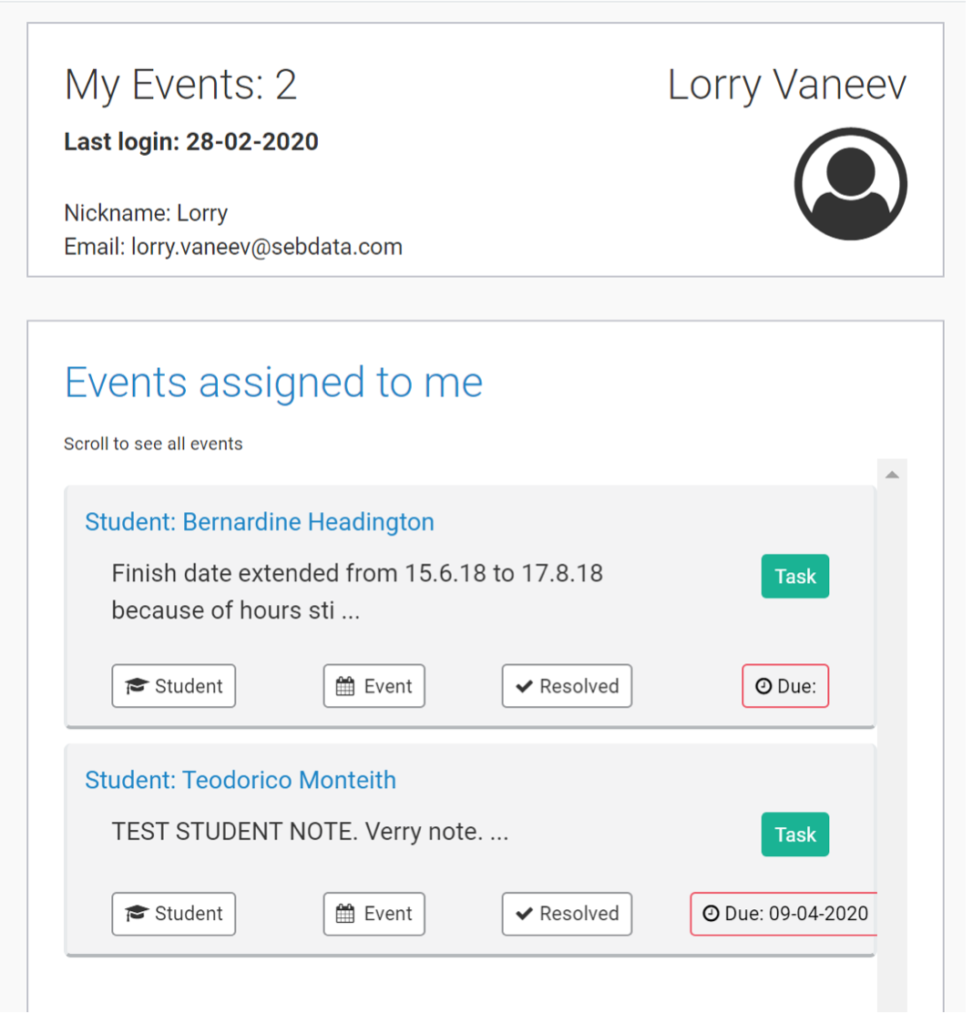
Please note the following:
- Tutors can see all student notes unless these notes are marked “confidential”, unless they created the confidential note themselves
- Tutors cannot edit or delete notes created by other users
- Tutors can only create notes for their own students
New student enrolment process
We have made a lot of changes to the Student Enrolment screen. Please see this screenshot to see an overall snapshot of the new enrolling screen, some of these fields users will already be familiar with, some will be new to users. The new features will be elaborated on below.
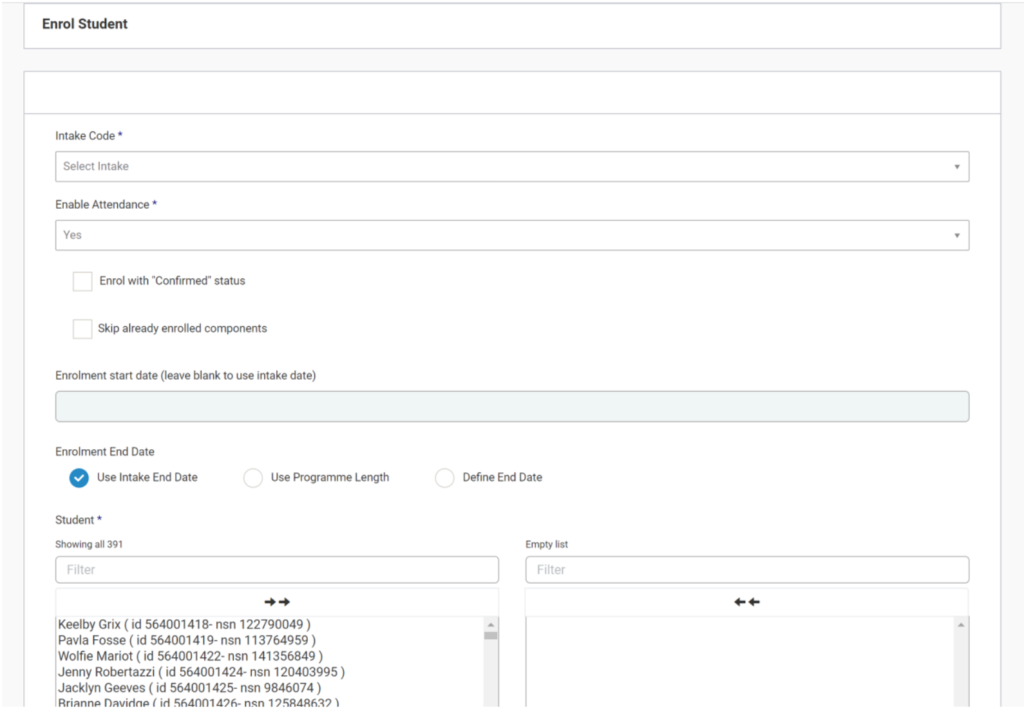
“Confirmed” Status
Before this software release, when SELMA users enrolled a student their enrolment status would by default be “provisional”. Then, to confirm the student’s enrolment, the user would have to go back into the enrolment and manually change the status to “confirmed”.
The changing of enrolment status from “provisional” to “confirmed” means that the enrolment becomes SDR committed.
With the addition of this new checkbox, users will now be able to “confirm” student enrolments in the same step as creating a new student enrolment by selecting this checkbox.
Of course, the option to provisionally enrol a student initially is still available to SELMA users, so that they can later change this status to “confirmed” with the status wizard.
Enrolling a student with this check box ticked will result in the enrolment status automatically being set as “confirmed” as can be seen in this screenshot:
This step will also automatically generate a note in the student’s events file notifying the user of the time and date of the confirmation date/time as seen here:
The text reads: “Enrolment confirmed at the time of creation”.
Please note: this step will also automatically confirm enrolments for all components within the enrolment as well:
Skip already enrolled components
If this option is selected, the system will skip (not create) components where a student already has an enrolment in the same component from another enrolment event.
This works if the student is actively enrolled into the component in another enrolment event or the student has completed this component with your provider in another enrolment event.
Enrolment End Date
The Enrolment End Date is another field where you can manually input the relevant date, however we have added convenient options to use either the Intake or Programme End Date as the set End Date for the particular Enrolment.
Use Intake End date: this populates the Enrolment End date with the same end date as the selected Intake
Use Programme Length: this will calculate the end date based on the programme length Define End Date: with this field, users can manually input the end date that they would like
to use as the End Date for the enrolment
Note: SELMA runs a validation check to make sure that the selected End Date is after the Enrolment Start Date. Otherwise, SELMA will throw an error
Time to Enrol!
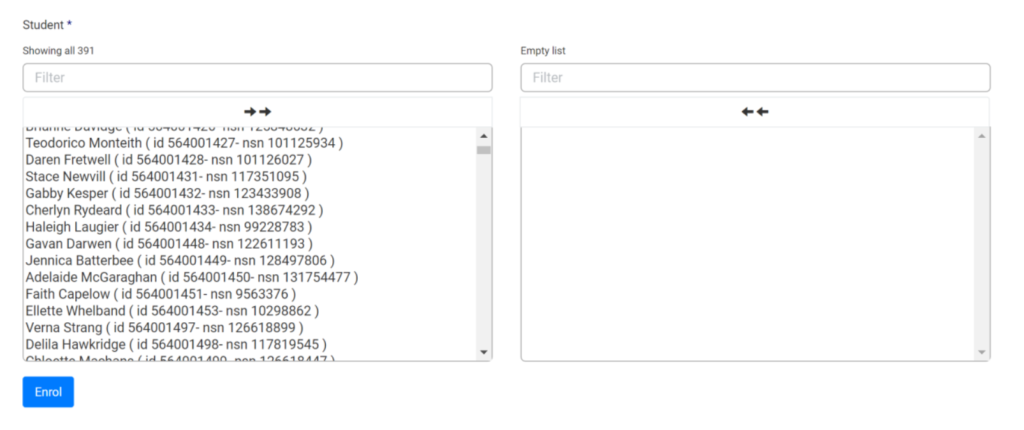
Finally, when you have filled out all the relevant sections, and added all the students that you want to, click the blue “Enrol” button to complete the enrolment process as you normally would to complete the enrolment process
Funding Source
Applying changes to Funding Source – apply to all
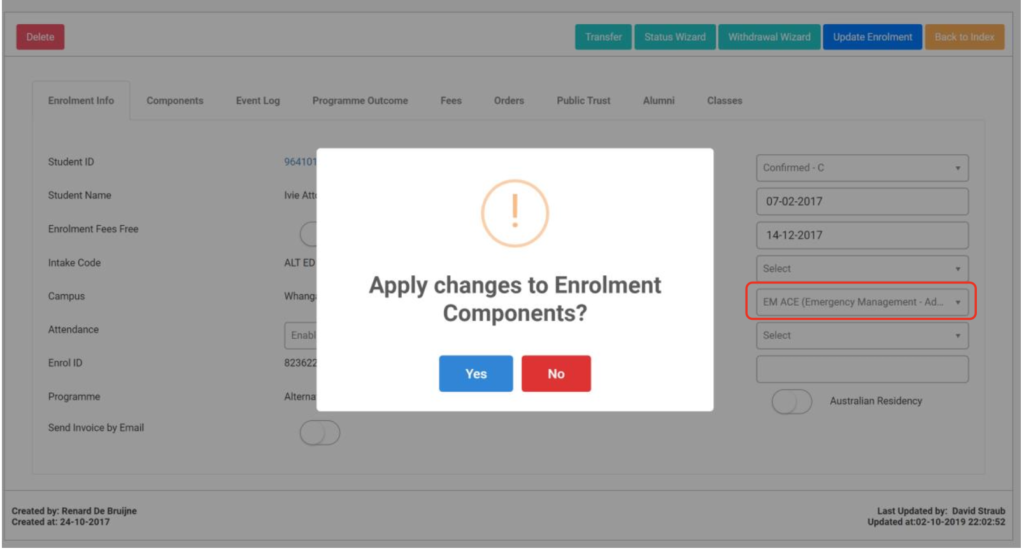
When a user goes to edit the funding source within Intake and/or Enrolment, a pop-up message will now show on your screen when you select a different Funding Source in the drop down menu, prompting you to accept whether you want to apply the Funding Source change across all components within the Intake/Enrolment.
The pop-up message(s) looks like the following. For changes to Funding Source in an Intake:
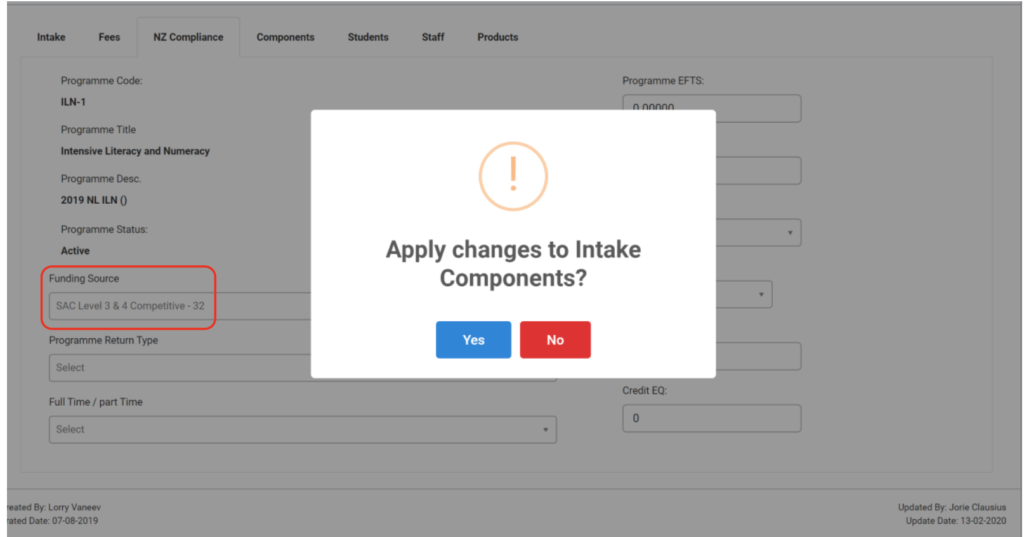
For changes to Funding Source in an Enrolment:
Making changes to Enrolment and Intake start and/or end date
For all of these changes, SELMA runs a validation check to make sure that the relevant end date is after the relevant start date. Otherwise, SELMA will throw an error, like the following:

SELMA will also run a similar validation check with the components as well at the same time.
Changing the start and/or end date of an Intake or Enrolment
When a user goes to change the start and/or end date of an enrolment or of an intake, they will be presented with a pop-up message like the following one that alerts them. This pop up message flags to the user that the change of the start/end date will also apply to the related intake or component enrolments at the same time as well. Please see the following screenshot as an example:
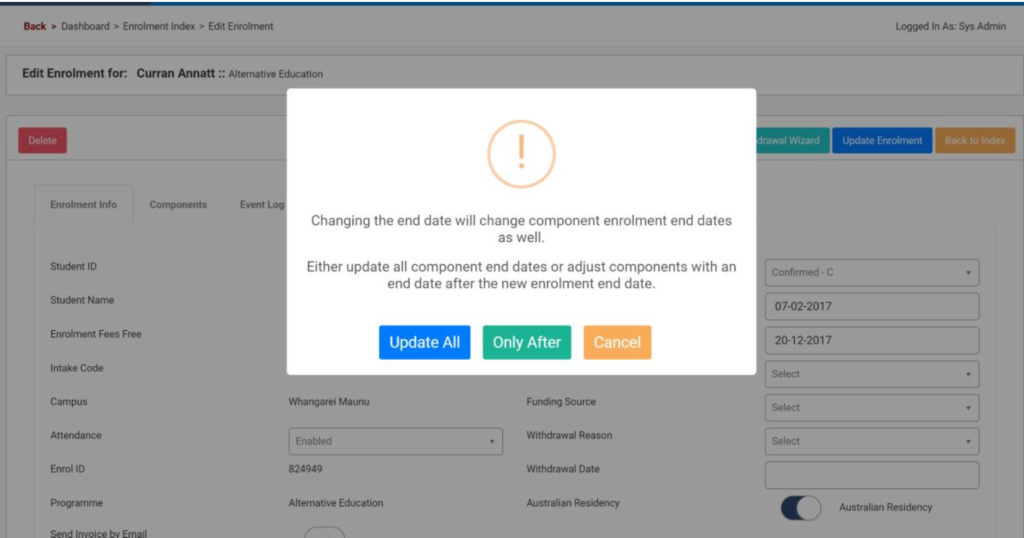
The user can choose one of the following options to proceed with. The logic behind these options will apply in a similar fashion to changes to enrolment and intake start and end dates:
Update All: selecting this button will update all components of the enrolment or intake to match the new elected start/end date
Only After: selecting this button will update only those components of the enrolment or intake with a date that falls outside the new elected date boundary.
For example: in the above example, the user is attempting to change the enrolment end date. In this case, the message alerts the user that they have the option to adjust only those components with an end date that is after the new enrolment end date.
Another example would be if the user is attempting to change the enrolment start date. In this case, the message would alert the user that they have the option to adjust only those components with a start date that is before the new enrolment start date.
Cancel: cancels the change that the user started to make, and returns user back to the “edit” scre
New column features in enrolment component grid Completion date
Now in the new SELMA instance, users of the enrolment component grid will be able to see the completion date of the component without needing to click into the component itself to facilitate quick decision making:
Component Count Total
Now at the top of enrolments and intakes, next to the EFTS counter at the top sits the component count total as well. This sums the number of components within an intake and/or enrolment, and shows this as a number so that you as a user can quickly look at and gauge these numbers without needing to scroll through and manually add these up:
Editing enrolment programme outcome
When a user goes to update a student’s grade in the programme enrolment outcome section, instead of manually entering the grade as it used to be, users will now be able to select from a drop down menu that populates grades that the user sets in the “Grading” section of SELMA:
To customize the grades that appear in this drop down menu, the user needs to go to the “Marking” tab, and then select “Grading Scheme”:
General miscellaneous bug fixes Deleted student enrolments
Previously, when a student enrolment was deleted, this appeared as a result entry in the list of enrolments under that student’s record.
This has now been changed so that deleted student enrolments no longer appear in this list to reflect its status more accurately as having been deleted
Withdrawal wizard note entry
It has been noted that sometimes the withdrawal wizard doesn’t correctly input the typed in text note in the relevant text box.
This has now been fixed
Reverse withdrawal malfunction
Previously, the reversal of a withdrawal would only reverse the relevant enrolment and not the associated courses.
This has now been rectified: relevant enrolment and also associated course withdrawals should be reversed when a user elects to reverse a withdrawal
