Bulk Import Students
- SELMA users can now bulk import student data from a csv file – Reporting -> Bulk Import
- We provide a csv template with relevant headers for the data and a Mapping Template File that defines the lookup values.
- A maximum of 200 records can be uploaded simultaneously
- The data is validated by SELMA before upload and if it fails, an error report outlines the data fixes necessary
- At the bottom of the page there is a grid displaying all previous uploads with links to original files and error reports.

Complete Instructions to bulk upload students can be viewed on the SELMA Wiki here
Offer of Place Comments
A new field has been added to Student and Intake sections. They can be found here –
Student -> Miscellaneous tab

Intake -> Intake tab
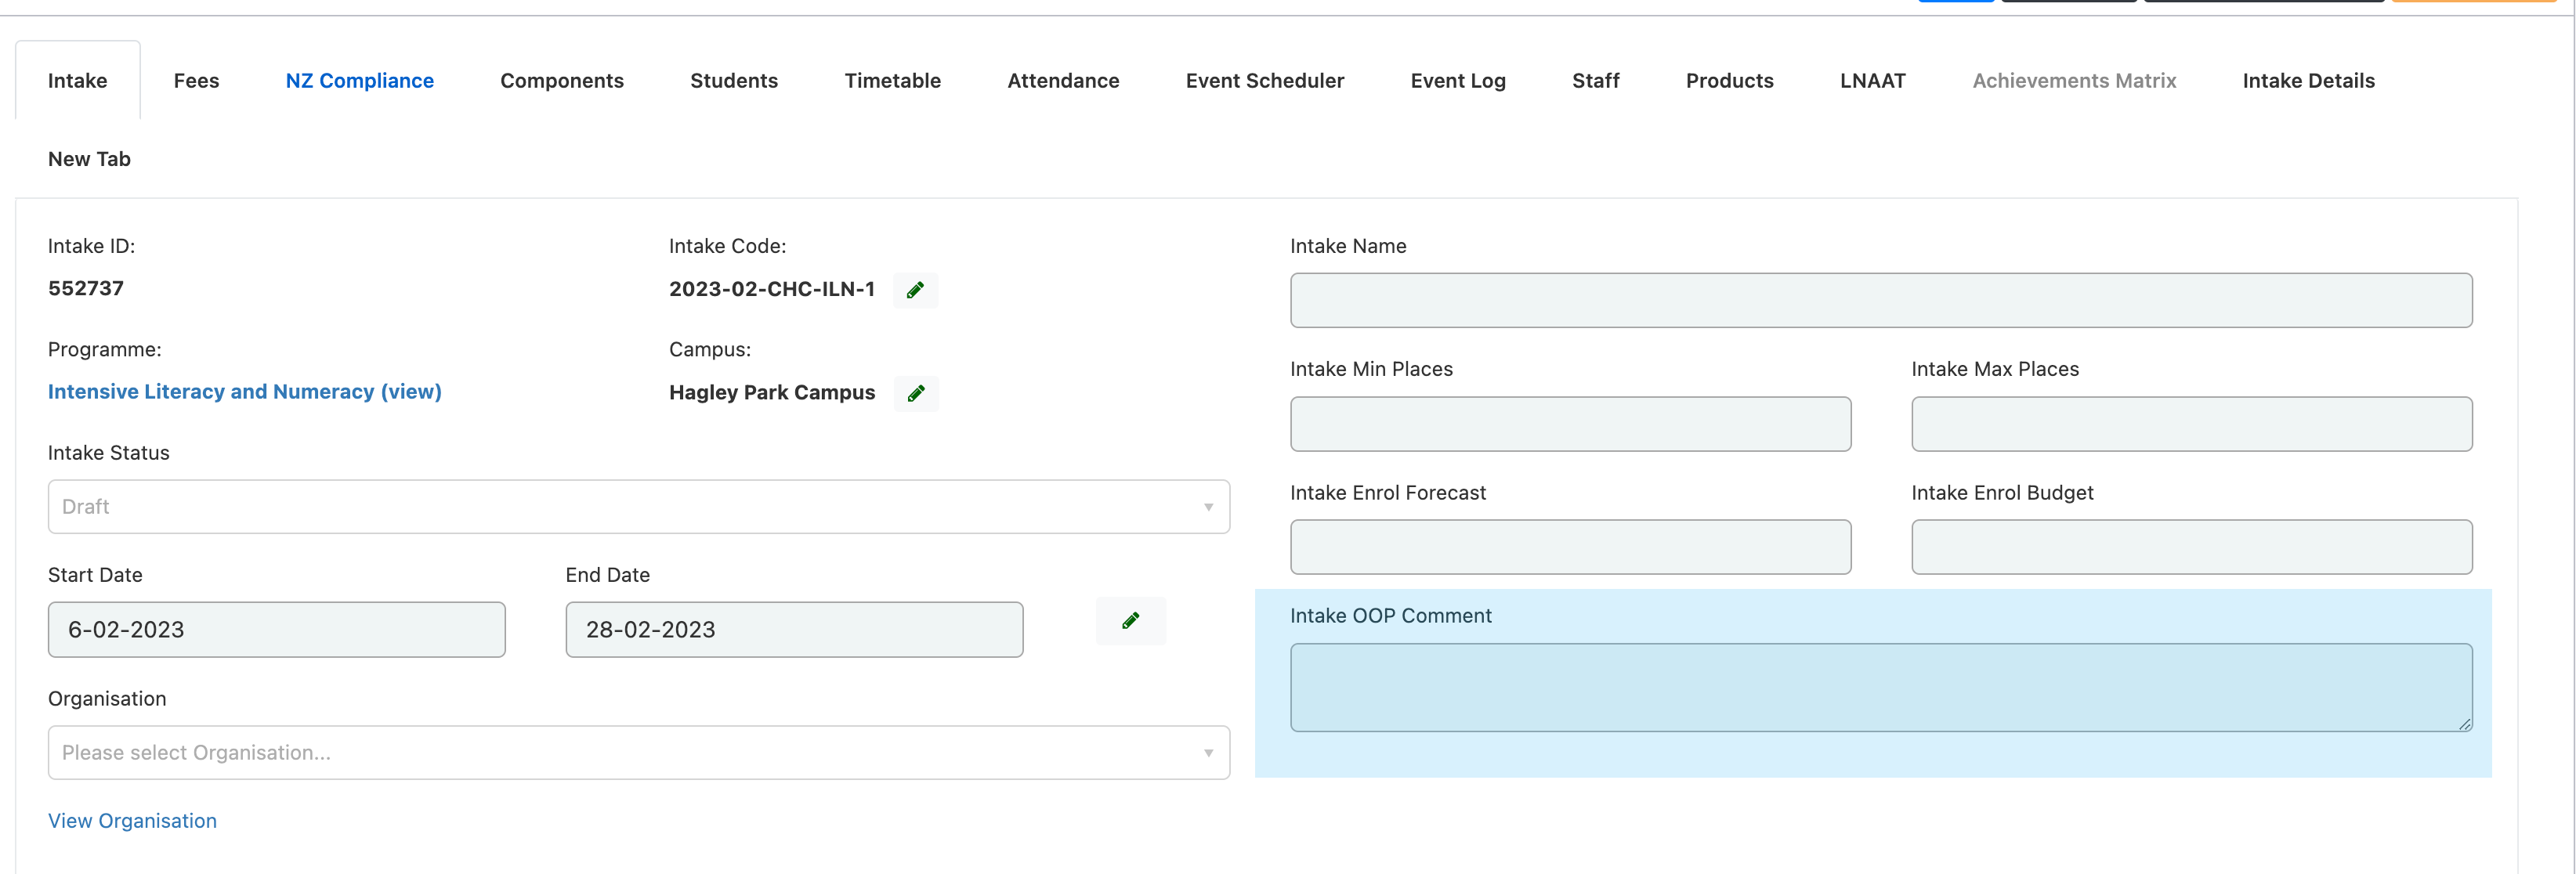
These fields can be used in communication templates as mail merge fields.
Intakes
Auto Cross Credit
A new checkbox titled ‘Auto Cross Credit’ has been introduced in the Intake component.
Intakes -> Select Intake ->Components Tab
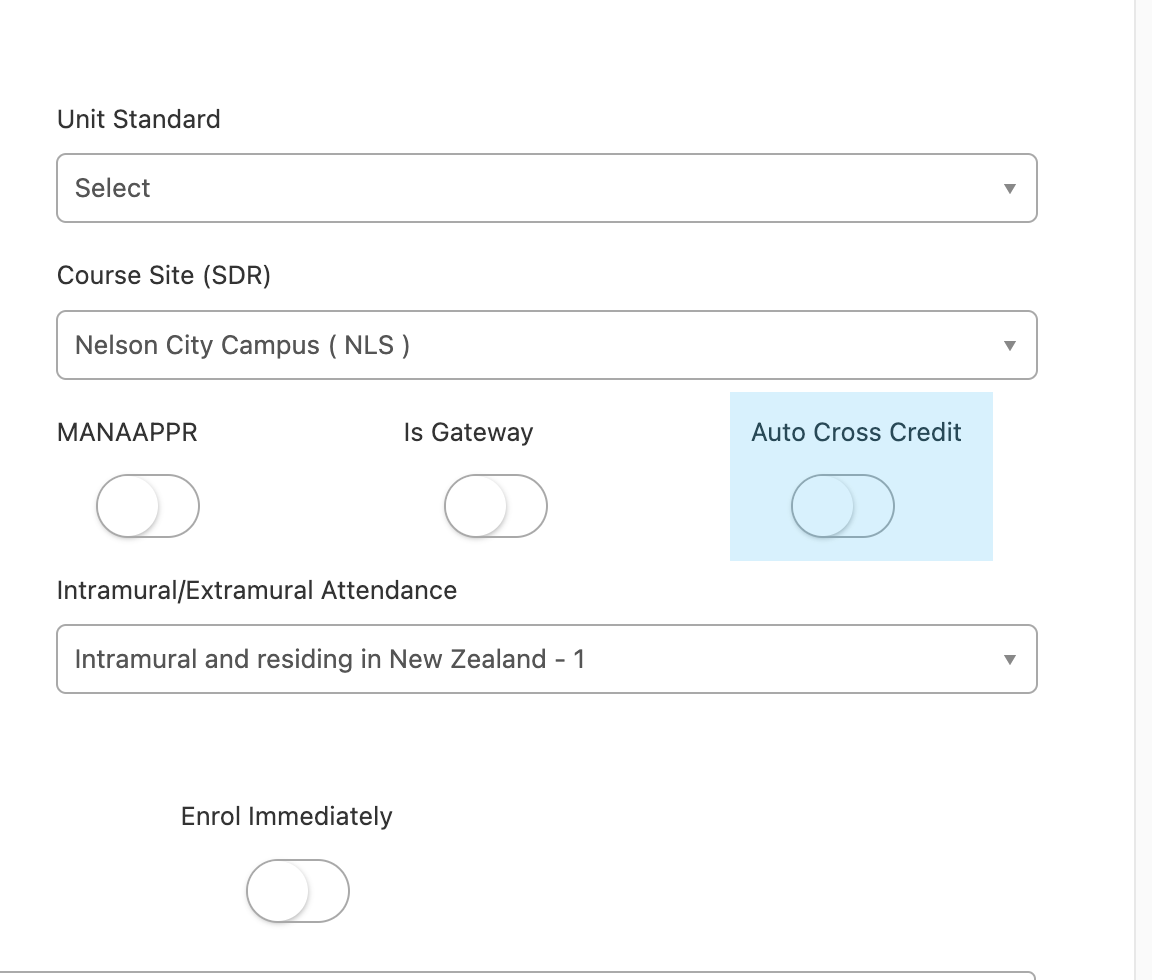
- When this checkbox is checked, any enrolment that includes this component will be automatically cross credited.
- SELMA Status for this enrolled component will be set to ‘Finished and Completed’.
- Completion Code will be marked as ‘X – Cross Credit (RPL)’.
- Completion Date will be set as the date when the enrolment was created.
Important to note:
- The ‘Auto Cross Credit’ checkbox is not visible by default – to enable this feature, please contact SELMA support.
- The ‘Auto Cross Credit’ function only applies to enrolments created AFTER the checkbox is enabled.
- Enrolments created prior to enabling this feature will not be retroactively cross-credited.
- Future enrolments will be automatically cross-credited once the feature is activated.
Upgrade of API endpoint for:
- Intake
- Intake Component
- Enrolment and
- Enrolment Component
We’ve added custom fields to the above endpoints payload
Enrolment Forms
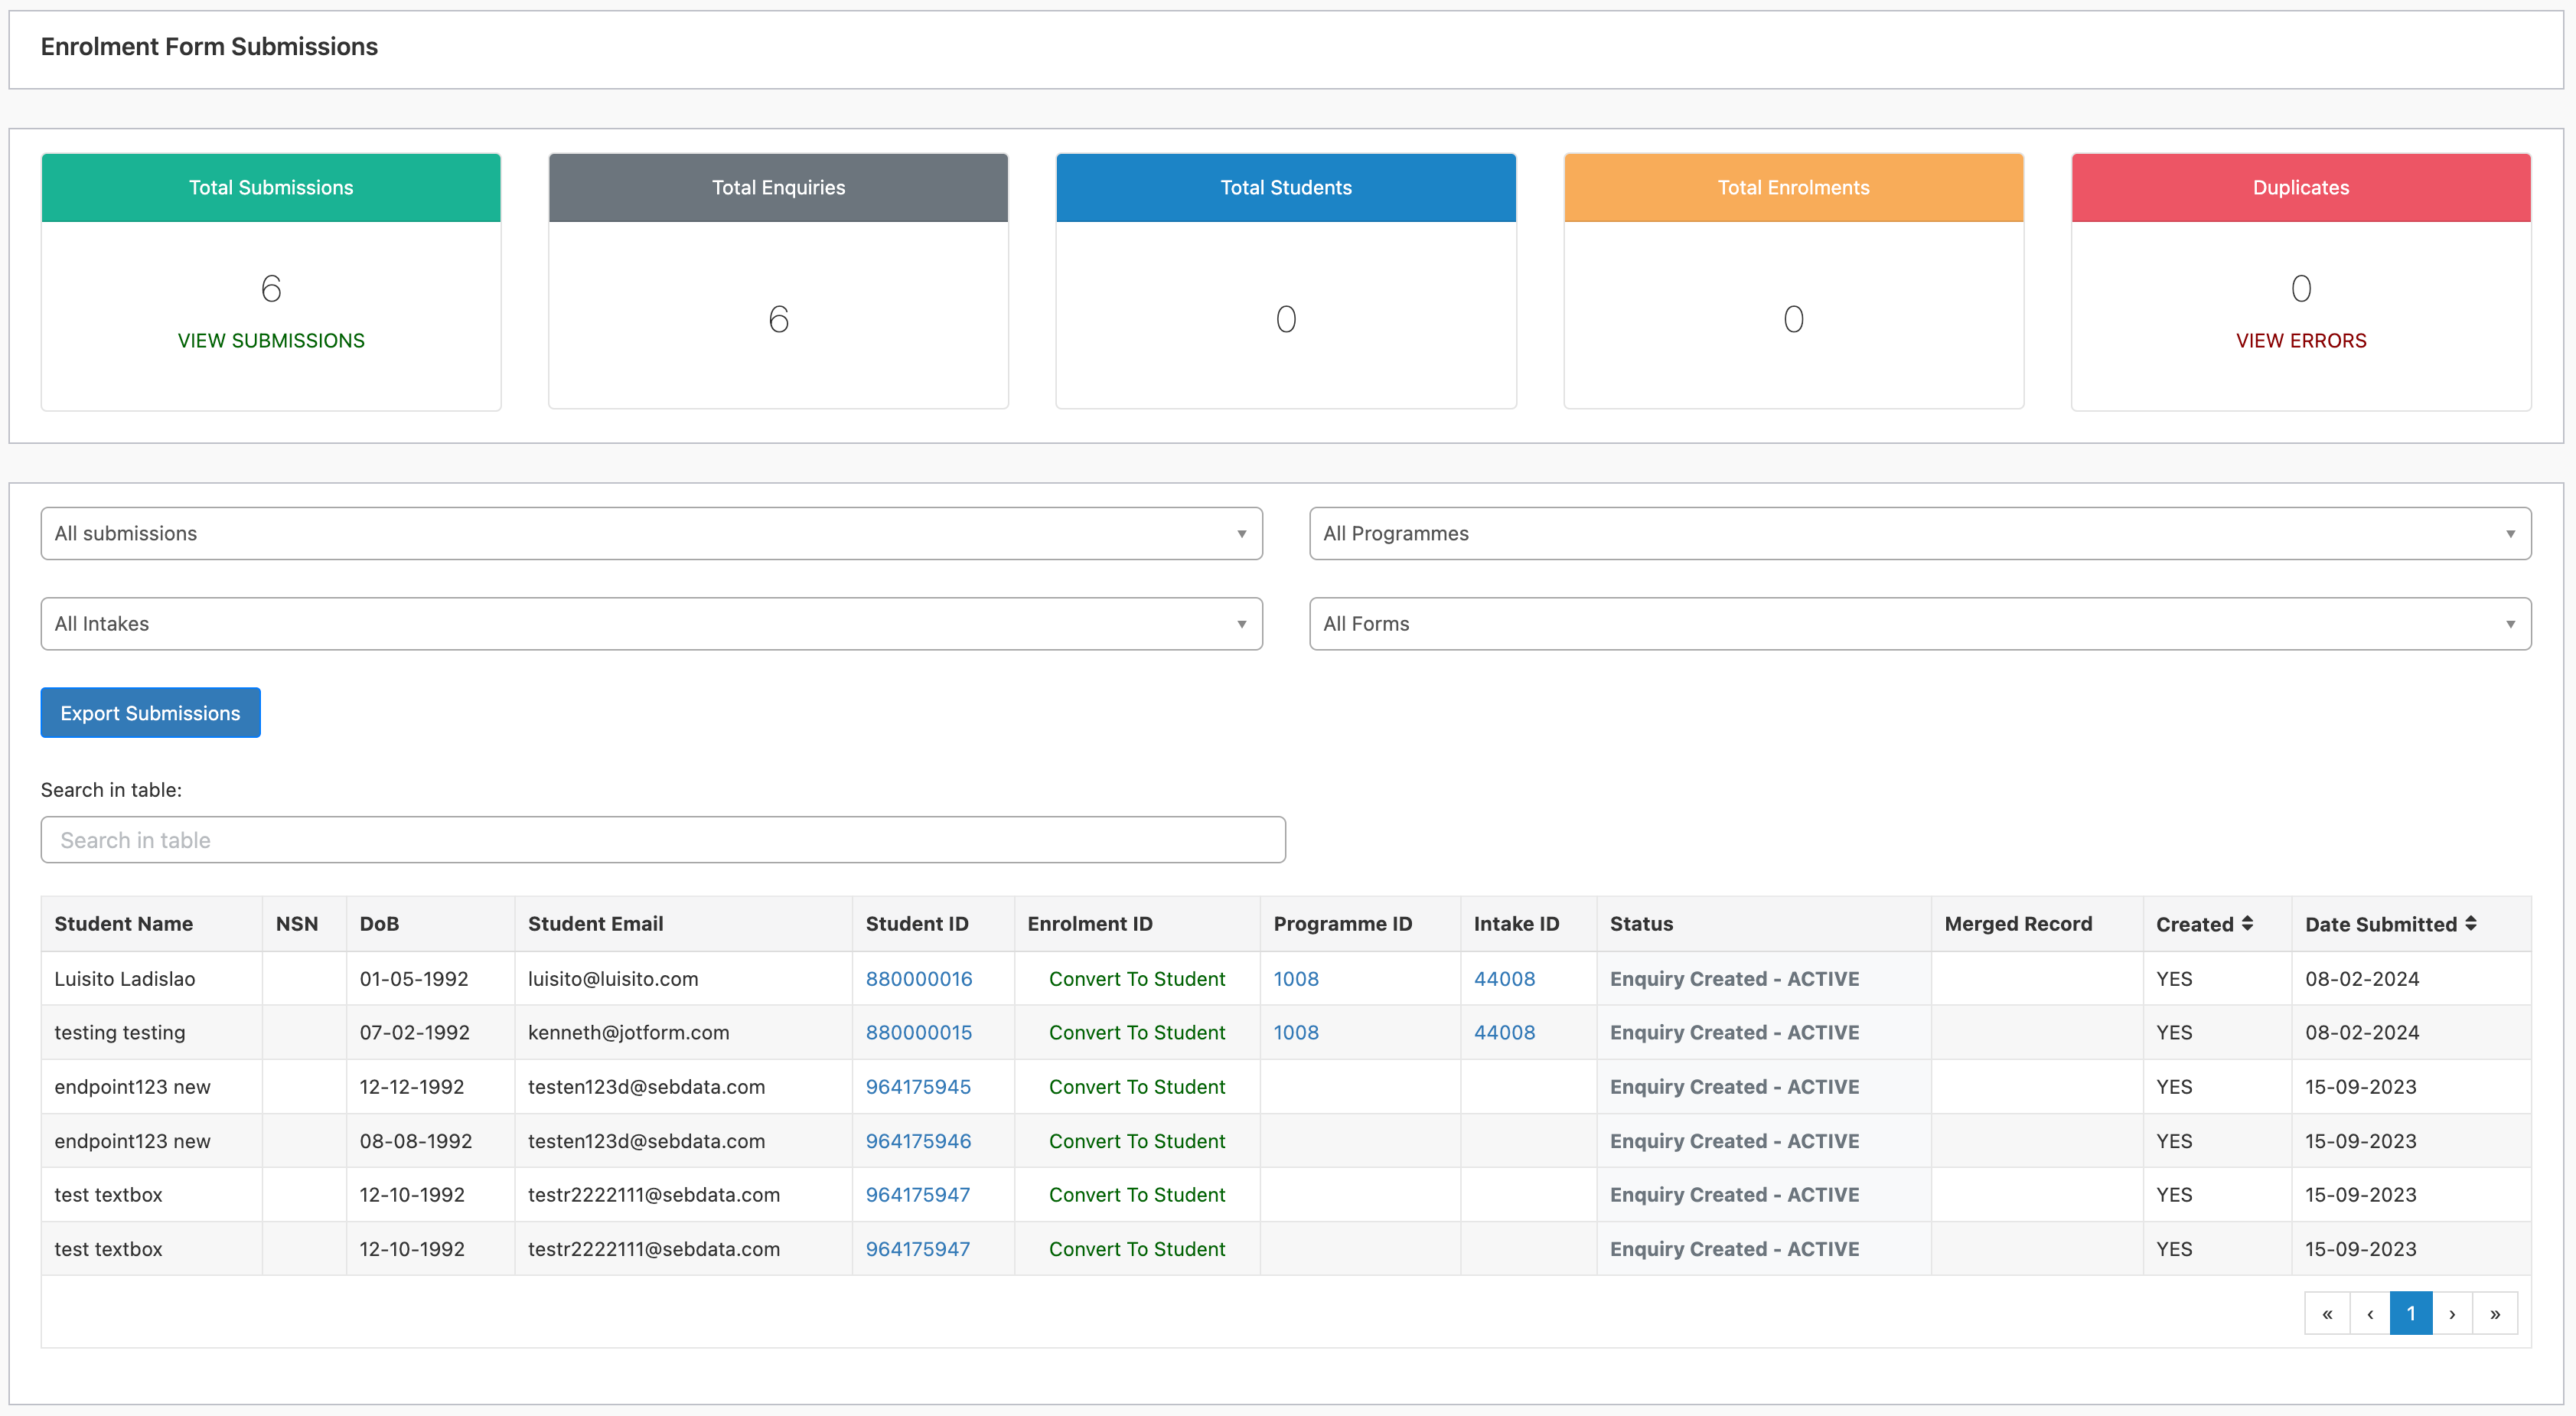
Improved Form Submission Dashboard
The form submissions overview has been updated to allow users to filter by form used, programme, and intake and also allows to show all submission and export them to csv:
Enrolment forms are a paid feature in SELMA and you may not be subscribed to it.
Enrolments
Updates to Enrolment Status Wizard / Withdrawal Wizard
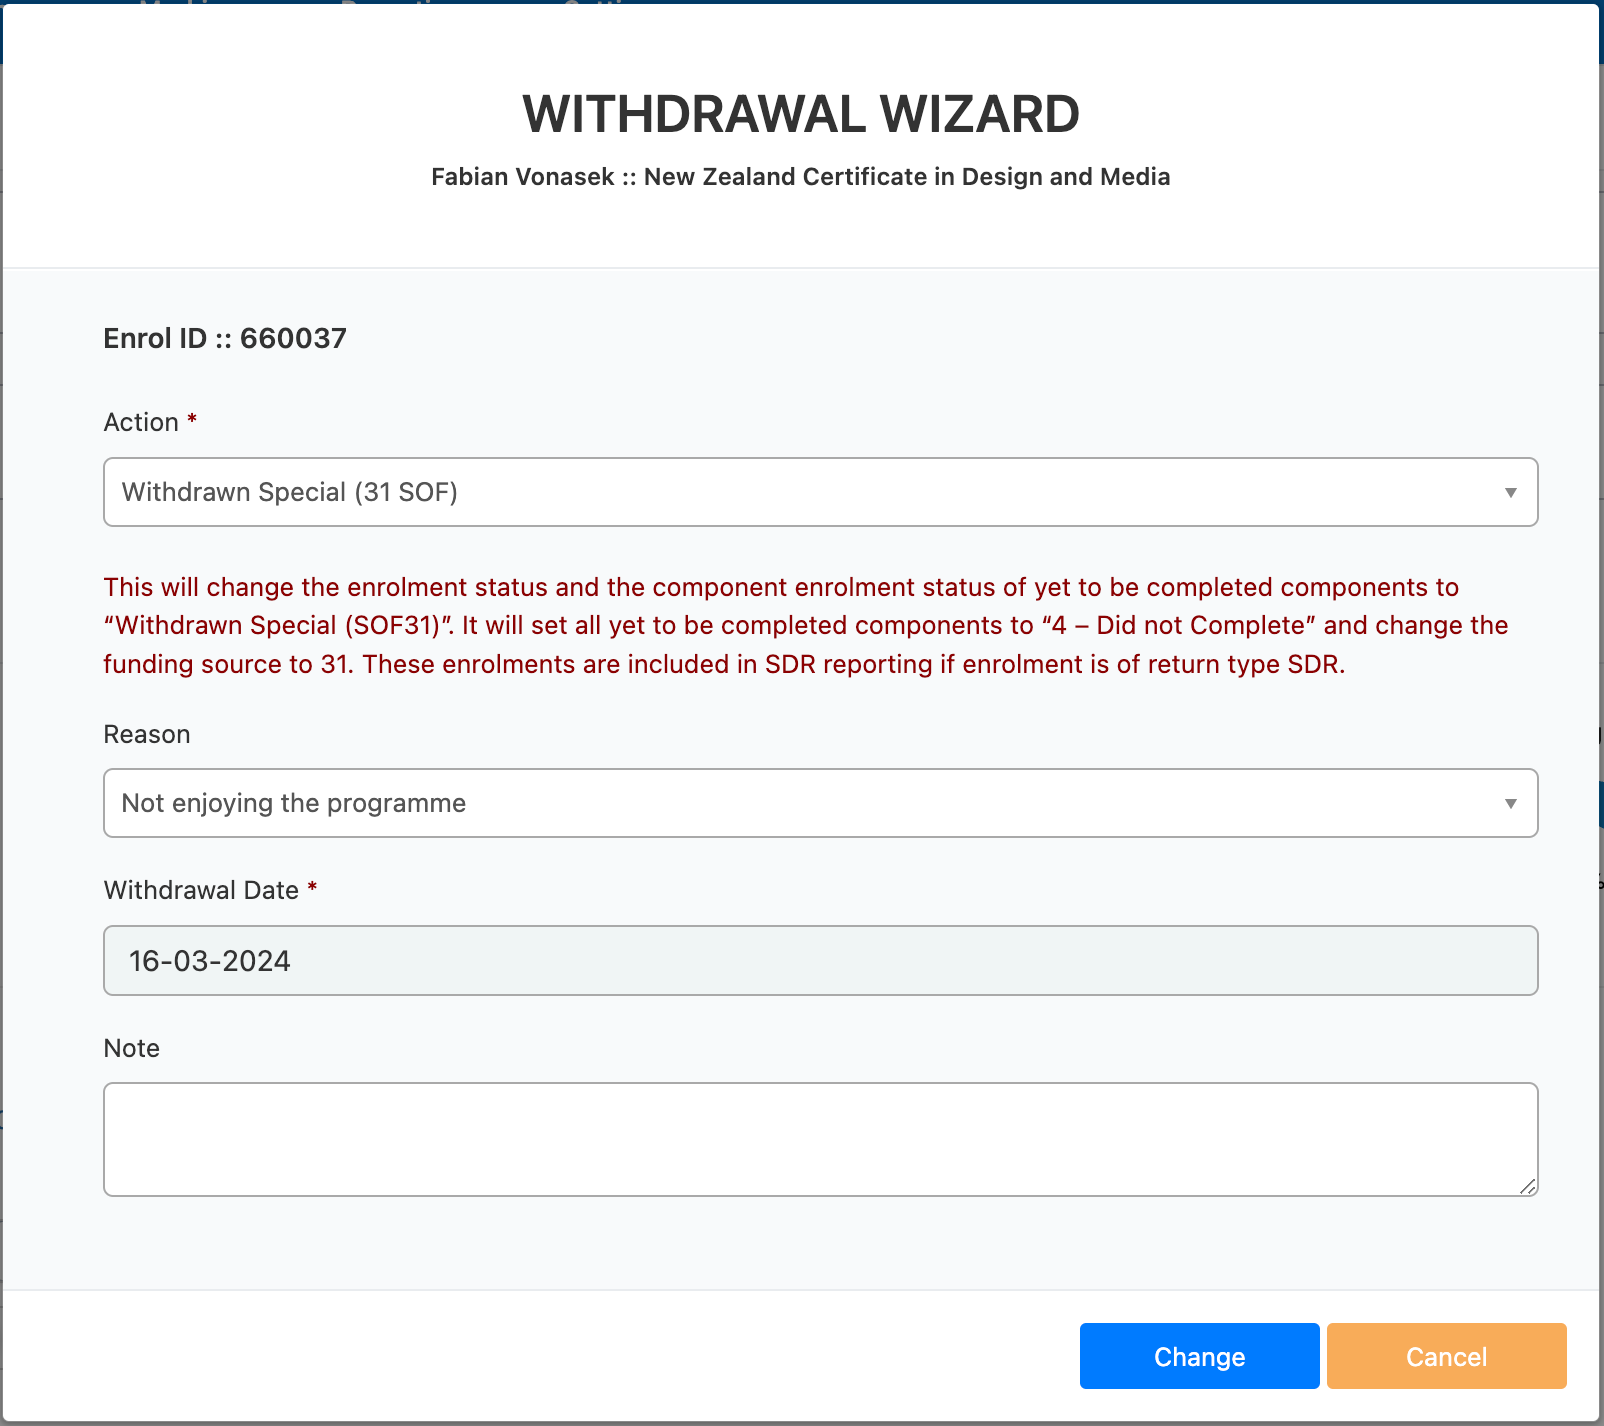
The Status Wizard and the Withdrawal Wizard have been updated to follow exactly defined rules and to display the action that the wizard takes on the screen before changes are made:
|
The withdrawal wizard showing the specific actions the wizard will take in red: |
The status wizard showing the specific actions the wizard will take in red: | |
|
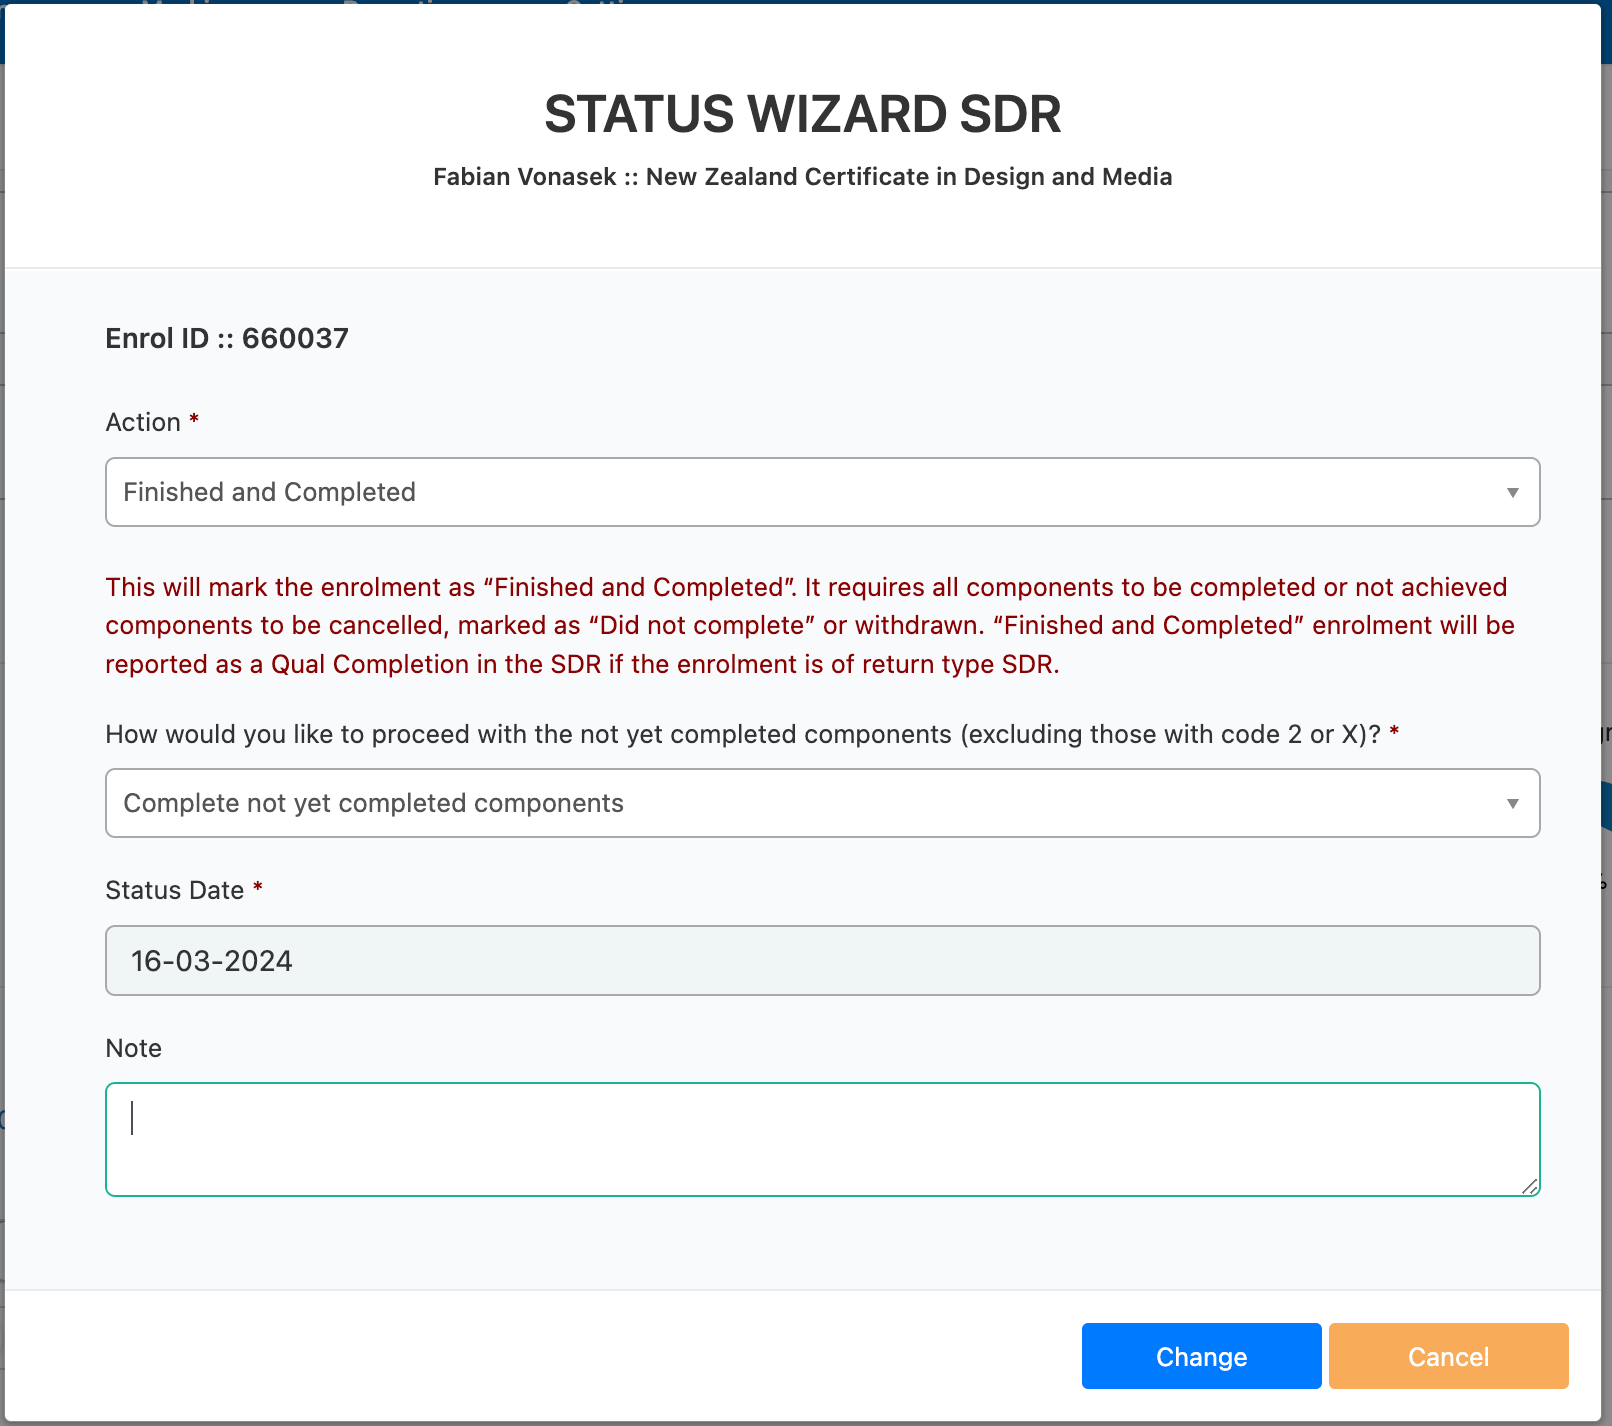 |
The exact definitions of the functions of the wizard are now outlines in the wiki for the status wizard here and for the withdrawal wizard here.
Smaller Updates to the Enrolment Screens:
- Add credit column to Enrolment Components table

- New Grid Report — Component Detailed Grid Report
- Allow user to control page size for student tab in intake

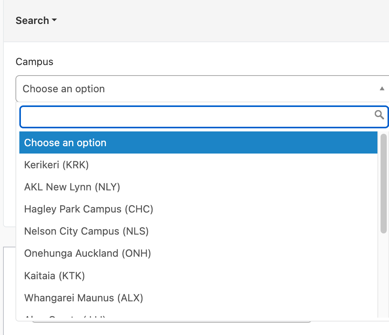
- Campus code added to campus dropdown
Marking
Bulk Upload Grades
- Student grades can now be uploaded in batches of up to 2000 via a CSV file – Report -> Bulk Upload
- A template with correct headings/formats is available for download
- The uploaded file will undergo a validation process – if there are errors a report will be sent to the user. Validation results will also be available via the SELMA upload screen.
- Once data is processed and validated and overnight completion workflow is triggered with components statuses being updated to Finishes/Completed.
Complete Instructions to bulk upload grades can be viewed on the SELMA Wiki here
Industry Training Register (ITR)
Request New Programme Version and Enrolment Transfer
It is now possible to request a new ITR Programme version and transfer existing enrolments to the new Programme and Intake.
- To request the change, clone the existing programme, adjust the programme details and post it to ITR.

- All cloned programmes are linked and history is stored in SELMA.

- If successful, create a new Intake for the newly approved programme and transfer the enrolments to the new intake from the old programme.
- All components in old and new enrolment will be merged, achieved and NZQA reported components will not be transferred.
- If component already exist – the status of component will be matched in the new Enrolment.
- The enrolment transfer history will be stored in SELMA as “Shadow” enrolments. These shadow enrolments won’t appear in any reports. They are “invisible” to the system.
- All shadow enrolments can be accessed from the Student Enrolment Tab. They can be viewed but not changed in any way.
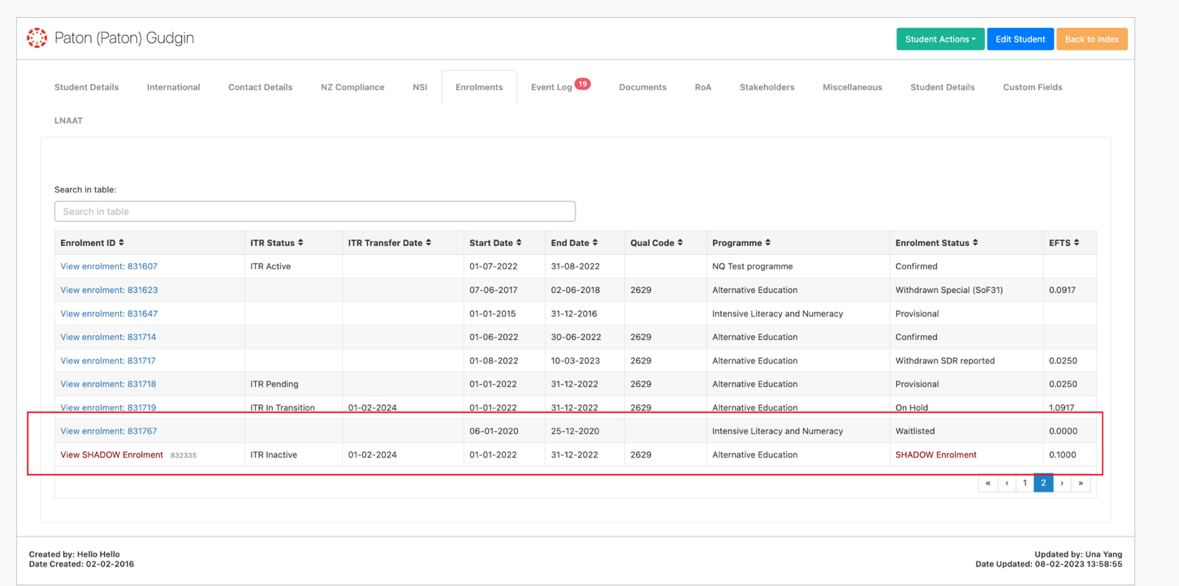
Or from the student enrolment, from the link to shadow enrolment.

MAC visit API endpoint
A new API endpoint has been developed to use with ITR enrolments, to send MAC visit over the SELMA API.
When sent, a log is created in the enrolment notes section and a reporting record is created to track the message status in the Reporting section of the ITR in SELMA.
Integrations
Canvas Integration – Rebuild
Our Canvas integration has been rebuilt following the latest best practices.
Here is an overview of the updates –
- You can now ‘drip-feed’ courses to students as you make your way through the year or release everything at once.
- Staff can be synchronised to support your students in Canvas.
- Utilise Classes to split your students into sections
To set-up the new integration, see the SELMA Wiki article here
Bug Fixes
- Online Enrolment Form Submissions are now showing correct error types
- Online Enrolment Form Submissions can now be converted to ‘Confirmed’ status
- Components Filter in Marking was fixed
- Intake end dates no longer exceed components end date if delivery mode is set as ‘staggered’
- Custom Fields in Programme, Intake and Intake Components can now be inherited by Enrolment and Enrolment components
- LNAAT – Duplicate rows can now be inserted if a student has completed the same assessments multiple times.
- Number of records have been limited in Achievement Matrix to improve UI
- Certificates have been updated to the latest NZQA specs
- O365 password generation has been converted to a more secure algorithm
- Emails to a student can now be sent to both email addresses attributed to that specific record
