
Programmes are the formal qualifications your organisation offers to students and clients, in other words the structured educational pathways through which learners can develop specific competencies and receive recognised certification from your institution.
These qualifications can be awarded as certificates, diplomas, bachelors programmes, etc.
On this page:
Create Programmes
 | SELMA allows the creation of programmes that do go through NZQA and those that do not (SDR or Non-SDR). Control what you are creating by selecting the correct Return Type (NZ Compliance Section). It is highly recommended that you verify every case to ensure that components are configured correctly in SELMA, and that you are meeting your obligations as an education provider. Be sure to confirm all details with your management team. |
There’s two ways to create a programme in SELMA:
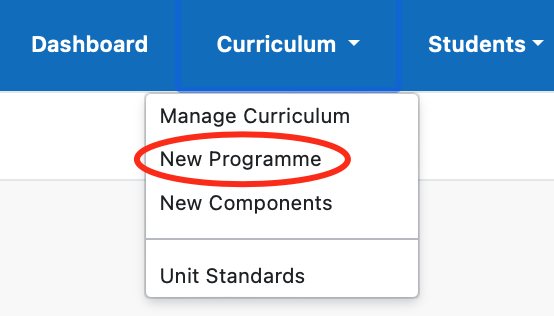
Click on ‘Curriculum’ on the top navigation bar and then ‘New Programme’ as shown below.
Or click on ‘Manage Curriculum’ and then ‘Add Programme’ as shown below.

You will be redirected to the Programme Setup Form. Please fill out all details accurately, refer to the programme approval document if your programme is NZQA Approved.
Programme tab
| If it is an NZQA approved course, use your programme approval document or have DXP Ngā Kete (formerly STEO) open in the browser to enter the correct values. |
Mandatory fields are marked with a star symbol (*)

| Field | Description |
|---|---|
Return Type* (mandatory field) | For UIP and SDR: Unfunded International Providers and Single Data Return ITR: Industry Training Register No Return: Not relevant for SDR purposes SDR: Single Data Return UIP: Unfunded International Providers |
| Programme Code* (mandatory field) | Please refer to the programme approval document. |
Programme Status* (mandatory field) | Active Inactive Pending Approval – programmes on this status can be setup but will not be captured for SDR reporting purposes. Withdrawn |
Programme Version | Optional – Leave blank if unsure. Some institutions will use “versions” to keep track of programmes that have had curriculum changes over the years. |
| Programme Title* (mandatory field) | Please refer to the programme approval document. |
| Other Programme Title | Optional |
| Owning School* (mandatory field) | Select from school(s) available (refer to School Details) |
| Default Campus | Select from campuses available (refer to Campuses) |
| Programme Length | Optional but highly recommended – Select a number from 1 to 100 |
| Programme Length Unit | Optional but highly recommended – Day, Week, Month or Year |
| Programme Approval Date | Optional – Leave blank if unknown or refer to the programme approval document. This field is associated with the date approval was granted by NZQA for the programme to be delivered and has no connections to any learner or intake start dates. |
| Programme Expiring Date | Optional – Leave blank if unknown or refer to the programme approval document. |
| Full-Time/Part-Time | Distance Learning – DL Full Time – FT Part Time – PT |
| Expiry Duration (Months) | Optional – Leave blank if unknown or set a date to automatically stop accepting new intakes. |
| Diploma* (mandatory field) | Select from options available – Default is always available, for custom types please contact support@selmasis.com. |
| Transcript* (mandatory field) | Select from options available – Default is always available, for custom types please contact support@selmasis.com. |
| Grading Scheme | Select from options available (to create Grading Schemes, refer to Lookup Data) |
Progress Measured In | This is what drives the Enrolment Measures for enrolments into the Programme. For more information on this, please go to Enrolments section. Component Count: measures progress based on completed components. Component Credits: measures progress based on credits from completed components. Component EFTS: measures progress based on EFTS from completed components. |
| Maximum Days Absent | Optional – Leave blank if unknown |
To make use of powerful data calculations in SELMA, make sure to enter ‘Programme Length’ and ‘Programme Length Unit’ in the Programme Section.

NZ Compliance tab
Please fill out all details accurately, refer to the programme approval document if your programme is NZQA Approved.
If the programme is not relevant for SDR purposes, leave this section blank.
| In order to go through a programme setup, it is best to use your programme approval document or have DXP Ngā Kete (formerly STEO) open in the browser to enter the correct values. |

| Field | Description |
|---|---|
| Qualification Code (SDR) | Enter the 6 character qualification code found on DXP Ngā Kete (formerly STEO) for SDR relevant programmes. Make sure to check you have entered the correct code – it refers to the programme approved by NZQA, besides being recorded in DXP Ngā Kete. |
| EFTS Value | Please refer to the programme approval document. |
| Programme Default funding | Please refer to the programme approval document. |
| NZSCED Code | Please refer to the programme approval document. |
| Award Category | Please refer to the programme approval document. |
| Youth Guarantee Type | Please refer to the programme approval document. |
| SAC 1&2 Programme Category | Please refer to the programme approval document. |
| NZQA Approval Ref# | Please refer to the programme approval document. |
| NZQA Approval Code Version | Please refer to the programme approval document. |
| NZQA Credits | Please refer to the programme approval document. |
| NZQF Level | Please refer to the programme approval document. |
| Allowance Approval | Toggle on or off |
| Loan Approval | Toggle on or off |
| Is Vocation | Toggle on or off |
| Main Subject | Please refer to the programme approval document. |
| Secondary Main Subject | Please refer to the programme approval document. |
| Third Subject | Please refer to the programme approval document. |
| Sub Field of Study | Please refer to the programme approval document. |
| Advance Destination | Please refer to the programme approval document. |
| Student Services Levy | Please refer to the programme approval document. |
| ISCED Level | Please refer to the programme approval document. |
| Teaching Weeks | Please refer to the programme approval document. |
| Teaching Hours per Week | Please refer to the programme approval document. |
| Vacation Weeks | Please refer to the programme approval document. |
| Learning Hours per Year | Please refer to the programme approval document. |
| Work Experience Hours per Week | Please refer to the programme approval document. |
| Self Learning Hours per Week | Please refer to the programme approval document. |
Edit programmes
To edit an existing programme, navigate to Curriculum -> Manage Curriculum.

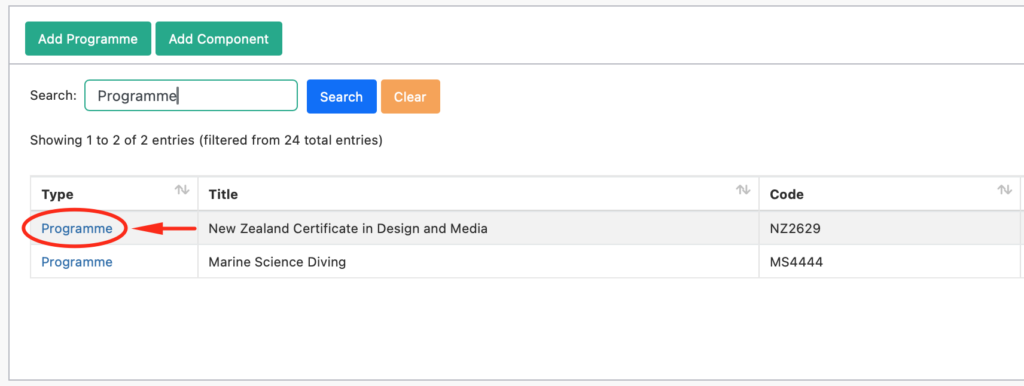
In the example below, when searching for ‘Programme’ the grid narrowed down the list to all available Programmes to two matching records. Select the one you would like to modify by clicking on the hyperlink.
Once the programme is selected, you will be redirected back to the programme form:
To edit, click ‘Edit Programme’.

Once you have updated all the necessary information, click ‘Update Programme’ to save your changes.
Programme editing also enables you to delete it, however, if it has been used in any intake or enrolment, the ‘Delete’ option will not be functional. In that case, the programme status can be changed to ‘Inactive’.

Map Components
When creating a new programme, no components will be available for mapping – course components must be created separately. Please refer to Components section on the Resource Centre.
.
A Programme may contain one or multiple components.
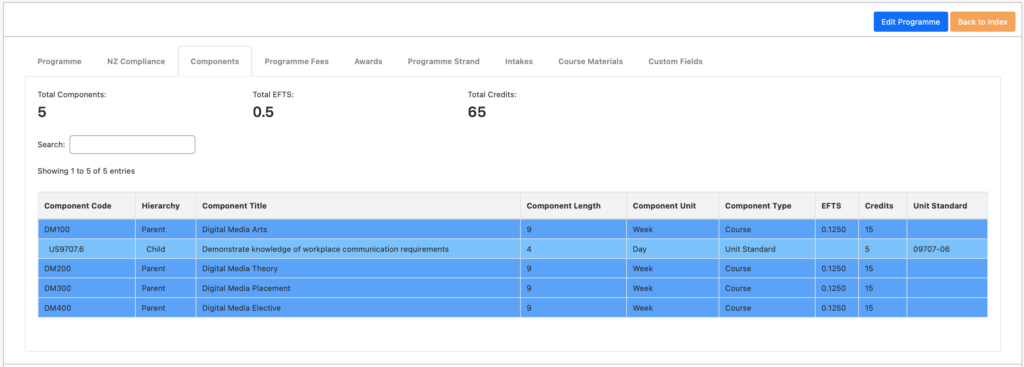
Once a programme has been created, find it by navigating to Curriculum -> Manage Curriculum, click on the programme and navigate to the ‘Components’ tab to create your programme hierarchy:
Click on ‘Edit Programme’ and the button ‘Map Components’ will appear on the top right:

Click on ‘Map Component’ to display the component mapping screen shown below:
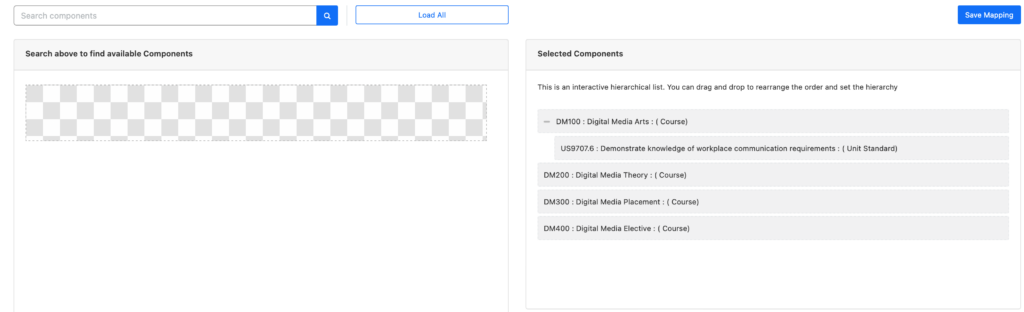
To display all available components, click ‘Load All’. This action will present all available components from your SELMA account on the left side panel.
If needed, use the ‘Search components’ bar to filter the results.
To add components to a programme, select a component from the left side, click and drag to ‘Selected Components’ section on the right. To remove, drag them from the right side back into the left panel.
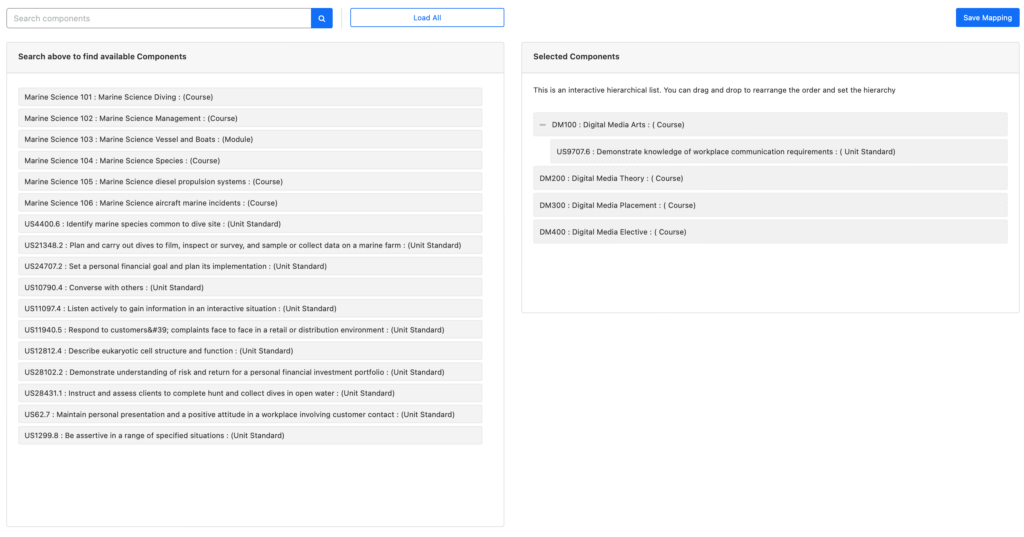
All selected components become part of your programme, simply drag and drop the components you want in your programme across the selected section.
The order from top to bottom will define the order of delivery of your course components. The hierarchy of the components is indicated by the degree of indentation on the list. If a component is indented to the right, it is a child of the component directly above it:
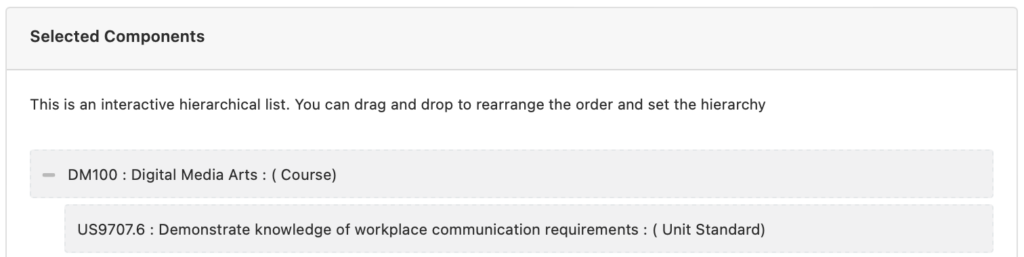
You can modify the hierarchy of the components by clicking on the individual component you wish to change and moving it left or right within the ‘Selected Components’ list. This action will determine the hierarchy of the components. In the example above ‘Demonstrate Knowledge of workplace communication requirements’ is a child component of ‘Digital Media Arts’.
Occasionally, some internet browsers may fail to register changes to the programme hierarchy while editing this section. If this occurs, there’s a straightforward solution: Click on each of the programme components, shift it left and right, and then return it to its original position.
Once you are happy with the components mapping configuration, save the changes by clicking ‘Save Mapping’. If the problem persists, please contact us at support@selma.co.nz.

A confirmation message will appear on screen if the mapping is successful. Click ‘OK’.

The final step to successfully save components on a programme is to click ‘Update Programme’.

You are all done! A green warning will display a message confirming that the programme has been updated.
