
In this page:
- setting up timetable template
- Create a Register
- Selecting Active Intake/Class
- Selecting a Template
- Create a Timetable
- AdHoc Week Options
- Attendance Codes
- Mark Attendance
- Learner Attendance Report
- Attendance Report PDF
SELMA’s attendance module is designed to be simple and fast to use. The typical attendance pattern (“template”) of a given week is set in the Attendance -> Manage Timetable -> Manage Templates section. That pattern can be applied to all or specific weeks of an intake. When a template is applied to an intake, this is what creates the attendance listing for the class. Marking is per student or per intake (class) and allows for fast fill marking, recording of late appearances and comments.
Set-up Timetable Template
The first step to creating a timetable is to define a standard week or a typical week of attendance. It can be a session per day with no specific topic or you can decide to create multiple sessions per day, specific to a subject, teachers and rooms.
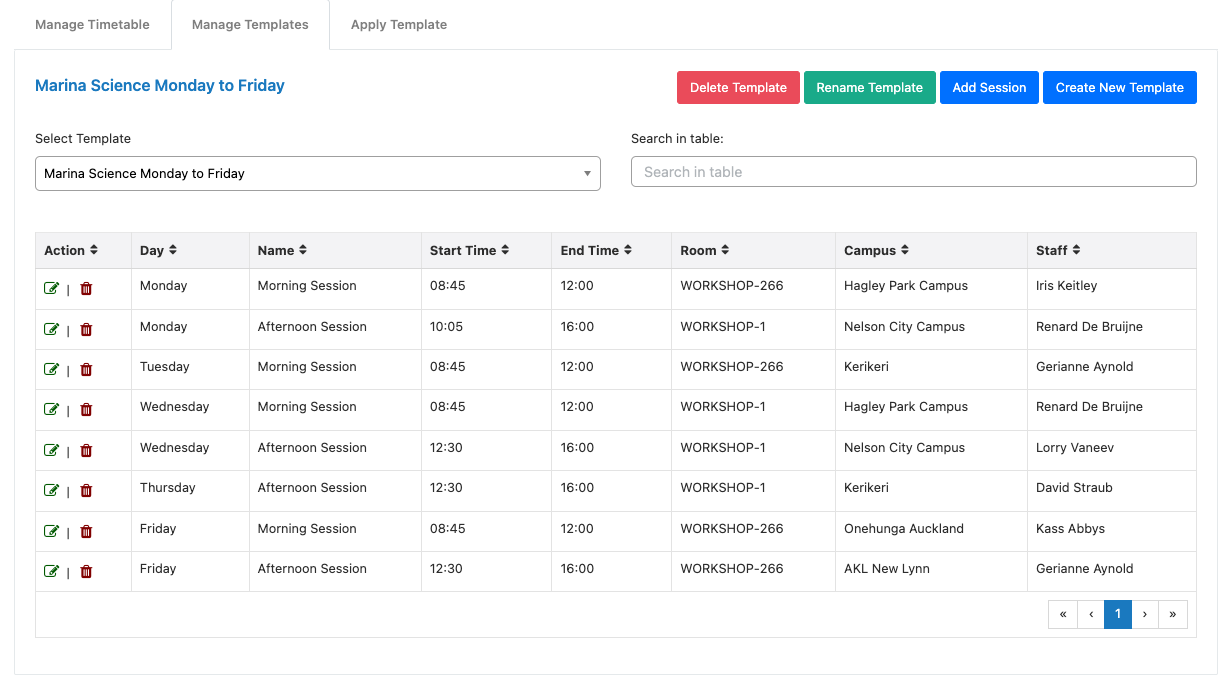
Below template shows a week of a Marine Science Programme with specific, named, sessions that take place in pre-defined classrooms and are taught by specific teachers:
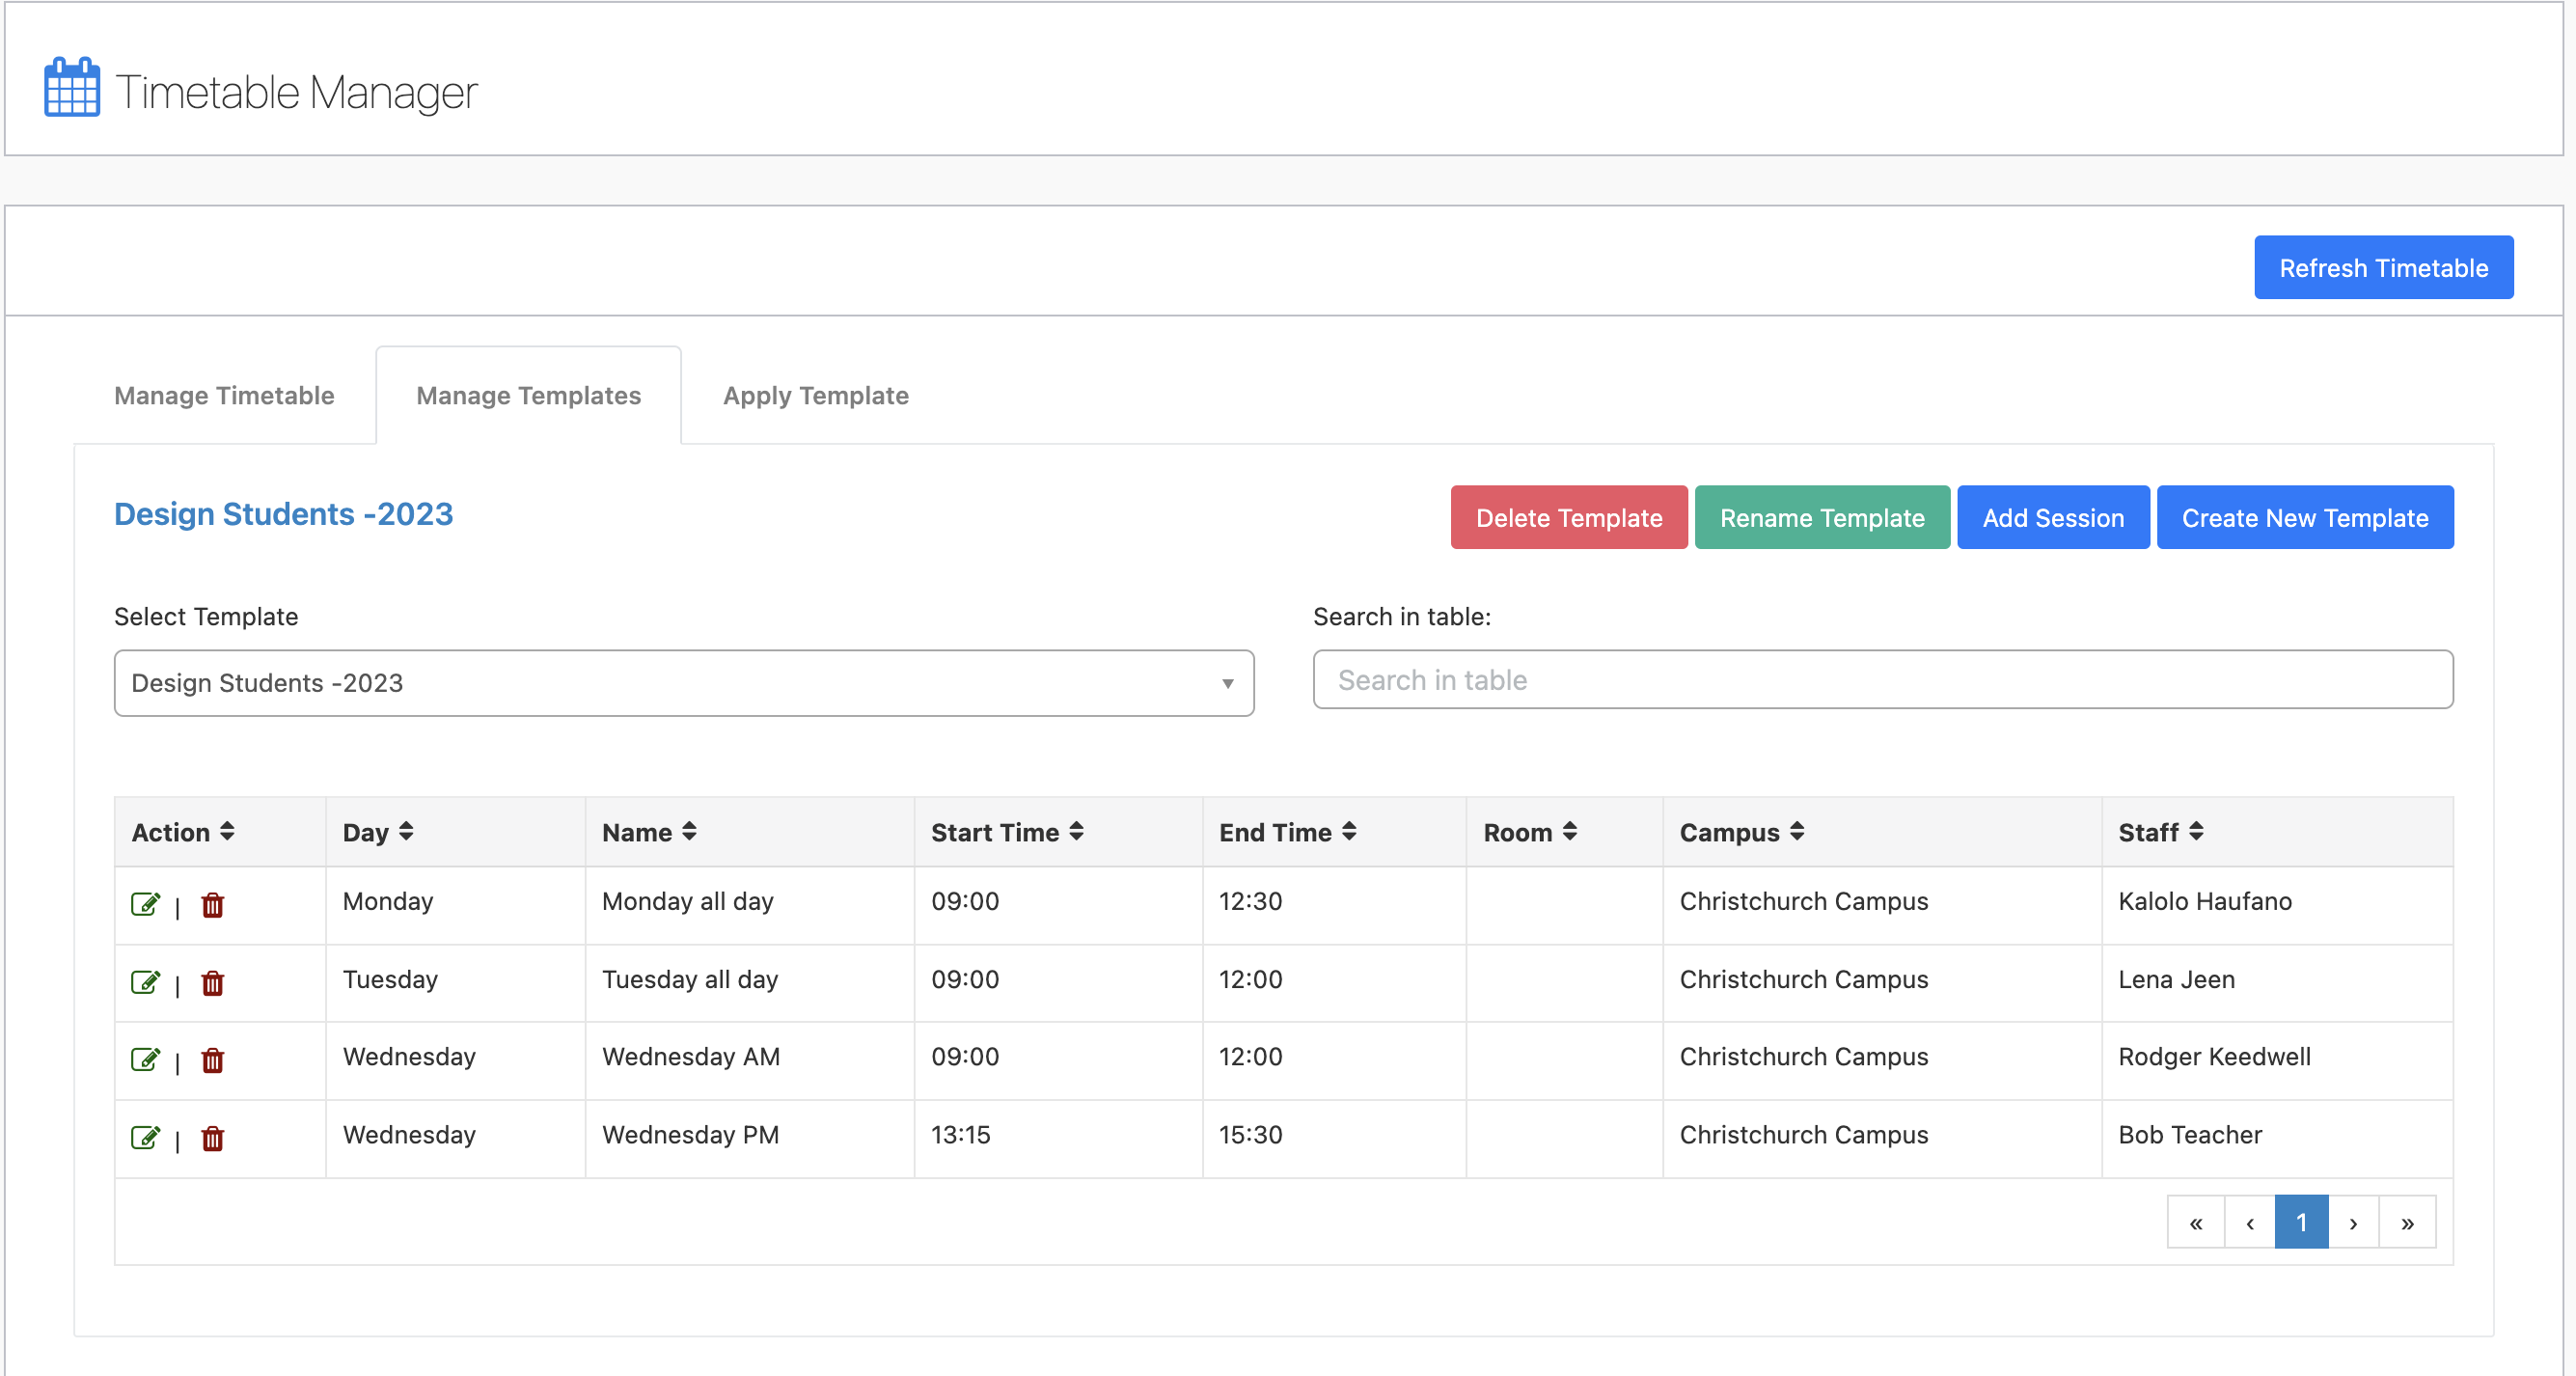
If you want to edit a template, navigate to Attendance -> Manage Timetable, then the “Manage Templates” tab. From here – as you can see in the above screenshot – you can choose to make edits by clicking the “Rename Template” and/or “Add Session” buttons along the top right. If you want to create a new template, click “Create New Template”, also sitting along the top right.

To add a session to an existing template, click “Add Session”.
To remove a session, find the session row item and click the red rubbish bin icon, that sits under the “Action” column in the template grid.
To edit a session, find the session row item and click the green pen and paper icon, that sits under the “Action” column in the template grid.
Please note that the start and end times of the sessions cannot overlap on the same day. If it does so, SELMA will generate an error.
Create all the sessions you want for all the days of the week. The template is not yet applied to any specific date. It is only a typical timetable of a specific day of the week. The next section will explain how to apply it to dates.
Create a Register
Once you have created your templates you can apply one or several to an intake or class – select the “Apply Template” tab in the Timetable Manager section under Attendance.
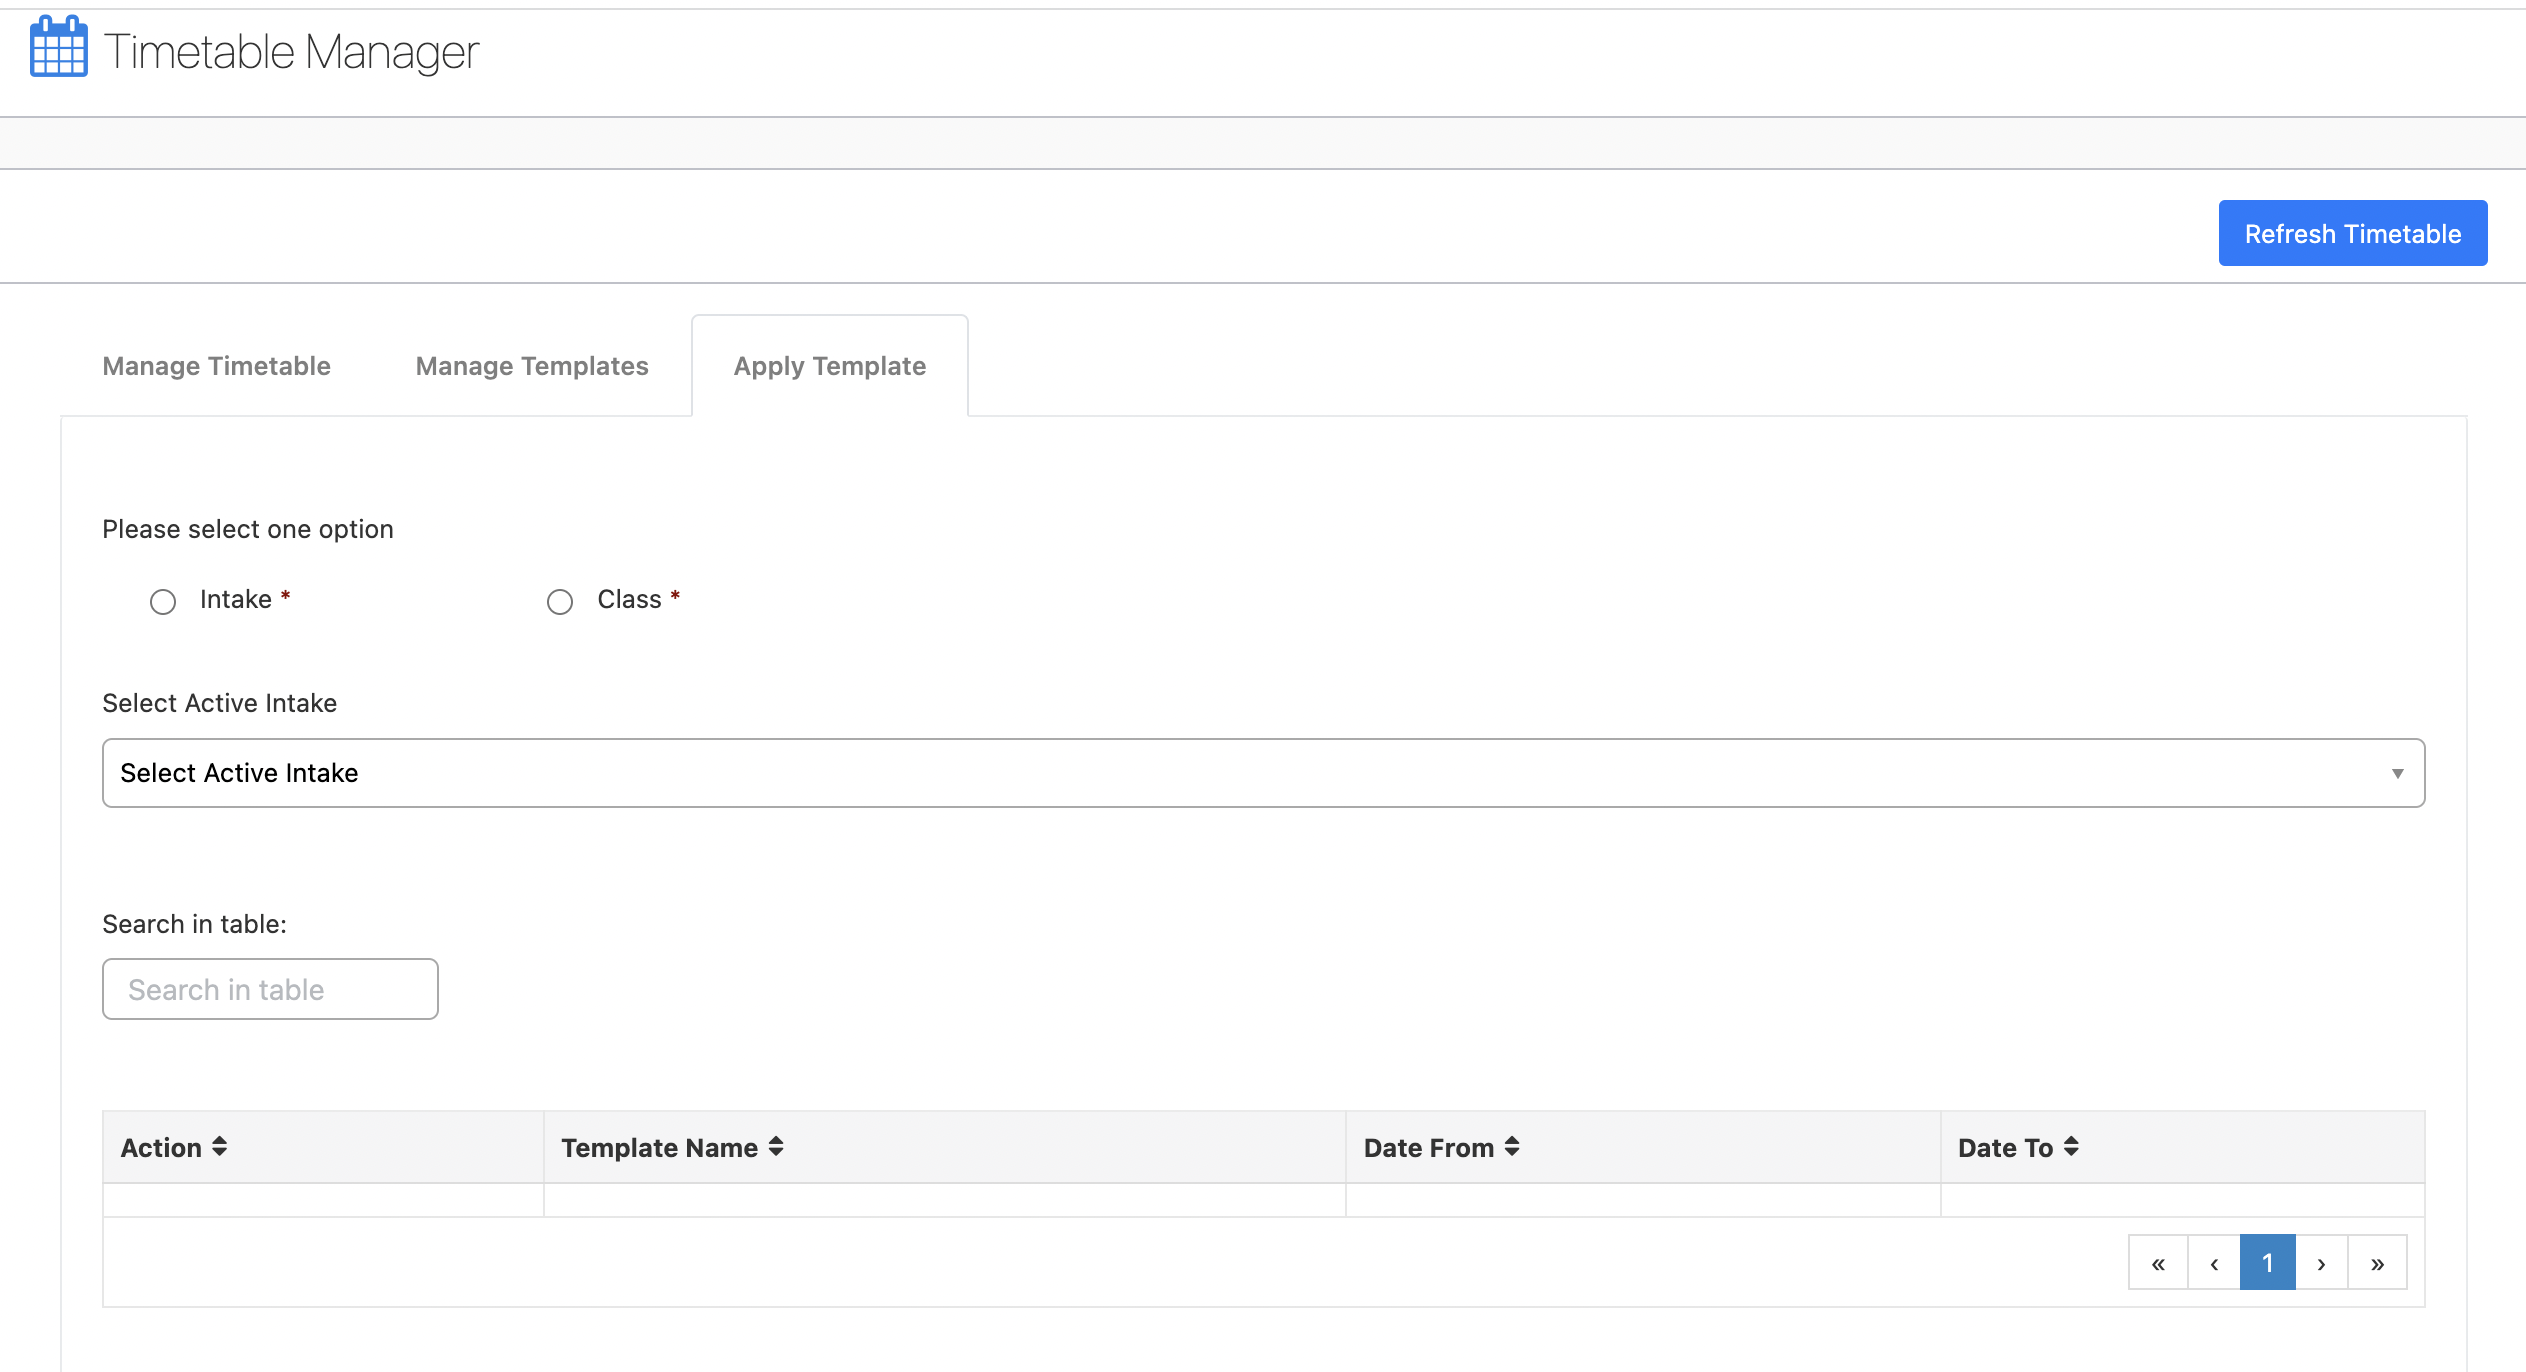
Select Active Intake/Class
Select an intake/class from the drop down list that has not yet an timetable attached to it (others that already have a timetable attached to it will not show in this listing so you will not be able to choose these)
Once you have done this successfully, a second drop down field will appear called “Select Template to Apply” for you to make a further selection.
Select Template to Apply
Choose a template you have created in the previous step – choose more than one if the students timetable changes throughout their studies (e.g. different weekly timetables for different semesters etc.). You can do this by manually selecting each timetable template – these will populate, one row after the next, on the screen as a list.
If you have selected available options, you will get a confirmation note from SELMA informing you that you have successfully applied a template to the intake.
Edit Template Date Range
To set the date range for the template, go to the green pen and paper icon under the “Action” column, and make edits here.
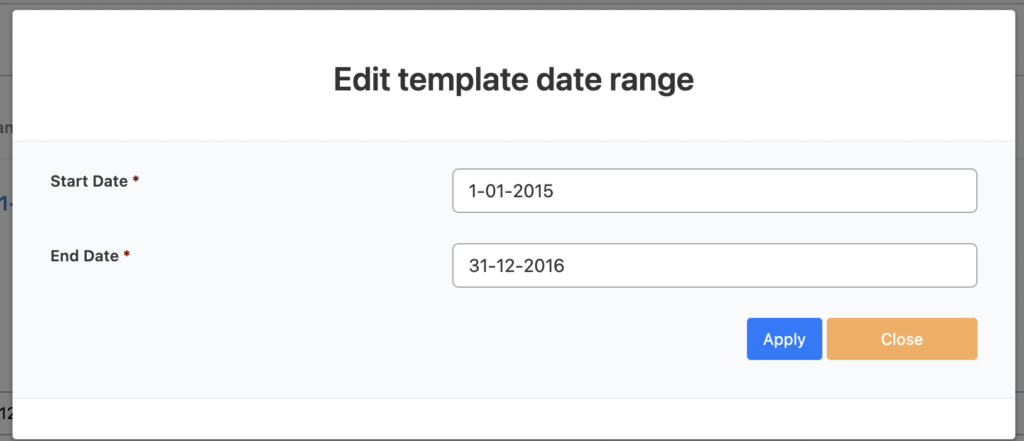
Note that you will have to cover the whole intake time with templates, they cannot overlap and not be outside the intake period. SELMA will warn you and stop you from going ahead if these criterias are not met.
NOTE: Please double check that everything is set up correctly here before moving on to the next step of the timetable creation process. Once you decide to go ahead and create the timetable, this triggers an irreversible process in SELMA. Once a timetable template (or templates) have been applied to an Intake/Class, this Intake will no longer be available as an option to have a timetable applied to. To rectify this you will have to delete the relevant timetable and templates.
Create a Timetable
Click on “Create Timetable”. Once this has been done, the browser page will ask to refresh and after this the timetable will be created. Your timetable is now created and applied to each day of the intake or class.
Edit Register
In the “Manage Timetable” tab select your intake or class. Then select the relevant week that you would like to edit the register of. This will populate a view of the timetable to look at.
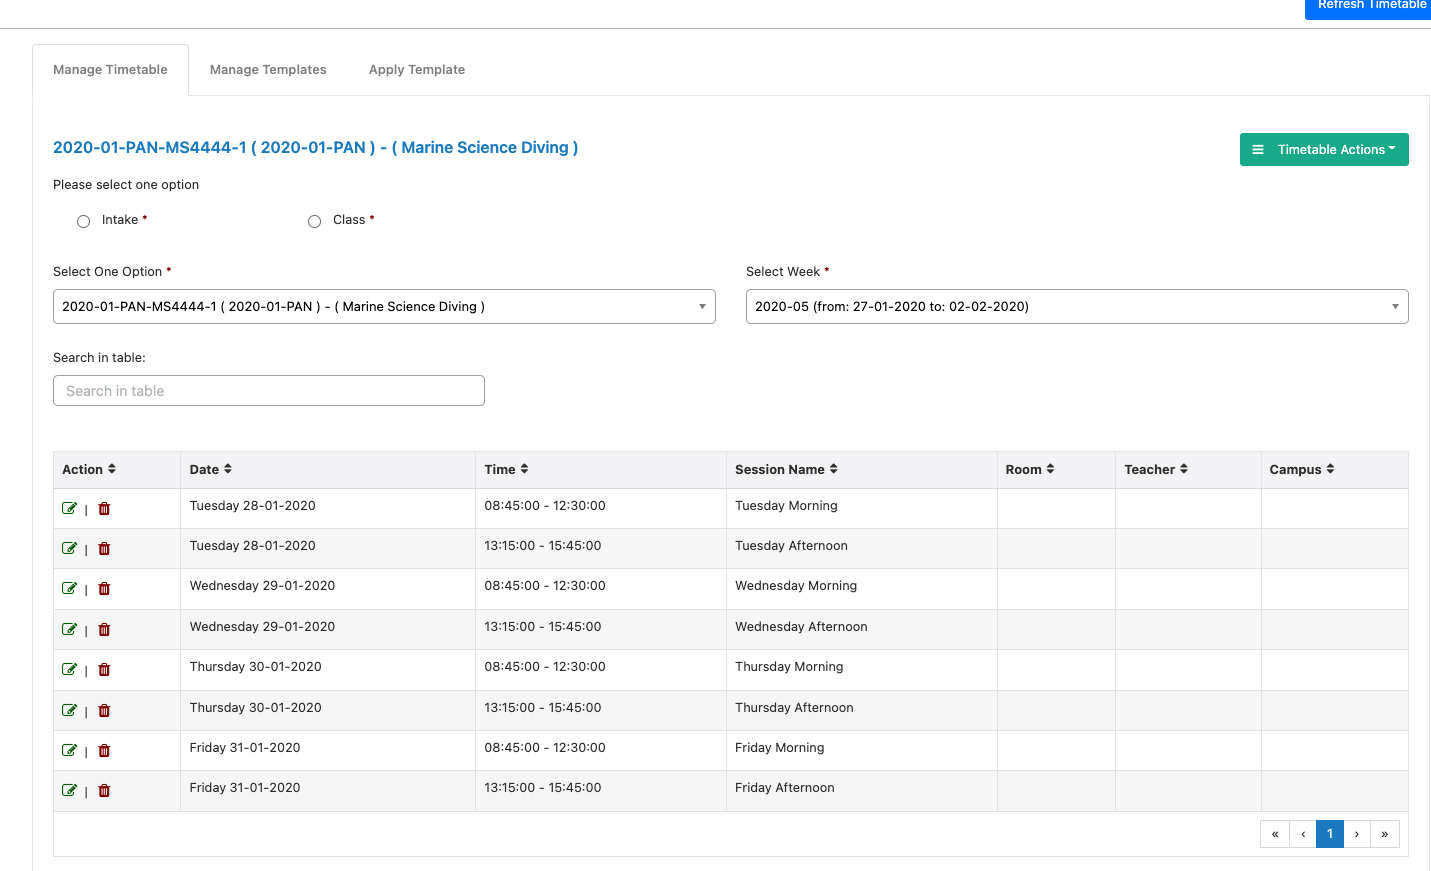
From here you can edit or delete a session if it is not required in a specific week. You can do this by locating the row item you would like to edit or delete from the list that is showing and clicking either the green pen and paper icon (edit) OR the red rubbish bin icon (delete) sitting under the “Action” column in the resulting grid that you can see.
You can also use the “Search in table” search grid to locate a specific session row item that you are looking for.
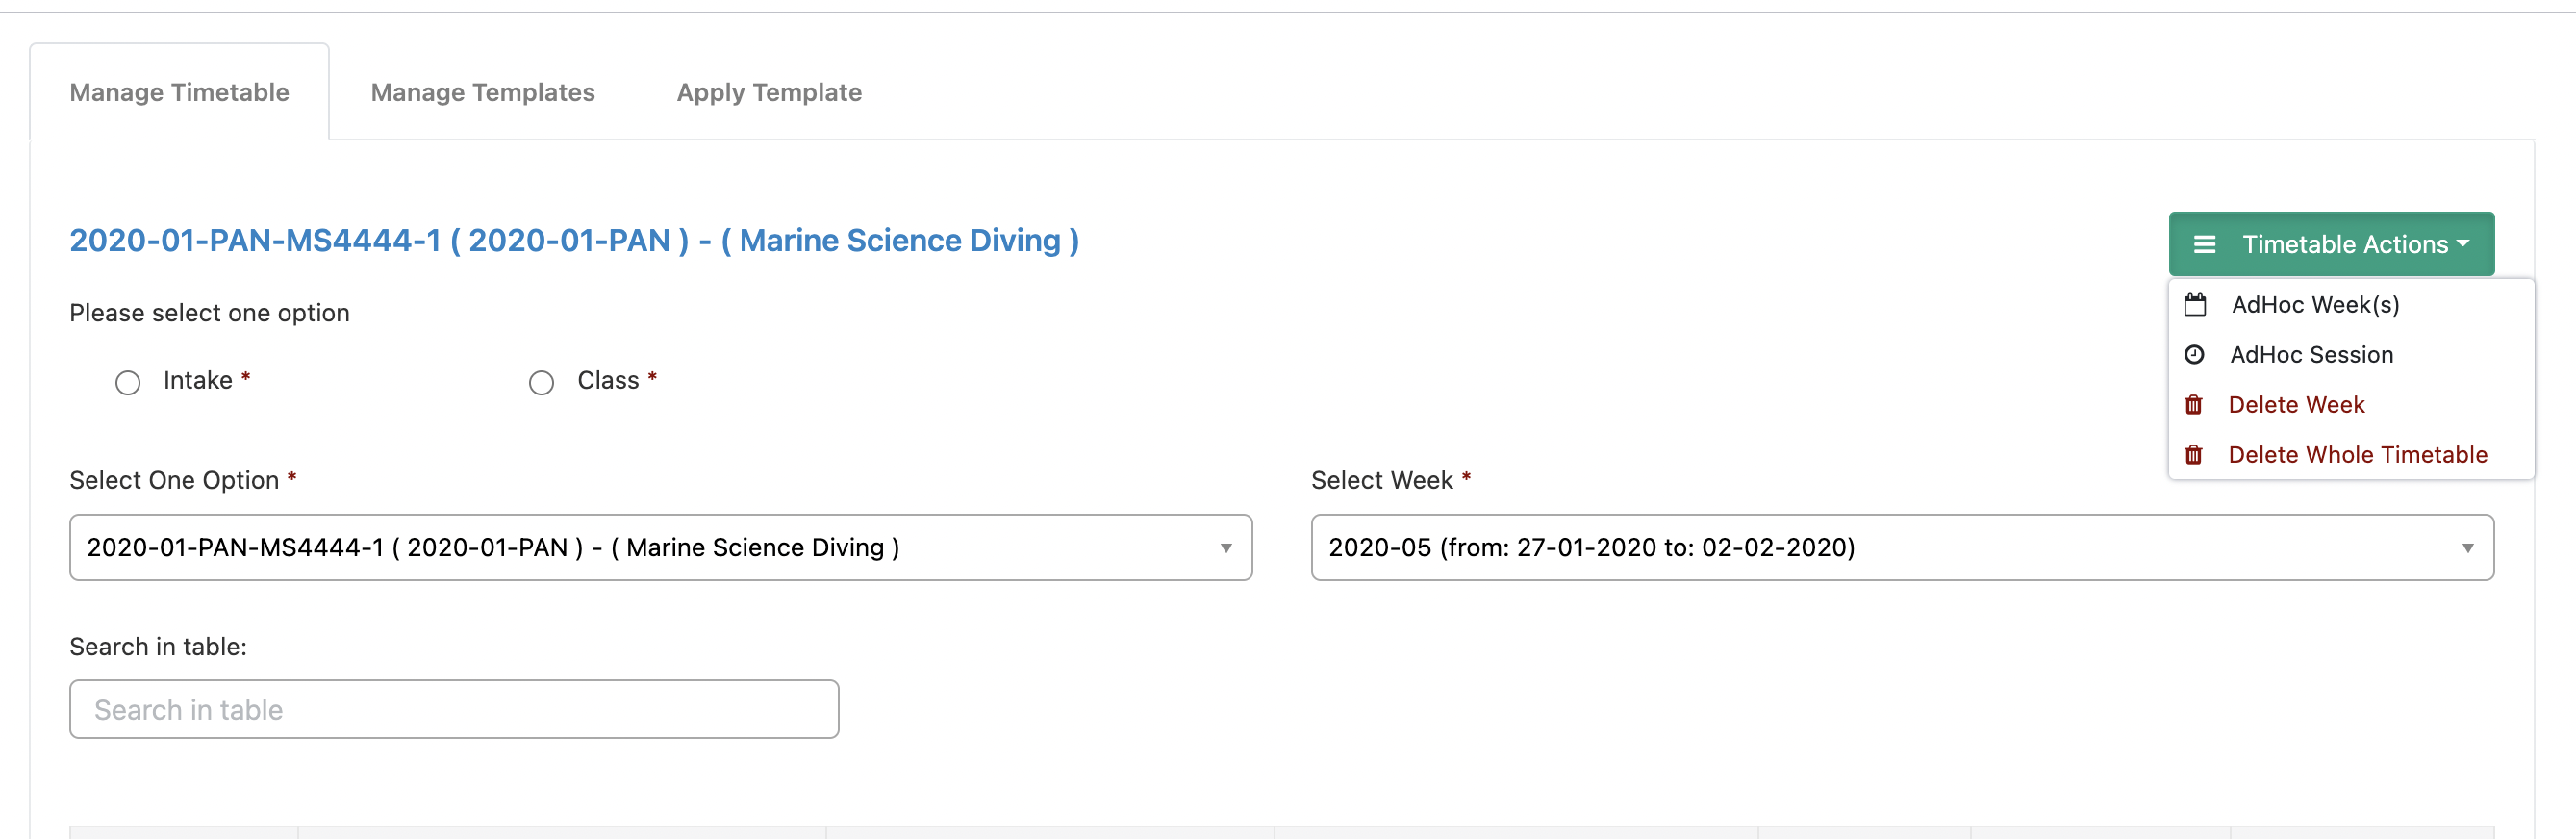
On the top right there is a button called ‘Timetable Actions’ with four options to make additional changes-

- AdHoc Week(s) – this allows you to add an additional session line item into a particular selected week.
- AdHoc Session – this opens up the relevant Attendance Report for your convenience.
- Delete Week – this allows you to delete the week that has been displayed to you on screen.
- Delete Whole Timetable – you can delete the entire timetable
AdHoc Week(s) Option
The AdHoc Week(s) function essentially allows the user to use a particular template week as a model to apply to subsequent available weeks in the intake timetable.
To do this, select the Intake and also any week. This will give you a preview of how the week looks like so that you can confirm that this is the one that you want to use.
Then, click “AdHoc Week(s)” and you will be presented with the following screen:
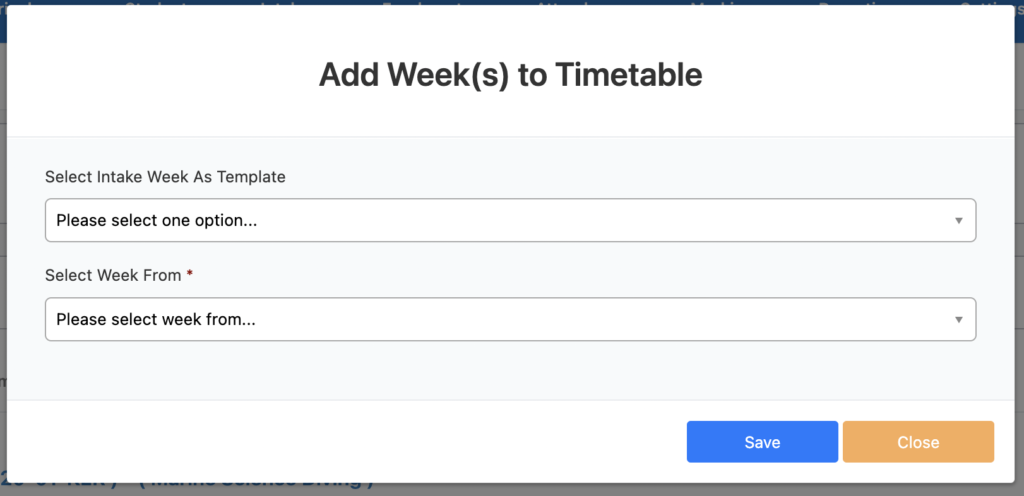
In the “Select Intake Week As Template” drop-down field, this is where you select the intake week that you would like applied to other weeks.
In the “Select Week From” drop-down field, this is where you select the first intake week from which you want to apply this template to. In other words, the first week that you want to look exactly like the one in the “Select Intake Week as Template” field.
This second field will only allow you to select weeks that are available to have a template applied to.
If you have selected an appropriate week, a third drop-down field will appear: “Select Week to”. Here you will select the last week in which you want to apply this template to. In other words, the last week that you want to look like the one in “Select Intake Week as Template” field.
Once you have selected a relevant available date range, click “Save” to apply the timetable template to the AdHoc Weeks selected.
Attendance Codes
SELMA provides a range of native attendance codes, but you can add more attendance codes. You can specify if they are counted as present or not or even give it a weighing (e.g. counts as 50% present).

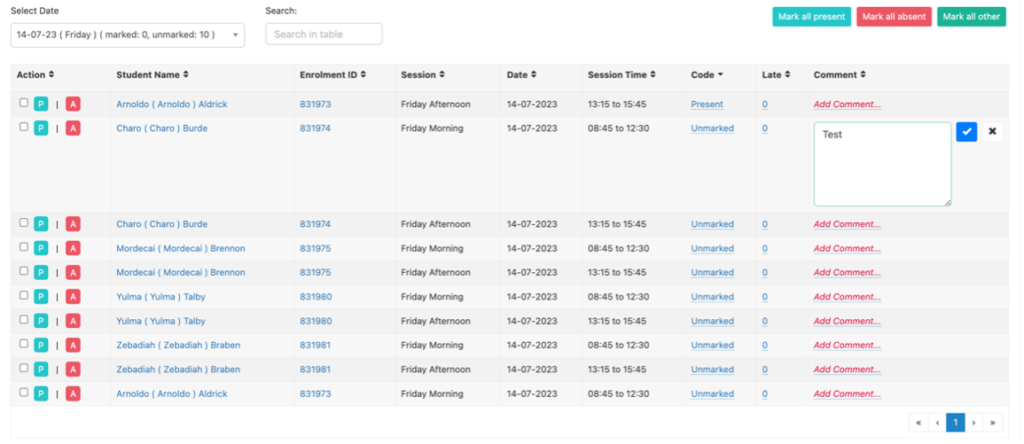
Inline Editing of Attendance
- To allow for faster attendance marking the Attendance Code and Comment can now also be inline edited rather than having to open the pop-up menu.
- Click on the mark or the comment to add/update the information –
Mark Attendance
To mark attendance, go to Attendance -> Mark Intake Register and select the relevant fields that apply to the particular enrolment that you would like to mark, according to the available fields as can be seen in the following screenshot:
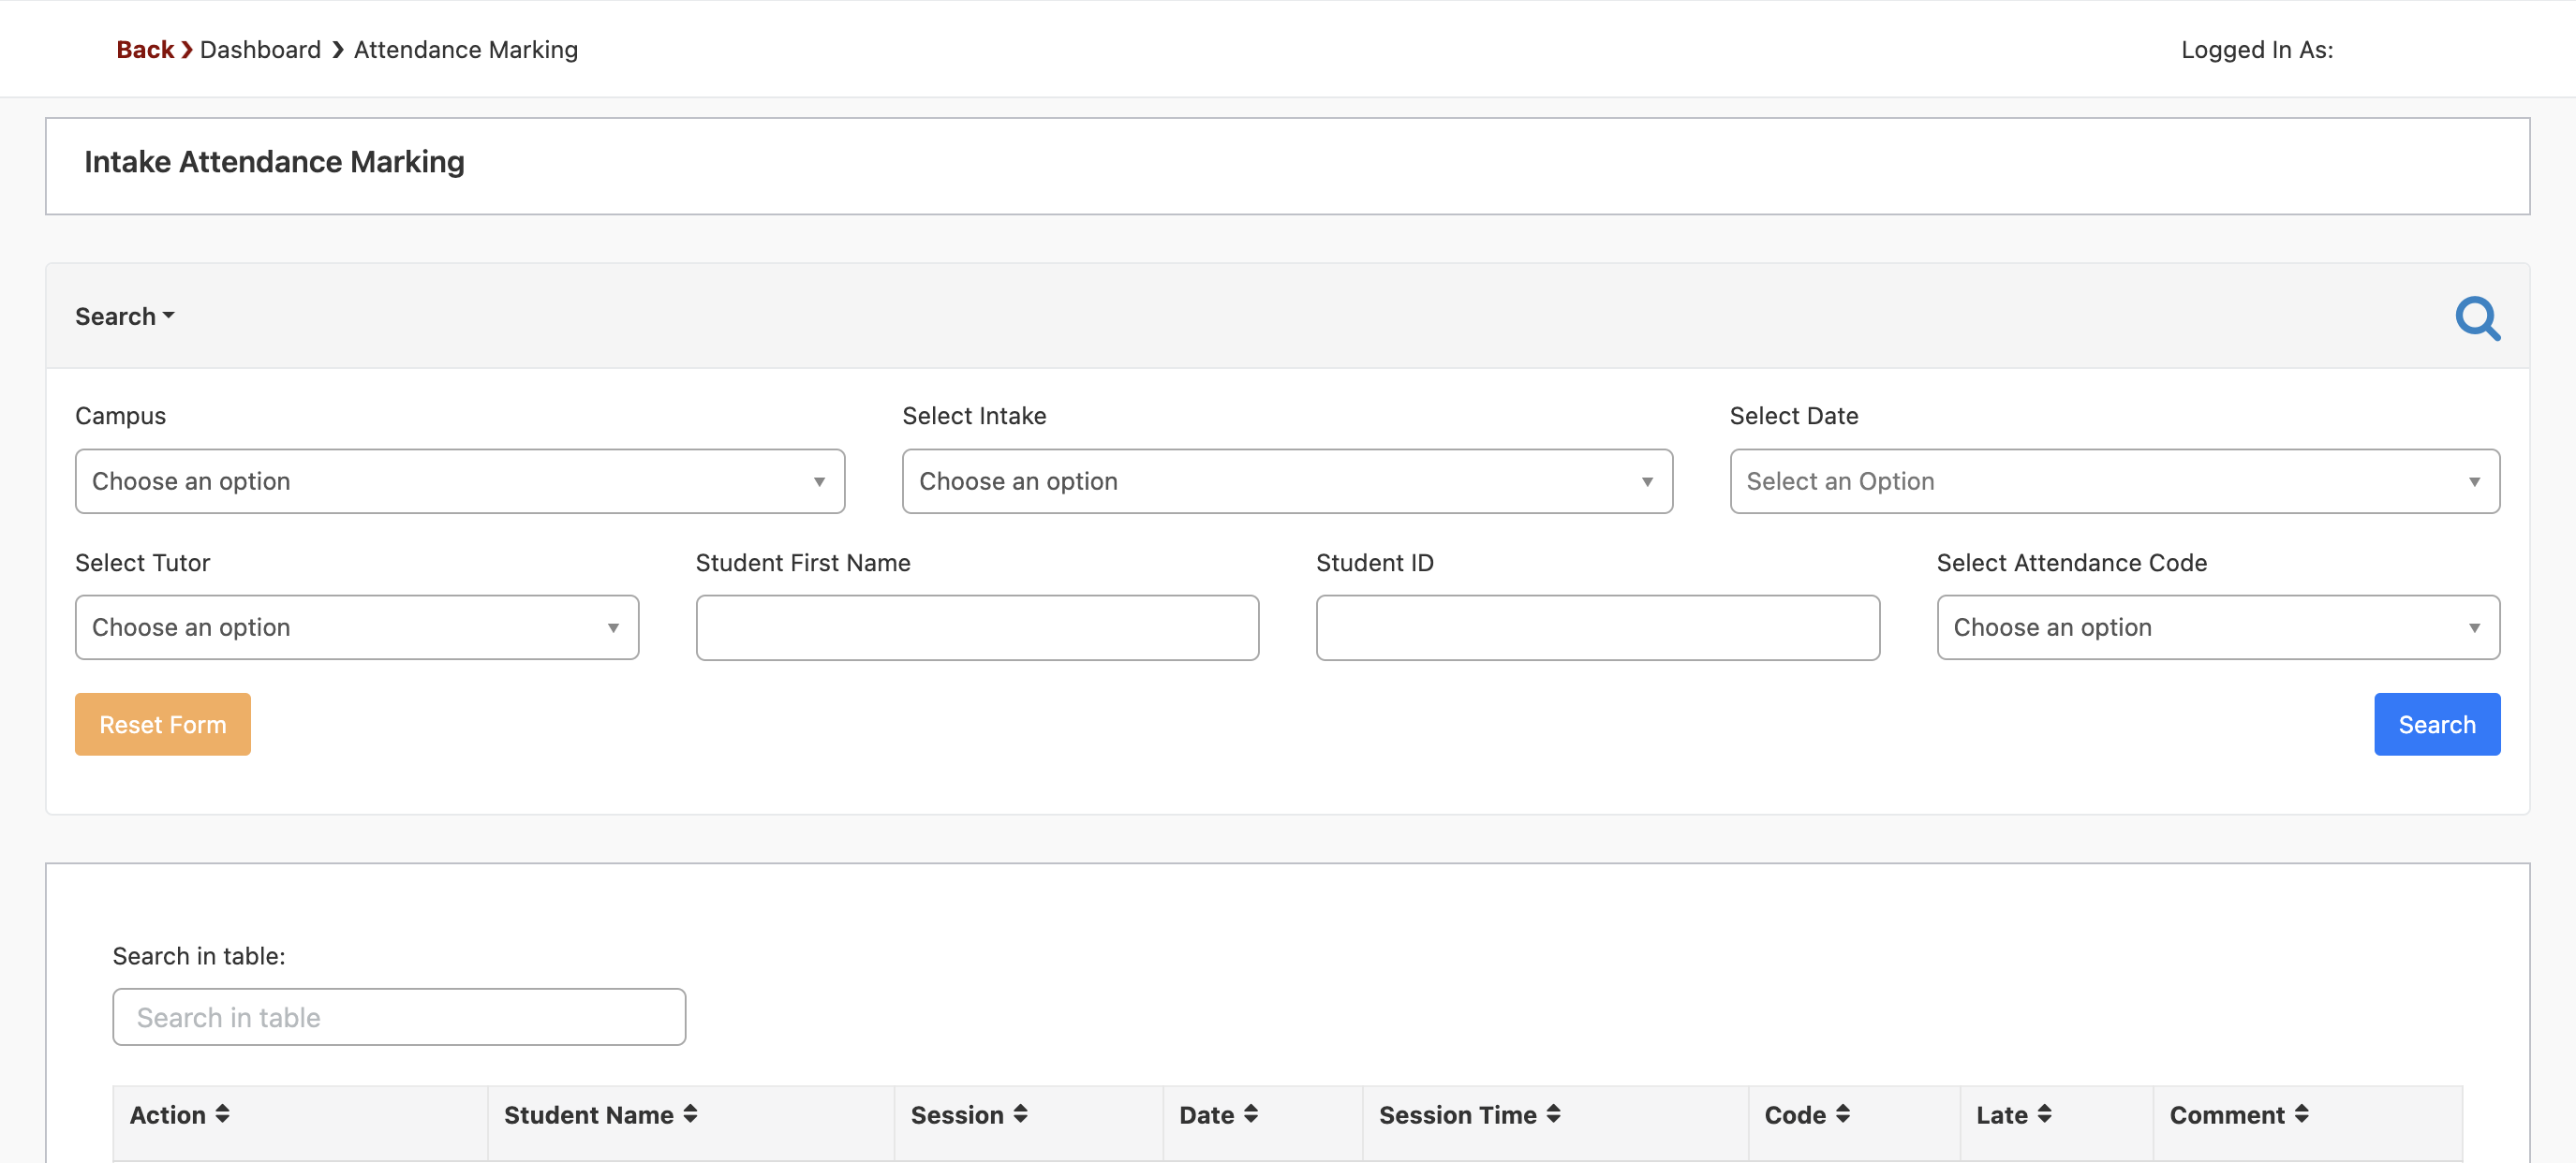
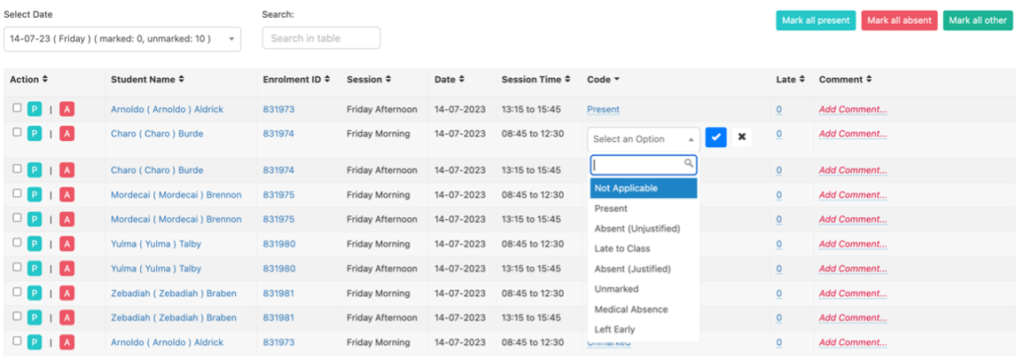
After selection of a relevant applicable fields, the user will see a screen similar to the following:
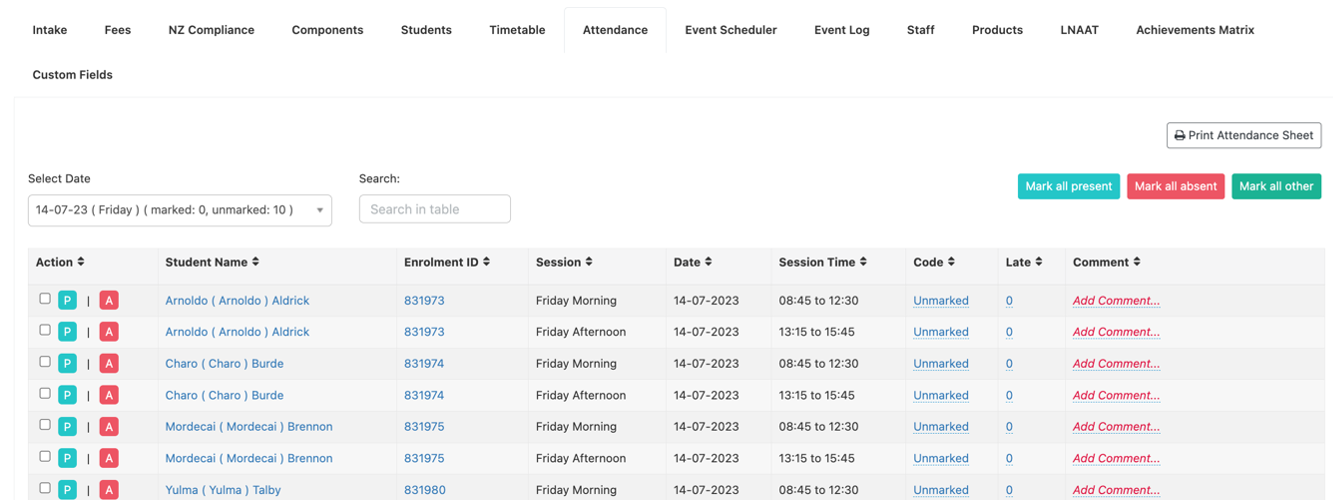
Now you can mark all attendance sessions by either using the fast buttons (P Present / A Absent) or use the edit function to choose from all you additional attendance codes.

Learner Attendance Report
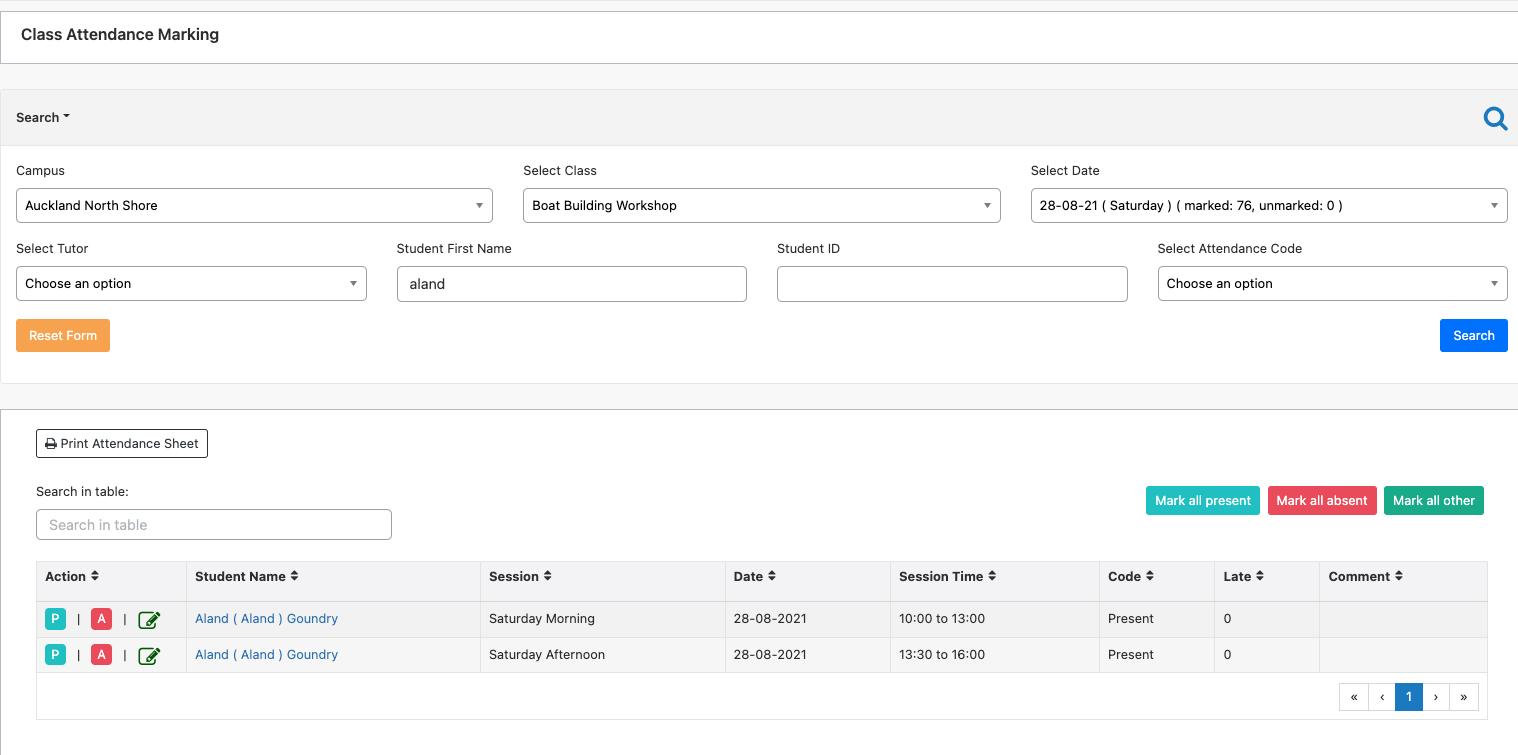
If a teacher is after an attendance report or if you would like to look at am individual learners attendance, go to Attendance –> Mark Class Register OR Mark Intake Register, and search for a specific student in the top search grid.
You can also mark an entire class or intake Present/Absent from here.
Attendance Report PDF
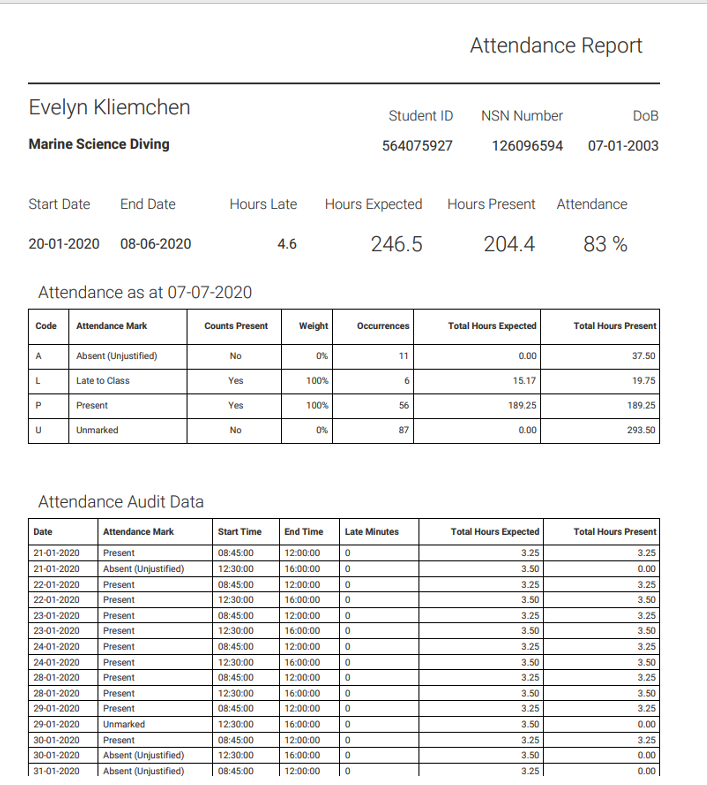
In the Attendance tab within Enrolments, users will be able to access a pdf Attendance Report by clicking the button “Attendance Report”.
Much like the Enrolment Transcript report, this is a button that extracts the student’s enrolment attendance data into a pdf file, that can be downloaded to the user’s computer system for further use.