
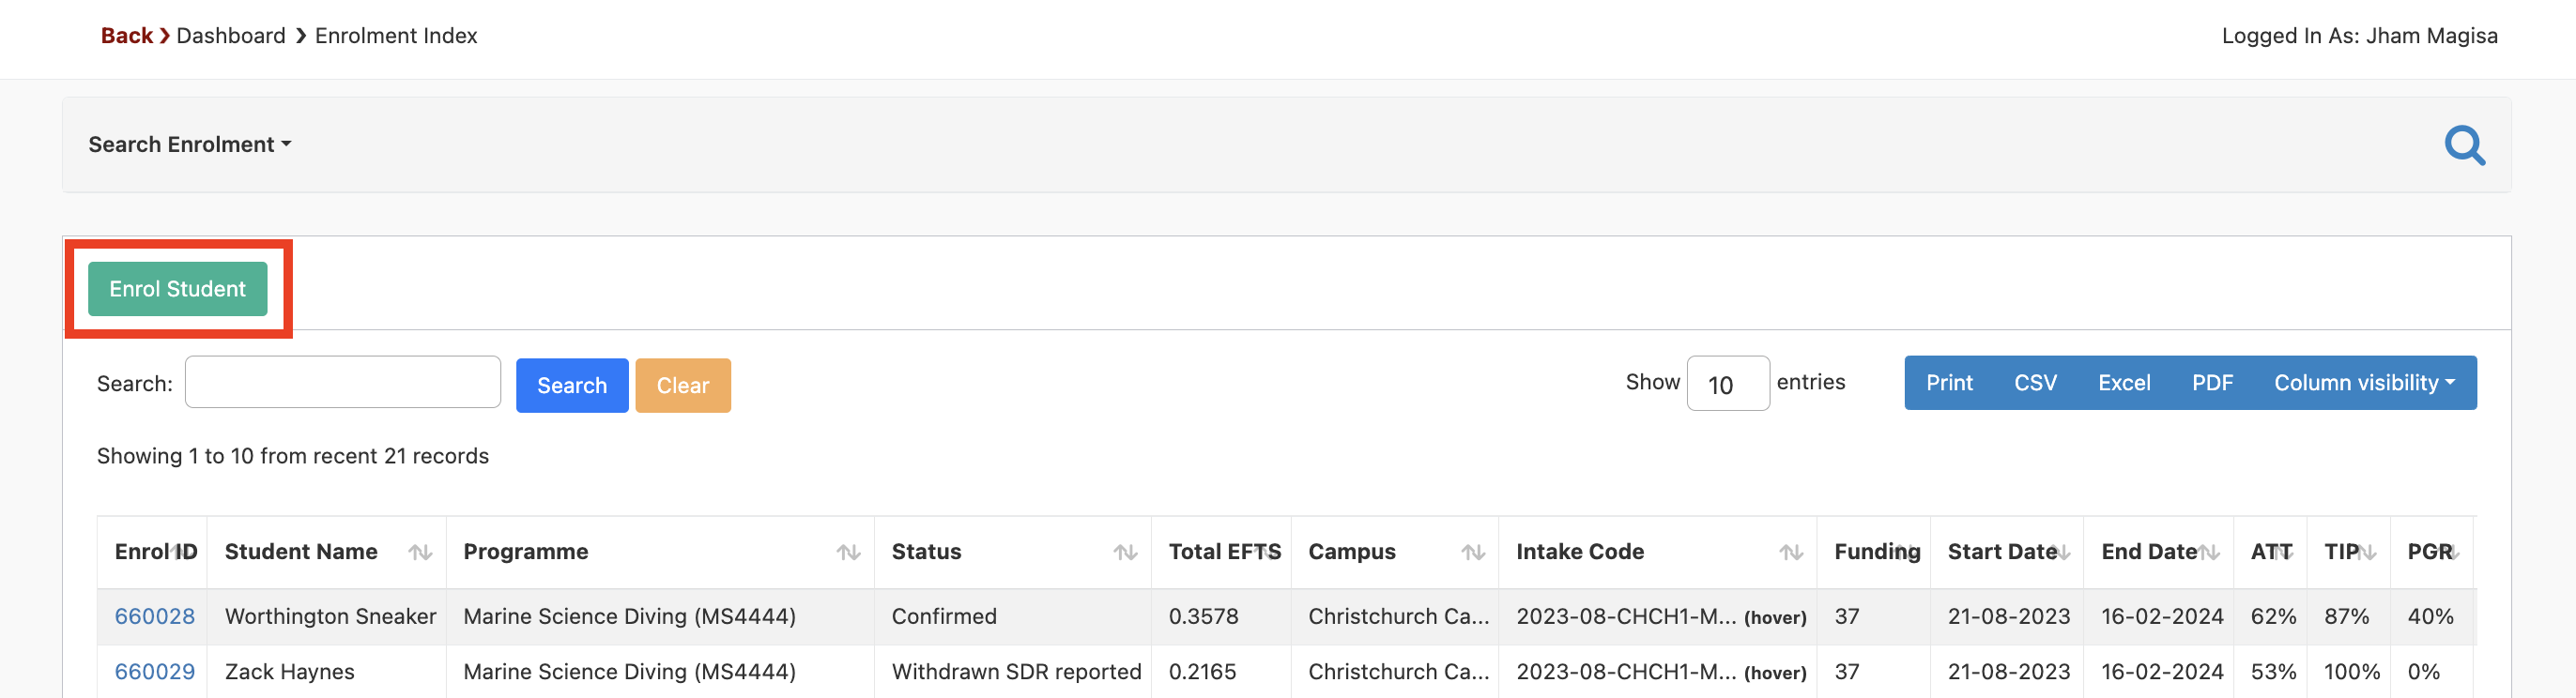
To enrol student(s), there are two navigation you can follow. The quickest way is to navigate to Enrolments -> Enrol Student(s). The other way is to navigate to Enrolments -> Manage Enrolments -> click the “Enrol Student”
Before you begin enrolling a student, please ensure that you have already added them as a student and that their Student Status is set to “Ready”, otherwise you will not be able to enrol them. To add a new student or manage students, please follow our Students manual.
Jump Ahead:
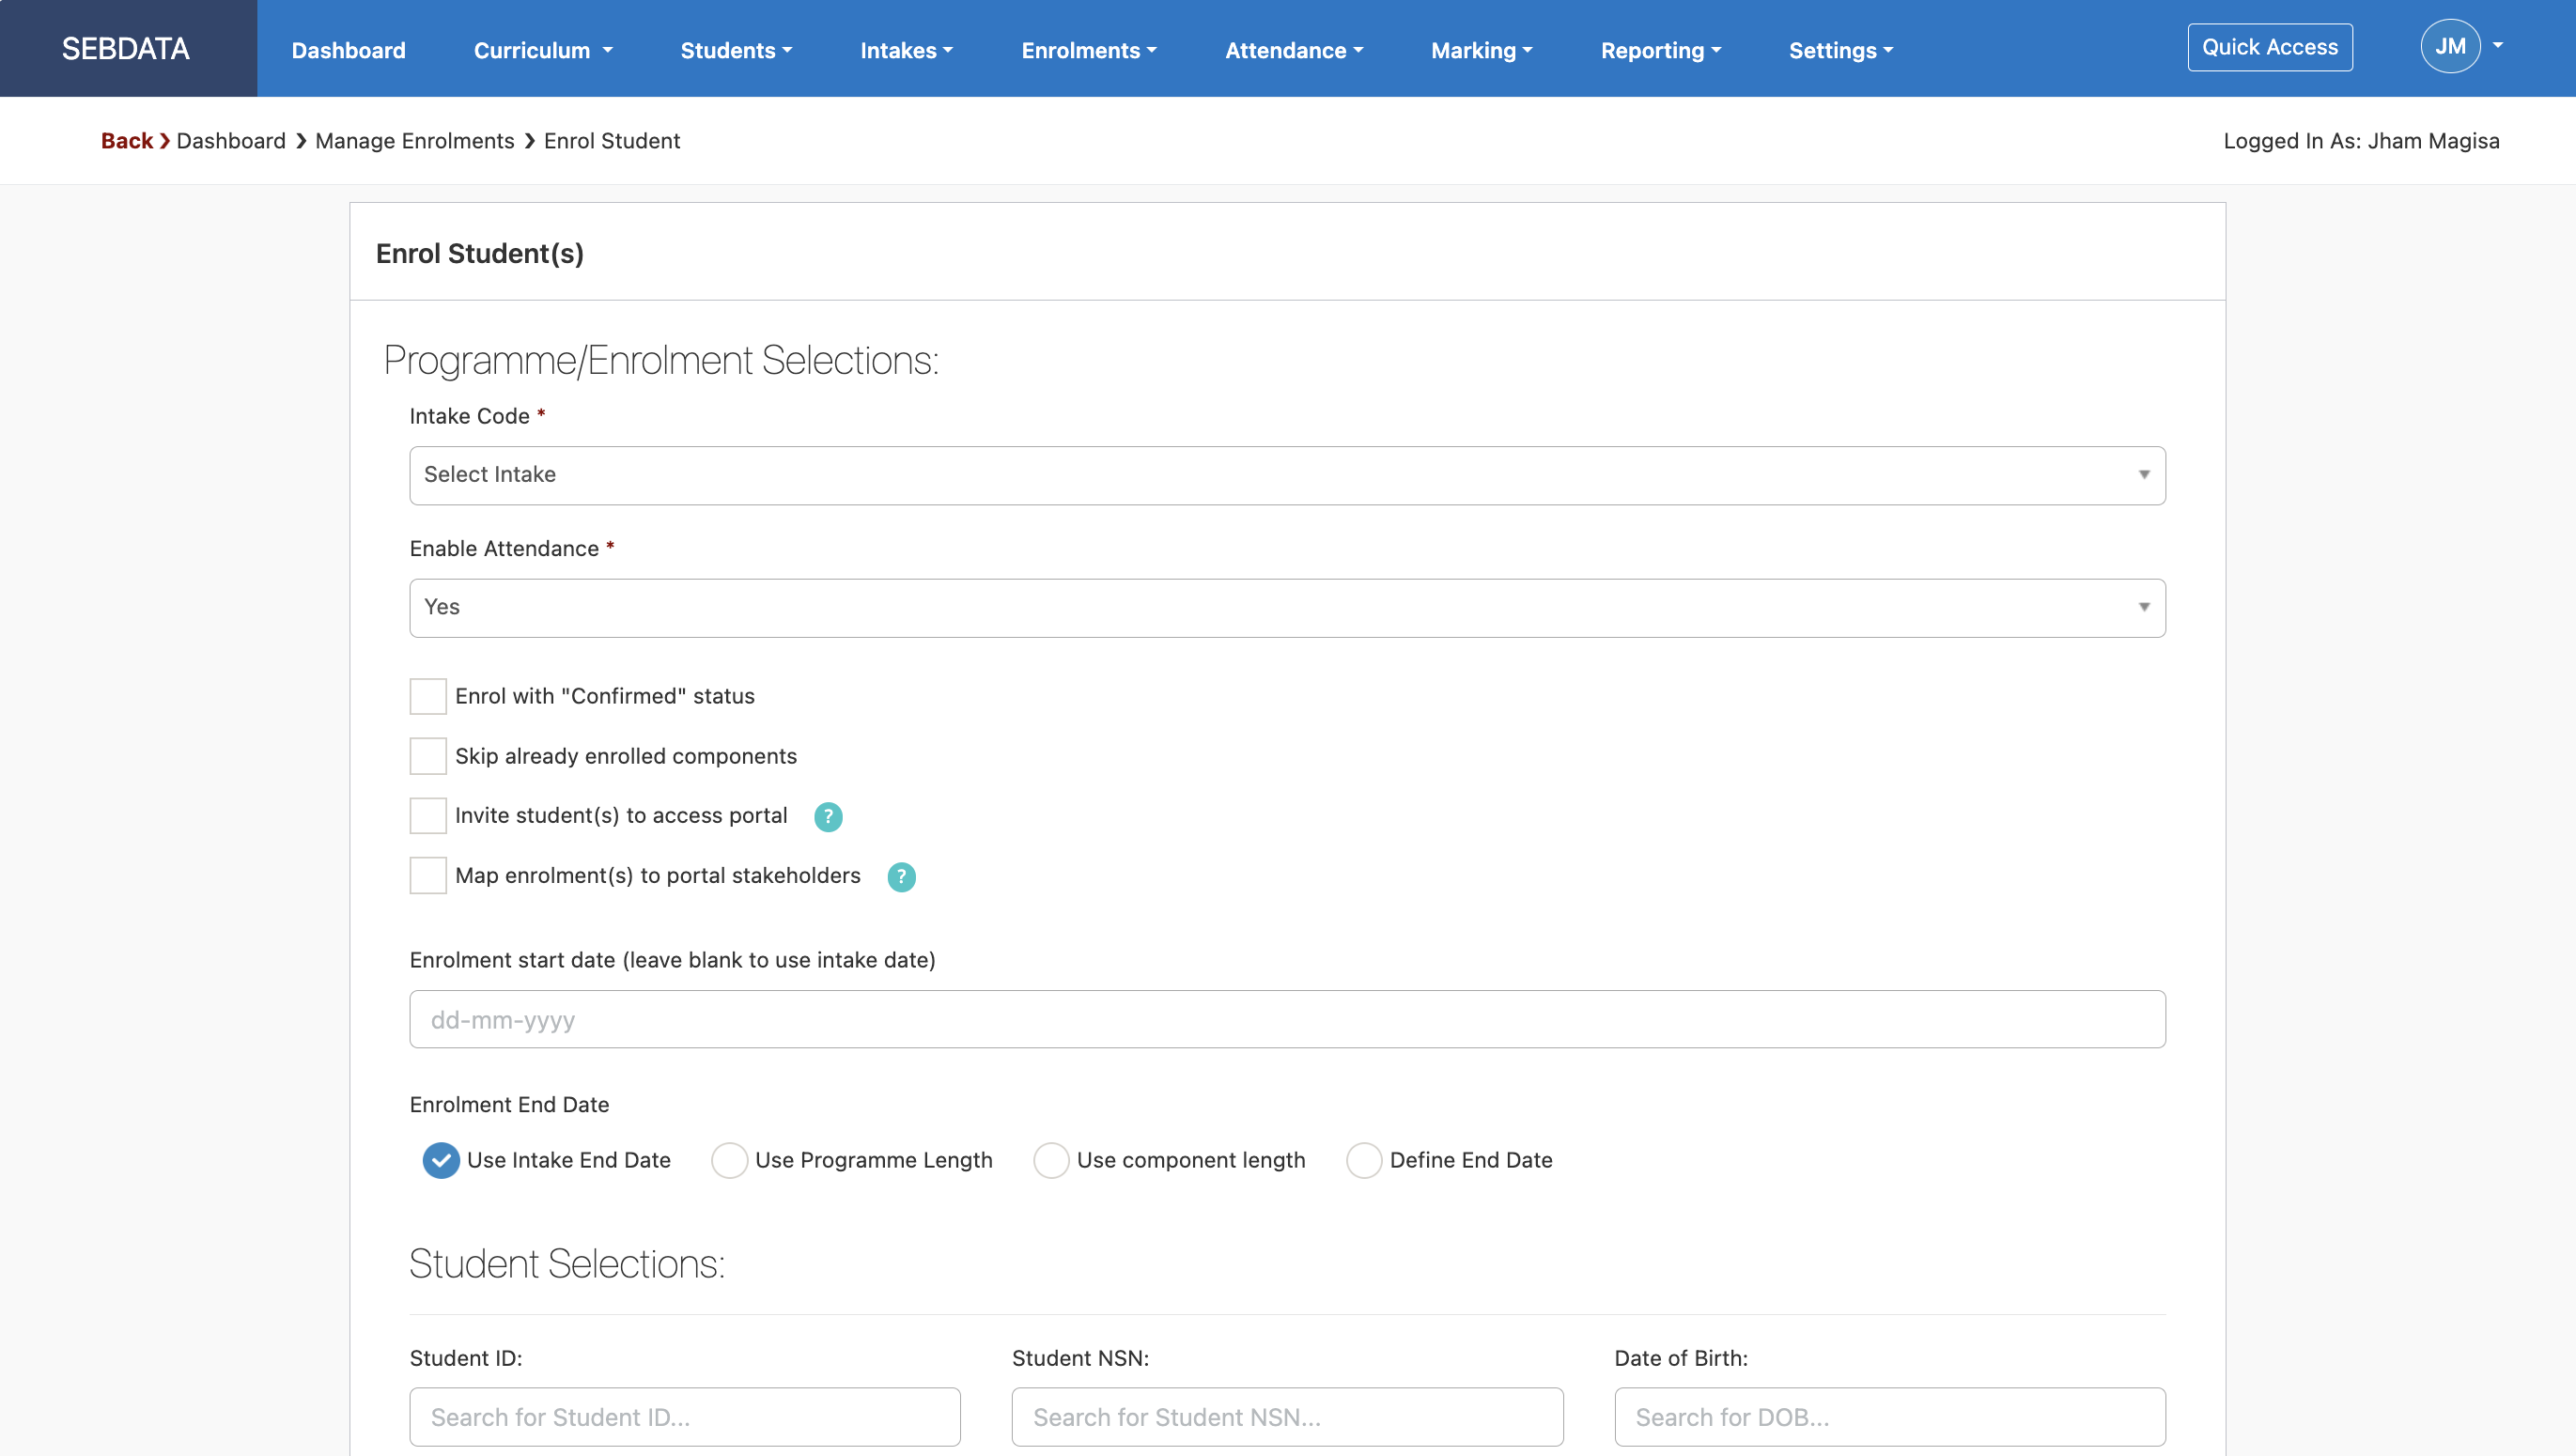
Please note that all of the fields that has an (*) is a compulsory field and must be filled in.
Programme/Enrolment Selections:
Intake Code
Select the correct Intake into which you want to enrol the student –
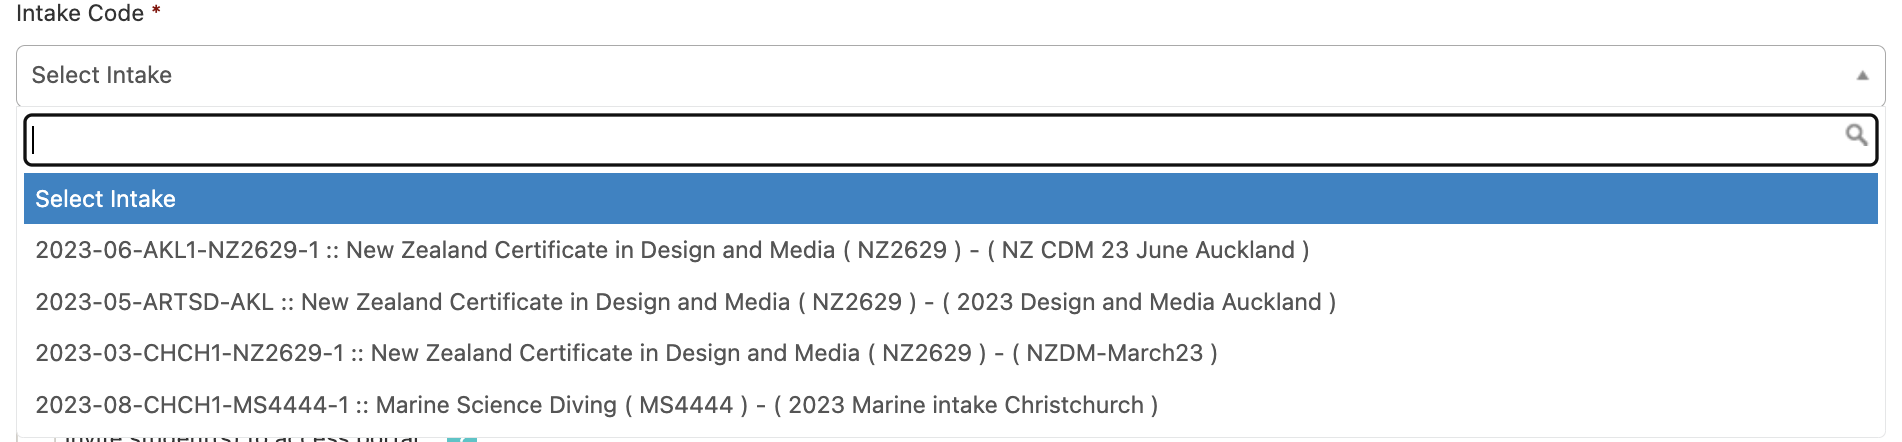
Only intakes that are Intake created and set to “Open” will be visible in this field. If the intake you want is not visible, please check that the desired intake is actually created and that the status of it in the Intake Index is set to “Open”.
Enable Attendance

By enabling attendance, individuals whose role are set to either ‘Teacher’, ‘Admin’, or ‘Registrar’ will be able to mark the student’s attendance. This is important for reporting.
Enrol with ‘Confirmed Status’
Selecting this field means that, upon enrolment, the student becomes “Confirmed” straight away and the enrolment becomes SDR committed. This step will also automatically generate a note entry in the student’s Events Log notifying the user of the time and date of the confirmation date/time.
You can provisionally enrol a student by not ticking this field and later change the status of the enrolment to “Confirmed”, with the Status Wizard, to commit the enrolment to SDR.
Skip ‘Already Enrolled Components’
If this option is selected, the system will omit components where the student is already enrolled in the same component from another enrolment event. This is also applicable if the student has completed this component with your provider in another enrolment event.
Invite student(s) to access portal
This will enable the student to access this intake’s enrolment detail in their portal.
Map enrolment(s) to portal stakeholders
Explain what this do
Enrolment Start Date
Enter the date that you would like to use as the Enrolment Start Date into this field. You can either type the date or select the desired date in the calendar that pops out when you click the box.
Enrolment End Date

You can choose from three options when selecting an Enrolment End Date according to your needs as an education provider.
- Use Intake End date – Populates the Enrolment End date with the same end date as the selected Intake.
- Use Programme Length – This will calculate the end date based on the programme length.
- Use Component Length – This will calculate the end date based on the component length.
- Define End Date – Users can manually input the end date. This will also enable the calculator function.
Calculator Function:

Once you click on the “Calculate” button, a pop-up calculator will appear:
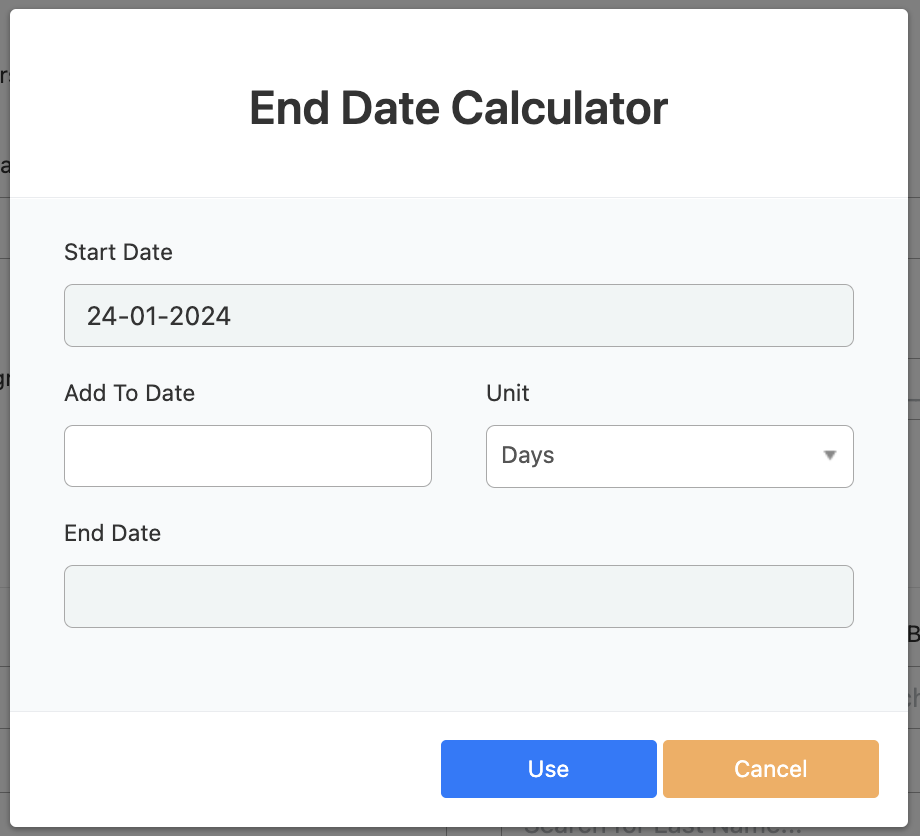
The “Start Date” will have already been pre-populated. Either manually enter a value into the “Add to Date” field or use the counter figure that pops up in the field when you hover over it with your mouse (Select unit value of days, weeks, or months). As you manipulate these fields, you will see the “End Date” figure change accordingly. This is the calculator function automatically calculating the End Date based on the information provided.
When satisfied with the End Date complete the process by clicking the blue “Use” button. This will input the calculated End Date into the “End Date” field in the Enrol Student form.
Note: SELMA runs a validation check to make sure that the selected End Date is after the Enrolment Start Date. Otherwise, SELMA will generate an error.
Student Selections
The final step is for you to select the students to enrol under the conditions you specified in the field below. To do this, locate the students you want to enrol in the left-hand column –
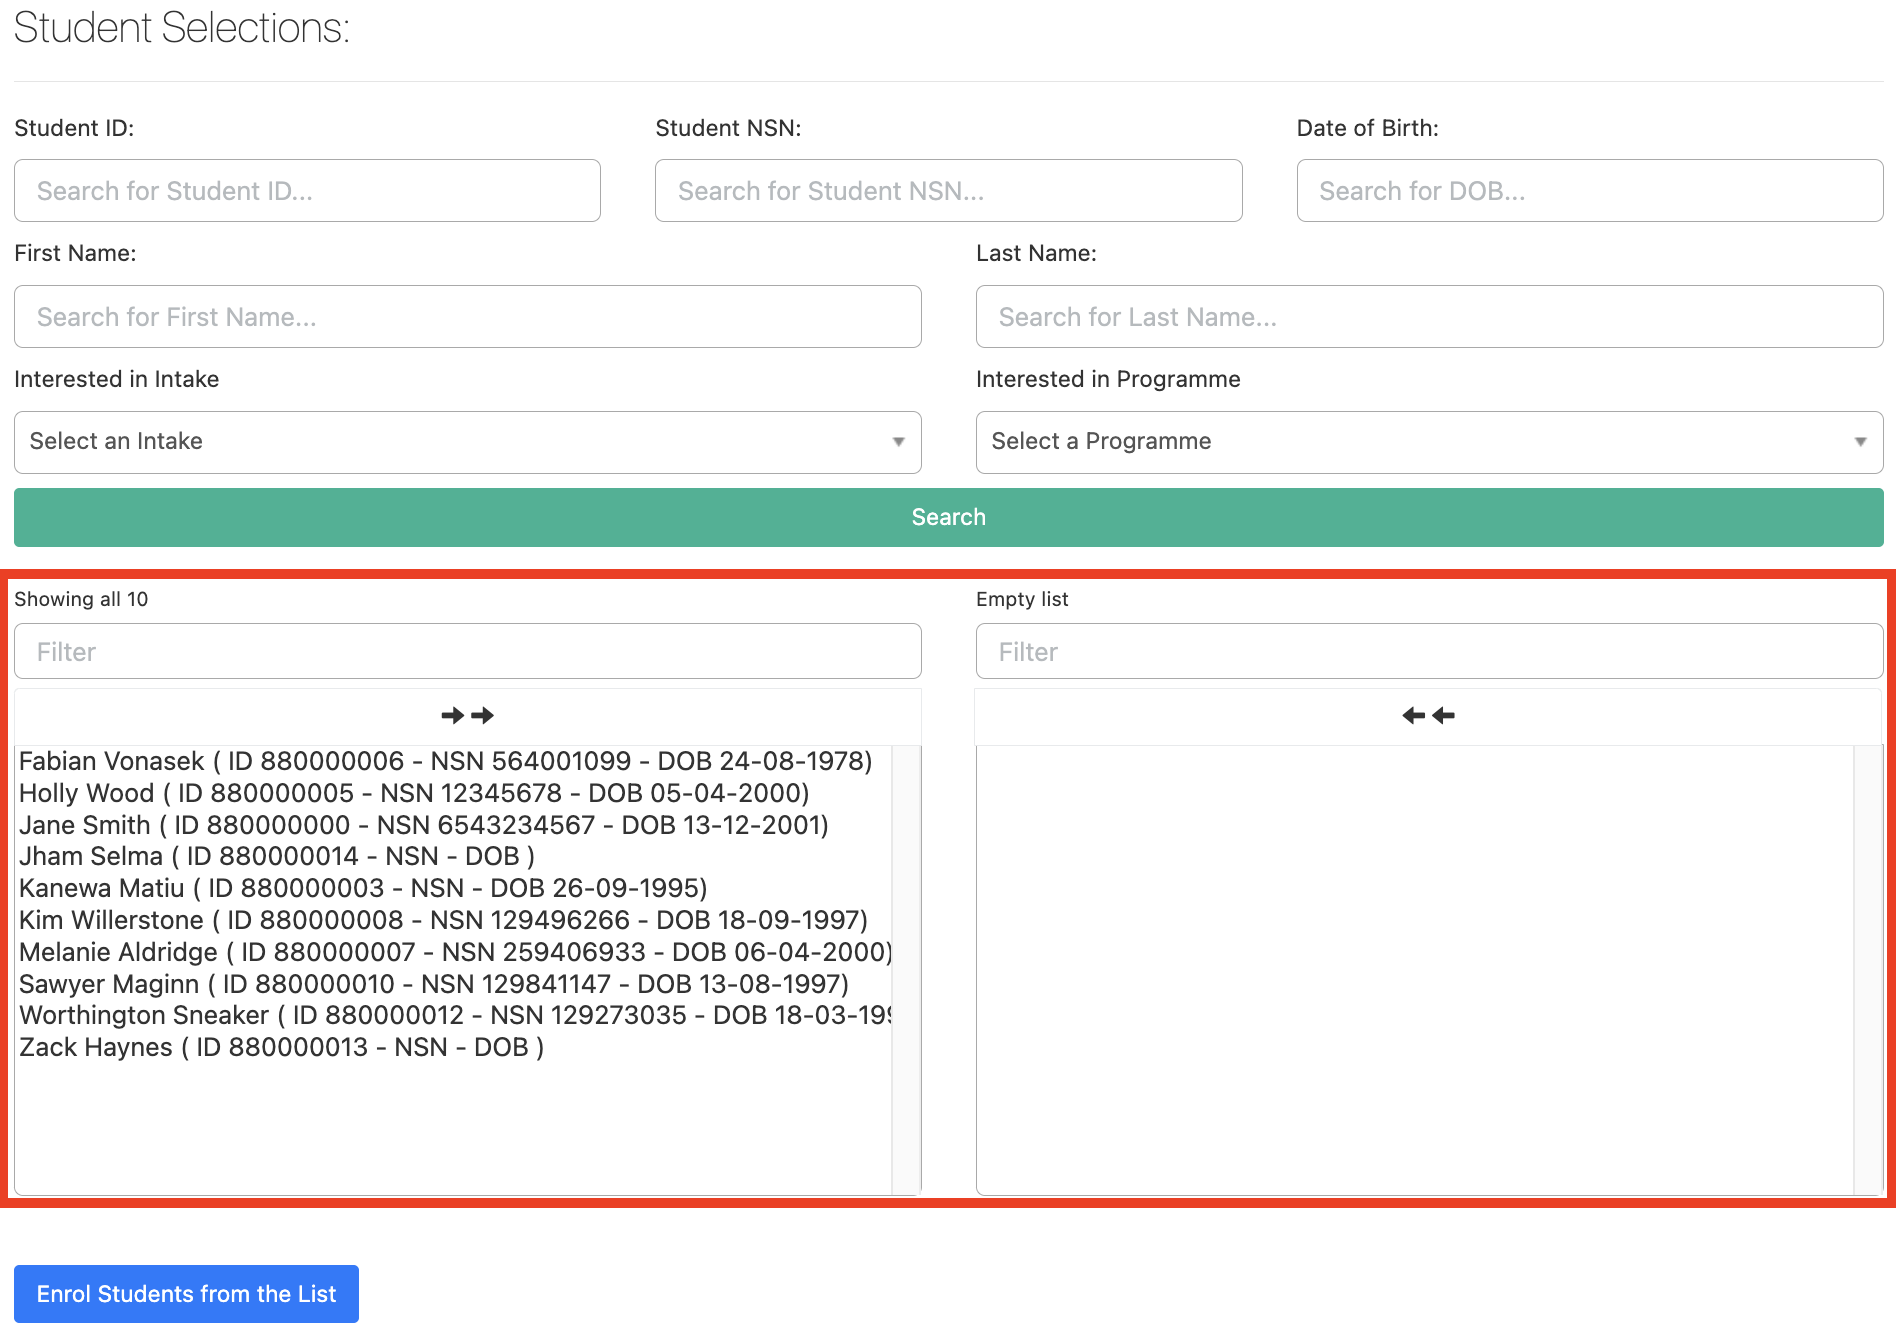
Click once on their names and this should automatically take them out of the left-hand column list of names and put them in the right-hand column list of names. Repeat this process for all the students you want to enrol. Note: You can also press the two arrows at the top to move everyone to the right-hand side and vice versa.
Once you have completed all relevant sections, and added all the students that you want to enrol to the right-hand list of names, click the blue “Enrol Students from the List” button.
Upon successful enrolment, you will be shown a “Successful” screen, which will also allow you easy access to make any edits to the individual successful enrolments.