
Contact Details
In the contact details tab you can add a phone number and email address.
It is important here to input the correct contact information, especially if the student is an international student.
For international students, be sure to clearly indicate what “type” of address it is. If it is their home address in their country of origin, this will usually be type “overseas”. Then after this it is important for these international students to have a New Zealand based “mail” address, to indicate their mailing residence while staying in New Zealand.

For current addresses, you will notice that the SELMA system defaults the “Valid To” date as being XX-XX-9999.
SELMA will manage the expiry of addresses automatically. If you create a new address of the same type for a learner, SELMA will automatically retire the old address by changing the “valid to” date to the date in which you created the new address record and add the new address with the correct “Valid From” date.
This process in SELMA creates a time log of different addresses added to the student’s record.
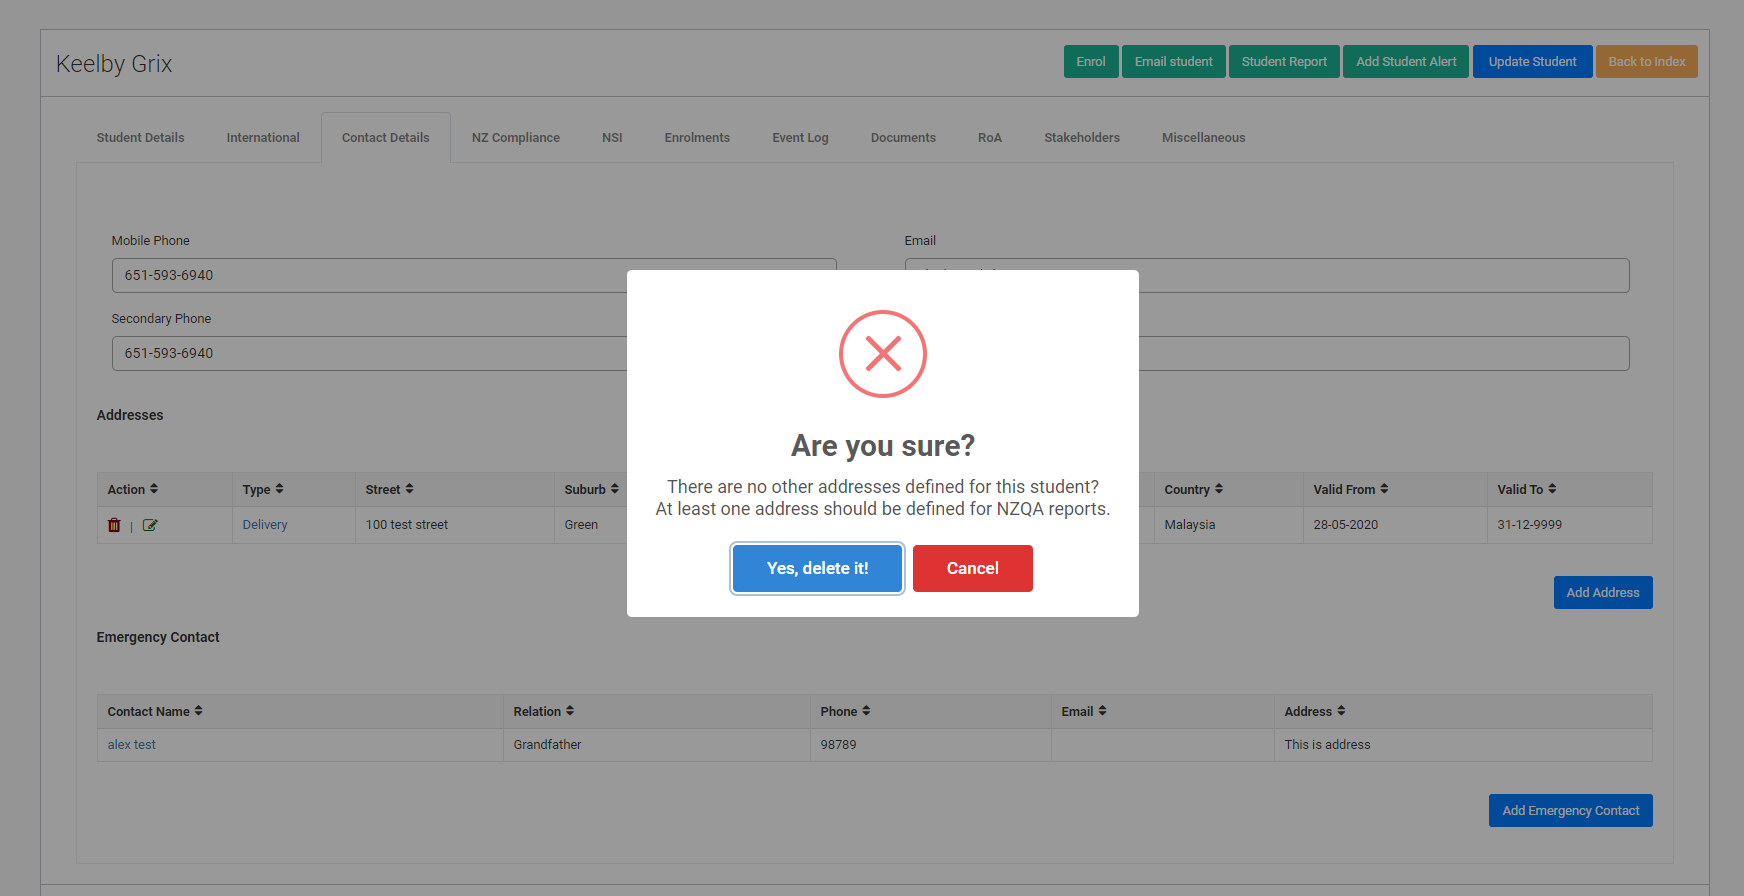
Please note that addresses can be deleted by users for convenience, however the following should be kept in mind when doing so:
- If there are two or more address line items, deleting the current address will revert the most recent address before that one to becoming the new current address.
- The user has the option of deleting a student address if they wish to do so and there is only one, however this is not advised. For this reason, if a user attempts to delete a student address when there is only one a pop-up message will appear on the screen, informing the user that doing this will have implications for SDR and NZQA reporting.
 | If you use the communication module, make sure you enter a valid email address and mobile phone number in this section. |