14.05.03 Create Employer

Create Employer and Contacts

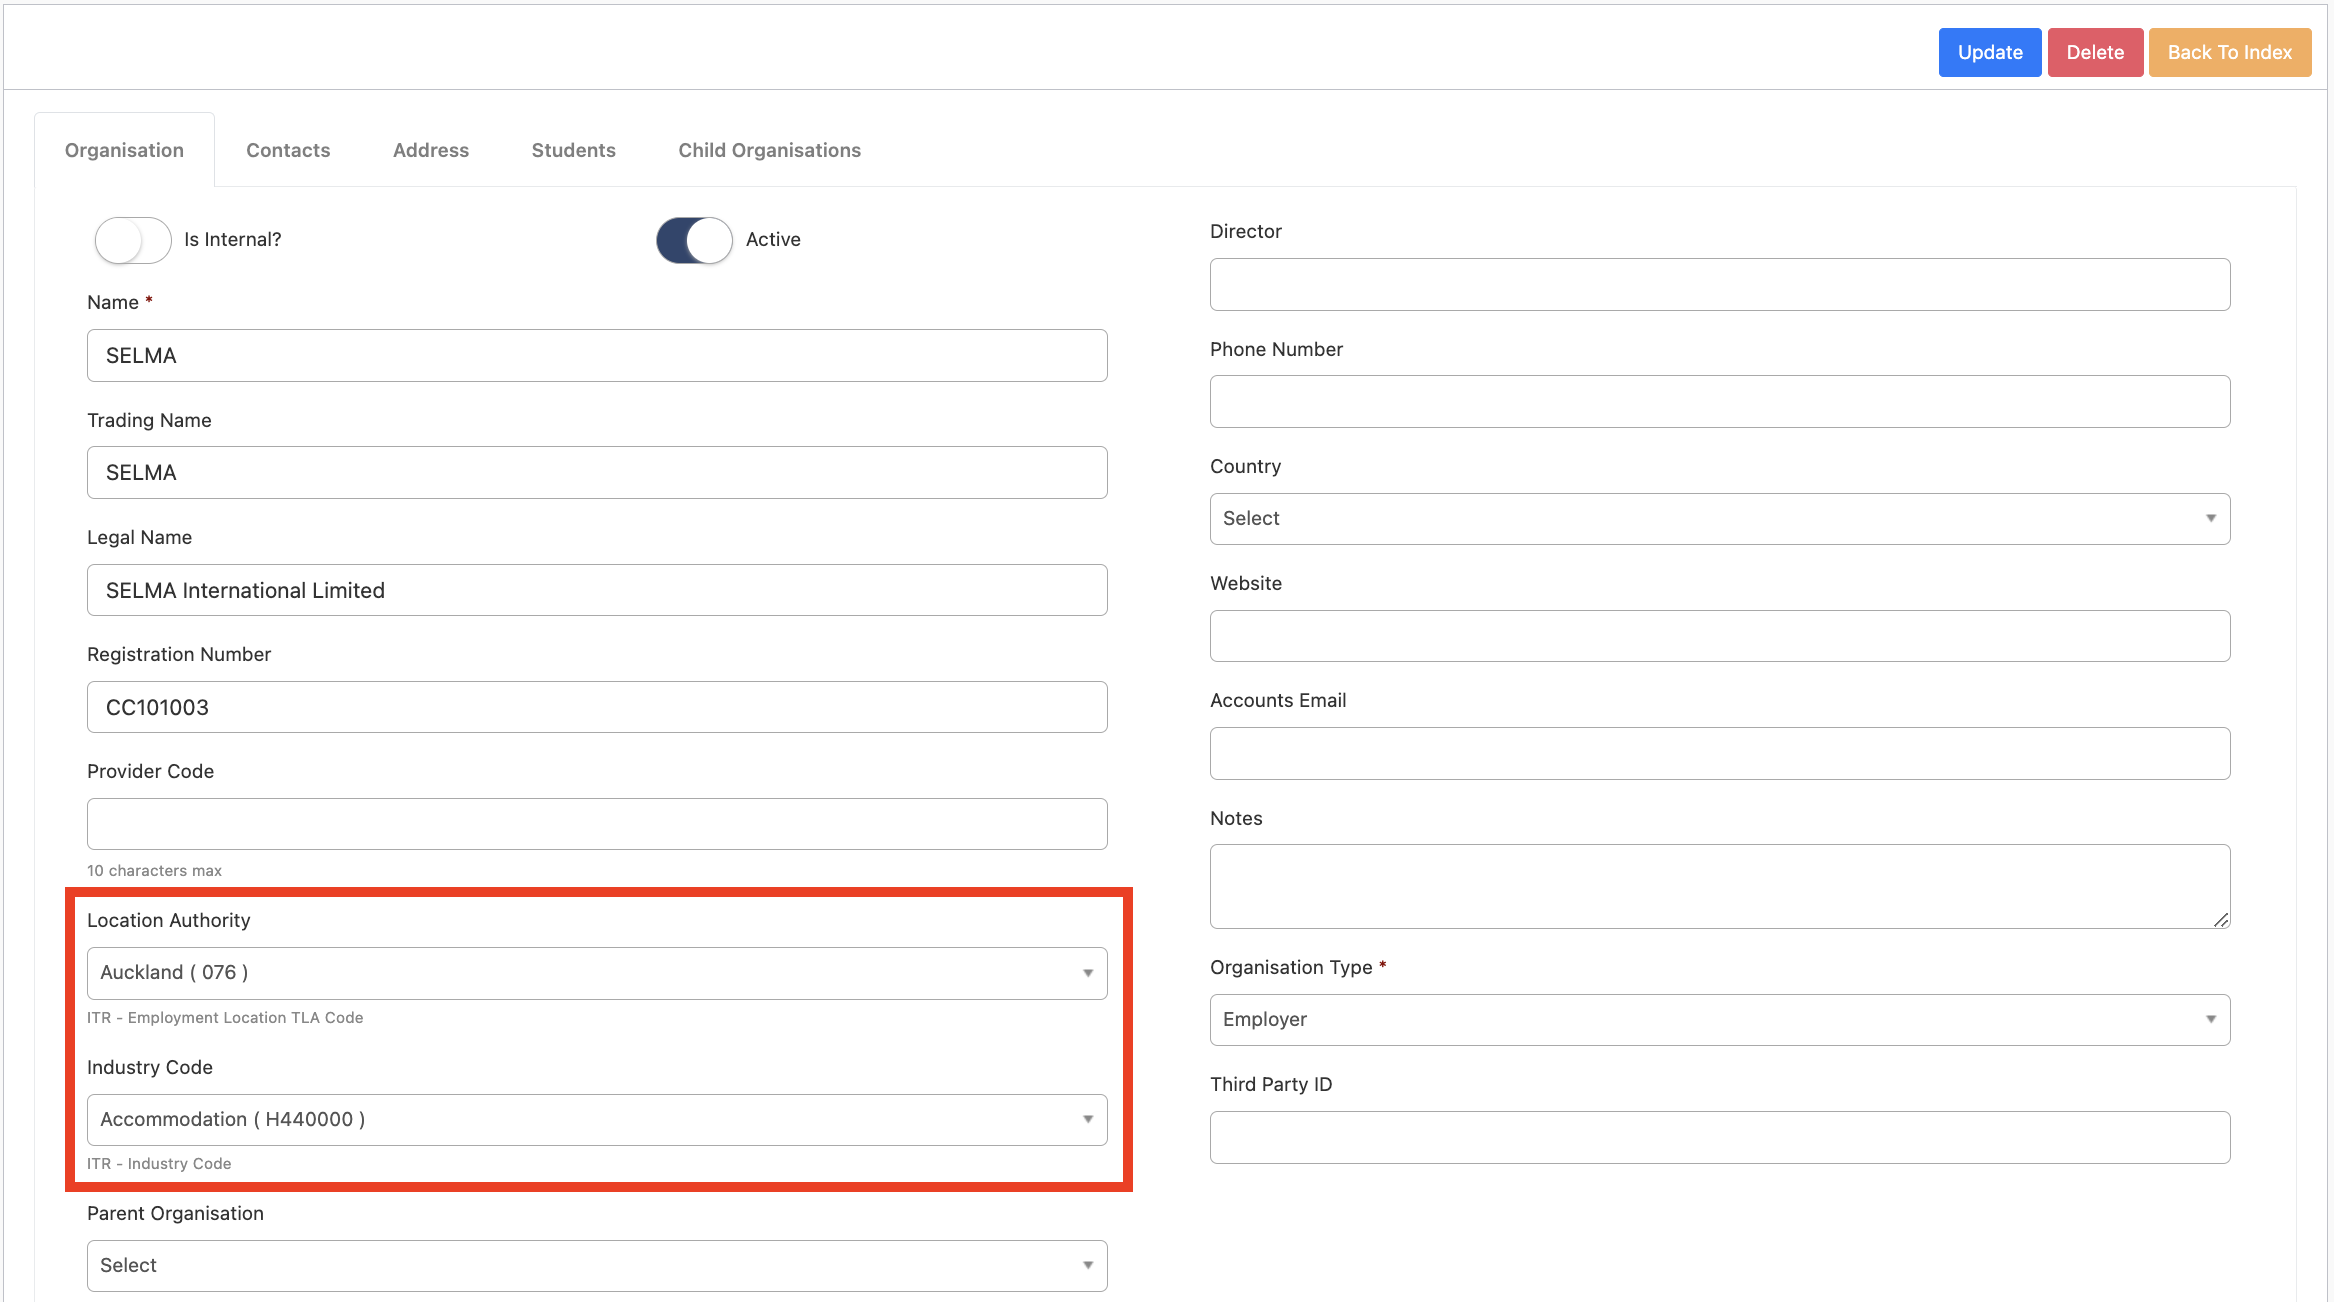
Before creating students and validating them for the ITR, the organization (employer) and the contact within the organization should be setup. For this, create an organization as usual under Settings -> Organisations and make sure that the Location Authority and the Industry Code are set for the organisation:

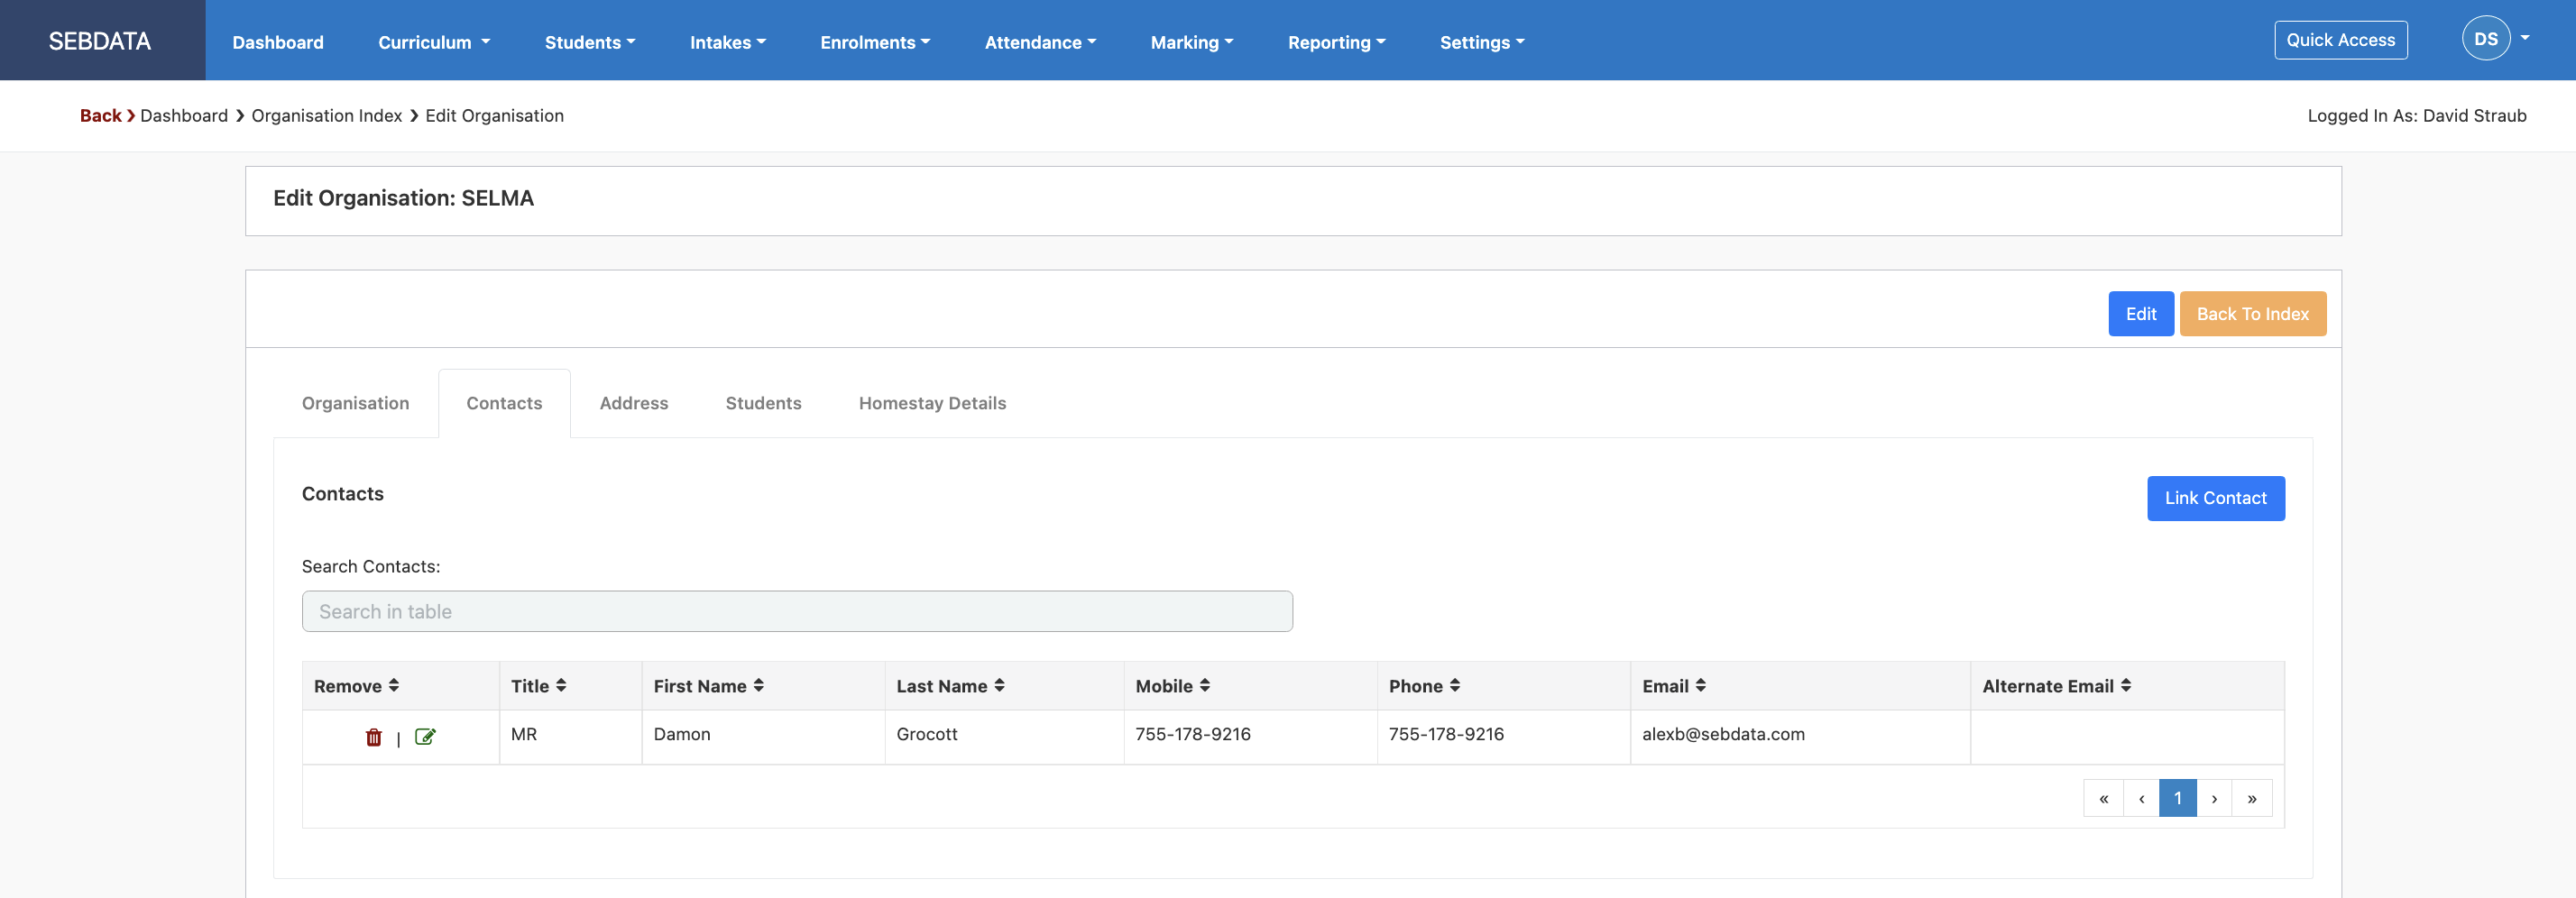
After that, make sure that there is at least one contact created and linked to the organisation:

The organisation and the contact will later be used to link against the student as the Employer for the students’ studies.

You can use the “See Full Message” button to extend the message and to see the full XML code that was sent or retrieved from the ITR.

Related Articles

2025 DXP SDR

SDR Changes SELMA has implemented a new feature and introduced new fields to align with the latest DXP SDR. Below is the summary of the field changes in the DXP SDR. For detailed specifications and implementation guidelines, please refer to the official TEC documentation at Data Specifications for the Single Data Return – Data System …

14.04.01 Updated NZQA Qual Check

If you deliver approved NZQCF Qualifications or Micro-Credentials, here’s a brief guide on how to generate a QE1 batch ready for submission to NZQA. Pre requisites: Programme: Under NZ Compliance tab, “NZQA” section must be filled out accurately. Enrolment: When the enrolment status is changed to “Finished and Completed”, the completion date is populated on …

14.04 NZQA Reporting

NZQA Reporting  Navigate to Reporting -> “NZQA Unit Batch” or “NZQA RoA Import” or “NZQA Qual Check” In SELMA, you can import your accredited unit standards to setup your curriculum and report completed unit standards of your learners to NZQA You can send Qual Check requests to NZQA for your students to get NZQA to …

14.05.05 Change Employer

Change Employer In the event of the student changing employment during their studies, the employer on the student record can simply be changed. Make sure you also select a contact for the new employer. To do so navigate to Students -> Manage Students -> Select desired student and under the “Student Details” tab you can …